My R12 POS Arrived!

I just might now Jenson, Confess I had heard of this mob when in Sydney and was going to give them a call.


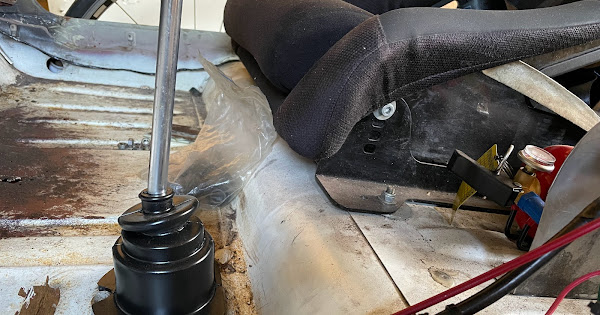
But Smooth Suspension look good.

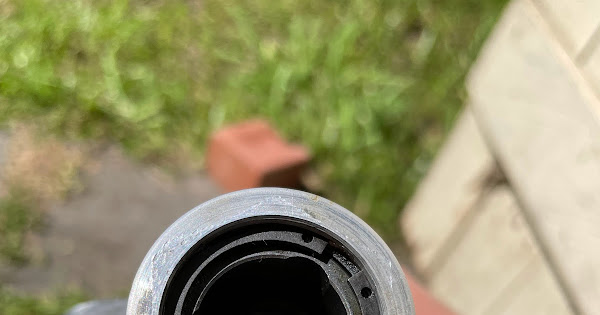
Schlitz, I've seen applications where they just rest a thread on the existing spring seat, or others where they grind away and weld on a sleeve.
 
Last edited:
Well they will have mine to practice on at least!

Pretty sure Top Performance mainly do importing/sales now and sub out the rebuilds to Smooth Suspension (and maybe others).

Mine are just being refurbed to original but you will be pleasantly surprised to see the threaded tubes and spring perches next to the front counter. Check out their Facebook page, amazing restos on some Konis out of Ferraris/Lamborghinis.
 
Well, with a free afternoon from looking at houses we cant afford, I went back and got the second front spring out.

The upper control arm bush was flogged, along with the ball joint, glad I'm taking this all out.

Anyway it was all going to plan until I dropped the spring, strut, control assembly and wrench on my big toe.

View attachment 138310

Yes it does hurt thank you very much... I even came limping back into the house for dramatic effect. Doesn't look like I can do any of the other chores my misses had planned for me this afternoon that I was putting off at all..

Suppose I best go have a beer.

oh bother. :p


Oh if anyone wants a set of springs with x2 coils removed, I wont be putting them back in. I'll prob take one of each to the Koni shop explaining what I want to happen and giving reference to what was in there, but after that if you want a set, done.
Maybe you shouldn't have had the Chinese safety boots on\.
 
Well they will have mine to practice on at least!

Pretty sure Top Performance mainly do importing/sales now and sub out the rebuilds to Smooth Suspension (and maybe others).

Mine are just being refurbed to original but you will be pleasantly surprised to see the threaded tubes and spring perches next to the front counter. Check out their Facebook page, amazing restos on some Konis out of Ferraris/Lamborghinis.
True! Thanks Jensen, they are closer to my work so will be easier to duck away during lunch. I'll check em out.

Maybe you shouldn't have had the Chinese safety boots on\.
That's exactly what my wife said...
 
True! Thanks Jensen, they are closer to my work so will be easier to duck away during lunch. I'll check em out.


That's exactly what my wife said...
Great minds think alike.
 
Well with shoes on, I continued to remove the final bits.

I was struggling to get the drive shaft nits off, so I wimped out and went and spoiled myself with a little rattle gun. Gees should have done that about 6 months ago :p

Anyway I thought to myself, this all started with wanting to remove some lower control arm bushes..


Oh well, to bad, fresh bushes and ball joints for everyone.

Wish I could swing a pressure washer in my tiny shed, would be nice to clean up 50yrs of crud under the wheel..

Anyway, It's gonna be great! :D
 
Very naaais.

Are you going to replace the other bushes as well, now that you have the whole thing apart? If yes be careful how you push out the old bushing in the upper arm, they bend easily and you can break the brazing where the tube is attached to the arm.
 
Yes, every bush will be new by the time this is done. The only bush type things left unchanged planned at this momement are engine and gearbox mounts.
 
Oh, and thanks for the tip toward being careful with those upper arms. yes I suppose I could change geometry here If I'm clumsy.
 
You just need to find yourself some spacer thingie that will push against that brazed tube in the arm when you go to push the bushing out. Not against any part of the arm. Same care when you push the new one in.
 
I pulled the heater fan assembly out of my Virage the other week and it has a bluetak-like substance around where the top of it is in contact with the car presumably to stop dirt and moisture from blowing out into the car's interior. It's still pliable but has got covered in dirt in the process of removal so won't really adhere anymore. Does anyone know what it is and where I can get it? It's not a glue as it's not super-sticky and hasn't hardened.

Thanks a lot!
 
I think it may be Mastic, a form of uncured/natural rubber they used back in the seventies between bolt-on body panels. My dad used it back then when he first repainted the car. Dunno if you can still get it but I'm sure there's some synthetic shmoo with similar properties waiting for you somewhere on the shelves of auto parts factors.
 
Yeah as he said, don't over think it, sikifl* something or other and you'll be cool
 
Hang on, I remember that stuff. On my 17 and the 17G the same join is sealed with some sort of bitumen foam or something. Sticky foam that sticks to everything including your fingers and disintegrates and becomes a sticky black stuff you can't get off with anything. Don't worry about it just use whatever silicone you can lay hands on (I would favour roof and gutter for its properties) to seal it. Maybe just make sure it's neutral cure so you don't stink the car.
 
Well time to polish my rack, I mean clean my shaft, I mean address the steering.

I was scrubbing away the 50yrs of dirt and then I realize I'm not really sure how this all works. Water and soap was going everywhere, oh well lets have a look and clean it properly.


Ah ok, so nicely cut shaft with teeth on the rack to mesh into the pinion, oh and a spring? whaaaa.


Oh, it puts pressure on this carefully shaped retainer which the rack passes within. Noice!


And the other side, the rack body is retained by a simple cir-clip within the housing. Ok ok ok ok! Well everything looked and still felt pretty good. I woosed out and decided to leave the pinion and rack body in and just do a bit of cleaning on the surfaces I could access. A bit of wear marks in the middle, where the steering would be sitting straight, makes sense I suppose.

So some fresh grease and here we go.

So why not grab those R18 ends and see how they all work with this rack. Yep it screws right into the rack alright.


Now how are you supposed to retain the inner rod. There is a plate which seats itself against the rack, then a toothed washer that interferes with the body of the ball joint. I couldn't see where to tighten it all up without risk turning the plate, against the rack and chewing that all up.

I'm assuming the eventual adjustment comes with the ball joint moving completely around in it's housing, and this rack to arm fit should be tight as tight can be?

So what. locktight, vice grips, go to town?

And just to show the difference.


So this removes another bush, and gives you fine adjustment. Yaaaay!

With that in mind I have some new rod ends that I'll never be using, anyone need them?


Which brings us to the real work today. That's right, there is nothing as luxurious as a fresh gear stick boot.


Would you just look at that.

VIV LA RENO
 
Well time to polish my rack, I mean clean my shaft, I mean address the steering.

I was scrubbing away the 50yrs of dirt and then I realize I'm not really sure how this all works. Water and soap was going everywhere, oh well lets have a look and clean it properly.

[/URL][/URL]

Ah ok, so nicely cut shaft with teeth on the rack to mesh into the pinion, oh and a spring? whaaaa.

[/URL][/URL]

Oh, it puts pressure on this carefully shaped retainer which the rack passes within. Noice!

[/URL][/URL]

And the other side, the rack body is retained by a simple cir-clip within the housing. Ok ok ok ok! Well everything looked and still felt pretty good. I woosed out and decided to leave the pinion and rack body in and just do a bit of cleaning on the surfaces I could access. A bit of wear marks in the middle, where the steering would be sitting straight, makes sense I suppose.

So some fresh grease and here we go.
[/URL][/URL]

So why not grab those R18 ends and see how they all work with this rack. Yep it screws right into the rack alright.

[/URL][/URL]

Now how are you supposed to retain the inner rod. There is a plate which seats itself against the rack, then a toothed washer that interferes with the body of the ball joint. I couldn't see where to tighten it all up without risk turning the plate, against the rack and chewing that all up.

I'm assuming the eventual adjustment comes with the ball joint moving completely around in it's housing, and this rack to arm fit should be tight as tight can be?

So what. locktight, vice grips, go to town?

And just to show the difference.

[/URL][/URL]
[/URL][/URL]

So this removes another bush, and gives you fine adjustment. Yaaaay!

With that in mind I have some new rod ends that I'll never be using, anyone need them?

[/URL][/URL]

Which brings us to the real work today. That's right, there is nothing as luxurious as a fresh gear stick boot.

[/URL][/URL]

Would you just look at that.

VIV LA RENO
Those R18 inner rod washers are a once only use, from memory there is little indents in the inner ball joint for the teeth of the washer to sit in when done up. When you undo the inner ball joint you break these teeth off and wreck the washer.

If you have a dial gauge; a spare plunger cover that you can drill a hole in and some spare adjusting shims; and with some basic maths you can return the steering rack back to what it was like when it come from the factory. If you like I can scan the procedure and post it here. It makes a big difference to how the car drives.
 
Last edited:
Yes please! If I can get it "near" for the suspension man to fine tune it it would help.

Am I on the right track with lock-tight + vice gripes to secure the ball joint / arm into the steering rack?
 
Here is the procedure for setting the plunger in an R12/15/17 steering rack
 

Attachments

  • IMG_20211127_0001.pdf
    848.1 KB · Views: 94
  • IMG_20211127_0002.pdf
    820.2 KB · Views: 100
  • IMG_20211127_0001.pdf
    848.1 KB · Views: 136
  • IMG_20211127_0003.pdf
    874.8 KB · Views: 92
Yes please! If I can get it "near" for the suspension man to fine tune it it would help.

Am I on the right track with lock-tight + vice gripes to secure the ball joint / arm into the steering rack?
According to the R18 manual I have here you need a couple of special factory tools

DIR.811 Steering rack locking tool https://www.ebay.com/itm/08-Orig-RE...nsertion-removal-tie-rod-/192549291410?_ul=IL

DIR.812 Steering axial ball joint locking tool https://www.ebay.co.uk/sch/i.html?_...-53481-19255-0&campid=5338792814&toolid=10001
 
COL I think you scanned page 1 twice and page two does not seem to have finished the explanation.

Either way, the idea is to measure the wear in the shaft and adjust shims accordingly such that there is some plunger pressure on the shaft even at the most worn point. I would suggest adjusting the shims to compensate for this wear can be done by simply trying different shim sizes. Yeah, not as accurate, but good enough. Shim stock is available in sizes from .05mm up. I think .05mm is quite fine, I would start with .1mm and when getting close I would switch to .05 to fine tune it. You will find a point where adding one more .1mm shim is too much, taking it out is too little. That is where I would add a .05mm shim instead. These numbers are just for example, you may find that you need to add so many .1mm sims, you might as well put a .5mm shim to begin with.

Alternatively, you can measure the rack diameter somewhere not worn at all (at the top of a tooth - the teeth tops do not wear because they never contact the pinion, so entire wear measured will be in the back of the rack where the plunger pushes against the rack) with a micrometer and compare with the worn section. That will at least give you some idea what shim thickness to start with. Take a few measurements along the rack. Only shortcoming of this method is that it does not account for wear in the pinion so you might end up with more shims than the numbers would suggest.
 
Last edited:
Top