Is this the best project car you have ever seen?

attachment.php


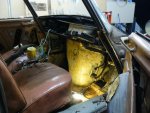
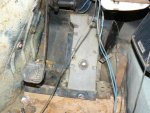
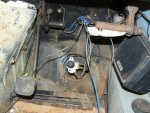
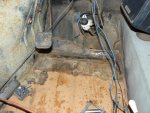
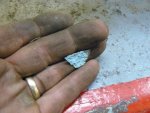
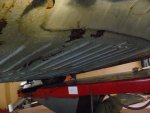
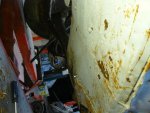
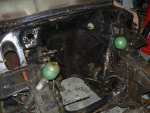
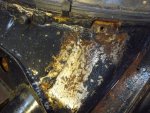
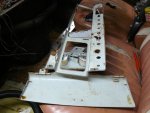
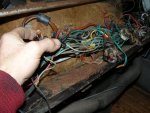
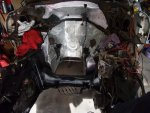
Gee's it stinks, I vacumed up all the mouse shit and crap... To find they haven't touched the wiring :confused: 
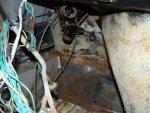
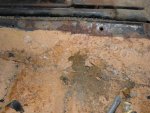
It all looks good. I wonder why they didn't eat it. They did cause surface rust from there p!ss though :rolleyes:

attachment.php


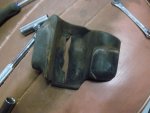
Well they made getting paint matched fun .... Every single item is a slightly different shade :rolleyes: 
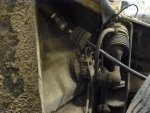
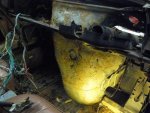
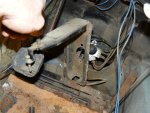
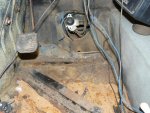
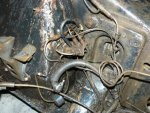
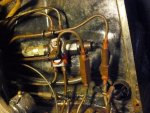
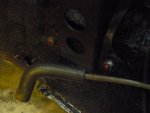
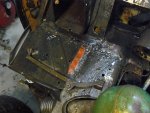
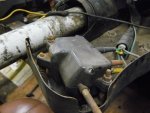
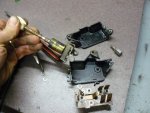
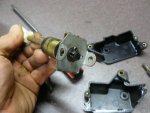
They must have painted them all at the factory at different times from different batches of paint... Bugger it, I'll just pick one and paint everything that colour, steering column, dalek air filter etc...

attachment.php


What an amazing design. the switch lever is spring mounted... Bloody brilliant!!! Later car have frail levers that can break, why didn't they spring mount them too :confused:

attachment.php


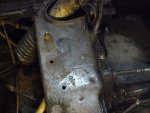
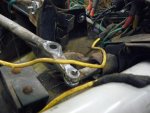
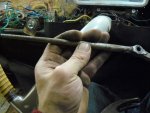
The shafts of course look really shitty. Maybe they can be plated too :confused: 
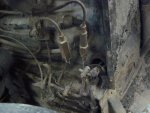
(I have two other switches, so I'll see what can be done).

attachment.php


attachment.php


Drill out the brass rivets and it'll easily come apart. The excellent new is it's brilliantly designed and made. It'll last the life of 1/2dozen ID19's... I could never imagine one wearing out ... not ever.

attachment.php


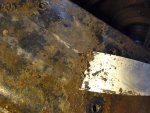
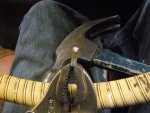
I spent bloody ages trying to wiggle the handle off.... DON'T TRY >>> As you can see the handle has been moulded onto the lever. It's impossible to remove it without destruction. I reckon a stainless steel sleave slipped over the top may work perfectly ?? Certainly you can't ever get this shaft plated with the handle in place.

attachment.php


attachment.php


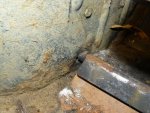
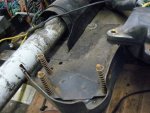
Pitty Richo didn't get these shift rubbers re-made :p
 

Attachments

  • P1050752.JPG
    P1050752.JPG
    64.3 KB · Views: 1,501
  • P1050753.JPG
    P1050753.JPG
    73.5 KB · Views: 1,603
  • P1050754.JPG
    P1050754.JPG
    63.1 KB · Views: 1,484
  • P1050755.JPG
    P1050755.JPG
    79.3 KB · Views: 1,456
  • P1050758.JPG
    P1050758.JPG
    81 KB · Views: 1,505
  • P1050759.JPG
    P1050759.JPG
    58.4 KB · Views: 1,483
  • P1050760.JPG
    P1050760.JPG
    56.4 KB · Views: 1,482
  • P1050761.JPG
    P1050761.JPG
    61.2 KB · Views: 1,462
  • P1050750.JPG
    P1050750.JPG
    89.6 KB · Views: 1,537
attachment.php


The shift lever cable fought me for bloody ages.... infact this stupid pin took more effort than anything else has to date .... grrrr....

attachment.php


I pried and hammered at the bloody thing for so long I ended up rounding the "opposite" end off it with vice grips and pushing it out the wrong way. Damn it had grown into place. If it's tight on the other cars, I'll just replace with a nut and bolt.

attachment.php


The cars just look so .... um, what's the word ... .hmmm..... shit ?? Yeah they look bloody shitful with all the peeling chrome on the gearshift lever, heater control levers and light levers.... So I'm going to get them all plated with the nuts and bolts. Eventually I'll get some re-chromed for it if possible. Plating will be free given I'm already sending a bucket full up there. And ID19 with sparkly gold coloured levers and gearshift will be like a rat with a gold tooth right ?? Hey it'll match the sprakly polished brass dash knobs though :)

attachment.php


What's the idea of this huge blanked off hole in the firewall around the steering column :confused:

seeya,
Shane L.
 

Attachments

  • P1050764.JPG
    P1050764.JPG
    70.9 KB · Views: 1,411
  • P1050766.JPG
    P1050766.JPG
    71.2 KB · Views: 2,247
  • P1050765.JPG
    P1050765.JPG
    79.2 KB · Views: 1,433
  • P1050748.JPG
    P1050748.JPG
    91.7 KB · Views: 2,705
The chassis was probably built to be either DS or ID. That would be where the control lever to the "Brain" would pass if it were a DS.
Cheers Gerry:cheers:
 
Hole in the firewall is to run amps and subs.

Seems like you are powering through this car at a rate of knots (or LHM drips) - What's the aim of the restoration, originality? Then don't put the firewall insulation in as it will look weird when you pop the bonnet - a bit of noise/heat hurt nobody back in the 50's! :roflmao:

As original as possible... within reason. eg: What is original :confused: These cars are all about 50years old. Who knows what's been done to them over the last 5 decades. In typical Citroen tradition, they would have used whatever parts are on hand to build the cars, so you can't really tell if any part is original to a car .... Unless it's a part that didn't exist until later on :) Doof, doof sound systems ... ppffttt.... I'm going to remove all traces of radio and sound and un-butcher everything. The music is all the rattles, clunks, hisses, squeaks and sighs of the car as it's moves along :)

I'll use modern paints and coatings... I figure if these coatings had been available at the time, Citroen would have used them! I'll probably re-coat the interior parts with acrylic laquer (ie: dash etc...). They'll look wrong otherwise (and far to shiny straight off the gun, I don't want a shiny dash, it's makes driving to difficult in the sun). All the black will be that POR hardnose activated brushable paint. I'm not spraying inside the car ... It'll take dozens of hours of dismantling to mask and prep everything to spray in there.

The pulling apart is the quick easy bit, it's the checking and re-coating of everything prior to assembly that will take forever. Can you imagine the jigsaw of bits when I get the bucket of brackets, bolts and fasteners back from the platers :eek: ... I guess I'll be asking here often "What is this part for" :roflmao:

The fortunate bit is none of this costs any money really. The first issue I come across that requires any sort of $$$ and everything will come to a roaring stand still (there actually isn't anything there that should cost any money ... hopefully... short of body rubbers and coatings).

The insulation will be on the inside of the firewall ... behind the dash and firewall trimming. No-one will know it's there without pulling the dash apart :) Unless they can tell the trim is all sitting slightly proud of where is should (not sure how this would be possible though).

seeya,
Shane L.
 
Shane, I think I have the key for it somewhere. I'll see if I can find it. If you are lucky I might even bring it to you tomorrow.

Roger
 
Shane, I think I have the key for it somewhere. I'll see if I can find it. If you are lucky I might even bring it to you tomorrow.

Roger

Hi Roger,

brilliant :dance: :dance: .... You'll be far to soon to take it for a spin though :( I guess I could make it look at least "clean'ish" before you see it :) ... I'll have to get my pressure washer back from my parents ... I'm not in a hurry as I'm sure I'll blast most of the paint off requiring to me almost immediatly prep/paint the entire underbonnet area ... and I'm not quite ready for that yet.

seeya
Shane L.
 
Shane - my comment re: insulation was more on the point that when you lifted the bonnet, I had visions of shiney insulation everywhere, but your post makes perfect sense now :tongue:
 
Shane - my comment re: insulation was more on the point that when you lifted the bonnet, I had visions of shiney insulation everywhere, but your post makes perfect sense now :tongue:

You mean like this?

Cheers, Pottsy.
 

Attachments

  • Under bonnet insulation.jpg
    Under bonnet insulation.jpg
    96 KB · Views: 542
Hi Shane

brilliant work, I applaud your idea to keep it original in your definition. Certainly is a wonderful example, amazing how much better it looks after a vacuum.

One thing though, I think every car needs a radio. You say you'll only toddle around to club events but my money is on it going to Cit-in. Also it already has a hole in the dash with an inappropriate unit installed. Has to be the right type, and in the same vein as your choice of paint, the guts of the radio can be upgraded.

http://www.tadpoleradios.co.uk/Default.aspx

Also there is a guy in Australia that does the same thing and he advertises in Australian Classic Car

Greg
 
Last edited:
Hi Shane

brilliant work, I applaud your idea to keep it original in your definition. Certainly is a wonderful example, amazing how much better it looks after a vacuum.

One thing though, I think every car needs a radio. You say you'll only toddle around to club events but my money is on it going to Cit-in. Also it already has a hole in the dash with an inappropriate unit installed. Has to be the right type, and in the same vein as your choice of paint, the guts of the radio can be upgraded.

http://www.tadpoleradios.co.uk/Default.aspx

Also their is a guy in Australia that does the same thing and he advertises in Australian Classic Car

Greg

This thread covers remote controlling car radio by the ring-tip-sleeve 3.5 mm remote control socket.
http://www.mp3car.com/input-devices/91373-pioneer-wired-remote-control-2.html

From what I glean the various functions can be selected by a different resistances to ground. The ring of the jack gives a shift function so the number of control functions are doubled.

The modifications by the UK mob as in the link above convert a period radio to talk serially to a Sony radio which effectively replaces the face panel. They are also expensive and custom.

Shane, since you are programmer why not get into some Arduino programming and make a unit to talk to the ring tip sleeve jack?

This way all that is needed is a couple of shaft encoders to replace the volume and station tuning and the rest of the switches on the old radio perform the modern head unit functions via Arduino digital inputs.

Aduinos are less that $50 with shield and once the software is written they can be readily duplicated.
Plus the program can be modified for different "modern radios".

Just some food for thought.
 
Last edited:
Thanks Guys,

Gee's I missed that post from David way back between bunches of piccies i was posting. Yeah, good idea, I'll tie the steering back to the car so it can be moved :)

Radio?? Nah that really is ugly the way it's been hacked into the dash (not to mention out of reach of the driver either way). If I ever decide to fit a radio, I'll just stick an MP3 player into the glovebox, and the glovebox can be opened if you want to use it (they all come with remote controls these days). There is no need to butcher the dash to fit one.

Remember these cars are pretty noisy, so you'll be trying to drown out one noise with an even louder noise (the radio). Noise wise I had my black ID19 on the road at the same time I drove my fathers (late 1975 sold) DS23 ie 5spd pallas home from Melbourne. At the time I was quite surprised how quiet that car was for a 'D'. Well he's been looking around at the car and lifted those huge pallas sponge back carpets, and there is really nicely applied body deadener sheets on the floors (they look factory). It appears Citroen had a really good attempt at quieting these cars down inside over the years. I'm going to buy in some extra insulation and apply a couple of layers throughout the hull to slow the "drumming" of the panels a little. It will all be hidden after all :)

attachment.php


That black firewall trim all fell off without damage (yes!!). So I'll clean it and re-apply over the insulation. Don' t you love the professional way the factory filled that advance/retard lever hole in the firewall......... Yep, just a plate "sort of" fitted into it :rolleyes:

attachment.php


I'm pleased I pulled the firewall trims off ... found surface rust behind this one.

attachment.php


Look at the big hole where the accellerator linkage heads out into the bonnet area.

That height corrector control linkage ..... big hole into the interior

attachment.php


I never before relised how much the engine is back into the passenger compartment. Little wonder D's get so hot and noisy. So the bolts? I'm pretty sure there the engine mount bolts :eek: ... way back here inside the car.

The firewall in these cars are bloody littered with holes and gaps .... No not rust, boody factory cut holes. I'm gonna spend a huge chunk of time ensuring every single one of these is air tight. You see these old motors have no crankcase ventilation (well there is ventilation .... straight into the underbonnet area :rolleyes: ). Given these fumes will give Ang asthma, this sucker needs to be air tight.

attachment.php


Height corrector linkage ..... the boots gone. just a big hole back into the car.

attachment.php


The brake valve and handbrake cable look like they sandwich the firewall holes, so can't leak air.

attachment.php


Look how far that engine bulge comes back into the passenger area .... I was only going to tidy up the underbonnet area and stick the other motor back in........ How did I end up with the inside of the car looking like this :clown: :crazy: Bloody D's, anyone that's worked on one will understand (I bet GB never thought he'd end up with his in a million bits like he did :roflmao: ).

seeya,
Shane L.
 

Attachments

  • aid9.jpg
    aid9.jpg
    71.6 KB · Views: 1,194
  • aid8.jpg
    aid8.jpg
    73.6 KB · Views: 1,186
  • aid7.jpg
    aid7.jpg
    65.2 KB · Views: 1,193
  • aid6.jpg
    aid6.jpg
    93.4 KB · Views: 1,198
  • aid4.jpg
    aid4.jpg
    87.3 KB · Views: 1,204
  • aid3.jpg
    aid3.jpg
    85 KB · Views: 1,441
  • aid2.jpg
    aid2.jpg
    75.4 KB · Views: 1,285
  • aid5.jpg
    aid5.jpg
    87.3 KB · Views: 401
(I bet GB never thought he'd end up with his in a million bits like he did :roflmao: ).

seeya,
Shane L.

You're making rapid progress on the pulling things apart Shane, and I for one am loving the pics and commentary.

These cars are sneaky when you start taking them apart, as you remove bits you reveal more that you can access - before you know it your car takes up 4 times the space it once did. The thrill is when you start to re-assemble and the rewards of effort can be seen.

You clearly have a good attitude with this car, and your enthusiasm is contagious. I can see this thread breaking many AF records :wink2:

Cheers
Chris
 
If you are down there at the brake button pull that apart and clean/check the brake light switch. They can be melted and dirty.

Good idea .... I'll take a piccie of it so those that have never pulled a 'D' apart before can see what the brake "master cylinder" looks like in a proper car :) ( yes I know it won't be a trolley valve).

I don't want to pull it apart further .... But while it's apart to this extent, you'd be insane not to clean, de-rust and seal under the brake pedal.

seeya,
Shane L.
 
feedback

You're making rapid progress on the pulling things apart Shane, and I for one am loving the pics and commentary.

Great stuff Shane,
I am also following the progress and the pictures, thanks for the big effort this takes to keep this up.

As Chris said this will be the biggest thread on AF and it deserves to be as the quality of pictures and commentary is as good as a TV reality show... :headbang:

Cheers

Colin
 
Will it be the biggest thread ..... Or the most boring :confused: :roflmao:

attachment.php


No point putting it off I guess.... This area is was heavily plated in the black ID19 when I got it (I didn't realise this), not long after it all rusted through and fell through the plating as well.... It's rusty in the floors, pedal box, sills and down into the front jacking points :( I wonder what the idea of the drain on the bottom of the brake pedal housing is ?? Are they expecting the brake valve to leak :confused:

attachment.php


I must admit I was quite concerned.... It looks like body filler had been spread over the pedal box and painted over ... I chisel some of the paint away and it appears to be big lumps of dirt that have been painted over :confused: Surely you'd at least vacuum the floor if you were going to paint it :crazy: I did sheer a couple of the little bolts... But gee's that's bloody nothing :)


attachment.php


attachment.php


I found a couple of the bolts were through from beneath, the jacking points didn't collapse as I lifted the car, so that's always a good start :) One of the people that have had the car over the last 25years obviously had a tin of orange paint (inside the car) and a can of blue paint (outside the car) ... The blues over everything ...

attachment.php


It all look like peeling rust .... 'Cos once again none of the dirt was washed off first, you can pull the dirt off with the paint still holding it together :roflmao: ... who the hell paints over dirt like this :confused:

attachment.php


enough dirt to plant some spuds in...

attachment.php


But the floor is bloody perfect :dance::banana: :banana: Amazing I was expecting big holes and lots of head scratching and "how the hell do I fix this" :blackeye:

seeya,
Shane L.
 

Attachments

  • P1050785.JPG
    P1050785.JPG
    95.4 KB · Views: 1,118
  • P1050788.jpg
    P1050788.jpg
    58.7 KB · Views: 454
  • P1050782.JPG
    P1050782.JPG
    89.7 KB · Views: 1,109
  • P1050793.jpg
    P1050793.jpg
    56.8 KB · Views: 1,066
  • P1050792.jpg
    P1050792.jpg
    58.8 KB · Views: 1,048
  • P1050791.JPG
    P1050791.JPG
    72.8 KB · Views: 1,115
  • P1050790.JPG
    P1050790.JPG
    69.8 KB · Views: 1,080
  • P1050789.jpg
    P1050789.jpg
    62.9 KB · Views: 1,033
No, no no Shane, this is far from boring, it's facinating! In fact, it might just be the inspiration for me to get off my fat arse and do something.....
I've even asked my mate tpo bring his engine crane to the farm.... I knoe a certain CX that needs a clutch replacement, followed by a total overhaul!

Go for it Smiffy !!! It's great tinkering with cars when your not relying on them as your primary form of transport :) It make it's bloody difficult if you need to drive the car and it doesn't work out :(

attachment.php


I pushed the car out of the shed and degreased/pressure washed. I used a karcher pressure washer with than very fine "turbo" type head on it.

attachment.php


attachment.php


attachment.php


It's a "tar" like substance. Degreaser doesn't really touch it .... Pressure didn't do much either.

attachment.php


You can scrape it off, though it's not easy. I wonder if it's all 25+year old brake fluid that has turned to a "tar" like substance as it's mixed with dirt. What chemical removes brake fluid residue. Maybe "brake cleaner" :confused:

attachment.php


Plenty of pressure to remove paint in places though.

attachment.php


attachment.php


Red dots on every hose connection and "safety critical" fastener .... I've got it ........

attachment.php


I bet this red dash signified the "checking person" had marked and check every hydraulic and safety critical fastener for tightness and leakage. So the car was "complete".

Am I nutty enough to re-create all these red "dots" when it's re-assembled :clown:

seeya,
Shane L.
 

Attachments

  • P1050794.JPG
    P1050794.JPG
    89.7 KB · Views: 1,076
  • P1050795.JPG
    P1050795.JPG
    96 KB · Views: 1,017
  • P1050796.jpg
    P1050796.jpg
    72.7 KB · Views: 1,024
  • P1050797.JPG
    P1050797.JPG
    78.5 KB · Views: 981
  • P1050798.JPG
    P1050798.JPG
    91.8 KB · Views: 1,108
  • P1050800.jpg
    P1050800.jpg
    65.6 KB · Views: 1,001
  • P1050801.jpg
    P1050801.jpg
    59.4 KB · Views: 1,004
  • P1050804.JPG
    P1050804.JPG
    57.5 KB · Views: 972
  • P1050805.JPG
    P1050805.JPG
    88.1 KB · Views: 1,023
Top