Shane, instead of that red thing with flaps, look for the rigid blue pads made by, I think, Josco. Bunnings have them. They come mounted to a disc that fits to the grinder. Just be careful of corners and edges as the pad is brittle and will break up prematurely if you do not use it in the correct manner.

You are using an out of date browser. It may not display this or other websites correctly.
You should upgrade or use an alternative browser.
You should upgrade or use an alternative browser.
Is this the best project car you have ever seen?
- Thread starter DoubleChevron
- Start date
Shane, instead of that red thing with flaps, look for the rigid blue pads made by, I think, Josco. Bunnings have them. They come mounted to a disc that fits to the grinder. Just be careful of corners and edges as the pad is brittle and will break up prematurely if you do not use it in the correct manner.
so Shane should not use it then

Looks like you need a set of Richo's beaut split sphere's to get it riding properly..
")
You are at the point where you could SO easily convert to LHM!!!!!!
You will need to overhaul the brake calipers anyway too.
You will need to overhaul the brake calipers anyway too.
but wot about originality
but wot about originality
I can't see a reason to change to LHM. Don't forget you also have the brake valve, every single line seal, every single return line, 4 x suspension cylinder boots, 4 x suspension rams, rear brake cylinders, rear brake hoses, pump seals, height correctors, priority valve ( ? )...... It's still *not* such a minor task even new
those green spheres are dead CX LHM spheres, they fill the holes so muck can't get in (I didn't want to damage the rebuildable spheres by having sticks in the suspension cylinders against there valves).
David, I'll certainly keep an eye out for those discs
seeya,
Shane L.
Hi Guys,
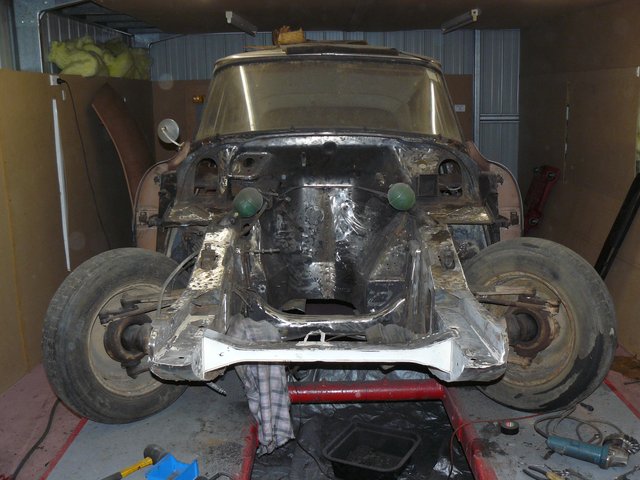
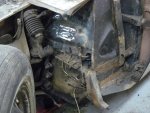
well all the big areas are stripped...
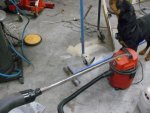
Has anyone tried using a sandblaster to strip all the in-accessable areas I have the cabinet and PA blaster I built a few years back, however I've never tried "blasting in the open" before. I imagine it would make an horrific mess ? You also couldn't recycle the abrasive ?

If you sand here ....

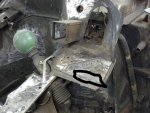
You'll find a body number!! That reminds me, my fathers been looking at the compliance plate on his DS23 ... It's complianced in 1974 .... Yet it's sold in 1975 ... and it's VIN number is smack bang in the middle of the 300 DS injecteds built in '75 Did the importers backdate there compliancing to get around new import rules or something
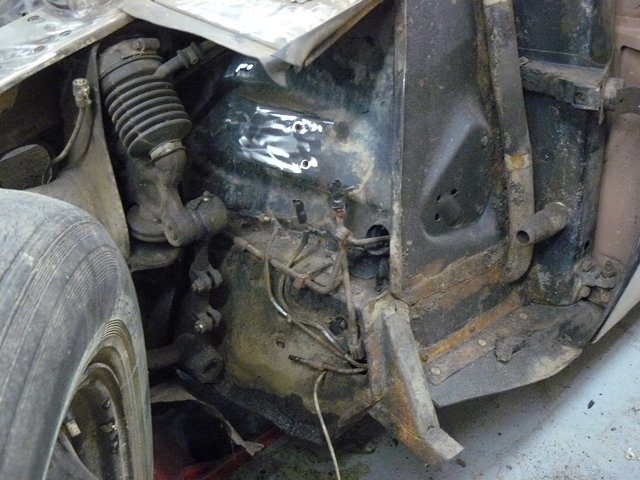
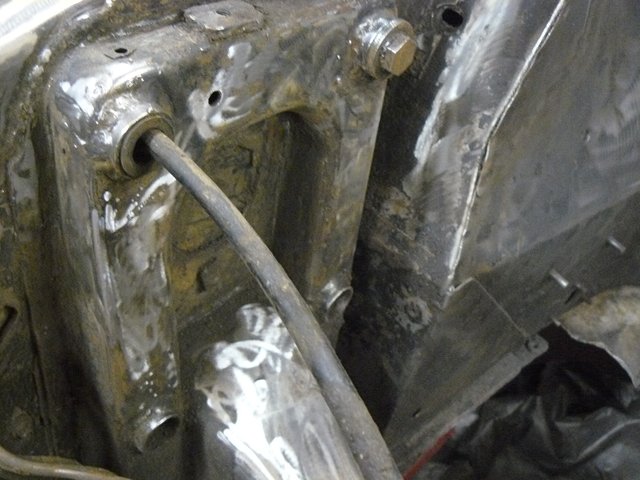
Everytime I think "I'm not pulling another bloody thing off .... this is getting rediculous" .... I end up pulling more off. It's only 5minutes work to get all those hydraulic lines out of the way .... All these 5minutes add up to a very complex jigsaw to re-assemble :crazy: Oh yeah, I reckon the fluid leaking from these lines was brake fluid, it smells ( and tastes ) like brake fluid. Yet there is so much evidence of oil around. I wonder if this car has genuine LHS2 in it ... which may well have 10% of caster oil added (which has separated out over time).
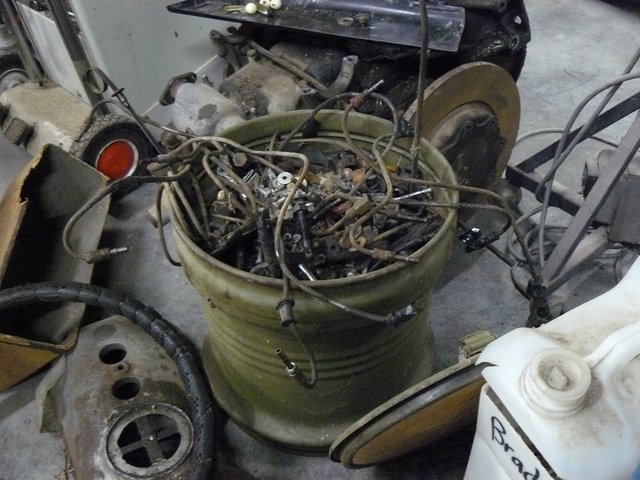
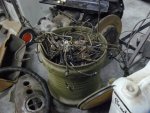
Just as I thought .. that ammo box is FULL of fasteners & brackets .... I just want to add some of the mounting bolts & shims for the body panels before I head upto the platers.

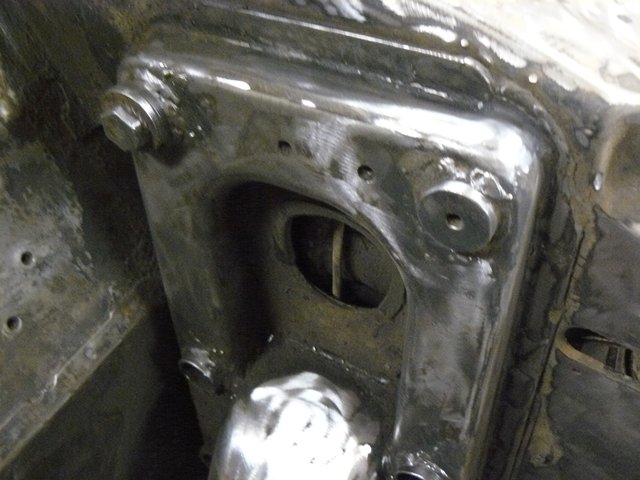
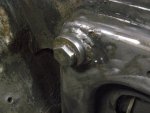
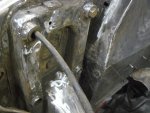
I see no reason to modify or add bracing to the suspension tubes. I reckon there so well welded as they have already been done in the past. There's welding splatter all around them (that couldn't be factory ).
Lots of fun here
seeya,
Shane L.
well all the big areas are stripped...
Has anyone tried using a sandblaster to strip all the in-accessable areas
I have the cabinet and PA blaster I built a few years back, however I've never tried "blasting in the open" before. I imagine it would make an horrific mess ? You also couldn't recycle the abrasive ?If you sand here ....
You'll find a body number!! That reminds me, my fathers been looking at the compliance plate on his DS23 ... It's complianced in 1974 .... Yet it's sold in 1975 ... and it's VIN number is smack bang in the middle of the 300 DS injecteds built in '75
Did the importers backdate there compliancing to get around new import rules or something Everytime I think "I'm not pulling another bloody thing off .... this is getting rediculous" .... I end up pulling more off. It's only 5minutes work to get all those hydraulic lines out of the way .... All these 5minutes add up to a very complex jigsaw to re-assemble :crazy: Oh yeah, I reckon the fluid leaking from these lines was brake fluid, it smells ( and tastes
) like brake fluid. Yet there is so much evidence of oil around. I wonder if this car has genuine LHS2 in it ... which may well have 10% of caster oil added (which has separated out over time).Just as I thought .. that ammo box is FULL of fasteners & brackets .... I just want to add some of the mounting bolts & shims for the body panels before I head upto the platers.
I see no reason to modify or add bracing to the suspension tubes. I reckon there so well welded as they have already been done in the past. There's welding splatter all around them (that couldn't be factory
).Lots of fun here
seeya,
Shane L.
Attachments


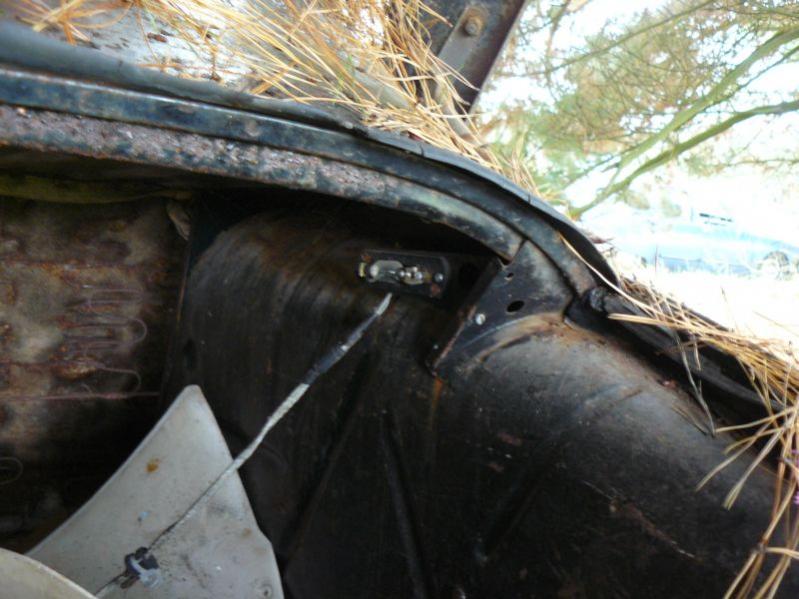
Look what I found on the rusty ID19 ... Is this light an option ? That'll be moved over to the good car.

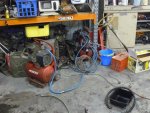
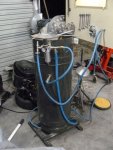
Well I grabbed some blasting abrasive yesterday ... So I better empty the blaster of the glass beads (there getting dusty to use as I've recycled them many times... It's the sliperist stuff known to man if you spill it on the floor!).
Anyway I cranked the blaster up ... glass beeds leave a "like new" unpolished finish.

Yeah I need to finish it yet. I need to setup the exhaust for the blasting cabinet so I'm not breathing any of the dust. Once I've emptied all the glass beads out, I'll see how we go using it on the in-accessable areas on the car. Does anyone have any ideas on protecting the "natural" finish so it doesn't oxidise back off (without polishing it ).

The bargain priced compressor I found at the tip ( :roflmao: :roflmao: ) has made a huge difference. Blasting was borderline with just the single compressor. With the two combined we must have about 25CFM .... It works much better (damn it's noisy though, certainly I don't want to look at the power meter spinning with those two running!).
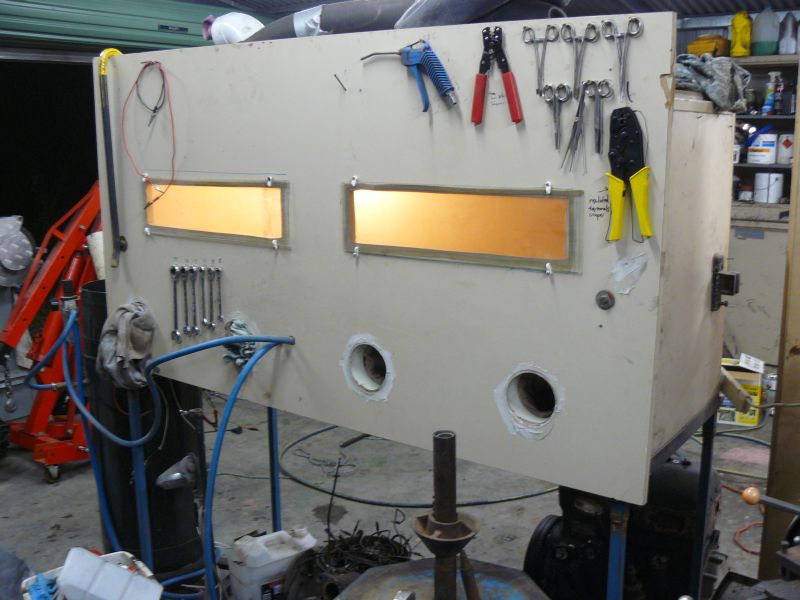
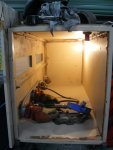
This is the blaster. It's an old computer desk I modified and sealed up. There is a radiator fan on the top to suck any dust out and blow it outside (only I've lost my bit of drainpipe that I used for the exhaust). The blaster unit is a "presure assist" blaster made out of a big LPG cylinder cut in half and welded back together. The idea is you pressurise this tank to about 4psi to "encorouge" the abrasive out so it doesn't clog like store bought blasters.
seeya,
Shane L.
Well I grabbed some blasting abrasive yesterday ... So I better empty the blaster of the glass beads (there getting dusty to use as I've recycled them many times... It's the sliperist stuff known to man if you spill it on the floor!).
Anyway I cranked the blaster up ... glass beeds leave a "like new" unpolished finish.
Yeah I need to finish it yet. I need to setup the exhaust for the blasting cabinet so I'm not breathing any of the dust. Once I've emptied all the glass beads out, I'll see how we go using it on the in-accessable areas on the car. Does anyone have any ideas on protecting the "natural" finish so it doesn't oxidise back off (without polishing it
).The bargain priced compressor I found at the tip ( :roflmao: :roflmao: ) has made a huge difference. Blasting was borderline with just the single compressor. With the two combined we must have about 25CFM .... It works much better
(damn it's noisy though, certainly I don't want to look at the power meter spinning with those two running!).This is the blaster. It's an old computer desk I modified and sealed up. There is a radiator fan on the top to suck any dust out and blow it outside (only I've lost my bit of drainpipe that I used for the exhaust). The blaster unit is a "presure assist" blaster made out of a big LPG cylinder cut in half and welded back together. The idea is you pressurise this tank to about 4psi to "encorouge" the abrasive out so it doesn't clog like store bought blasters.
seeya,
Shane L.
Attachments


Does anyone have any ideas on protecting the "natural" finish so it doesn't oxidise back off (without polishing it
Hi Shane,
I sprayed mine with High temp clear coat and it came out like this.
Use the Matt and then its easy to wipe clean.
Cheers
Attachments
Last edited:
there is a bloke around here that does bi carb blasting and he comes to you to do the job
i tell you i have seen some of the work and bi carb leaves a much better finish and it's cooler to blast with as well so no hot spots, perfect for panels as you won't get any warpage
i tell you i have seen some of the work and bi carb leaves a much better finish and it's cooler to blast with as well so no hot spots, perfect for panels as you won't get any warpage
A pickling solution can work well to remove the corrosion without changing the surface finish. BOC sell this type of product. Most parts never came from the factory with a blasted finish and it can look a bit odd.
Be very careful to avoid breathing the dust. It can have long-lasting health impacts with some blast media.
Be very careful to avoid breathing the dust. It can have long-lasting health impacts with some blast media.
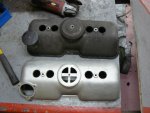
They're a good looking thing when painted up, new gaskets and correct fasteners...


Roger Wilkinson gave me this one to use on the Franken D when it was intended to be a long stroke.
I spent a Saturday evening with it.
Shane, it was in that box of stuff with the clockwork brakes.
Your grab bag should be there by the end of the week.
There will be more.
Roger Wilkinson gave me this one to use on the Franken D when it was intended to be a long stroke.
I spent a Saturday evening with it.
Shane, it was in that box of stuff with the clockwork brakes.
Your grab bag should be there by the end of the week.
There will be more.
Last edited:
Hi Guys,
yeah nothing will really look like the original casting. You see even if you used an acid dip, this will remove the oxidisation .... leaving a "textured" finish where the oxidization has been removed. polishing will level the suface leaving it shiny. with richos you can see he's used one of those amazing wire brushes by the fine scratching. There is a fine texture where I've blasted that, you know probably more than in the past as with two compressors running I had a huge amount move pressure to blast with .... I'll turn it down and go over it again, then do the rest of the alluminium parts (until I've emptied the blaster). 5minutes with one of those wire brushes would bring up quite a shine now it's clean.
I don't mind the clear there ... .Though is does have a "silver painted" look in the photos. It probably jut the photo that makes it look like that.
There's no way I'd go anywhere near any car panel or anything you want to paint with soda blasting. You need to know how to properly prep the surface or your paint will lift.
there's dozens of threads here about failed paintjobs from soda blasting ... here's the first one returned by a search for "soda blasting"
http://www.autobody101.com/forums/viewtopic.php?f=5&t=14772&p=124925&hilit=soda+blasting#p124925
glass beeds are possibly just as good at low pressure, with none of the residue ( from memory there about $36 a bag versus $17 a bag for the stuff I just grabbed).
seeya,
Shane L.
cleaning
Hi Shane,
I actually had mine vapor blasted, here is a description of the process.
http://www.andybuysbikes.com/Vapour blasting.htm
I know where one is in Sydney but I am sure there will be someone in Melbourne who does it.
This is the one I used,
To get the aluminium parts back to the original "New Look"
Vapourblast Cleaning
22a Adderly Street, Silverwater, NSW 2264Phone (02)9748-3164 Dan Murdoch
I googled it and found this guy, but again in Sydney.
____________________________
I can vapour blast (glass beads in water) your manifold and put a finish on it as close to the original as cast finish as you will find. Durable and easier to clean too!
I am in Sydney but I have a lot of interstate guys sending me stuff - cheaper than the petrol to drive across town, lol!
Dave Mac 0416074750
____________________________
The manifold and rocker cover looked like new when i picked them up.
Autosol and elbow grease. Gentle, and brilliant results. Hey Richo did you get that green colour matched or does it have a name?
Hi Shane,
I actually had mine vapor blasted, here is a description of the process.
http://www.andybuysbikes.com/Vapour blasting.htm
I know where one is in Sydney but I am sure there will be someone in Melbourne who does it.
This is the one I used,
To get the aluminium parts back to the original "New Look"
Vapourblast Cleaning
22a Adderly Street, Silverwater, NSW 2264Phone (02)9748-3164 Dan Murdoch
I googled it and found this guy, but again in Sydney.
____________________________
I can vapour blast (glass beads in water) your manifold and put a finish on it as close to the original as cast finish as you will find. Durable and easier to clean too!
I am in Sydney but I have a lot of interstate guys sending me stuff - cheaper than the petrol to drive across town, lol!
Dave Mac 0416074750
____________________________
The manifold and rocker cover looked like new when i picked them up.
Now THAT is interesting
I haven't seen that before. It's good to note the part still looked like old banged up parts after cleaning .... Just very, very clean banged up old parts :joker: So not "as new", but certainly most likely the colour and look they had when new (but with corrosion and other damage done over the years still evident).seeya,
Shane L.
Autosol and elbow grease. Gentle, and brilliant results. Hey Richo did you get that green colour matched or does it have a name?
Hi Tim,
Matched by eye on dried results compared to NOS parts and carefully cleaned originals.
Pedantic fool that I am.
It is a little shinier than the parts which were 50+ years old, can't create patina!
This whole sandblaster setup costs little if you have plenty of scrap around your place. This is really an old desk ... I just "re-arranged" and sealed it up with silicon. On the top is a CX radiator fan to suck the dust out and blow it outside the shed so you don't breath it. I just scoop the glass beads back out with a brush and shovel. The "windows" are just the old slat window we removed from our last house. If you guess I was trying to find something big enough that DS panels would fit inside ... You guessed right
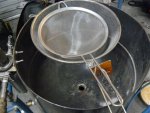
and simply filter it back into the blaster with a seive. Only I've been struggling the last day or so. The abrasive feed line kept blocking (you just put you finger over the end of the blasting gun and shoot some pressure back down it into the tank).
This is the blaster. They work brilliantly. You just need to find any tank ... compressor receiver, LPG bottle ... any sort of cylinder... I chopped the top off and welded it back on upside down so it had a funnel to add the abrasive into. I just screw the gas tap back in to seal the hole (I only need to pressure the tank to about 4psi for problem free abrasive feeding). I found out what the problem was, once I emptied the tank i could hear something rattling around inside it ..... I must have dropped a fastener in therre
How in the hell will I get that out .... You see I'd need to chop the bloody tank back in half to get it out as it'll be going straight to the bottom and blocking the hole the blasting media leaves the tank by at the bottom No kicking sh!t out of didn't acheive much other than hurting my toes .... .Screaming abuse at it didn't seem to do much either I did try holding it upside down and shaking it ... THis is difficult, 'cos it's heavy, the top is domed the wrong way and there is a flange around the threaded insert. Once you hold it upside down, you always end up with some glass beads on the floor. Imagine a shiny ice coated bit of concrette, then cover it in a super slick oil... and you'll get the idea how slippery glass beads on the floor are. To hold the tank upside down and standing there trying to shake it is inviting you to slip over and end up with that heavy b@stard crashing down ontop of you
I'm sure you can figure out how it works just by looking at the piccie. It really is very effective, please do the guy a favour that designed this and go and pay the $10bucks for his plans if you copy it. I think the person on ebay.com selling his plans isnt' him ....
Someone else is selling his plans :crazy: Anyway, the guy that designed this owns the yahoogroups list PA Blaster (pressure assist blaster)http://groups.yahoo.com/group/PA_Sandblasting
Eventually I thought "maybe it's small enough I can vacuum it out... so I found a bit of piping that would fit into the hole and taped it to the end of the vacuum cleaner hose .... I only vacuumed about 4 bags fulls of abrasive out before it was finally empty ( no the vacuum cleaner didn't go up in smoke ... I was expecting it to though :roflmao: ).
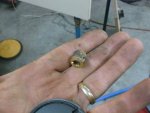
Finallly I got this out .... WTF ??? How the hell did that get in there
No wonder I was having feed problems.I just hook a car battery to the radiator fan when I'm using it. It keeps the cabinet nice and dust free (the problem is you fog the glass as your breathing onto it on the outside).
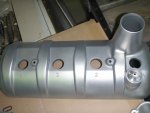
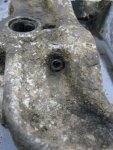
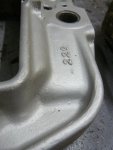
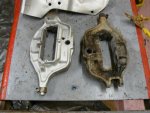
The surface comes up nice and clean, the reason it can be so pitted is the corrosion shown here.
The frail exhaust shield come up perfectly.
Attachments
-
 id2.jpg65.5 KB · Views: 1,900
 -
 id10.jpg92.4 KB · Views: 1,254
 -
 id9.jpg73.9 KB · Views: 1,261
 -
 id8.jpg79.7 KB · Views: 1,284
 -
 id7.jpg99.9 KB · Views: 1,632
 -
 id6.jpg90.3 KB · Views: 1,684
 -
 id5.jpg78.2 KB · Views: 1,316
 -
 id4.jpg63.4 KB · Views: 1,548
 -
 id3.jpg71.2 KB · Views: 1,648
 -
 id1.jpg89.2 KB · Views: 1,755
The sweet calming sounds of a pair of compressors hammering away late at night is great for the soul (well that's not what my wife said when I came in after midnight anyway  )
)
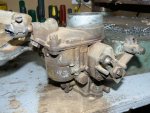
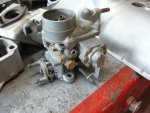
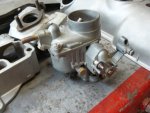
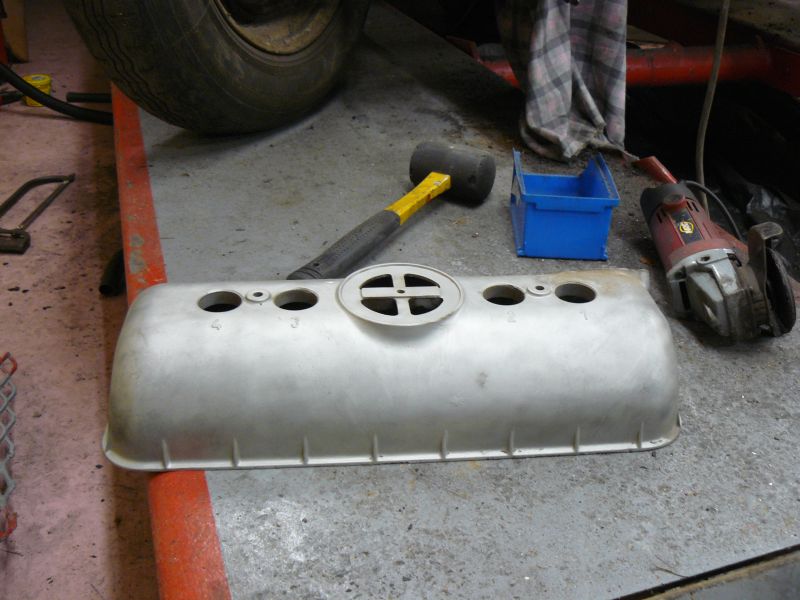
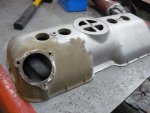
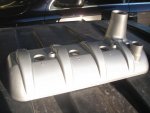
I think everything alluminium is now done...


carbies come up a treat... It'll be fully dismantled and a carby kit put through ensuring no traces of glass beads are left in it before being used.
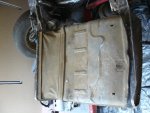
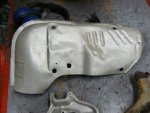
I thought I'd clean this up too....
But bugger me ... I never realised... It's made of galvanised metal, not alluminium. Why have I always thought these were alluminium (or maybe the CKD aussie ID's only are not alloy ??). I might have to use something ugly like silverfrost paint to tidy it up. The galvanising is coming off.
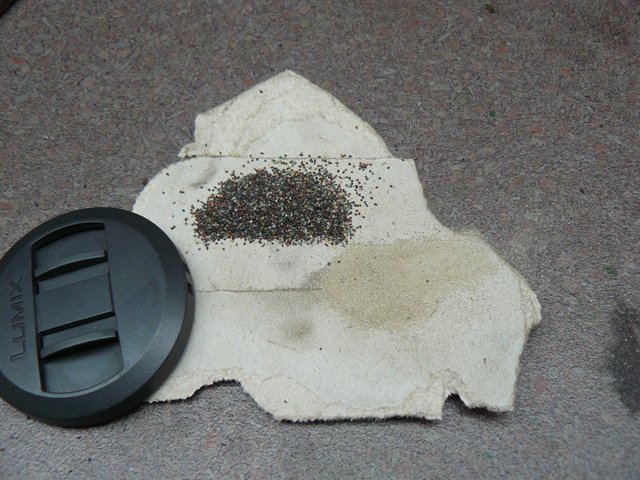
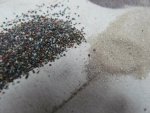
I grabbed the cheapo blasting grit to add to the sandblaster for all the metal stuff.... I'm not sure about this at all... I thought I'd be here until I died of old age trying to strip everything with gentle glass beads ... but look at the difference!
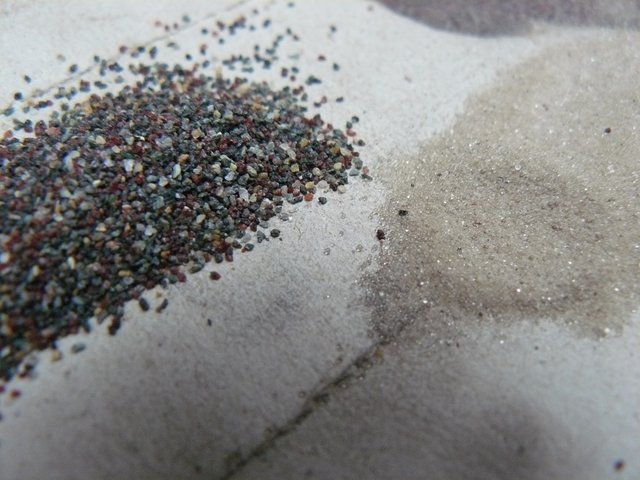
This stuff feels as aggresive as sandpaper, the glass beads feel like baby powder. My brother turned up with the rusty big heavy pin from a boat trailers tilt mechanism... he wanted to use the wire brush in the angle grinder to clean the heavy rust off with.... So I finished loading this stuff in ...... Bloody hell This grit is absolutely bloody brutal. It ripped the rust off back to shiny metal in seconds.... Little wonder everyone is scared of using sandblasters on frail car panels
seeya,
Shane L.
(well that's not what my wife said when I came in after midnight anyway )I think everything alluminium is now done...
carbies come up a treat... It'll be fully dismantled and a carby kit put through ensuring no traces of glass beads are left in it before being used.
I thought I'd clean this up too....
But bugger me ... I never realised... It's made of galvanised metal, not alluminium. Why have I always thought these were alluminium (or maybe the CKD aussie ID's only are not alloy ??). I might have to use something ugly like silverfrost paint to tidy it up. The galvanising is coming off.
I grabbed the cheapo blasting grit to add to the sandblaster for all the metal stuff.... I'm not sure about this at all... I thought I'd be here until I died of old age trying to strip everything with gentle glass beads ... but look at the difference!
This stuff feels as aggresive as sandpaper, the glass beads feel like baby powder. My brother turned up with the rusty big heavy pin from a boat trailers tilt mechanism... he wanted to use the wire brush in the angle grinder to clean the heavy rust off with.... So I finished loading this stuff in ...... Bloody hell
This grit is absolutely bloody brutal. It ripped the rust off back to shiny metal in seconds.... Little wonder everyone is scared of using sandblasters on frail car panels seeya,
Shane L.