GreenBlood’s D(very)Special Rejuvenation 2009>

Are you going acrylic on top coat Chris, I' m pondering the paint on mine at present, cheaper, less toxic and manageable..?

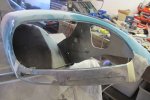
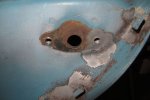
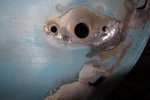
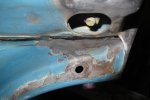
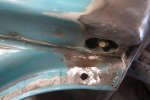
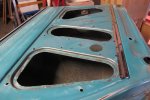
It's a big decision Steve, and one you need to make early, before you commit to panel preparation. . .

If you go back to the beginning of this thread you'll see I was all but convinced that I would be painting using acrylic lacquer. After talking with my paint supplier and seeing what can be achieved with modern 2K finishes I have been swayed. You can pretty well duplicate the factory finish with additives which just take that 'glass gloss' back to a finish that suits the era of the D, perhaps more like an acrylic finish.

I can still think of good reasons to run with acrylic, but I'm committed to 2K now with my preparation.

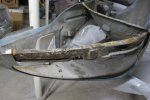
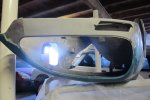
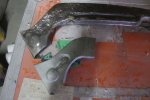
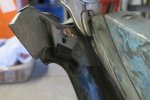
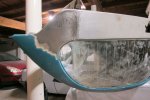
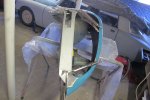
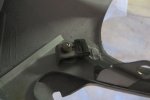
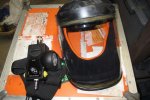
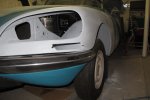
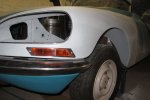
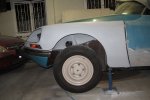
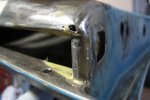
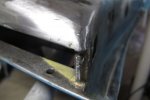
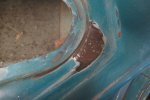
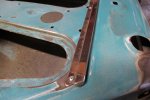
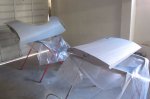
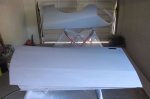
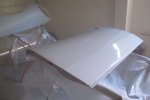
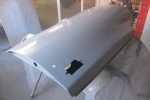
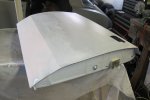
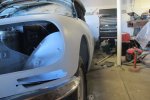
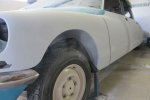
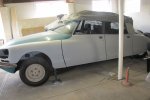
At this stage I will get all the panels to primer stage and possibly top coat the inside of doors, bootlid, front and rear guards and the underside of the bonnet. I should then have the use of a booth for top coating all the exterior. Currently I am using a full face airfed mask and disposable tyvek overalls when painting. The airfed mask is run off a second compressor which is sitting outside in the clean air, ideally the air should run through a filter but at around $400.00 its still sitting on my ebay watch list.

attachment.php


In terms of cost, I doubt there would be much in it, using 2K with a good HVLP gravity gun most of the paint goes on the panel, very little overspray unlike acrylic. 2 coats would be more than sufficient whereas to get a decent film thickness with acrylic you may require 6 coats or more - bottom line you will use less paint which may cost a little more in 2K. I think they would be on par $ for $.

Short answer, 2K :wink2:

Cheers
Chris
 

Attachments

  • Air Fed Mask.jpg
    Air Fed Mask.jpg
    61.3 KB · Views: 1,112
It's a whole curve, I've done rear panels on my car but it was all very unprofessional, just a filter mask and a compressor that isn't designed for spraying. Result was not too bad but health wise way dodgy! I might do all the prep and hand it over to the chain smoking painters... Looking good there. I will be posting side tracked developments of my car soon. Fun and games.
 
18-06-14

A few more hours invested . . .

attachment.php


attachment.php


attachment.php


Filler to the front indicator area and lower rear then spot primed, a little more work required but taking shape. I really need that inner support panel in place now before I can get the shape across the front. :(

In the meantime I will probably get back to that front passenger door and get it to paint stage.

Cheers
Chris
 

Attachments

  • 39 Filler spot prime.jpg
    39 Filler spot prime.jpg
    73.2 KB · Views: 1,019
  • 40 Filler spot prime.jpg
    40 Filler spot prime.jpg
    76 KB · Views: 1,023
  • 41 Filler spot prime.jpg
    41 Filler spot prime.jpg
    78.5 KB · Views: 1,025
20 -06-14 Holes and cracks passenger front door

Hey GB, out of interest ..... Did you find any cracking around the lower door hinge on the doors .... It seems to be an early car problem, they possibly beefed up this area on the later panels.

seeya,
Shane L.

In the meantime I will probably get back to that front passenger door and get it to paint stage.

Cheers
Chris

Managed a few hours on the front passenger door today. . .

On removing the upper hinge I found a small crack (I had repaired the lower hinge with the bottom inner corner previously) , out with the Punkblaster, a quick weld, grind and all fixed :wink2:

attachment.php


attachment.php


Working around the door another crack where the mirror bolts through, I think a largish washer would be a good idea here.

attachment.php


attachment.php


Door tops, this appears to be a common weak spot and it's not uncommon to see a break through here. . .

I had previously tried to repair using bronze but it looks like I made things worse :eek:
Attacked it with the MIG and now solid metal in both corners :)

attachment.php


attachment.php


It's my intention to use the DS style door cards with the top stainless trim, why? I much prefer the look of the DS door cards and the stainless top trim not only provides a good rigid mount for the top of the cards keeping them straight but will work in nicely with the black/chrome look of the interior - another deviation from original but I feel it will enhance without any pretence to something its not, I won't fit the top bolster so door tops will be as per D Special, in paint.

attachment.php


The top stainless is screwed in place, laying it in place I found a small problem in that one of the hole positions sits right over a larger hole used to accommodate the nylon cups for the card clip! The hole needed to be disappeared :eek:

These pics might interest Matthew (we have discussed welding holes closed), I clamped a brass key to the underside of the hole and was then able to fill working from the outer circumference to the centre. The brass key will not accept the weld but still allow you to strike an arc.

attachment.php


attachment.php


Then drill the required holes to fix the stainless. . .

attachment.php


I think I have now completed and welding/ grinding etc. I can get serious with stripping the paint, seam seal, shape and prime.

Loving the new workspace, just brilliant having your tools at hand rolling equipment up to the job and being able to leave things without worrying about rain etc. Luxury :approve:

Cheers
Chris
 

Attachments

  • 1 Hinge crack.jpg
    1 Hinge crack.jpg
    76.1 KB · Views: 1,008
  • 2 Hinge crack welded.jpg
    2 Hinge crack welded.jpg
    77.1 KB · Views: 1,044
  • 7 Mirror hole crack.jpg
    7 Mirror hole crack.jpg
    77.4 KB · Views: 986
  • 8 mirror hole crack welded.jpg
    8 mirror hole crack welded.jpg
    81.1 KB · Views: 1,334
  • 9 Top door corners.jpg
    9 Top door corners.jpg
    69.8 KB · Views: 977
  • 10 Top door corners.jpg
    10 Top door corners.jpg
    59.1 KB · Views: 961
  • 10a DS door trim.jpg
    10a DS door trim.jpg
    94.9 KB · Views: 1,225
  • 10b Stainless trim.jpg
    10b Stainless trim.jpg
    95 KB · Views: 251
  • 10c Hole.jpg
    10c Hole.jpg
    73.9 KB · Views: 959
  • 10d Hole filled.jpg
    10d Hole filled.jpg
    77.5 KB · Views: 933
  • 11 stainless fixed.jpg
    11 stainless fixed.jpg
    86.8 KB · Views: 924
22-06-14 Milestone

Could this be a milestone? The left side of the car is now all in primer, if I include the bootlid and the roof it would be fair to say a halfway point in panel preparation :)

There is still a lot of fine tuning on all these panels but they are for the most part rust free and straight. I still have to fit that inner repair panel on the front guard when it eventually arrives :cry:

Three coats of primer on the front door inside and out and spot primed more fine tuning of the front guard. . .

attachment.php


attachment.php


attachment.php


attachment.php


Moving house has made a huge difference to how and when I work, even welding is easier here with decent light to actually see what I'm doing. For now I'll skip the bonnet and have a good look at the front right hand guard next.

Cheers
Chris
 

Attachments

  • 12 Door in primer.jpg
    12 Door in primer.jpg
    68.8 KB · Views: 918
  • 13 Door in primer.jpg
    13 Door in primer.jpg
    57 KB · Views: 918
  • 14 Door in primer.jpg
    14 Door in primer.jpg
    53.8 KB · Views: 916
  • 15 Door in primer.jpg
    15 Door in primer.jpg
    59.9 KB · Views: 895
26-06-14 Left hand side panel fit

For now I'll skip the bonnet and have a good look at the front right hand guard next.

Cheers
Chris

Not so quick, the left hand side needs some remedial work :nownow:

The rear door has bugged me since I first hung it, it just wasn't quite right. I've added a little fill to the bottom fold through the centre. This, plus adding a shim to the lower hinge on the tub has moved the bottom of the door out nicely in line with the front door and rear guard. :wink2:

attachment.php


attachment.php


attachment.php


attachment.php


I've also messed with the door catch shims and now have nice pings when closing doors :approve:

I've heard from the supplier of the inner repair panel for the front guard, I should have it in the next day or so. In which case I'll get back to finishing the left hand guard before turning the car around and working on the right hand side.

Cheers
Chris
 

Attachments

  • 1 Rear door line.jpg
    1 Rear door line.jpg
    65.7 KB · Views: 861
  • 2 front panel lines.jpg
    2 front panel lines.jpg
    86.5 KB · Views: 861
  • 3 Left front.jpg
    3 Left front.jpg
    59.6 KB · Views: 1,378
  • 4 Left front.jpg
    4 Left front.jpg
    71.4 KB · Views: 856
Unreal Chris.... panel alignment looks insane. Apart from your air fed mask, do you have any ventilation set up in your new "shed"?

Matthew :)
 
Unreal Chris.... panel alignment looks insane. Apart from your air fed mask, do you have any ventilation set up in your new "shed"?

Matthew :)

Huge amount of time has now been invested to get to this stage, that rear door is much better now but still not as I'd like. I'm hoping the outer trim may hide a few sins, I'm reluctant to add any more filler. In this regard a Pallas is probably a little more forgiving with the upper and lower stainless trims to draw the eye and establish the line.

For ventilation, when not painting I open the garage door and windows in the work area, when painting I have a large floor fan extracting through a side window. As you have discovered, the painting of a panel only takes a few minutes so not so bad. Still not ideal but for the convenience of doing this work from home it works.

Cheers
Chris
 
Awesome work! Looks absolutely amazing.. I can imagine how much time you've invested to get to this stage!

Can't wait to see the next update!
 
Coming along very well now. Yes, the Pallas trim can let you off the hook if the swage line in the door is not quire right, but the strips at the bottom can make it look very wrong if one is higher than the rest.

Comments/suggestions that may or may not be helpful ...
The weight of the glass, winders and trim will probably mean you need to adjust the hinges when fitted up.
Check that the gaps are still OK if it sits on the front wheels rather than stands.
Test fit the door rubber on the new holders to make sure they will sit against the corner of the sill correctly. You may find that you need to trim the ends of the holder a little or even move the door.
Try an offcut of windscreen rubber in the glass channel to see how the bonnet will relate to the rubber when fitted.
Have a careful look at where the window glass will be sitting against the rubber on the body when you come to fit it. Without the glass fitted, it's easy to add shims to push the doors away from the door posts, but then find the glass will not press against the rubber enough to form a seal. If you have to bring the doors inwards, then you may have a clearance problem with the bonnet to deal with.

There is almost too much adjustment available, but I guess the panels on your car were already used to living with each other before all of this work began.

Wow David,
Fantastic post thank you :wink2:

I know I should be setting things up with the car on 4 stands or on 4 wheels :nownow:

So, even before my first coffee this morning I went down to the workshop and started the car for the first time in 3 months and removed the front stands. Happy to report I can't see a discernible difference in gaps and lines, no better or worse to my eye. :)

There is much of your advice I can't check at this stage, I've removed the window glass tracks, in fact everything off the doors and guards for painting. I remove and refit the hinges and door catches each time a door is removed.

Yes the panels have all lived with this car for some time but I'm finding small adjustments in one area can have a big impact elsewhere - funny thing is I have probably gone around in circles and ended up close to where things were :clown: :crazy:

The rear door has had extensive work with the entire bottom being replaced, that would have to have caused some distortion to the door frame and as we know the repair panels are just a starting point requiring some manipulation to fit. Given my budget I have to be content with how things are proceeding, it will never be a show stopper and was never intended to be. It still astounds me how much rot these cars can hide, this one looked quite respectable but under that glossy paint agahhhh! :eek:

I've made a start on the right hand front guard, I'll update once I've made some decent progress :wink2:

Cheers
Chris
 
...
I have probably gone around in circles and ended up close to where things were :clown: :crazy:
...

It is a bit like that. Do you have enough of each type of shim?

The book gives a starting point dimension for the rear points of the bonnet, but front door fit at the kink in the rubbers at the waist and at the sill would seem to slightly override the need to get that right. It's all something of a compromise and the variations are introduced by the inevitable crashes and rust repairs.
 
Have a careful look at where the window glass will be sitting against the rubber on the body when you come to fit it. Without the glass fitted, it's easy to add shims to push the doors away from the door posts, but then find the glass will not press against the rubber enough to form a seal. If you have to bring the doors inwards, then you may have a clearance problem with the bonnet to deal with.

There is almost too much adjustment available, but I guess the panels on your car were already used to living with each other before all of this work began.

Good advice David - I've just gone through all of this myself.

There is the ability to "tilt" the glass in it's runners when fitted so it helps get the correct clearance on the door rubbers.

Panels were apparently selected for their compatibility with each other at the factory - which goes some way to explaining why even the fit of NOS panels can be dodgy.

We have also been spoilt by the near perfect panel gaps of modern cars. They were just not that good back then apparently.

My BVH is relatively unmolested and the gaps and edge alignment is way less than perfect.

I would argue that time spent in getting a close to perfect fit is a lot more than what Citroen invested when they were new.

I think Chris's work is exceptional and will result in something better than new.

Cheers,

Mark...:)
 
29-06-14 Stop the rot!!!

It still astounds me how much rot these cars can hide, this one looked quite respectable but under that glossy paint agahhhh! :eek:

I've made a start on the right hand front guard, I'll update once I've made some decent progress :wink2:

Cheers
Chris

Back in 2009 after replacing the starter motor I had planned on a quick tart up and continue driving D(very)Special. A few rust bubbles on the front guards - quick hit with filler, paint and away we go. . .

attachment.php


One thing lead to another and here we are taking things a little more seriously.

I've now cut the front out of the right hand guard, even after stripping the paint it didn't look too bad. You can be sure though, if there is evidence of rust on the outside of the panel it will be much worse on the inside - the front lower guard will rust from the inside out :eek:

attachment.php


attachment.php


Cut the outer repair panel ready to fit. . .

attachment.php


Chris, that is wonderful work!
I know what is involved here having made one of those panels and having fitted it to the guard.
At the time we could not buy replacement panels and while I was able to complete a satisfactory facsimile of the original the inner bracing panel was a little on the crude side having been home made with just hammer and dollies and pliers!

The inner is totally rotten, I can't even rescue the section that is not available as a repair piece.

So, Gerry, as per your comment above I've had to fabricate that section. The longer section I will buy in and weld in the fabricated part.

*Note evidence that this guard is not original to the car, bleu platine on that inner support. . .

I transfered the shape needed onto a piece of scrap. . .

attachment.php


Then cut to shape and folded. . .

attachment.php


Added the dimples and fitted a stud, checked it all fits into place on the guard and it's good to go once I have the new section.

attachment.php


attachment.php


The rest of the guard checks out OK, although there is evidence of a poorly repaired dingle at some stage, a bit of creasing on the inner mud-guard. I'm sure I'll beat it into submission :mallet:

Cheers
Chris
 

Attachments

  • 1 Right front - Copy.jpg
    1 Right front - Copy.jpg
    89.8 KB · Views: 745
  • 4 Front guard 2009.jpg
    4 Front guard 2009.jpg
    97.2 KB · Views: 797
  • 5 Fabricate inner support.jpg
    5 Fabricate inner support.jpg
    97.5 KB · Views: 738
  • 2 Outer skin cut away.jpg
    2 Outer skin cut away.jpg
    86.3 KB · Views: 758
  • 6 Fabricate inner support.jpg
    6 Fabricate inner support.jpg
    86.7 KB · Views: 712
  • 3 Repair section.jpg
    3 Repair section.jpg
    77.7 KB · Views: 751
  • 7 Fabricate inner support.jpg
    7 Fabricate inner support.jpg
    82 KB · Views: 734
  • 8 Fabricate inner support.jpg
    8 Fabricate inner support.jpg
    75.1 KB · Views: 688
Wow that's looking good. Did you figure out a way of bracing the tops of the doors so they dont' crack :confused: From memory you need to remove the old brazing before you can MIG weld there (the two types of weld don't like each other). You might find they soon crack again otherise. MIG is harder so more likely to fatique crack than the original bronzing. That's why I'd like to figure out a way of bracing the area.

It's a huge amount of work ... but go with what David S suggests... Refit the windows and get them working before it's painted.... You may find you need to "tweek" some panels to get them lined up .................... and the door locks working ......... without the windows touching ...... You should be ok though, 'cos you started with a car that had matching panels that fitted each other in the first place.

seeya,
Shane L.
 
2-07-14 Right front guard progress :)

The inner support panel has arrived :headbang:

My observations:-
The panel is a good starting point but requires some gentle massaging to get it to fit nicely with the outer.

  • I have had to make an adjustment of the centre caged nut holder by about 3mm
  • The folded shelf that the glass rests on needed trimming down as the light bucket would not sit correctly as it was.
  • The stud for the glass clamp is again about 3 - 4mm out of position, short of moving it, the solution will be to extend the slot on the clamp.

attachment.php


I started by spot welding the inner corner section saved from the old panel to the new section (after cutting the new for a butt fit).

attachment.php


Then over to the bench and welded from behind, cleaned the weld and trial fit with the glass and bucket.

attachment.php


attachment.php


Seems I got lucky because the fit of the glass is near perfect - without the rubber seal and chrome trim I can barely get my fingernail between glass and panel :wink2:

I'll now get some rust protection on the insides of both sections and weld them together and finish the shape on the exterior, prime ready for paint.

I've also made a little more progress with the second guard, the welding is vastly better on this one.

attachment.php


attachment.php


This is the guard that has had a dingle in the past, have a look at the depth of filler where I have sanded. :eek:

Cheers
Chris
 

Attachments

  • 11 Outer repair welded.jpg
    11 Outer repair welded.jpg
    77 KB · Views: 657
  • 9 outer clamped for welding.jpg
    9 outer clamped for welding.jpg
    83.6 KB · Views: 664
  • 43 Trial fit glass & bucket front view.jpg
    43 Trial fit glass & bucket front view.jpg
    71.3 KB · Views: 666
  • 42 Trial fit glass & bucket.jpg
    42 Trial fit glass & bucket.jpg
    86.5 KB · Views: 669
  • 41 Trial fit inner support.jpg
    41 Trial fit inner support.jpg
    82.4 KB · Views: 675
  • 44  Inner glass stud.jpg
    44 Inner glass stud.jpg
    53.8 KB · Views: 656
Are you going to grind that bog off and have a look? Might be hammer time! Great work Chris I'm jealous I'm miles off even considering this side of the effort involved to cheer a 40 year+ D up.
Told myself my current effort will be sufficient for a long time to come. I can imagine what mechanics say when people come in and say "can you restore my car?"
"Yeah no worries!"...

Thanks for the encouragement Steve :wink2:

Don't we need it? 5 years in and I feel I'm in the never ending story with an enormous task ahead :crazy:

With regard to that front guard, honestly I can't fault the paint and preparation on it - no cracks or crazing, the gloss is still excellent and hard as nails. It may not augur well with the "must go back to bare metal" folk, but I can't see the point in ripping it back to metal and starting again. It has held up now for over 15 years so whoever worked on it back then did something right. I'll feather the repair areas and sand back to the primer level on the rest of the panel, make my own repairs with filler and prime for paint. The panel will be relatively rust free and with a 2K finish it should hold up for at least my ownership. (Flame suit on :burnboun: )

Cheers
Chris
 
Top