GreenBlood’s D(very)Special Rejuvenation 2009>

Thanks for the feedback Bill :wink2:

There is a bit of fiddling to get the Retrosound unit to fit neatly, the trick for me was to have the unit slightly angled down so that the rear connectors don't come in contact with the plastic heater demister tube, and mounting the knob shafts as close to the unit as possible.

The unit I have, I bought in Australia via ebay seller fordmustangparts, as the name suggests these guys specialise in Ford Mustangs and as such their Retrosound unit is styled accordingly with big chrome knobs and chrome face etc. Knowing I was eventually going to customise a faceplate to suit the D installation the price and convenience of having representation in Aus for warranty claims etc. suited me.

You know your stuff, yes, the replacement knobs are the Becker style :)

Perfect for me would have been black rather than chrome face and push buttons, they are available in this combination but not through the Aus reseller. I'm more than happy with the outcome, especially the sound, in real life the unit really does look like it was meant to be there :)

BTW, I always print more than one when I do this sort of work for myself so I have spare faceplates if anyone is interested.

Cheers
Chris

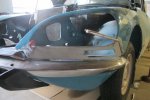
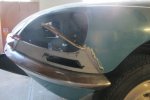
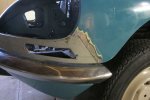
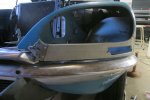
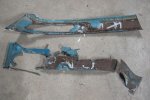
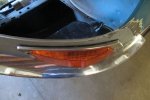
A bit of fiddling, yes, but still better than attempting to fit a DIN unit. I've had to do that, and it ain't fun. I tell everybody that working on a D dash is fiddly as all hell, but not difficult. I see you used the factory radio pocket for your chrome surround. How did you install that- a careful cut to fit, then a little double backed tape?

Actually, the unit you fitted looks better than the black unit would- much more in keeping with the overall style. I didn't think the RetroSpec units were that deep- we fitted a cheap ISO-sized (old Japanese spec) radio to the 3-dial D's here. IIRC they're about 3.5" deep. No RCA plugs out the back, though.

Any of you others who wish to mount a modern stereo to your late D without chopping up your dash, talk to Chris. His faceplate combined with the stereo is a saving grace. :jiggy:
 
So.. Any chance of ordering a faceplate..?

Awesome work!

I keep losing your mailing address :clown:
Send me a PM with your address and I post a set down to you :wink2:

Cheers
Chris
 
advice please

hi Chris
I (like a few others, I see) am starting down the D Special rejuvenation route.
I have had the car a few weeks and although it is a driver its in pretty poor shape.
Rust in the boot, doors, c pillars and plenty of hydraulic issues.
But it is a complete, original car and everything works (sort of). I already love it.
Before I found this thread I had already decided on the rejuvenation, not restoration route. You have convinced me I'm on the right track.
I am planning to fix a couple of basic issues (rear spheres - ever ridden a bucking bronco? and a couple of other things) and drive it for a few months.
Then engine out for a clean up and engine bay. And other hydraulic/mechanical work.
Mid next year to my friend the body man. (NO way I would attempt what you have done with welding etc...)

I absolutely love your thread, which I will be referring to a lot I am sure.

This is my first Citroen, but I have a few other classic cars which I do a fair bit of work on myself. Nothing of the magnitude this D represents tho.

So, I have rambled on, but I do have a question or 2..... Please excuse, but I am new to Goddess world

1. I have downloaded a few pdf's of parts and service manuals, but nothing seems to be the 'soup to nuts' that I am used to with other cars. e.g. I cannot find a reference on how to remove front and rear mudguards. Yes, I know it's simple and I could probably figure it out, but it would be nice to know how to do it "correctly". What reference(s) do you recommend?
2. Any special tools required? Do i need a Ligarex plier? What size flare nut spanners are required?

I'M EXCITED

thanks for any advice

cheers, Ken

Hi Ken,
I've sent a PM but in case I have missed something I'll post the contents here, others may add what I've missed.

GreenBlood said:
Hi Ken,
Welcome to the D Special club, we're a rare breed

I'm flattered by your reply in my thread and have no problems whatsoever with going a little off topic. The whole point of the forum is to share the knowledge.

I'll reply in more detail, but for now, it sounds like you have PDF 648 parts manual and 814 for remove and re-fit procedures?

Removing the rear guard is done simply by removing the large external bolt at the rear of the guard, your wheel nut tool is the correct size (Citroens you gotta' love 'em). Just lift from the rear and slide backwards easy.

The front guard is a little more complex but once you have done it a few times it is like riding a bike. Set the car on high and place car stands under the jack points just under the front of the front doors. Remove the nut and bolt you can now see at the bottom of the front of the wheel arch. Remove the light bar (grey) undo the bolts on the radiator shroud support bar (4 x M5) Remove the bolts at the front where the fresh air duct is. Wiring harness disconnects up at the firewall, (get some tape and number each connection male and female, the connectors are colour coded but no doubt have faded to the point they are no longer useful - many now use a dot system using a permanent marker). There is a cable that connects the swivel lights, it runs through a nylon eye on the alluminium shroud left to right, locate the joiner, pull the cable to give some free-play and slide the the cable end and release from the joiner. You can now carefully lift the guard forward and up - done

I may have missed a step (I'm at work and no where near my car), but once you get stuck in it should all become apparent.

All the best

Flare nut spanners, Gerrypro posted this link in another thread, all you will need for $20.00
http://www.ebay.com.au/itm/Toolpro-...s&hash=item2eca33e793&clk_rvr_id=555451561258

Ligarex, if you are going to be servicing the car yourself, yes, invest in a kit. Shop around, I know Citroworld sell the kits but you may find cheaper.

. . .and just in from michaelr, I knew I would miss a few important steps - thanks Michael ;)

michaelr said:
"Hi Ken

It looks like GB has given you a good intro and answered some questions.

Regarding the removal of the front guards he did miss a couple of important parts! Before you attempt to lift the guards off first remove the ventilation pipes front and rear (obvious) but also the bonnet release cables (they easily detach from the bonnet catch end) and some more electrical connections adjacent to the bonnet catches: an earth on the right hand guard and on the left the earth, horn connections and another for the brake pad warning light which go to the disc pads.

On replacement remember to re-connect the bonnet release cables before you close the bonnet!!!!!

Cheers
Chris
 
Just a call out for Richo :)

As mentioned earlier we are in the slow process of packing up to relocate, still haven't found a house with a 4 car garage with 3 phase and a hoist. With the way real estate is at the moment I may have to settle for enough yard space to re-install my Supercheap shed :( :confused:

So again just getting as much back on the car as possible, panel and paint has been put off again. . .

I've fitted 4 adjustable spheres re-built by Richo, valved for comfort, I can't believe the difference in doing the bounce test, the whole car responds - sensational. The old spheres were in pretty good condition but no where near as floaty - very frustrating not to be able to take the car for a drive. Just wanted to acknowledge the brilliant work Richo does, not only are they functional but they look mighty pretty :approve:

Also fitted the inner and outer exhaust heat shields, fun job without fully removing the exhaust manifolds :eek:

attachment.php


Little steps, getting closer just need to find a decent workspace to really make some progress.

Cheers
Chris
 

Attachments

  • Richo sphere.jpg
    Richo sphere.jpg
    63.4 KB · Views: 1,399
As mentioned earlier we are in the slow process of packing up to relocate, still haven't found a house with a 4 car garage with 3 phase and a hoist. With the way real estate is at the moment I may have to settle for enough yard space to re-install my Supercheap shed :( :confused:

So again just getting as much back on the car as possible, panel and paint has been put off again. . .

I've fitted 4 adjustable spheres re-built by Richo, valved for comfort, I can't believe the difference in doing the bounce test, the whole car responds - sensational. The old spheres were in pretty good condition but no where near as floaty - very frustrating not to be able to take the car for a drive. Just wanted to acknowledge the brilliant work Richo does, not only are they functional but they look mighty pretty :approve:

Also fitted the inner and outer exhaust heat shields, fun job without fully removing the exhaust manifolds :eek:

attachment.php


Little steps, getting closer just need to find a decent workspace to really make some progress.

Cheers
Chris

thanks chris, for the info re tools
it looks as if its a big investment for the DS 'bible', but i'll keep looking
good luck with your house hunting
cheers, ken
 
On the road again. . .14-03-14

As mentioned earlier we are in the slow process of packing up to relocate, still haven't found a house with a 4 car garage with 3 phase and a hoist. With the way real estate is at the moment I may have to settle for enough yard space to re-install my Supercheap shed :( :confused:

Cheers
Chris

Finally we have relocated, didn't manage a 4 car garage, no 3 phase, no room for a hoist, and no room for my Supercheap shed :cry:

It's not all bad, I've a good space for the D and a pretty decent workshop space where I can spread out. Just need to organise some shelving and storage, get my tools stowed and I can get back to work on the car.

For the move I bolted the roof. sunroof and all panels back on the car and drove it onto the back of a flatbed truck. This was the first time in over four years I had driven the car on bitumen, albeit for only 20 metres or so.

Interesting following the tow truck to the new address to see the car making full use of it's suspension, I can't wait to experience that floaty ride from inside the car :wink2:

attachment.php


Cheers
Chris
 

Attachments

  • Tow truck.jpg
    Tow truck.jpg
    63.1 KB · Views: 1,427
27-04-2014 Gung Ho!!!

We're a little more settled, still many things on the to do list.
Lighting is a priority, 9 double fluros now on the shopping list, along with shelving and storage.

I've spent the weekend on the left front guard, made the call that patching was a waste of time and it is in need of major surgery.

The outer skin under the headlight glass has been repaired numerous times given the combination of welds/filler and fibreglass, the inner support panel obviously neglected and is rotten to the core.

attachment.php


attachment.php


I started by drilling out spot welds and removed the inner support panel. . .

attachment.php


I then stripped the outer skin back to where I found solid metal either side of the rust.

attachment.php


Next I marked the outer skin for cutting, the two lines are 12mm apart, I'll cut the inner lines afer marking up the repair panel - the repair panel will cut to the outer lines and be joddled to fit under the cut skin.

attachment.php


attachment.php


Repair panel then held in place using clamps. . .

attachment.php


attachment.php


attachment.php


A trial fit on the car

attachment.php


attachment.php


After a few adjustments, repair panel held in place with self tappers

attachment.php


attachment.php


The discarded rust. . .

attachment.php


Before anyone says you're insane, I'm well aware of the pitfalls (I don't have access to an English Wheel to make a jig, so the gung ho approach is all I can muster), as things stand I have set the glass against the opening and it sits nice and flush all the way around. I have tested the outer chrome trim and it also fits the circumference.

I need a repair panel for the inner support, once I have it I will set it in place before any welding. I figure I have nothing to lose in having a go, the guard was useless as it was. This may end in tears, but. . . well, watch this space :rolleyes: :clown: :crazy:

Cheers
Chris
 

Attachments

  • 1Guard.jpg
    1Guard.jpg
    96.5 KB · Views: 1,147
  • 2Rusty internal panel.jpg
    2Rusty internal panel.jpg
    88 KB · Views: 1,181
  • 3Internal panel removed.jpg
    3Internal panel removed.jpg
    98.2 KB · Views: 1,155
  • 4Stripped outer panel.jpg
    4Stripped outer panel.jpg
    85 KB · Views: 1,166
  • 5panel marked for cutting.jpg
    5panel marked for cutting.jpg
    70.6 KB · Views: 1,141
  • 6panel marked for cutting.jpg
    6panel marked for cutting.jpg
    74 KB · Views: 1,130
  • 7repair panel cut to fit.jpg
    7repair panel cut to fit.jpg
    78.7 KB · Views: 1,132
  • 8Repair panelcut to fit.jpg
    8Repair panelcut to fit.jpg
    73.9 KB · Views: 1,132
  • 9Repair panel clamped.jpg
    9Repair panel clamped.jpg
    98.4 KB · Views: 1,121
  • 10Trial fit on car.jpg
    10Trial fit on car.jpg
    82.9 KB · Views: 1,147
  • 11Trial fit on car.jpg
    11Trial fit on car.jpg
    66.2 KB · Views: 1,099
  • 13Panel screws.jpg
    13Panel screws.jpg
    74.4 KB · Views: 1,108
  • 14Panel screws.jpg
    14Panel screws.jpg
    82.1 KB · Views: 1,089
  • 15Rust.jpg
    15Rust.jpg
    94.9 KB · Views: 1,128
Nice work Chris. Looks tricky- what replacement panels are they? Citroworld?

Workshop looks good!

I guess with nothing to lose Toby I won't die wondering. Yes, Citroworld for the repair panels. I've had the outer panels for ages but the previous workspace was hopeless for this kind of work, no sooner than I made a start I would be cleaning up. I have most of the underneath area of the house with full head height here "Luxury" :)

This will not be a professional job and will no doubt need a good dab of filler, but I will get the opportunity to get as much rust protection between the inner and outer skin as possible to slow the future rot.

David S posted an inquiry about a rubber I'd not seen before, I now understand where and how it works sitting on the upper ledge of the support panel, the glass then rests on it. When fitted this would assist in preventing dirt, grime and most importantly water getting between the two sections. I'll make sure a similar rubber section is fitted.

BTW, if anyone has a spare LH inner support repair panel available I'd be happy to take it, otherwise it's a 3 or 4 week wait from Geert.

Cheers
Chris
 
Hey Chris

your work always looks precise to me. Have you checked the curve of the repair panel with the indicator in place? I only mention it as my left guard has been badly repaired at some stage and the indicator sits out from the guard. It's all being replaced with another guard eventually I have in readiness.

Matthew :)

Thanks Matthew,
The indicator lens is not an absolutely perfect fit, but to be honest neither was the fit to the original panel, if anything I think it is now a little better.

attachment.php


attachment.php


These are repro parts, to my mind they are hit and miss, you can get lucky :wink2:

Cheers
Chris
 

Attachments

  • 16Indicator trial fit.jpg
    16Indicator trial fit.jpg
    80.8 KB · Views: 1,029
  • 17Indicator trial fit.jpg
    17Indicator trial fit.jpg
    80.9 KB · Views: 1,047
Is it possible to check to see if the glass fits before tack welding it into position. :confused: You sure don't complain about the costs of getting professionals to do this stuff when you figure out for yourself how much time and effort is involved in making sure everything is ok :)

seeya,
Shane L.

Worry warts, you're stressing me. . . :cry: :clown:

It's a bit tricky to check the glass fit from the inside now Shane, the self tappers are in the way. Laying the glass on from the outside shows a really snug fit all the way around. I don't think the photo shows the fit too well - but trust me I'm a. . . :evil:

attachment.php


Cheers
Chris
 

Attachments

  • 18Glass trial fit.jpg
    18Glass trial fit.jpg
    92.1 KB · Views: 1,060
Chris, that is wonderful work!
I know what is involved here having made one of those panels and having fitted it to the guard.
At the time we could not buy replacement panels and while I was able to complete a satisfactory facsimile of the original the inner bracing panel was a little on the crude side having been home made with just hammer and dollies and pliers!
 
Thanks Matthew,
The indicator lens is not an absolutely perfect fit, but to be honest neither was the fit to the original panel, if anything I think it is now a little better.

attachment.php


These are repro parts, to my mind they are hit and miss, you can get lucky :wink2:

Cheers
Chris

Looks OK to me... mine looks like the Harbour bridge compared to that! they've put extra foam behind it to fill in the arc. :rolleyes:

Matthew :)
 
Top