Working on the SM

Well Folks,

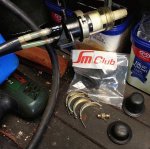
I had a big day on Saturday. My air con expert came over and we worked out a route for the refrigerant hoses and measured what was required for each run, and worked out what fittings would be required to crimp onto the end of each hose.

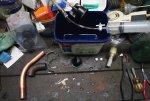
After lunch we hooked the gauges up to the air con on Dave's BX 16V, checked whether it would hold a vacuum which it did sort of, and then proceeded to give it a camping gas (butane/propane mix) trial refill. It wouldn't pull in the compressor even though we put in 40 psi of gas, so I hot wired the compressor and the radiator fans. With a bit of accelerator and inversion of the camping gas can, pressure built up on the high side to about 180 psi at which level a halt to charging was called - and there was cool air in the car. I later found that the air con temp knob was sitting on the RHS of the pin connected to the slider temp rheostat so that the air con was not even turned on. So a prod with a small screwdriver to move the pin over had it all working with compressor pulling in and radiator fans working in series. And it is still working after three days - how long will it last??

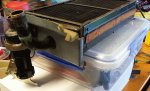
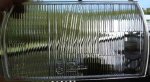
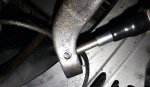
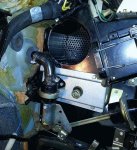
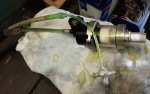
Yesterday I managed to get my heater matrix out so I can make the 90mm air entry hole in the LHS of the air box above. To make room for the air entry tube from the under dash unit, I have to modify the J tube coming out of the matrix either by cutting it off at the bottom or bending it at 45 degrees so there is room for the air pipe to go into the air box above. That way the coolant pipe will go back to the firewall at 45 degrees roughly at the same height as the right angle coolant pipe that goes on the heater tap and back to the firewall. I think my only real option is to use a hacksaw but any other ideas would be welcome.

I went and bought all the fittings and hoses from Ashdown Ingram today and they were all in stock.

Cheers, Ken
 

Attachments

  • SM Heater Matrix.jpg
    SM Heater Matrix.jpg
    99.4 KB · Views: 307
Last edited:
You could take the matrix to a radiator shop and have them do it. It is, after all, just a brass and copper radiator. They could probably unsolder the header from the matrix and then braze the tube in the other way.
 
Last edited:
Hi John,

I can also get a good view of the speedo cable attachment to the gearbox. There doesn't seem to be anything obviously holding it in but it doesn't respond to a tug on the cable. Does anyone know how that comes out? I do have a new cable that I could fit.

Cheers Ken

Ken,

The speedometer cable is removed by withdrawing a long M9 bolt that goes through the front of the transmission approximately in line with where the cable enters the transmission. With the bolt removed, press down on the region immediately surrounding the cable and tug. It should come right out. The reason you press down on the region at the same time is to avoid dislodging the carrier that holds the drive gear and possibly dropping the drive gear into the transmission.
 
Hi Froggers,

I see it has been about 6 months since I last posted and I have to say there hasn't been much progress on the SM. But I have had 5 weeks in Tasmania and a few months training for a 4 day walk that we did down there. The other project to repair our timber front stairs is almost ready to hand over the the painter so I am trying to get going on the SM to get it one the road soon and the air con working before summer.

I will add to this post a little later. At least I will be able to find the thread easily.

Cheers, Ken
 
Wow this thread features ... a picture or two finally :dance: With the BX, check the 'O'rings on the TX valve. They seem to be the culprit. With the condenser, I asked the local A/C guy here. He uses range rover classic condensers in his aftermarket installs, as they are big, efficient and quite cheap. In the CX I just asked them to get the biggest most efficient condenser they could find in there catalogue (it wasn't cheap ... about $280 from memory). The best thing you can do to keep the pressures down is fit some decent fans. Ford EL falcon fans wired through a trinary switch would probably be perfect... ie: wire the fans series for A/C operation, but when the trinary switch trips, run the fans flat out (ie: parallel ).
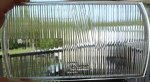
Can you get an athermic windscreen for the SM? If it's anything like the CX this will be your biggest problem!


seeya,
Shane L.
 
Hi Ken,

I'd be interested in how you go with refilling the turning headlamp controls. Is the any info on the procedure?

I have bought diaphrams to do the repair. I also see there is a cable conversion, but would like to keep it original.

Funny, I originally thought it was LHM in the units...........Guess everything green with Citroen isn't LHM.

If you change to LHM to do you have to change the rubbers?

Just something to note re the rectangular low beam headlamps. The little plate at one end of the lights is what makes them RHD, so don't loose them.

Regrettably, the performance of the low beam is on par with with the late DS low beam: ABYSMAL. Upping the wattage, as in the DS doesn't work either, just gives you a brighter nothing.

I'm interested in trying H1 LEDs to see if they can make a difference?

Best regards,

Greg
 
Greg,

I am grappling with the directional headlight control at the moment. I can get a whole new hydraulic one from SM Club de France for 420 euro but that would be too easy wouldn't it. So I'm following the Citrothello method however he seems to totally ignore the thermal compensation limb of the circuit. Mine is fluidless at the moment and trying to get the plug out of the end of the tube is destroying the tube - so I need to find some new 9mm OD nylon tube to fill up with the little thermal compensation cylindery bits before I try a refill. I have heard that Citroen used Glycerin in the early systems but then changed to LHM. I cannot get the SM Club to tell me what their diaphragms are compatible with but I will use LHM and see how that goes.

Low Beam Headlights - I have come to the conculsion that although my car is English, I have one RHD and one LHD low beam unit. Yes the little stainless steel inserts were on different sides but the glasses also seem to have a different lens pattern as well. Those big lamp holders that seem to have blackened with age will absorb at least half the light from the H1 bulb. I have two sorts of H1 LED Lights to try out in them and I was going to paint the whole insert white as well. Another idea is to take the whole insert out of the beam and fit a P23D dip/main bulb and just wire up the dipped beam. I intend to try these all out and compare results once I get the glasses re-glued onto my newly aluminised reflectors. I might even buy a lux meter!

Main job at the moment is to get my heater matrix refitted with altered return piping so I can get a large air entry cut into the LHS of the centre airbox to get cool air in there from the aircon evaporator unit I am mounting on the LHS passengers side.

I also need to get an order off to SMCDF to get a new heater tap seal and a few other parts so I can get the cooling system back together.

Cheers, Ken

Hi Ken,

I'd be interested in how you go with refilling the turning headlamp controls. Is the any info on the procedure?

I have bought diaphrams to do the repair. I also see there is a cable conversion, but would like to keep it original.

Funny, I originally thought it was LHM in the units...........Guess everything green with Citroen isn't LHM.

If you change to LHM to do you have to change the rubbers?

Just something to note re the rectangular low beam headlamps. The little plate at one end of the lights is what makes them RHD, so don't loose them.

Regrettably, the performance of the low beam is on par with with the late DS low beam: ABYSMAL. Upping the wattage, as in the DS doesn't work either, just gives you a brighter nothing.

I'm interested in trying H1 LEDs to see if they can make a difference?

Best regards,

Greg
 
Last edited:
Hi Ken,

I'd be interested in how you go with refilling the turning headlamp controls. Is the any info on the procedure?

Greg

Hi Greg,

Interestingly, Andrew Brodie was very cryptic on this issue - eluding to the conclusion that everyone does their own thing. You may find that as helpful as I did.

I too, have hung on to the LHM filled cables. I've filled them several times (thanks to my inability to permanently repair a damaged cable). Which is maybe OK now. I suspend the cable from the piston control unit. This unit has a form of band clamp holding upper, lower and the diaphragm.

I just take my time filling the cable and getting the air out. I put a little more fluid in than required to get the pistons slightly "more" than in the middle, assemble without letting air in (some of the excess fluid will leak) and put a cable clamp around the original band clamp. Works OK for me.

Alternatively, I suspect the sensible thing might be to install a pneumatic tube valve fitting in the brass end cap, for future top-ups.

Cheers,
Rhys
 
SM RHD Headling Glass Required

Hi Froggers,

Been working on a few different bits over the last couple of days.

I decided I had to get the plug out of the thermal compensation tube of the directional control relay so I could clean the foul smelling green runny liquid out of it before I reload with LHM and try to minimise the amount of air in it. Eventually with application of some heat from the hairdryer, the tube broke and the plug came out with about 5mm of nylon still attached. I have managed to sneak a luer lock head of a three way tap extension set into the end so that should help me refill it using a big syringe. (Shane I will add a pic tomorrow.) It might even last long enough to become a refill port Rhys.

I have cut the right angle off my heater matrix and am trying to work out how to bead the new end to stop the hose from forcing off under pressure. I am thinking some small smoothed dobs of solder might do this job.

I also had a play with my low beam lights. The H1 lamps I purchased do not focus very well in the original P45t to H1 inserts. An QI H1 bulb focuses better but is dim and yellow by comparison. So then I tried the low beam filament of a P45t H4 QI bulb and it seems to be a good compromise. I am now pretty certain I have one RHD low beam headlight and one LHD headlight. Swopping the glasses on one headlamp seems to alter the flare because of the angled prisms in the top centre of the lense. The hooky side cutouts don't seem to do anything Greg. I need to find another RHD headlight or at least a glass so I can get my flares correct. Any of our Pommy members are to help directly or to give me a lead on one please?. I could swop a LHD Lense. It is a Kurb side lense below that I need.

I also thing the bulb needs rotating a bit as well to get the flares right. I can dimly remember in the past having a little slider on the bottom of bulb mount that allowed the bulb to be set for RHD or LHD. I noticed the headlights on my CX have P45t to H4 adaptors fitted as standard. Anyone have a couple of those they are prepared to sell to me?

Weather forecast of for a rainy week next week so I might get a bit more work done especially when my next order from the SM Club de France arrives.

Cheers, Ken
 

Attachments

  • SM odd Lense from kurb side.jpg
    SM odd Lense from kurb side.jpg
    99.9 KB · Views: 226
  • SM Low Beam Glasses.jpg
    SM Low Beam Glasses.jpg
    97.3 KB · Views: 221
  • SM E2 Lense from LH from front.jpg
    SM E2 Lense from LH from front.jpg
    98.5 KB · Views: 213
Last edited:
Here are some photos of the proposed method to refill the hydraulic link for the turning headlight and the low beam output from the LHD lamp using a QI bulb and showing some flare to the right - not really ideal in Oz. Thankfully when using H1 sidefire LED bulbs, there isn't any flare because I think there is little light travelling through the flare zones of the lense.

The remaining fluid in the hydraulic link is that blue stuff in the butter container. I doesn't seem to mix well with water or metho???? You can see the syringe plugged into the three way tap with one of the tubes being attached to the thermal compensation tube.

Also see new through the firewall return pipe for the heater matrix bent in 3/4 OD copper pipe.

Cheers, Ken
 

Attachments

  • LHD Low Beam Light with Flare.jpg
    LHD Low Beam Light with Flare.jpg
    93.6 KB · Views: 224
  • Commande Directionelle refill tool.jpg
    Commande Directionelle refill tool.jpg
    98.5 KB · Views: 234
Ken, I've got a NOS headlamp, but it's for driving on the right (which is not much use to me or you).

I'm going to an SM Parts meeting here next Saturday (now there's a rare event!) and will ask if anyone knows of a UK car that's being broken. There were 300 odd imported originally so I guess there's a chance. Have never given it much thought but I guess a headlamp glass is just about the only item on the car that is different between RHD and LHD.
 
Gearbox Cable Troubles

Hi Froggers,

I have been busy doing a few of the other tasks that I need to do while the radiator is out. So this afternoon I decided to see how I went changing the cable that takes the lateral movement from the gearstick to the selector plane level on the front of the gearbox. All went well until I hit trouble on the final bit of getting the pin into the cable inner fixed point on the front of the gearbox. The pin slides easily in through the U channel and the hole in the end of the cable, but I cannot get it to go through both. It would appear there is a misalignment between the two arms. If I flex the arms using a screwdriver as a lever, I can get the pin to go right through the cable but not into the hole on the other side of the U channel.

Any ideas on how to sort this?

I will probably think of some options overnight.

Cheers, Ken
 

Attachments

  • Lateral control gear change cable at gearbox.jpg
    Lateral control gear change cable at gearbox.jpg
    97.3 KB · Views: 209
Hi Ken,

Are you sure the relay bracket arm isn't bent or twisted? Will try and take some pics tomorrow of our SM gear change linkage.

best regards,

Greg
 
Hi Greg,

Yes I've been thinking I will have to get out the big shifters tomorrow and do some judicious bending and realignment of the stationary arm so the pin goes in perpendicular to the line of the cable action.

Cheers, Ken
 
Well the big shifters weren't big enough to bend the brackets but a bigger screwdriver worked. Not sure which bent but I suspect it was the moving outer cable bracket plate not the cable inner stationary plate. Anyway, pin slides in easily now and should not wear with use. I got the cable adjusted so I can easily get to 1-2, and 5th planes before hitting either the left side gate limit or the lift to reverse gate limit. I have been having some problems getting reverse selected in the past so it will be interesting to see how that goes now.

I have refilled one of the hydraulic relays for the directional headlight with LHM using a modified Citrothello technique. Got it right first time I think.

I have cut the hole for the air entry on the RHS of the air box and then found a flap for the front console air exit sweeps by very close to this wall. I will have to make a tube mount to glue onto the air box so that the entry tube does not hit this flap.

Next job is fitting a speedo cable which will hopefully get rid of the wobbles in the speedo below 60km/hr, then it will be time to get back onto the aircon job.

Cheers, Ken
 

Attachments

  • AF Air box hole.jpg
    AF Air box hole.jpg
    99.8 KB · Views: 264
  • AF Hyd Relay 1.jpg
    AF Hyd Relay 1.jpg
    99.1 KB · Views: 256
  • AF Hyd Relay 2.jpg
    AF Hyd Relay 2.jpg
    97.8 KB · Views: 272
Need to change the LHM

Well the air con is all plumbed up and when I get some electrics in the car sorted it will be ready for some gas.

My LHM is very brown so I think I should change it. I'm thinking I will drain it out of the bottom of the level tube system, take the filter out and give it a clean in petrol and compressed air dry it before replacing. Is there anything else I should do?

I have a 20l container of Total LHM+ that I use for the BXes and Xantias - Is that OK for the SM as well?

I will add some photos.

Cheers, Ken
 
I thought SM headlights contained a glycol solution (I've never seen or worked on them though :) ). Have you joined the SM yahoogroups server yet :confused: All of the knowledge in the world is on that listserve.

seeya,
Shane L.
 
Top