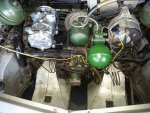
Working on the SM

Rhys,

John, all my snap inserts seem to have survived so I have 24 of them ie 6 spare ones. But my plastic holding in blocks are now just a pile of crumbs on the bench, so I will need to remake 18 of these or find someone who can supply.

I have the glass out of all my lights now and will take them to the vacuum aluminium deposition place tomorrow to see if they can re-surface them.

Cheers, Ken

Ken,

I finally have the 3D printer adjusted to produce acceptable facsimiles of the crumbling blocks made out of nylon. Nylon is tricky to print with, but it is flexible, so the blocks will snap in place. They will require just a bit of hand sanding on the bottom to get a good snug fit. I will probably end up sending you 20-30 to share with your friends.
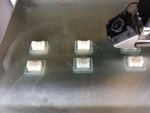
Printing Snap Rivet Support Blocks.jpg
 
Headlight Directional and Levelling Diaphragms

Thanks John for making the nylon blocky bits. :cheers:

It looks like the package has made it to Australia so I will probably get them this week.

I am making some progress with the repair of the front stairs project so I might be able to get back to the SM in the next week or so. The next diversion from tackling the air conditioning was going to be to get the right hand side direction light working again. I went and checked the parts I had bought and have decided it is a kit for repairing the damper on the headlight levelling system. Does anyone know where to purchase the new diaphragms for the headlight directional relays. I see an item on the SM Club de France listing called 'Membrane Bellofram Cde Direction - SMC980001. Is this the item?

I also suspect the diaphragms my headlight leveling controls are also perished as the headlights were pointing at the ground when I got the car and the adjusting rod has run out of thread. Are these diaphragms the same as the directional ones? If not where would I find these?

Cheers, Ken W
 
Well my lights have all been re-aluminiumised and I will pick them up the week after next. Hopefully the blocky bits will arrive next week. Apparently what is priority in the USPS does not translate well into an Aust Post priority delivery effort.

In the meantime, I will have to get cracking on the air-con install and the associated gearchange cable and oil cooler hoses replacement. Thank goodness it is going to cool down a bit by the middle of next week - it has been above 30 oC and humid every day this week.

Cheers, Ken
 
Thanks John for making the nylon blocky bits. :cheers:

It looks like the package has made it to Australia so I will probably get them this week.

I am making some progress with the repair of the front stairs project so I might be able to get back to the SM in the next week or so. The next diversion from tackling the air conditioning was going to be to get the right hand side direction light working again. I went and checked the parts I had bought and have decided it is a kit for repairing the damper on the headlight levelling system. Does anyone know where to purchase the new diaphragms for the headlight directional relays. I see an item on the SM Club de France listing called 'Membrane Bellofram Cde Direction - SMC980001. Is this the item?

I also suspect the diaphragms my headlight leveling controls are also perished as the headlights were pointing at the ground when I got the car and the adjusting rod has run out of thread. Are these diaphragms the same as the directional ones? If not where would I find these?

Cheers, Ken W

Hi Ken

I think SMCdF is probably the only place to get those, but it might be worth trying Andrew Brodie Engineering in London. I think the headlamp damper on the wing just uses height corrector diaphragms from memory.

Cheers

Marc
 
Well my lights have all been re-aluminiumised and I will pick them up the week after next. Hopefully the blocky bits will arrive next week. Apparently what is priority in the USPS does not translate well into an Aust Post priority delivery effort. Cheers, Ken

I see what you mean. Tracking shows Phoenix, to Los Angeles to Sydney in 2 days, then nothing for 3 days. By the way, when you get the blocks you will need to trim the lattice out from under the bridge area. I did it on some of them so you would get the idea. Since the block have to be flexible enough to snap in place, they can't be completely solid on the bottom. You will also have to sand the bottom legs as necessary to get a good fit.
 
Light Pod Extracted

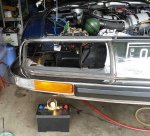
This morning before it got too hot, I discovered the workings of the battery door and extracted the battery. Then after extracting the top bolts that hold the bonnet lock onto the front light frame to get a bit more flex there, I was able to wiggle and extract the light pod down and out through the battery door.

Now I can take off the light direction control to wait until I get some parts to repair it, and clean the pod up ready to fit the refurbished lights and refit it and the battery.

Next job is to take the wing off the other side.

Cheers, Ken
 

Attachments

  • SM Light Direction Control.jpg
    SM Light Direction Control.jpg
    98.7 KB · Views: 289
  • SM Battery out.jpg
    SM Battery out.jpg
    99.2 KB · Views: 286
Thanks John for making the nylon blocky bits. :cheers:

It looks like the package has made it to Australia so I will probably get them this week.

I am making some progress with the repair of the front stairs project so I might be able to get back to the SM in the next week or so. The next diversion from tackling the air conditioning was going to be to get the right hand side direction light working again. I went and checked the parts I had bought and have decided it is a kit for repairing the damper on the headlight levelling system. Does anyone know where to purchase the new diaphragms for the headlight directional relays. I see an item on the SM Club de France listing called 'Membrane Bellofram Cde Direction - SMC980001. Is this the item?

I also suspect the diaphragms my headlight leveling controls are also perished as the headlights were pointing at the ground when I got the car and the adjusting rod has run out of thread. Are these diaphragms the same as the directional ones? If not where would I find these?

Cheers, Ken W
I believe, but am not positive, that the diaphragms are the same as a height corrector.

Do the dance. Do the Daffyduck dance using the Aussiefrogs app. Be real happy if you can.
 
Thanks Marc,

I have sent a message to Daniel. 100 euro for a repair sounds attractive when the 2010 diaphragm price from SMCdF was listed as 35 euro each.

Daffy, the cylinder diameter on the self levelling actuator is slightly larger than the directional actuator but the stroke is much shorter. I will send a message to Daniel to see if he can repair this system as well. There is likely a shipping saving to be made from sending both over to France at once.

Cheers, Ken
 
Some progress

Daniel has not understood my Google translated French about whether he can also reapir the headlight level control system although my question did seem to lose its meaning in translation tho. So I will try again with more words and saying it two different ways.

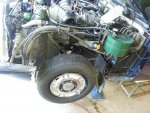
It has been a bit cooler this week so I managed to get the left front wing off. I was getting a bit worried about the drip that was developing into a run on the ground behind the front wheel from the region of the brake accumulator. Luckily, it appears to only by the bottom tank connection to the LHM level tube - easy fix.

So access to the oil cooler and hoses seems a lot better at the front. Still wondering if I can get them off the cam covers and engine without taking off the air intakes or losing any nuts bolts and washers etc. Time will tell I suppose.

Plan is to get the radiator out next week to fit the air con condenser.

Shane, Here is a picture for you.

CHeers, Ken
 

Attachments

  • SM L wing off.jpg
    SM L wing off.jpg
    98.6 KB · Views: 280
Ken,

It would appear from the photo that you have the clamps supporting the plenum fronts - rather than (like my car), the springs.

It would seem that this manufacturing change occurred somewhere between my build date of November 1972 - and yours of May 1973?

Regards,
Rhys
 
It has been a bit cooler this week so I managed to get the left front wing off. I was getting a bit worried about the drip that was developing into a run on the ground behind the front wheel from the region of the brake accumulator. Luckily, it appears to only by the bottom tank connection to the LHM level tube - easy fix.
CHeers, Ken

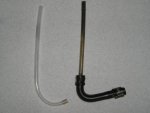
The bent rubber hose that connects the sight tube has probably gotten hard with age. No amount of tightening of the hose clamp will stop the drip. You can either source a new bent rubber hose, or do what I did, which was to fabricate a new sight tube from a piece of 5/16" (8mm) clear nylon tubing (use a heat gun to gently warm and bend into an elbow). That way you can use a piece of straight 5/16" fuel line to make the connections. I may have put a piece of hobby shop thin wall brass tubing in the end of the nylon for reinforcement.

SM Sight tube.jpgSM sight tube installed.jpg
 
On a DS, the repair is a lot easier since the rubber tube is straight. You can simply replace the rubber bit at the bottom with a short piece of industrial tubing (Viton or Buna) 1/8 I.D. x 3/8 O.D. On the SM the bend makes things a bit more difficult.
 
The bent rubber hose that connects the sight tube has probably gotten hard with age. No amount of tightening of the hose clamp will stop the drip. You can either source a new bent rubber hose, or do what I did, which was to fabricate a new sight tube from a piece of 5/16" (8mm) clear nylon tubing (use a heat gun to gently warm and bend into an elbow). That way you can use a piece of straight 5/16" fuel line to make the connections. I may have put a piece of hobby shop thin wall brass tubing in the end of the nylon for reinforcement.


View attachment 91053View attachment 91054
Has that piece of tube got a manufactured bend or has it been in that shape so long that the bend is now permanently set there? I would be willing to guess that a new straight piece of tube will conform to that required shape fairly easily!
 
Last edited:
Gerry,

The original rubber tube is formed with a bend in it. The problem with using a straight rubber tube in its place (without making a rigid bent sight tube) is the upper end of the sight tube goes into a rather feeble rubber fitting that is part of the filler neck. The resiliency of the straight rubber tube causes the sight tube to snap out of the upper end and drain your LHM tank when you don't want to (don't ask me how I know this)..
 
I bet using careful application of heat using a heat gun and a jig to hold the tube would allow this to be made.

Do the dance. Do the Daffyduck dance using the Aussiefrogs app. Be real happy if you can.
 
Well, it has been a few weeeks but some progress has been made.

Engine coolant has been drained out of the radiator and the radiator has been removed.

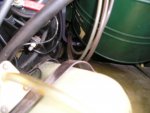
I have also refitted a condenser to the radiator. I have added nice stainless steel self tappers to the top condenser mounts since this photo was taken.

Now I think it is time to contact my air con hoses colleague to organise for some refrigerant hoses to be made to suit this install.

Cheers, Ken
 

Attachments

  • SM no radiator.jpg
    SM no radiator.jpg
    98.6 KB · Views: 346
  • SM Radiator with Condenser mounted.jpg
    SM Radiator with Condenser mounted.jpg
    99.6 KB · Views: 339
Good looking parallel flow condenser. Your A/C should blow nice and cold. Are you going to use flouorocarbon (R132) or Hydrocarbon (HC-12) refrigerant? I started using hydrocarbon refrigerants here in Arizona some years ago and found that they work better and are much cheaper than florocarbon. Plus they are not greenhouse gasses.

Also that is a very interesting radiator return pipe. Is that unique to RHD conversions? Every SM I have ever seen has a rigid pipe running under, rather than over the accessory tray.
 
Hi John,

I am intending to use a hydrocarbon refrigerant so hopefully that will keep pressures down and reduce the load on the compressor and the power drive from the engine.

Yes the lower cooling pipe is a new one that was fabricated to get up over the Diravi control on the steering rack. I have a corresponding small hole over on the other side now.

While I wait for my air con hoses, I'm looking at replacing my gear change cable as per previous discussions.

I can also get a good view of the speedo cable attachment to the gearbox. There doesn't seem to be anything obviously holding it in but it doesn't respond to a tug on the cable. Does anyone know how that comes out? I do have a new cable that I could fit.

Thanks for the encouragement.

Cheers Ken
 
Top