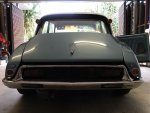
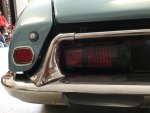
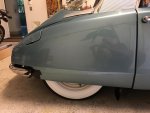
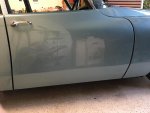
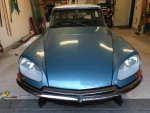
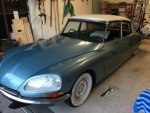
The "Blue Danube"

Thanks Chris. They are definitely M7, the square M5 nuts are already installed in he head light buckets.... So the M7 must go somewhere else

hmmm, the only other location I can think of is on the tension bars for HP pump and alternator - but you would not have removed these from what I can see, and they have a slightly domed side.

Searching text in the parts manual there are only two references to 'square nut' the M5s on the headlight bucket and a fixing on the distributor -again you wouldn't have removed.

Curious :tongue:

Were they caged on the bumper bar ends or the metal front air intakes :confused:

Cheers
Chris
 
damn! I'm missing those plates!

You wouldn't be Robinson Crusoe, easily lost after 40 years - I need a set too :(

Found it!!

They are inside the bonnet locking pins! Phew...

Well done, a part I have yet to remove - now stored in the ol' grey matter for future reference, thanks :wink2:

Cheers
Chris
 
Pretty easy to make up, guess they're about 5mm?

My plan was to cut them in 3mm rubber or polypropylene, less risk of them scratching when fitting and removing the tyre support. . .

Cheers
Chris
 
I guess they are there to provide lateral adjustment and possibly some clearance but mostly lateral. ?
 
Found it!!

They are inside the bonnet locking pins! Phew...

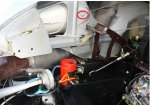
I'm not so sure Sven - I thought they may have gone behind here....

Cheers,

Mark...:)

Tyre support plate.jpg
 
OMG, they are the two nuts that go in the middle under every thing that hold it all together. Without them it won't work so the only way to get them in is to pull it all apart (;0)
 
See, that was my concern. I put the whole bugger together and then find I have to pull it all apart again..... But no, all still on track.

Mark, the one you are thinking of are the M5 headlight bucket nuts... Not M7.

Only a few more steps until completion.
 
Carpet samples for Dano

Dano!

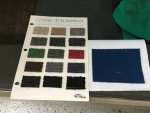
here the photo of the carpet samples... A few dark / black choices on it...

image.jpg

Sven
 
Thanks Sven,

I'll definitely follow up your contact.

Cheers

Dano
 
Adjust, adjust, adjust... Getting closer!

Aaarrrghhhhh, those bloody doors are driving me crazy...

in summary: the passenger side doors, gaps and alignment has been a breeze - straight forward. Even gaps, enough adjustment to fine tune and both doors shut easily and the windows and rubbers also sit well and right.

image.jpg

Looks fine, doesn't it? The door creases are aligned as well, so onto the other side. That is where the pain has started and continues... I can not get the doors to shut ( front door only with a lot of force, rear door impossible to shut, both only latch into the first stage...)

image.jpg

So I tried to use as much logic as I could think of. Started checking at the back. Yes, the boot lid sits up quite high due to the new seal (still not sure I will not rip it out again, it does sit high and doesn't seal well either yet). Anyway, looking at the levels, I can not find anything wrong with it:bumper is level, guards at the same height, the gaps to the bumper match photos in the Original DS guide...

image.jpg

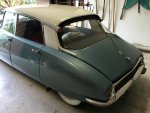
Looks fine to me... There is however a difference in height / alignment between the middle top of each fender and the middle of the boot lid. The passenger side does not show a gap, the driver side has a 5 mm or so gap, but not sure how to get rid of it.

image.jpg

You can maybe just spot it on the photo below.

And now the problems start: the rear wing sits well on the bumper edge. But to fit well against the rear door it would have to come down further, which would open up the gap again/further.

The rear door would preferably have to come up further, but the striker plate is already at its highest point... The rear fender cannot go up further either, it is at its max as well...

image.jpg

Looking at the front door and rear door gaps they are now better (after a lot of shimming changes, etc), but still not great. The front door still sits too high, but again the stiker plate is right at the lowest point... So the door would need to come up even more... :confused:

image.jpg

But I could get the alignment better, the thing that has me stumped is that neither door locks easily and properly. The doors are fully against the seals and cannot budge any further inwards. They used to lock well before I pulled them out... And I didn't change the seals, the shims are as they were... I gave up (for now)!

so onto the bonnet: it also had me stumped for a while... The "horns" at the door/windscreen corners were sitting too high... After staring at the hinges and moving every bolt I could think of and whinging to my wife about it, she pointed out that I should try and move the one bolt I hadn't moved (as I thought that one needed to be all the way to the back of the slot - see photo below). So after having that lightbulb come on, it was easy to align and level the bonnet.

Bonnet gaps look even and about 6mm as per manual. Locks work well. Seals push the bonnet up a little in the middle still, but maybe that will settle or can be adjusted? Suggestions anyone?

image.jpg

Passenger side gaps... Even, maybe not as small as they could be, but level... Happy!

image.jpg

Here the mischievious bolt, a 5mm movement makes a lot of difference! Simple trigonometry once you realise it! Phew... At least one thing worked...

image.jpg

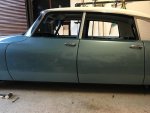
Here the result: looking at the nice side of course... The car is looking great!

image.jpg

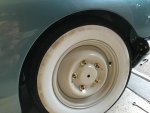
But I think Chris has jinxed my white walls... The car is starting to reject them... :D:D:D. Has anyone ever seen anything like this? After sealing them with tyre shine they have started absorbing dirt just sitting there. It does clean off with a bit of rubbing, but it is weird.

image.jpg

Man, what a mix of frustration and joy today... Fiddly stuff. But if anyone has any more ideas on the door locks / striker plate problems... Yes, I asked before, but I must be missing something. If I had changed a lot on the doors, welded a lot, changed seals or else I could understand that they won't lock, but I haven't...

I must be missing something. I don't think new striker plates would do it either... It must be in the shimming of the doors or "approach angles"... HELP!

Sven
 
Hi Sven,

Everything moves once the car is painted - I don't know why but it does...!

The gap between the rear guards and the bumper is larger than it should be. You need to pull the end of the guard down more closer to the bumper... this will mean the rear door gap will be tapered so you will have to adjust the rear doors again.

The boot lid is meant to sit proud - with the foam rubber it's the best you can do.

This will also help with the striker plate alignment in that by twisting the rear LH door clockwise as your looking at it to make the gap even again your lowering the striker plate on the rear door.

This is why I tend to ignore the manuals (for once) and start at the back as there is little adjustment in the rear guards.

The car is just looking superb - love the colour....!

Hope this helps,

Mark...:)
 
I must be missing something. I don't think new striker plates would do it either... It must be in the shimming of the doors or "approach angles"... HELP!

Sven

Car is looking superb Sven, a transformation, colour change was inspirational :headbang:

I still think your adjustment will be the connecting rod inside the door - try this - loosen the chrome nut on the inner door handle and see if the door now closes, if it does you may get away with just tightening the nut in the new set position. If not you would need to loosen the set screw at the lock mechanism and adjust the rod a smidge longer.

Cheers
Chris
 
Chris, even though I can not see how lengthening/shortening the internal rod will affect the "second clicking / ability to make it to the second stage" of the lock I will try - have tried everything else I think, so might as well as I am at wits end...

I thought the rod is only there to transfer the internal latch / door opening button movement to the spring tensioned hook / ratchet mechanism on the "star wheel" which enables the star to wheel freely to reverse and open the door... so my logic was: "as long as the ratchet arm is being moved out of the way of the star wheel far enough to free wheel the star, the adjustment is correct"... but maybe there is a limit? Too 'tight' and the ratchet moves out too far, too 'loose' and the star doesn't free wheel using the outside door knob / internal handle and the door won't open..!?

Anyway, will play with the two extreme settings and see... it may be the same light bulb moment than the bonnet hinge (didn't think my wife was right at first either - but she was [always is?] :wink2:).

Once I solve the "mysterious door latch" mystery I will carry on adjusting the panels... almost looking forward to that...

Sven
 
congratulation looks so coool !!!
remember to cruise past as many shop front windows as you can, because its just mobile art, and the reflection of a restored or DS gliding past in exceptional condition is priceless.
 
Last edited:
Guys, could you do me a favour and post a photo of where exactly the rear view door mirrors go? I need to drill new holes for them and am not 100% sure where exactly they need to be placed to have space for the nut inside the door....

preferably a photo of the inside of the door showing the nut as well - please...

thanks in advance.

Sven
 
Coming soon: DS/ID mirror wars! Put your helmets on boys.

It's A series season over here cannot easily get to the DS/ID to snap the pics. But I do have two, original, unrestored specimens close by if it comes to that.
 
Ditto for me please. My DS came with an aftermarket mirror on the drivers side.
Don
Guys, could you do me a favour and post a photo of where exactly the rear view door mirrors go? I need to drill new holes for them and am not 100% sure where exactly they need to be placed to have space for the nut inside the door....

preferably a photo of the inside of the door showing the nut as well - please...

Ditto for me please. My DS came only with an aftermarket mirror on drivers side.
Don

thanks in advance.

Sven
 
Top