I don't think so guys, although being Aussie spec, I'm easily wrong. The heater fan is usually a mauve sleeve and comes through the harness from an ignition fed circuit. A quick check would be switch on the ignition, switch on the fan (everything else off) and check for power there with a test light. Switch the fan off, see if the light goes out. If the fan runs without testing, you can eliminate that. You can also run this check through the headlight circuit, except you won't need the ignition switch on for that. It looks like a yellow sleeve, so I'm thinking headlamps- main high beam.
I agree, having now looked at the wiring diagram

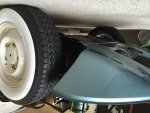
It would normally form part of the wing loom connections, but appears to be floating free

Cheers
Chris


 (I don't think I have ued that expression since High School)