Long Stroke full flow oil filter

Yes, 5mm. effectively I made a lash cap for the end of the clutch pushrod. Clearly, the flywheel has been machined well beyond the recommended depth. I suppose if I ever have to do it again to this engine I will need to source a new flywheel or come up with a better solution.
 
Theoretically, yes but the early cars have a fairly complex system. The pushrod consists of a rod that is attached to an M7 bolt with a crimped-together ball joint that is brazed? to the end of the bolt. The bolt has a pair of captive nuts that squeeze the end of the clutch fork. It was a lot simpler just to add a lash cap.
 
A thicker clutch friction plate perhaps? Or machine down the raised face the pressure plate bolts up to to restore the depth of recess of a new flywheel.

How do you think your lash cap will wear? Was the pushrod end hardened at all?
 
All possibilities for the next build, which hopefully won't happen for another 20+ years.

I think the lash cap should wear fine. It was a grade 10.9 cap screw
 
Had a major setback today.... I drained all of the sour gasoline out of the tank and added 5 gallons of fresh fuel before I started the engine, but apparently that wasn't enough to dilute the varnish..... The two intake valves closest to the carburetor are seized. I now have two bent pushrods and the head has to come off...
 
Now you know how my foot feels. Broken.

Do the dance. Do the Daffyduck dance using the Aussiefrogs app. Be real happy if you can.
 
Well, I guess I got lucky. None of the valves were damaged. I was able to remove them (with a hammer and drift), then spray them with carburetor cleaner (toluene) to get the brown streaks off the stems. I also filled the guides with carb cleaner then used the valve as a plunger to clean the varnish off the interior bores. Everything checked out, so I put the engine back together.

I drove for about a mile using a gas can sitting on the dash as the fuel tank and everything works fine.

Except... I have a small oil leak from the seam where the timing cover meets the oil pan (It's not the three bolts through the cover that need sealant - I used Dowty sealing washers under them). At least the car can now move on its own.

Took the gas tank to the local Reddi-Strip. Estimate is $150 to clean the tank. According to the owner "we hate doing gas tanks, especially when they smell this bad."
 
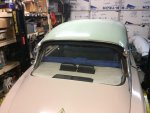
On the road again after a 17-year slumber, 1961 DS19, now with full flow oil filter, air conditioning (well the compressor is installed at least) and LHM conversion.

20170302 (2).jpg20170302.jpg

Photographed here with its proud owner (my step-son), whom I helped restore her

20170302(1).jpg
 
Thanks, Roger. It definitely was a labor of love.

Thankfully the car was stored in a covered shed so that with about 10 hours of work with the clay bar, compound and wax, most of the paint came back to life.
 
As a final note, she came back from the upholstery shop this week, so I finally assembled the dash completely, for the first time in over 15 years.

170420 Instrument Panel Assembled.jpg
 
... Took the gas tank to the local Reddi-Strip. Estimate is $150 to clean the tank. According to the owner "we hate doing gas tanks, especially when they smell this bad."

Well done John.

Just looking back to the last page and seeing the tank issue. I assume that's been lined with one of the liquid slop it around kits. We did this on a friend's vintage Chrysler several years ago and that was after cutting the tank open, bead blasting it and letting a new panel in to close it. While the goop approach certainly fixed it, I did notice some of it blistering a little near the filler after a couple of years, which was disappointing. The car was sold, so I don't know how it has held up longer-term. I'd wondered about using electroless nickel (fill it with the plating solution and heat - no electrodes) to replace the lost tin plate inside instead of using the goop approach. I think this is what I will try with a pair of Jaguar tanks when I eventually get around to it. They have the usual pinholes at the bottom to be repaired (gas/solder/braze) and would have surface rust inside. Diluted vinegar with salt added to saturation is one option for de-rusting the internals. Just some thoughts. Someone else may have take a different route to buying repro or using a goop liner.
 
Hi David,

The fuel tank turned out to be a total disaster. We tried to TIG weld the rusty spots, but didn't have the skill. I ended up sourcing a replacement tank that was not rusty, but it was full of varnish. I soaked it for a few days with a sodium hydroxide solution (DEP drain cleaning crystals), to dissolve the varnish, then rinsed thoroughly with water, then lacquer thinner. I did not end up having to coat the inside, since this one had no pinholes.
 
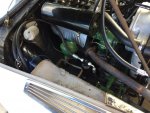
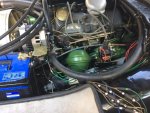
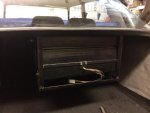
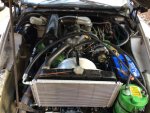
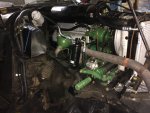
This should be the final installment of this saga. Over the past several weeks, I have been installing a trunk-mounted air conditioner in the 1961 DS19. The trunk mounted evaporator was necessary because I could not find anything that would fit underneath the first series dash and a floor mounted evaporator would rob it of the 6th passenger position. To avoid using up too much space, we fabricated a shelf to suspend the evaporator from the parcel shelf. The coolant lines run along the right side under the frame covers, next to the fuel line and suspension return lines. It was tight, but everything fits with only a slight massaging of the opening.

The installation was completed just in time, considering it was 110F (43C) over the father's day weekend.

AC Front.jpgAC hoses.jpgAC Left.jpgAC rear.jpgAC Right.jpgevaporator.jpg
 
Top