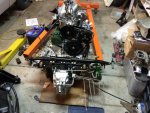
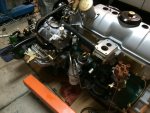
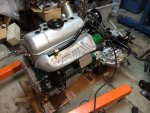
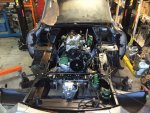
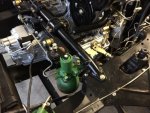
Long Stroke full flow oil filter

I did. I did just see an aircon pump.

Do the dance. Do the Daffyduck dance using the Aussiefrogs app. Be real happy if you can.
 
How do you intend to drive the alternator that is shown in the picture? Your Aircon compressor is in the place normally occupied by the Dynamo!
 
A guess. Put it above the hydraulic pump and drive from the spare pulley grove. I have never been able to figure out why a D needs two belts to drive the HP. On CX's that have the auto box the HP is driven by 1 belt. More than enough.
 
Yet the CX has done about 300k on one belt, realised it was overkill. That way you wouldn't need to get the special water pump for air con in a D.
 
A guess. Put it above the hydraulic pump and drive from the spare pulley grove. I have never been able to figure out why a D needs two belts to drive the HP. On CX's that have the auto box the HP is driven by 1 belt. More than enough.

You are correct sir. The alternator will be driven from the second groove on the Aircon compressor, similar to the way the centrifugal regulator is driven from the third groove of the HP pump.
 
More progress. I have finished fabricating all of the hydraulic lines that are in the engine bay. Almost all hydraulic lines are installed now, so with any luck the engine will go in next weekend.

161128 hydraulic lines progress.jpg
 
More progress. I tested the oiling system. At first, when operating the starter, I could not get any oil pressure through the filter, which I had pre-filled with oil. I removed the filter to see if oil was getting to the filter and cranked the engine (no spark plugs or carburetor). Oil poured out of the oil filter head after 8-10 seconds of cranking. When I put the oil filter back on, I had oil pressure in the gallery. I surmise that the oil pump, which I had assembled dry, could not self-prime against the back pressure of the oil filter full of oil.

Next, I tested the transmission to make sure I had assembled the cover correctly. I made up a little transmission testing manifold, which I connected to my sphere testing pump.


161211 engine transmission test.jpg

All gears could be engaged with the engine cranking on the starter, so we attached the engine hoist. You can see the final product of the heater pipe/air filter support that I had to fabricate using a converted Harbor Freight pipe bender.

161211 engine LH.jpg161211 engine RH.jpg


And now the engine is sitting in the frame.

.161211 engine installed.jpg161211 engine left side installed.jpg

The oil filter clears the frame nicely, as I had hoped....
 
Success!
I started the engine yesterday. Got oil pressure at the sensor right away. After about 5-10 seconds, the clattering from the valve gear quieted down (which I took to mean oil got to the top end). Ran the engine until it got to temperature then shut it down. I still have a few hydraulic lines to make, then will take it out for a brisk break-in drive.

https://youtu.be/BHeKfYHSVL0
 
More progress. After I fabricated a new steering rack supply manifold the car is on its feet with no further hydraulic leaks.

The one remaining problem is the clutch does not disengage even though the slave cylinder is working. I assume that the issue is caused by the machining of the flywheel. The DS19 transmission cannot easily be shimmed out to compensate. Is it reasonable just to shim the slave cylinder to compensate?
 
Hi :)
As I am not familar with you circumstances this is just a general suggestion. :) If the clutch pedal seems to be travelling down the full travel as it should and feels as it should. It may be the following problem.
If the clutch has been sitting applied for a while, particularly when the surface was freshly machined it may just be rusted lightly together. The plate is sticking to the flywheel.
Try shocking it while holding the clutch down with the car in gear and using the starter. Or something like that.
Jaahn
 
Dollars to donuts there are divots in the back of the throw out bearing housing where it touches the clutch fork. That 1mm to 2mm of depth translates to less clearance when all the pieces are put together.

Do the dance. Do the Daffyduck dance using the Aussiefrogs app. Be real happy if you can.
 
Last edited:
... The one remaining problem is the clutch does not disengage even though the slave cylinder is working. I assume that the issue is caused by the machining of the flywheel. The DS19 transmission cannot easily be shimmed out to compensate. Is it reasonable just to shim the slave cylinder to compensate?

Do you have further fork movement to play with by shimming the cylinder? With the engine stopped, can you currently move the fork enough to fully disengage the clutch?
 
Hi :)
As I am not familar with you circumstances this is just a general suggestion. :) If the clutch pedal seems to be travelling down the full travel as it should and feels as it should. It may be the following problem.
If the clutch has been sitting applied for a while, particularly when the surface was freshly machined it may just be rusted lightly together. The plate is sticking to the flywheel.
Try shocking it while holding the clutch down with the car in gear and using the starter. Or something like that.
Jaahn


I thought that only happened when cars sat around for years. Wasn't aware it could happen with a newly-machined surface. In any even, I have just barely not enough throw. With the engine stopped and the parking brake set, I can select 4th gear and with the reserve pressure holding the clutch out, I can spin the engine with the starter and the car doesn't move...

Possibly, I can back out the stop ring in the slave cylinder to get me the additional throw, rather than shimming the slave cylinder itself. NOS throw out bearing. The last one in North America according to Brad Nauss. Will report back.
 
It may not be as bad as you think. Clutches on BVH cars are adjusted completely differently from those on BVM cars. Have you gone through Red Dellinger's BVH adjustment procedure? Well, such of it as you can without driving the car. The clutch is supposed to disengage by only one or two turns of the adjusting nut on the slave cylinder rod.

Roger

Yes, I went through the Red Dellinger procedure, however, I could never get the hand crank to the point where it wasn't rejected by the dogs in the transmission, even though I am at the end of the adjustment. If I could remove the lock nut and replace it with a thinner M7 nut, I could probably get the clutch to release fully, but I can't see how to disassemble the adjuster from the pushrod without destroying something.
 
OK, so it is as bad as you think. Probably somewhere in the mechanical linkage from slave cylinder to clutch plate

Roger
 
OK, here is how I solved the problem.
I made a shim from the head of an M8 socket head cap screw. As it turns out the pushrod just fit inside the hex and the O.D. of the head just fit inside the piston. This added about 5cm to the effective length of the pushrod. Now when the slave cylinder is fully extended, you can barely slip a piece of paper between the head of the adjuster and the accordian boot of the rack.

I used a modified Dellinger approach, with the manual clutch released, moving the adjuster until I could spin the hand crank without it spinning the engine, then incrementally moving the adjuster one flat at a time until, with the engine running, I could engage 1st gear without a crunch. With the pushrod thus shimmed, I now have about 2 threads left on the adjuster, but everything works.

Tomorrow, with any luck, the car will move under its own power for the first time in over a decade.
 
Top