Inspired by UFO's respray thread UFO's D Special - UFO - respray and retrim repost
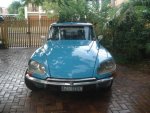
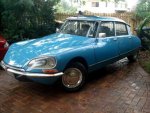
I thought as this project seems to have gone a little epic I would record the progress of D(very)Special’s rejuvenation – this is by no means a restoration more identifying 35 years of deterioration and hopefully giving her a chance at another 35 years.
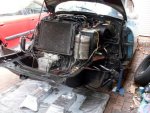
I think it was back in July this year with a failed starter motor D(v)S gave me a hint that it was time for some TLC. With some great assistance from Aussiefrogs I fitted a new Valeo starter, and of course whilst in the bowels a reconditioned engine mount. I guess it all started there, I couldn’t replace parts without cleaning, and where required painting.
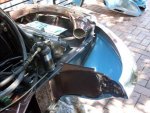
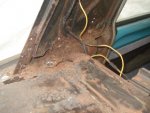
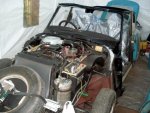
With the front guard off it was opportune to fix rust under the headlights, but on inspection of the front valance (hidden by the guard) I could see this was going to be more than a quick patch-up.
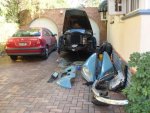
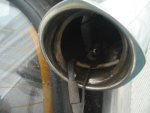
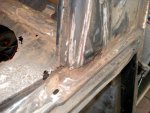
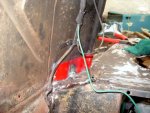
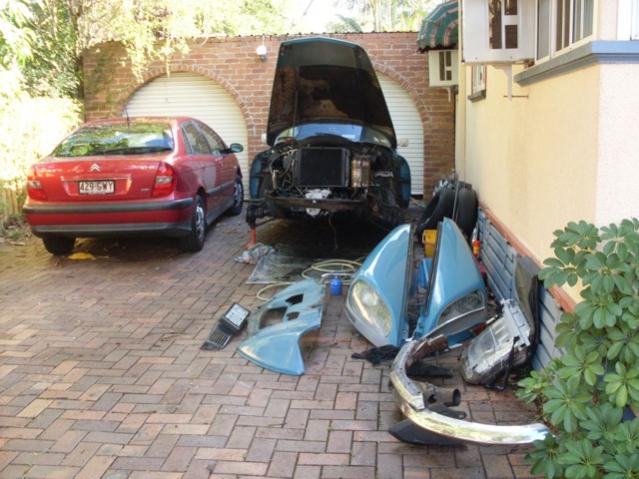
I decided to pull the front end off and get to cleaning fixing painting. The front valance and number plate holder were looking quite sad. One of the outriggers was rusted through, the other would not have been far behind without fairly immediate attention. I actually had a rusted hole in the front air scoop where the tube attaches running air up to the interior vents.
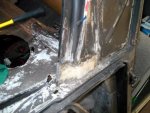
I washed the chassis down with a kerosene gun and hosed off with water. I then used POR Marine Clean and Metal Ready before painting with POR.
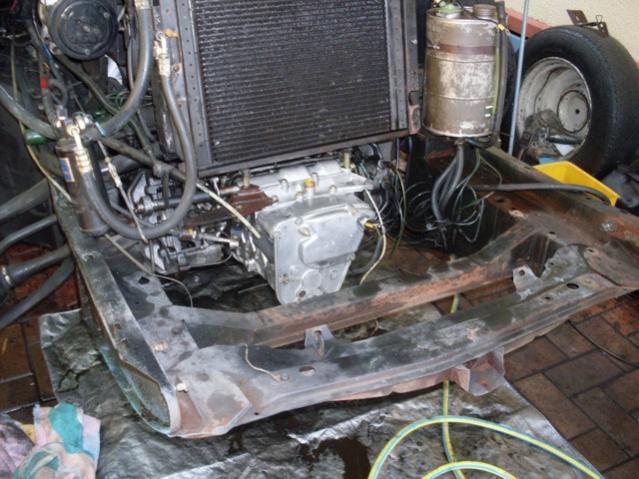
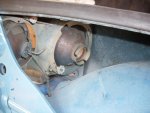
I was quite surprised to see surface rust forming once the years of accumulated oil and grease had been removed.
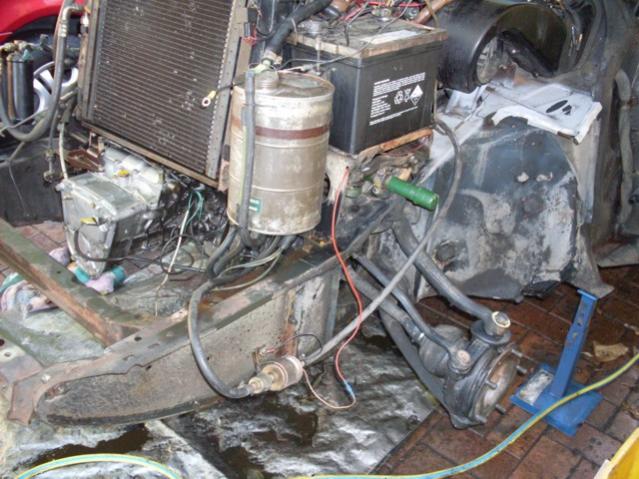
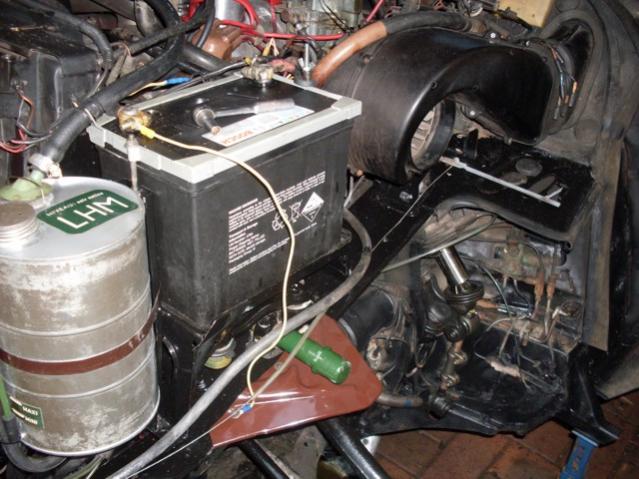
I pulled the battery tray out and gave it the same treatment using silver POR for the top cradle. (yes I have a suspension boot and bump stops on my list of things to do.
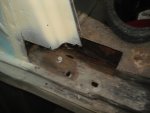
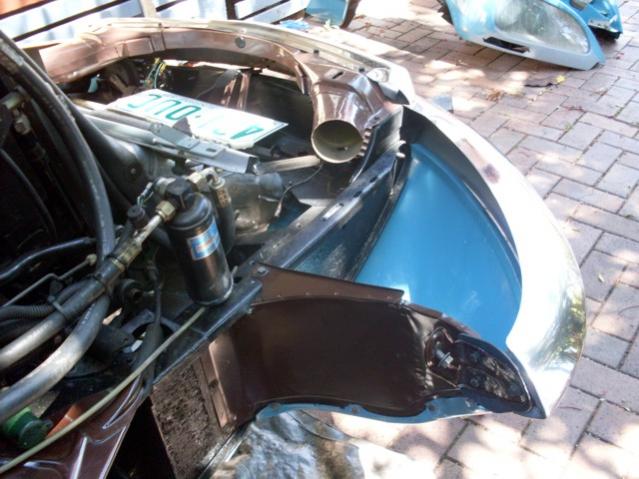
Pic of the valance and number plate holder, some rust at the front of the valance and some serious rust on the number plate holder.
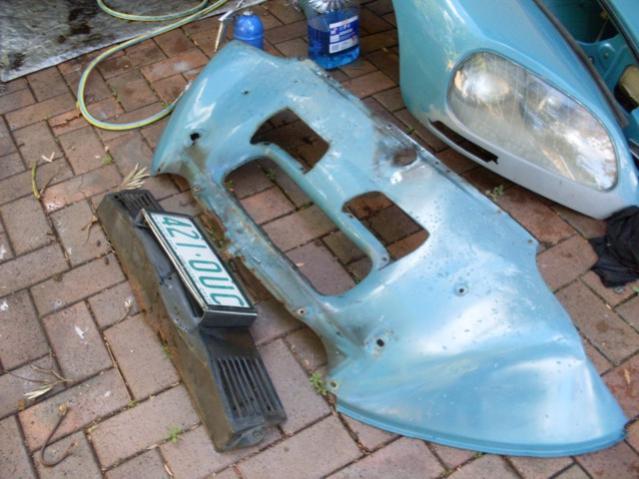
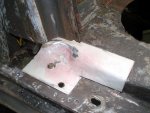
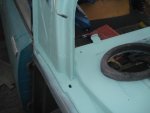
The chassis painted and the drip tray and brake scoops cleaned ready to re-fit

Front valance repaired and painted, the car has been painted using acrylic lacquer which despite comments to the contrary has stood up very well after more than 10 years. I’m painting at home so acrylic lacquer it is.
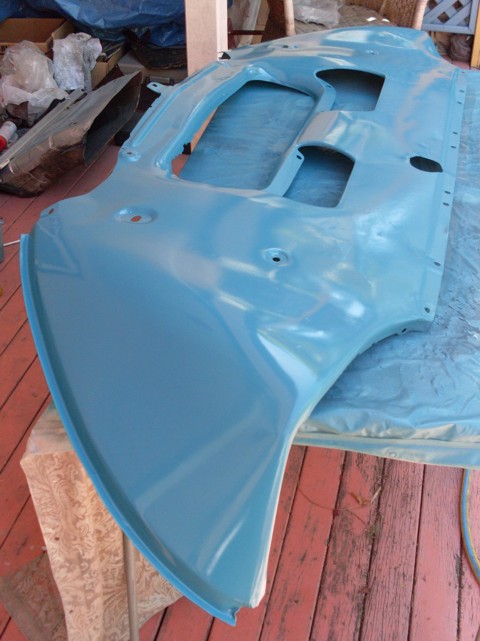
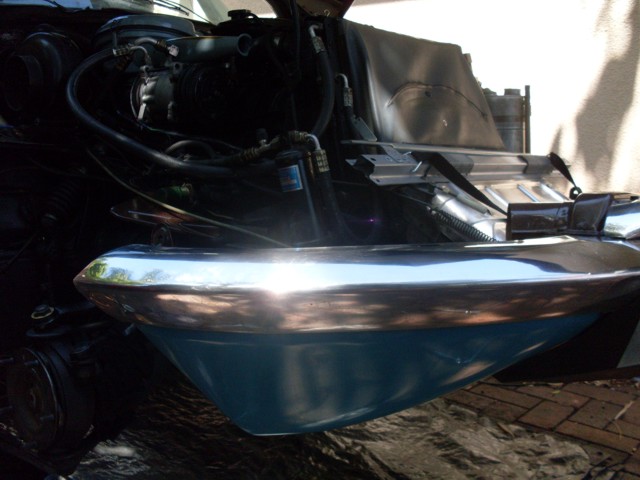
Valance and number plate holder re-fitted.
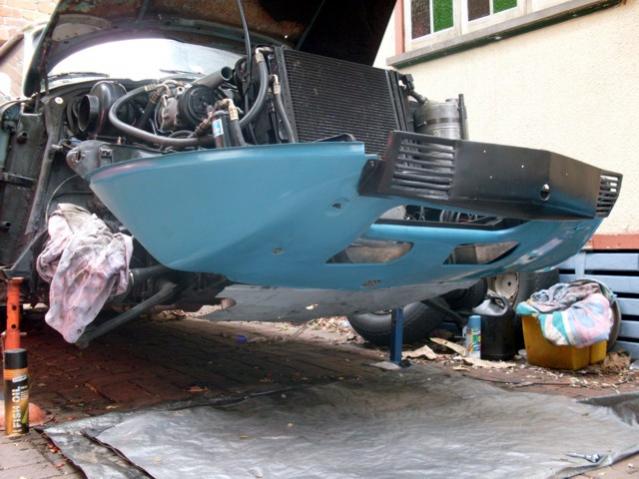
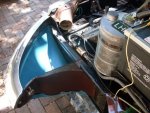
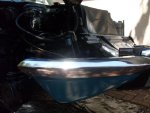
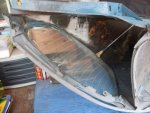
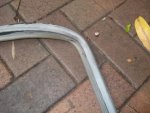
I pulled the bumper apart and polished using a kit from Bunnings, a couple of grades of abrasive and matching disks that were fitted onto a drill – slow and tedious but the results were very rewarding, more work to do to finish but definitely getting a result. The air dam/scoops were repaired and painted.

This front guard has been completely disassembled, the light buckets painted, rust repaired and spot painted, very happy with the colour match which was slightly different to the AC code. New headlight surrounds and inner seals etc.

I still have to do the same with the offside guard, and then slowly work back, bottom of all doors need attention as do the tops where the weather strip is.
That’s it for the moment, four months of weekends invested so far…
Cheers
Chris
_________________________________________________________
6th Dec 2009, 10:04 PM
GreenBlood
Thanks dino,
I think this work will be on-going, the positives of this car far outway the negatives, nothing that can't be fixed, nothing structural or major. I'll do the work that is within my scope (having a ball honing my skills).
Cheers
Chris
_________________________________________________________
_________________________________________________________
11th Dec 2009, 04:08 PM
GreenBlood
Quote:Originally Posted by eMi16
Nice work Chris, will look spectacular at the next French Car day no doubt! What sort of spray outfit are you using? The paint on the top of the Mi is looking rather sad these days and thinking of doing it myself. Did once re-spray a beetle in acrylic in another lifetime.
Cheers
Ralph
Hi Ralph,
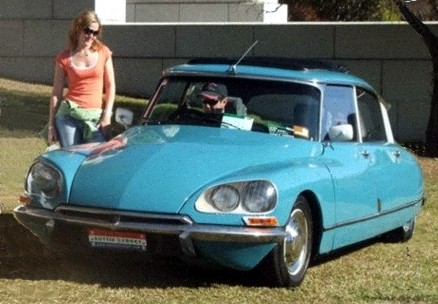
I often think of you when driving the D, you just looked so at home behind the wheel in this pic.
I'm almost ashamed to admit that my spray equipment at home is only just up to the job, I wouldn't paint a panel bigger than the valance, poor compressor only just kept up. Using acrylic lacquer is quite forgiving, you can spend time and block back and polish to the desired finish. The roof on your Mi should be painted with 2pack, being metallic it's base coat and clear, you would be well advised to do the prep and hire a booth for a few hours for your finish, you should be able to hire the spray gun, airflow mask and booth for a couple of hundred? I think there is a place in Morningside behind Toyota off Wynnum road.
Cheers
Chris
_________________________________________________________
12th Dec 2009, 06:21 PM
Light Bucket
Quote:Originally Posted by Iron Oxide
Great thread! Really inspiring me to get off my duff and get my bodywork done! I love the look of a D stripped down, what an awesome piece of engineering!
Dave
Thanks Dave, funny it was your thread on yankeefrogs that was a good part of my motivation - let's keep one another inspired.
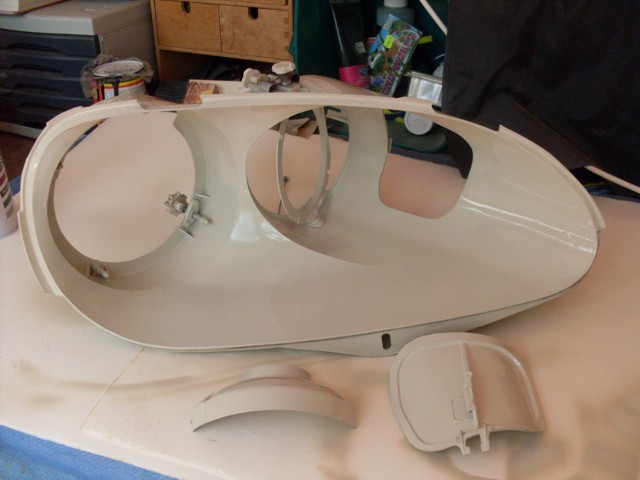
Today has been spent tarting up the light bucket on the offside guard.
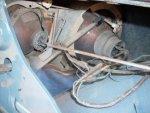
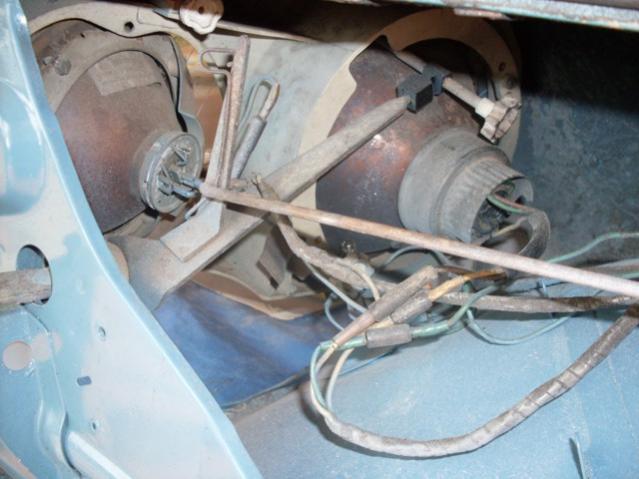
I'll go into some detail on the removal of the light bucket, I don't think it has been covered here on aussiefrogs. It can look a little daunting but in reality it is a very straight forward job, with the guard off you'll have the bucket removed in maybe 10 minutes.
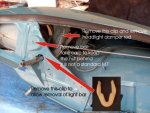
Start by removing the clip and light damper rod, then the bolt shown in pic, this has a square nut behind which you should take care not to lose, could be hard to find a replacement. Remove plastic clip hiding behind light bar adjuster as shown in pic.

Remove wiring harness.
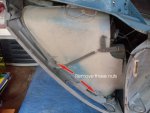
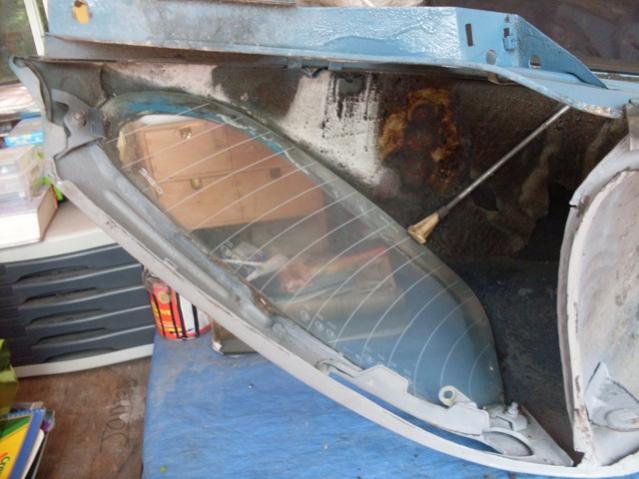
Turn guard over and remove two nuts shown here.

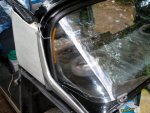
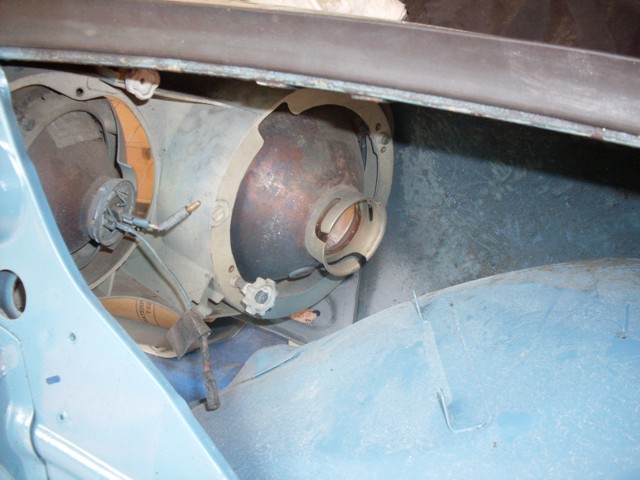
Remove bucket - You can now release the glass, two rod tensioners and two nuts.
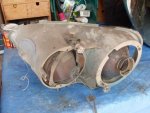
Light bucket removed – not pretty is it? The foam dust seal appears to be unavailable as a Citroen part but I have sourced a good copy through Whitworths Marine in Brisbane - a self-adhesive foam with about the same profile. Most of the crap that ends up on the bottom of the bucket is in fact the dried out foam from this seal.

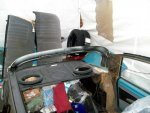
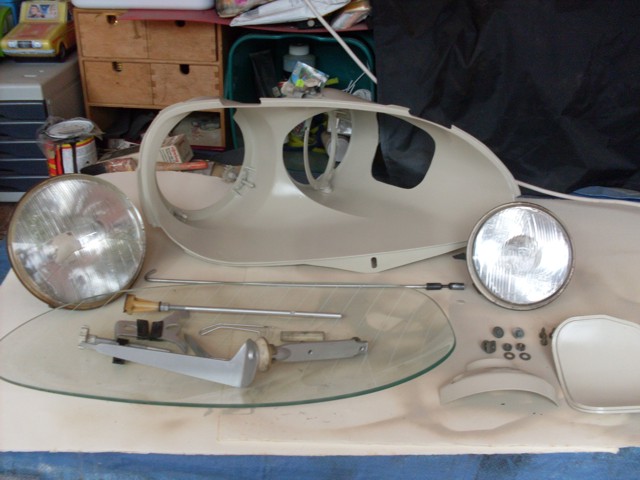
To remove the lights is just 4 nuts on the spotlight and two press fit clips on the main light.

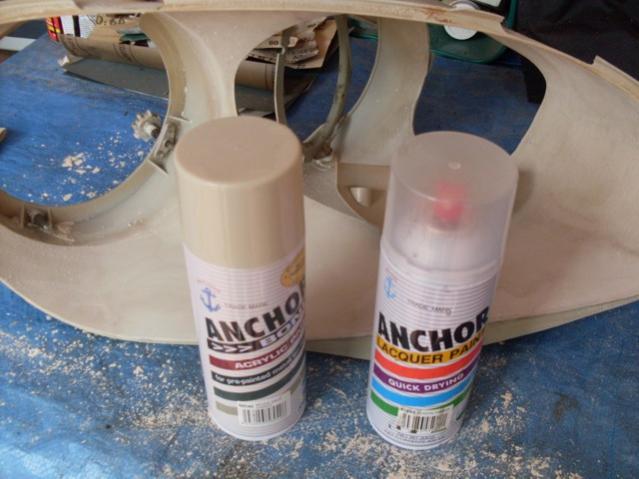
The bucket has been washed down with warm soapy water, then sanded with 800grit, primed with plastic primer and top coated
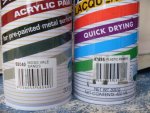
I’m painting using pressure pack Anchor Bond Acrylic lacquer - a plastic primer and a top coat. A bit controversial but as my buckets had never been painted I used a good area to get a colour match, to my eye Gris Rose was too dark and had a pinky tinge. The closest I found in ready to spray acrylic was Moss Vale Sands.

Cleaned up all the bits and pieces ready to re-install. Probably a better pic in terms of the final colour and finish, slightly satin.
I need to do the final repairs on this guard, rust proof as best I can, paint and then re-fit the lights. Way too humid to paint in Brisbane at the moment.
_________________________________________________________
_________________________________________________________
26th Sep 2010, 01:21 PM
GreenBlood
September 2010
Cripes, started this thread in December 2009...
Time, money, weather... but I'm still as enthusiastic as when I started
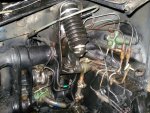
Finally put enough money aside to collect my HP pump from DS Motors, Lance and John have been fantastic (could have sold my reconditioned pump a dozen times since I left it with them).
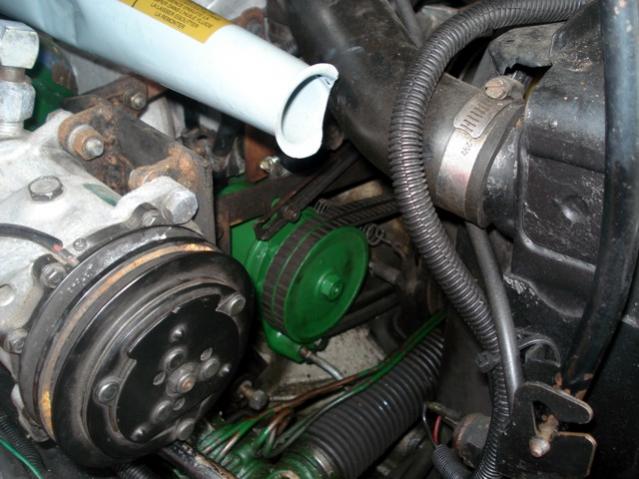
I did my first suspension boot and bump stop yesterday...
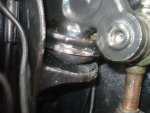
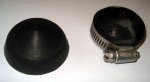
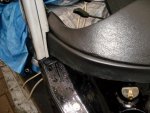
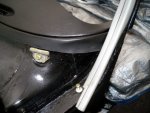
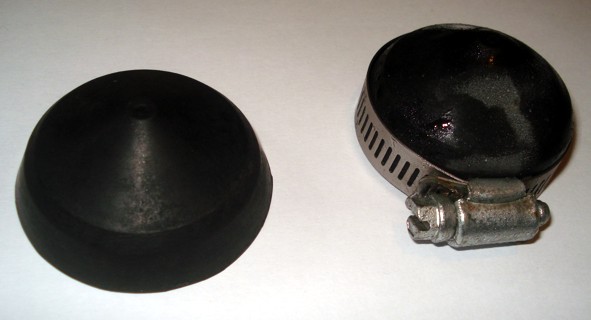
Bump stop first, used the method outlined by Craig (UFO) Tighten a hose clamp around the base of the bump stop - quite tight, you need to reduce the diameter by at least 5mm., then freeze for a couple of hours. Fitting is then a breeze, jack up wheel hub, fit bump stop in place and lower wheel hub - done
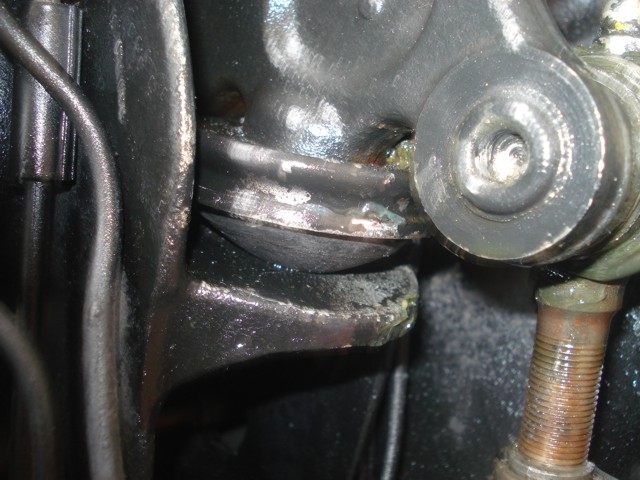
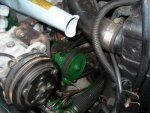
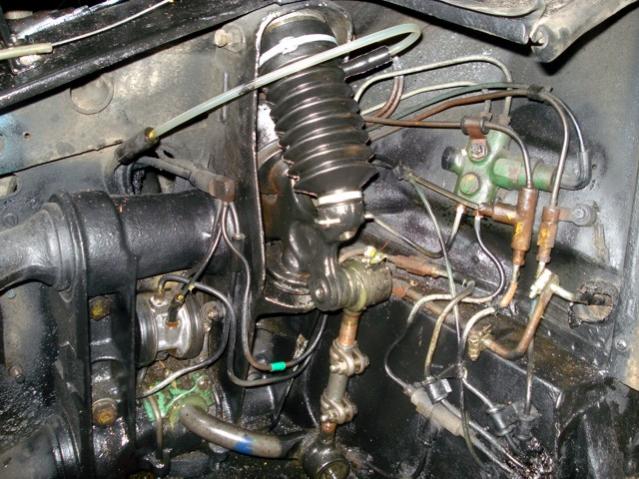
The top bump stops on my car are still good for while yet, so I moved on to the suspension boot. All pretty straight forward. Remove cotter pin from bell crank, remove ligarex and slip old boot off. I removed the rod and greased the ball. Fitted bottom of boot with the rod out, also found it easier to remove the return line from the car and fit to boot then re-fit and clamp the boot top - first time I've used my Ligarex pliers whoohooo....
Much more to do
Cheers
Chris
_________________________________________________________
I thought as this project seems to have gone a little epic I would record the progress of D(very)Special’s rejuvenation – this is by no means a restoration more identifying 35 years of deterioration and hopefully giving her a chance at another 35 years.
I think it was back in July this year with a failed starter motor D(v)S gave me a hint that it was time for some TLC. With some great assistance from Aussiefrogs I fitted a new Valeo starter, and of course whilst in the bowels a reconditioned engine mount. I guess it all started there, I couldn’t replace parts without cleaning, and where required painting.
With the front guard off it was opportune to fix rust under the headlights, but on inspection of the front valance (hidden by the guard) I could see this was going to be more than a quick patch-up.
I decided to pull the front end off and get to cleaning fixing painting. The front valance and number plate holder were looking quite sad. One of the outriggers was rusted through, the other would not have been far behind without fairly immediate attention. I actually had a rusted hole in the front air scoop where the tube attaches running air up to the interior vents.
I washed the chassis down with a kerosene gun and hosed off with water. I then used POR Marine Clean and Metal Ready before painting with POR.
I was quite surprised to see surface rust forming once the years of accumulated oil and grease had been removed.
I pulled the battery tray out and gave it the same treatment using silver POR for the top cradle. (yes I have a suspension boot and bump stops on my list of things to do.
Pic of the valance and number plate holder, some rust at the front of the valance and some serious rust on the number plate holder.
The chassis painted and the drip tray and brake scoops cleaned ready to re-fit
Front valance repaired and painted, the car has been painted using acrylic lacquer which despite comments to the contrary has stood up very well after more than 10 years. I’m painting at home so acrylic lacquer it is.
Valance and number plate holder re-fitted.
I pulled the bumper apart and polished using a kit from Bunnings, a couple of grades of abrasive and matching disks that were fitted onto a drill – slow and tedious but the results were very rewarding, more work to do to finish but definitely getting a result. The air dam/scoops were repaired and painted.
This front guard has been completely disassembled, the light buckets painted, rust repaired and spot painted, very happy with the colour match which was slightly different to the AC code. New headlight surrounds and inner seals etc.
I still have to do the same with the offside guard, and then slowly work back, bottom of all doors need attention as do the tops where the weather strip is.
That’s it for the moment, four months of weekends invested so far…
Cheers
Chris
_________________________________________________________
_________________________________________________________dino said:6th Dec 2009, 09:22 PM
good work....I like the colour, reminds me of my dads old fiat...
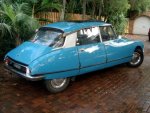
... car looks very solid from this end.... Work like this 'usually reveals' more than one wants to find...
Good luck with it...
dino
6th Dec 2009, 10:04 PM
GreenBlood
Thanks dino,
I think this work will be on-going, the positives of this car far outway the negatives, nothing that can't be fixed, nothing structural or major. I'll do the work that is within my scope (having a ball honing my skills).
Cheers
Chris
_________________________________________________________
_________________________________________________________rmac said:7th Dec 2009, 01:42 AM
What a great job. Well done and love the pics! They are a good reference.
_________________________________________________________DoubleChevron said:7th Dec 2009, 08:56 AM
The only change I'd make ... Is chuck all of SWMBO's junk out of the shed, and move the car into the shed, so your not in the rain and sun while working
I'm sick to death of having nowhere decent to work on a car myself
Did you ever get the front suspension boot done ?? Roger Parker had a brake fluid one in stock. It wasn't cheap at $80, but it's far better than "Not Available".
seeya,
Shane L.
Boyracer said:7th Dec 2009, 12:54 PM
I'm loving all these resto threads. We will have done our duty. The next generation will have plenty of nice Deesse to choose from.
Cheers,
Michael
_________________________________________________________
_________________________________________________________dogboy said:10th Dec 2009, 07:08 AM
Nice job Chris... it's inspiring me onwards with my 2CV and DS
_________________________________________________________eMi16 said:11th Dec 2009, 03:45 PM
Nice work Chris, will look spectacular at the next French Car day no doubt! What sort of spray outfit are you using? The paint on the top of the Mi is looking rather sad these days and thinking of doing it myself. Did once re-spray a beetle in acrylic in another lifetime.
Cheers
Ralph
11th Dec 2009, 04:08 PM
GreenBlood
Quote:Originally Posted by eMi16
Nice work Chris, will look spectacular at the next French Car day no doubt! What sort of spray outfit are you using? The paint on the top of the Mi is looking rather sad these days and thinking of doing it myself. Did once re-spray a beetle in acrylic in another lifetime.
Cheers
Ralph
Hi Ralph,
I often think of you when driving the D, you just looked so at home behind the wheel in this pic.
I'm almost ashamed to admit that my spray equipment at home is only just up to the job, I wouldn't paint a panel bigger than the valance, poor compressor only just kept up. Using acrylic lacquer is quite forgiving, you can spend time and block back and polish to the desired finish. The roof on your Mi should be painted with 2pack, being metallic it's base coat and clear, you would be well advised to do the prep and hire a booth for a few hours for your finish, you should be able to hire the spray gun, airflow mask and booth for a couple of hundred? I think there is a place in Morningside behind Toyota off Wynnum road.
Cheers
Chris
_________________________________________________________
_________________________________________________________DoubleChevron said:11th Dec 2009, 04:17 PM
Quote:Originally Posted by eMi16
Nice work Chris, will look spectacular at the next French Car day no doubt! What sort of spray outfit are you using? The paint on the top of the Mi is looking rather sad these days and thinking of doing it myself. Did once re-spray a beetle in acrylic in another lifetime.
Cheers
Ralph
It's a bigger job than you think ... You see you will have to paint both rear quater panels too.... You can't really "blend" it in as such. Then there is the fact the bonnet and bootlids paint will probably look just like the roof in a very short time (unless it's been resprayed at some point )
DS's are the "ultimate" car to tinker on at home, as each and every panel can be unbolted and worked on individually. With the colour GB is painting his, he could basically respray the entire car one panel at a time with acrylic laquer, and the colour will very closely match on each panel.
seeya,
Shane L.
_________________________________________________________Iron Oxide said:12th Dec 2009, 01:58 PM
Great thread! Really inspiring me to get off my duff and get my bodywork done! I love the look of a D stripped down, what an awesome piece of engineering!
Dave
12th Dec 2009, 06:21 PM
Light Bucket
Quote:Originally Posted by Iron Oxide
Great thread! Really inspiring me to get off my duff and get my bodywork done! I love the look of a D stripped down, what an awesome piece of engineering!
Dave
Thanks Dave, funny it was your thread on yankeefrogs that was a good part of my motivation - let's keep one another inspired.
Today has been spent tarting up the light bucket on the offside guard.
I'll go into some detail on the removal of the light bucket, I don't think it has been covered here on aussiefrogs. It can look a little daunting but in reality it is a very straight forward job, with the guard off you'll have the bucket removed in maybe 10 minutes.
Start by removing the clip and light damper rod, then the bolt shown in pic, this has a square nut behind which you should take care not to lose, could be hard to find a replacement. Remove plastic clip hiding behind light bar adjuster as shown in pic.
Remove wiring harness.
Turn guard over and remove two nuts shown here.
Remove bucket - You can now release the glass, two rod tensioners and two nuts.
Light bucket removed – not pretty is it? The foam dust seal appears to be unavailable as a Citroen part but I have sourced a good copy through Whitworths Marine in Brisbane - a self-adhesive foam with about the same profile. Most of the crap that ends up on the bottom of the bucket is in fact the dried out foam from this seal.
To remove the lights is just 4 nuts on the spotlight and two press fit clips on the main light.
The bucket has been washed down with warm soapy water, then sanded with 800grit, primed with plastic primer and top coated
I’m painting using pressure pack Anchor Bond Acrylic lacquer - a plastic primer and a top coat. A bit controversial but as my buckets had never been painted I used a good area to get a colour match, to my eye Gris Rose was too dark and had a pinky tinge. The closest I found in ready to spray acrylic was Moss Vale Sands.
Cleaned up all the bits and pieces ready to re-install. Probably a better pic in terms of the final colour and finish, slightly satin.
I need to do the final repairs on this guard, rust proof as best I can, paint and then re-fit the lights. Way too humid to paint in Brisbane at the moment.
_________________________________________________________
Boyracer said:12th Dec 2009, 08:59 PM
Great stuff! I have a pair of spare front wings. I am inspired to pull the buckets out and clean them up with the idea of swapping them into one of the other cars.
The pictorial helped heaps. It was nice to see the lie of the land in there. God knows I had enough trouble last night changing a headlight bulb in the dark.
Cheers,
Michael
_________________________________________________________
_________________________________________________________DoubleChevron said:12th Dec 2009, 10:11 PM
DoubleChevron
I must say, I like that colour a lot more than the "grey" (gris, wheel colour ?) they are usually painted. I think I'd paint them body colour and make them completely wrong if I had a DS good enough to be driven
seeya,
Shane L.
_________________________________________________________UFO said:12th Dec 2009, 11:21 PM
UFO
Remember to put some stone guard on the glass before you put it back in
eMi16 said:13th Dec 2009, 07:41 PM
Quote:Originally Posted by DoubleChevron
It's a bigger job than you think ... You see you will have to paint both rear quater panels too.... You can't really "blend" it in as such. Then there is the fact the bonnet and bootlids paint will probably look just like the roof in a very short time (unless it's been resprayed at some point )
DS's are the "ultimate" car to tinker on at home, as each and every panel can be unbolted and worked on individually. With the colour GB is painting his, he could basically respray the entire car one panel at a time with acrylic laquer, and the colour will very closely match on each panel.
seeya,
Shane L.
Yep you're right, the bonnet and boot aren't far behind. It's probably out of my league to make any sort of half decent job of it. Just one of those do i spend the money on it questions.
Ralph
_________________________________________________________eMi16 said:13th Dec 2009, 07:45 PM
Quote:Originally Posted by GreenBlood
Hi Ralph,
I often think of you when driving the D, you just looked so at home behind the wheel in this pic.
I'm almost ashamed to admit that my spray equipment at home is only just upto the job, I wouldn't paint a panel bigger than the valance, poor compressor only just kept up. Using acrylic laquer is quite forgiving, you can spend time and block back and polish to the desired finish. The roof on your Mi should be painted with 2pack, being metalic it's base coat and clear, you would be well advised to do the prep and hire a booth for a few hours for your finish, you should be able to hire the spray gun, airflow mask and booth for a couple of hundred? I think there is a place in Morningside behind Toyota off Wynnum road.
Cheers
Chris
Ah! memories! I do like that pic so saved a copy to my pc, hope you don't mind. You're doing a great job. I always wanted to try to clean up the light buckets when we had our D, but it never got done of course, the car was always working too hard! Thanks for the paintshop info.
Ralph
26th Sep 2010, 01:21 PM
GreenBlood
September 2010
Cripes, started this thread in December 2009...
Time, money, weather... but I'm still as enthusiastic as when I started
Finally put enough money aside to collect my HP pump from DS Motors, Lance and John have been fantastic (could have sold my reconditioned pump a dozen times since I left it with them).
I did my first suspension boot and bump stop yesterday...
Bump stop first, used the method outlined by Craig (UFO) Tighten a hose clamp around the base of the bump stop - quite tight, you need to reduce the diameter by at least 5mm., then freeze for a couple of hours. Fitting is then a breeze, jack up wheel hub, fit bump stop in place and lower wheel hub - done
The top bump stops on my car are still good for while yet, so I moved on to the suspension boot. All pretty straight forward. Remove cotter pin from bell crank, remove ligarex and slip old boot off. I removed the rod and greased the ball. Fitted bottom of boot with the rod out, also found it easier to remove the return line from the car and fit to boot then re-fit and clamp the boot top - first time I've used my Ligarex pliers whoohooo....
Much more to do
Cheers
Chris
_________________________________________________________
jackafrica said:26th Sep 2010, 08:23 PM
Congratulations on the steps forward Chris.
All good things take time. D lightful.