GreenBlood’s D(very)Special Rejuvenation 2009>

GB...I havent checked this thread for a while...been to self obsessed :D...You really are doing great work there...But all jokes aside DO BE CAREFUL...we dont want you getting hurt...And its so easy to do...Recently I ve had two or three close shaves...One at work where i didnt get a good grip on a grinder and when I switched it ON she twisted out of my hand...I only just escaped the spinning blade by a cm or so as it fell past my abdomen...and hit the concrete...Then on the 604..I caught the carpet with the drill bit...and that really could have hurt as it swung my arm into the panel of the boot...then one night I was using the dremel..you know one of those situations where you are holding the item on your chest and filing away but bit is facing the "liver"...yep she slipped...and again only superb bosnian reflexes saved the day... So please, pretty please...be careful...you are achieving "superb" results thus far...lets not spoil it...

:cheers:

dino

ps...its nice to hear the family participates...and supports...a sign of a very healthy relationship... :cheers:
 
Surely it would be better to do this by, well, measuring what you want to cut off several times, marking it, and then carefully bracing the fan blade in a suitable mount, even bolting it onto a piece of softwood that is then gripped in a vice.

You would then start on the edge that needs to be removed and work in towards the marked like. A dremel or similar would be an ideal tool to use. Finish with a fine grade emery paper to a smooth surface. With the minimal weight of the plastic, circular perfection of the hole could not be that important near the centre of the rotating fan.

Anything that rotates the fan can only end in expensive plastic shattering tears or worse.

That was plan 'A', and on reflection it is still the safest way to proceed.

Thanks Craig, sometimes we need to go back to basics, I have a dremel with a fine circular saw bit definately worth a shot :wink2:

...and thanks Dino for your encouragement, I've been following your progress with the 604 and admire your work. None of us could embark on such projects without the full support of family I am very fortunate in that regard.

Cheers
Chris
 
One step forward...

That was plan 'A', and on reflection it is still the safest way to proceed.

Thanks Craig, sometimes we need to go back to basics, I have a dremel with a fine circular saw bit definately worth a shot :wink2:

Well, that all went well, used a mug to mark the circle, fine cutting blade on a dremel - all done and dusted ready to re-fit :wink2:

attachment.php


Thanks lads :cheers:

Cheers
Chris
 

Attachments

  • New Old Fan.jpg
    New Old Fan.jpg
    43.3 KB · Views: 2,533
That looks fantastic !!! I guess the test will be if she disintegrates at 6000rpm :p

seeya,
Shane L.
 
All back together and running...

Fitted fan, radiator, wired up the new alternator - then a big clean up of tools and my shed :wink2:

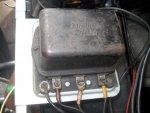
This is a piece original technology that I won't be sad to see the end of. It was playing up and was the cause of overcharging boiling a battery and much of the grime I'm cleaning away is acid corrosion.

The only useful wire here is the brown sleeved wire next to the earth on the left - marked 'L' I guess for light? It is the connection required for the dash light. All the other wires when disconnected become free, i.e. they don't enter the loom.

attachment.php


On Richo's revamped alternator, the black wire connects to what was the 'L' wire for the dash light, the red goes to battery positive. I then made up a heavy positive and negative cable which connect to the appropriate connections on the back of the alternator and battery terminals direct.

attachment.php


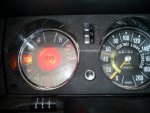
This was what I was waiting for, on starting the car the light goes out immediately as it should. The battery is a little flat but with a few rpm I'm now charging at 14.5v steady - very happy :wink2:

attachment.php


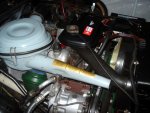
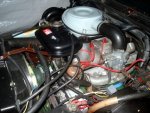
I've still got to tidy wiring, waiting for a few bits and pieces from Geert at Citroworld, rubber tidy straps etc. Amazingly the aircon works, but needs a re-gas and maybe receiver dryer, that will have to wait until the car is back on the road.

attachment.php


attachment.php


The beast is mobile again, big clean-up and I can start to look at some panel work...

Cheers
Chris
 

Attachments

  • Regulator2.jpg
    Regulator2.jpg
    80 KB · Views: 1,822
  • Alternator Light.jpg
    Alternator Light.jpg
    44 KB · Views: 1,554
  • Header Tank sticker.jpg
    Header Tank sticker.jpg
    99.8 KB · Views: 2,500
  • Header Tank sticker2.jpg
    Header Tank sticker2.jpg
    53.2 KB · Views: 1,602
That all looks great Chris! I can see I am going to have to do some serious engine bay cleaning to catch up a little :)

How did you clean the aluminium on manifolds, rocker covers etc?
 
That all looks great Chris! I can see I am going to have to do some serious engine bay cleaning to catch up a little :)

How did you clean the aluminium on manifolds, rocker covers etc?

Supercheap degreaser as an initial cleanup, and carby cleaner, the carby cleaner is great at getting the stubborn baked on crap off. It says not to get it on painted surfaces so use caution - and no smoking :D

I haven't done anything with the rocker cover (yet), it was quite polished when I first got the car so should respond to a bit of alluminium polish.

Cheers
Chris
 
Hi GB,

what colour did you use for the steering column and air cleaner (I imagine the darth vader air-cleaner will be the same colour!).

I'm going to keep the generator as i think it "looks" right under the bonnet of an ID :)

seeya,
Shane L.
 
Hi GB,

what colour did you use for the steering column and air cleaner (I imagine the darth vader air-cleaner will be the same colour!).

I'm going to keep the generator as i think it "looks" right under the bonnet of an ID :)

seeya,
Shane L.

I think the accepted colour for the aircleaner is gris rose (as used on wheels etc.) The steering collar you can see in the pics hasn't yet been set to the correct position, it sits further up into the firewall. I've not had to paint it as it is clean and protected from grime, the steering shaft is a satin black.

Yes, definately keep the generator, your car deserves to be as original as possible. D(v)Special has been changed so much from original spec that I'm comfortable with a bit of modern tech - at the same time I'd like it to be as close to original from the outside, on the road it should be indistinguishable from factory original with the exception of the sunroof.

Cheers
Chris
 
No worries,

I have some of that paint mixed somewhere (I think .... hmmm....). I reckon the colour I had mixed for my ID19 wheels was far to white though :confused:

I'm going to hit the alloy bits on this car with glass beeds :)

seeya,
Shane L.
 
Hi GB,

what colour did you use for the steering column and air cleaner (I imagine the darth vader air-cleaner will be the same colour!).

I'm going to keep the generator as i think it "looks" right under the bonnet of an ID :)

seeya,
Shane L.

The generator on the early cars is significantly narrower than the vast majority of alternators.
Even though the type of alternator on Chris's car pre-dates your car.
 
That all looks great Chris! I can see I am going to have to do some serious engine bay cleaning to catch up a little :)

How did you clean the aluminium on manifolds, rocker covers etc?

Supercheap degreaser as an initial cleanup, and carby cleaner, the carby cleaner is great at getting the stubborn baked on crap off. It says not to get it on painted surfaces so use caution - and no smoking :D

I haven't done anything with the rocker cover (yet), it was quite polished when I first got the car so should respond to a bit of alluminium polish.

Cheers
Chris

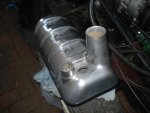
Pulled the rocker cover off today and gave it a bit of spit and polish.

When I had the faulty alternator/regulator and boiled the battery I had no idea the damage being done by the gassed acid, the cause of much of the cleaning and painting going on under the bonnet.

The rocker cover has responded to a light sanding, then rubbed down with a scotch pad and finally alluminium polish. I'll have to wait to re-fit, I'll fit a new gasket and the rubber rings at the top of the spark plug tubes, a couple of the tubes had oil in them which must be getting past the seals, probably new spark plug insulators while I'm there?

attachment.php


Cheers
Chris
 

Attachments

  • Rocker cover1.jpg
    Rocker cover1.jpg
    76.8 KB · Views: 1,671
Pulled the rocker cover off today and gave it a bit of spit and polish.

When I had the faulty alternator/regulator and boiled the battery I had no idea the damage being done by the gassed acid, the cause of much of the cleaning and painting going on under the bonnet.

The rocker cover has responded to a light sanding, then rubbed down with a scotch pad and finally alluminium polish. I'll have to wait to re-fit, I'll fit a new gasket and the rubber rings at the top of the spark plug tubes, a couple of the tubes had oil in them which must be getting past the seals, probably new spark plug insulators while I'm there?

attachment.php


Cheers
Chris

Nice...really nice..Something about polishing a nice piece of metal... :approve:

:cheers:

dino
 
Nice...really nice..Something about polishing a nice piece of metal... :approve:

:cheers:

dino

Quite so Dino,
The D is such a willing car to work on, and a great compromise between old and new - so many parts can be brought back to as new with a bit of elbow grease and with bits and pieces now readily available here in Aus or now very accessible from overseas, these cars will live on for many years yet.

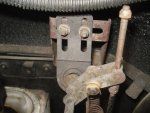
This is a great way to improve a sticky throttle on a D, the part is available new but I have restored mine using a kit supplied by an American Ebayer - I think it cost less than $15.00Aus delivered.

This is the old linkage, the centre bronze bush is very worn and the rubber about to collapse, symptom when driving is a notchy throttle, as you accelerate you reach a point where it feels like the throttle is stuck, pressing on you overcome the resistance but end up with more throttle than required. Not good in a D where smooth throttle response is paramount.

attachment.php


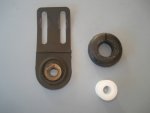
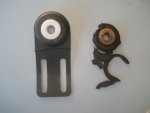
These are the replacement parts, you cut out the rubber from the old part, and fit the new - the new centre is a nylon cotton reel, the rubber has a cut that you fit into the hole on the old part, then the cotton reel. The fit is very tight but with a bit of pressure it all comes together.

attachment.php


attachment.php


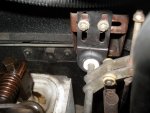
...and fitted back on the car, the difference is remarkable, smooth pedal control. Such a difference for such a small investment :wink2:

attachment.php


Cheers
Chris
 

Attachments

  • Linkage old2.jpg
    Linkage old2.jpg
    99.6 KB · Views: 1,617
  • Linkage bits.jpg
    Linkage bits.jpg
    48.9 KB · Views: 1,520
  • Linkage bits2.jpg
    Linkage bits2.jpg
    49.8 KB · Views: 1,464
  • Linkage new.jpg
    Linkage new.jpg
    99.3 KB · Views: 1,527
Top