Gawd, another R8 upgrade

Any zinc plating I get done I always ask for it to be de-embrittled. Its a process where they bake everything for a certain time period which returns the parts to their normal state.

That's correct Ross. I had a quick read of the manual this morning before I left for work. They claim they have never experienced it, but state that it is possible. Their recommendation if concerned was to bake any plated parts for 2hrs@200C within 30 mins of plating. They also said that it mostly occurs during the acid pickling pre-clean stage of plating which their kits don't have. I didn't do this for those parts. I'm quite a while off that mattering in this case, so I might install and monitor when ready and perhaps have a spare set of clips on hand.
 
So, I was due to pick up the shell last Friday. The panelbeater then requested Saturday instead. I reminded him it was Xmas eve and that this may not be suitable. Currently scheduled for the 28th.

I went to see it a couple of weeks ago. It was almost complete but still some work to do so will be excited to see how it looks. He is painting it underneath, engine bay and boot; plus internally in the non visible parts (after reassembly). I'll get it to a rolling shell, then take it back for final coat externally once all the fibreglass panels etc are on.
 
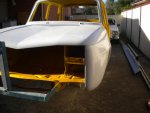
Picked up the shell tonight from the panelbeater. Still in Undercoat, but allows a bit more assembly to be completed before final painting etc.
 

Attachments

  • shellDec16.jpg
    shellDec16.jpg
    101.4 KB · Views: 372
  • ShellDec162.jpg
    ShellDec162.jpg
    101 KB · Views: 386
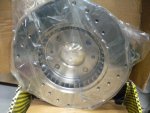
My new discs arrived last week.
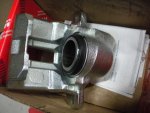
Those crazy Germans - the callipers are listed separately on eBay (Left and right); I ordered one of each of course, and asked if they could combine postage. I guess not. One arrived today (left I think), so I'll probably get the rhs tomorrow or later this week.

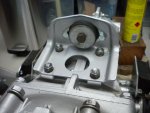
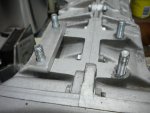
I spent a bit of tonight putting the gearbox back together with my modified plates and spacer blocks. Will hopefully complete that tomorrow night.

In case any eagle eyes are out there. I realised that with the spacer blocks I wasn't going to be able to use the existing studs on the gearbox plate. I tried and couldn't get any suitable studs, so I bought four oversized H/T bolts (set screws actually), and hacksawed them to length. Marked with a red texta the optimum depth, then wound them down into the casing. I obviously was a bit sloppy with the wind down part, as they all appear to be different lengths - they are cut to the same length!
 

Attachments

  • DSCN2922.jpg
    DSCN2922.jpg
    94.2 KB · Views: 368
  • DSCN2920.jpg
    DSCN2920.jpg
    87.8 KB · Views: 348
  • DSCN2923.jpg
    DSCN2923.jpg
    91.9 KB · Views: 347
  • DSCN2924.jpg
    DSCN2924.jpg
    97.9 KB · Views: 360
Last edited:
Small progress to report. It's just been either so hot or pouring, nothing in between lately.
I had a local brake shop remake the brake lines that run over the rear cross member. I had made them up myself, but I wasn't confident that a potential split in the bundy near the termination might not leak. Given I only want to put the gearbox in once, I thought I'd make sure.

Next step was to drop off the new OMP discs out to Bruce at Precision for redrilling like in Brettr's car. The discs are the ventilated ones in the pic above.

This morning there was a good break in the weather to do some touch up spraying underneath the car. You'd think you wouldn't have to touch up a professionals job, but there you have it. I was using the last of a small pot I got off the panelbeater but ran out at 1pm. Pity the local paint shops closed at 12! I'll have to get some more paint during the week and hopefully have another crack next weekend.

Had a feel good moment tonight. I unwrapped the refurbished upper and lower control arms and got them ready to bolt on. When I pressed the new bushes in the inner collar went in too far such that they wouldn't fit over the cross member mount. I rigged up a length of threaded rod, double nuts and an oversized socket and pushed the inner collar back out a smudge. Starting to feel like putting it back together again finally.
 
...if you lived up here they would likely have still been open. Don't you worry about that. :deal:
 
Last edited:
Yes, but they'd just be closing wouldn't they?
My own fault. I thought I'd have enough left over. The closer I looked, the more I found I wanted to touch up.

Both places used to be a 20 minute drive away in opposite directions so I thought I google their hours. One place closed at 12. The second has moved 10 mins closer but had no hours listed, so I went over there. Neither are open Sunday, and both closed at 12. Such is life.
 
Yes, but they'd just be closing wouldn't they?
My own fault. I thought I'd have enough left over. The closer I looked, the more I found I wanted to touch up.

Nawh, being Saturday night, I expect they would be cracking open the tinnies:D :adrink:
 
Yeah, but It would be that XXXX shit wouldn't it. :trouslap:
 
So, a little bit more progress.
I went back to one of the paint suppliers when they were open and got some more base coat, so this morning managed to get a bit more done underneath. Then I noticed that I needed some more paintable seam sealer, so bolted to the paint supplies shop getting there at 11:50 and luckily got what I wanted and out again just as they were closing.

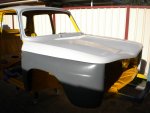
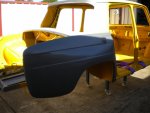
Spent the afternoon pottering about, so decided to do a trial fit on the guards. At least if I can bolt them on it saves having to stack them inside the car or somewhere else!
 

Attachments

  • DSCN2942.jpg
    DSCN2942.jpg
    90.1 KB · Views: 359
  • DSCN2941.jpg
    DSCN2941.jpg
    85.3 KB · Views: 333
  • DSCN2936.jpg
    DSCN2936.jpg
    89.7 KB · Views: 330
Nice guards for a track car. Polyester?

That's not Rouge Trinidad!! :)

Cheers
 
Very high standard on the panels KB. Worth the dollars for sure. How well does the headlight panel line up with the bonnet and guards ?
 
We're yet to find out Bustamif. I was thinking about that the other day. In all the retro shows like American hot rod, chopper etc they do a dry build then "send it out for paint and chrome".

I however, thought stuff that, I only want to build it once. I'm starting to regret that. For example the left rear guard doesn't line up properly at the top of the engine bay. It's like the whole top part has to be moved across. I trial fitted the front panel quite some time ago and it looked ok, but I didn't fit the guards and bonnet then. That will have to wait until it is on the ground as the frame for the stands is in the way.
 
The other thing to consider is that the panels will adopt a memory to the shape they rest in while not mounted on the car.

After they are mounted on the car for a week or so they will move and set a little to their permanent home. The engine lid not so much since its probably steel but the bonnet will move into a new shape once the fasteners, hinge and latch are pulling at it.
 
True. That thought had occurred to me. Especially since they were shipped half way around the world, stored boxed for a while (years) then stacked on top of each other for the last year.

The grey ones I must have bought three - four years ago; the white ones when I put the post up in this thread.

Now I need to finish mounting the hubs to the new discs, and get the front suspension on.
 
Just wondering if the trim is going to be replaced on the C-pillar (adding weight :)), or are the holes going to be filled?
 
Did you go to the trouble of weighing each standard panel and then comparing it to the new panels? Would be interesting to know how much difference there is. Renault panels aren't exactly heavy to start with. They're a beautiful shape aren't they!
 
I weighed mine which are lighter than production fibreglass panels. They are half the weight on average, some panels are less than half the weight of the Renault bits such the bonnet and engine lid while some are a little over half the weight such as guards.

Much cheaper than achieving more horsepower when chasing a better power:weight ratio
 
Top