Finally ... Repairing a traction gearbox.

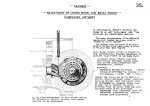
OK, dumb question time ... Is there an easy way to measure the pinion depth. I can't be as easy as somehow getting 1.7mm of feeler gauges "somehow" down between the pinion and gearbox casing can it :confused: I may need to chase up a dial gauge maybe :) ( I bet my grandfather has 1/2 dozen of them in his shed somewhere).
 
No. Pinion depth refers to an engagement distance that is measured between the centerline of the crown wheel shaft and the face of the pinion. There is no "space" to measure with a feeler gauge. This is a critical dimension if you want your crown wheel to last. I made up a tool (for DS and SM transmissions) by drilling a hole through the center of a piece of 80mm diameter precision ground shafting. Then I tapped a hole on the edge to thread in a dial gauge. Setting the shaft on a glass table with a 20mm gauge block lets me "zero" the dial indicator at exactly 60mm (shaft is 40mm radius + 20mm gauge block), then I can take the pinion depth measurement.

Bevel Pinion Depth Gauge.jpg
 
Elegant! That 80 mm shaft sits precisely where the differential would fit I presume?

I've just been looking at a set of the original factory tooling for setting up Renault 4CV transaxles, which a friend in Paris uses for rebuilding units to new specification. Doing this crownwheel and pinion setup from scratch is not to be taken lightly, is it?

Fascinating thread.
 
Elegant! That 80 mm shaft sits precisely where the differential would fit I presume?

Yes, the O.D. of the carrier bearings for the DS and SM transmissions are 80mm, so the 80mm precision shaft sits exactly on center in the transmission case. I don't know what the dimensions are for the T/A or 4CV, so adjust the dimension accordingly.
 
No. Pinion depth refers to an engagement distance that is measured between the centerline of the crown wheel shaft and the face of the pinion. There is no "space" to measure with a feeler gauge. This is a critical dimension if you want your crown wheel to last. I made up a tool (for DS and SM transmissions) by drilling a hole through the center of a piece of 80mm diameter precision ground shafting. Then I tapped a hole on the edge to thread in a dial gauge. Setting the shaft on a glass table with a 20mm gauge block lets me "zero" the dial indicator at exactly 60mm (shaft is 40mm radius + 20mm gauge block), then I can take the pinion depth measurement.

View attachment 88250
There is plenty of space on a traction. The feeler gauge stack of 1.7mm in Shanes case can be slipped in the aperture of the case quite easily an slid between the pinion face and the rectified diameter of the diff. 55mm +1.7mm =56.7mm the distance engrave on that pinion face. Other pinions will have differing conic depth measurements. No need here to mess around with dial gauges and custom made supporting fixtures. Just aim for a feel on the gauge that gives a slight drag . If your gauges are clean the measurement will be dead accurate. I have done this procedure many times.
DS/SM GS gearboxes are quite a different kettle of fish ----a dial gauge is essential in these cases!

For a traction, refer to plate 35 and 35a of the Drawings Section of the workshop manual!
 
Last edited:
There is plenty of space on a traction. The feeler gauge stack of 1.7mm in Shanes case can be slipped in the aperture of the case quite easily an slid between the pinion face and the rectified diameter of the diff. 55mm +1.7mm =56.7mm the distance engrave on that pinion face. Other pinions will have differing conic depth measurements. No need here to mess around with dial gauges and custom made supporting fixtures. Just aim for a feel on the gauge that gives a slight drag . If your gauges are clean the measurement will be dead accurate. I have done this procedure many times.
DS/SM GS gearboxes are quite a different kettle of fish ----a dial gauge is essential in these cases!

For a traction, refer to plate 35 and 35a of the Drawings Section of the workshop manual!

Oh, I think I know the diagrams you mean. I must have scanned a photocopy when those manuals were scanned, and I can't make out what the pinion depth diagrams say. I'll take another look ( and see if I can download a better version of the manual from somewhere).

seeya
Shane L.
 
Look what Gerry just sent me .... No wonder I'm scratching my head. The manual I'm looking at is missing several pages by the looks of it (either they weren't in the manual I scanned, or I stuffed up printing them way back when I printed the manual).

attachment.php


I'll chekc the manual CD's when I get home and see if these diagrams are on it.

83444d1461400663-finally-repairing-traction-gearbox-p1180512.jpg


This will make sense if I post the picture from earlier on in this thread. See the pinion depth in scribed onto the pinion from the factory. 56.7mm

seeya,
Shane L.
 

Attachments

  • traction_pinioon.jpg
    traction_pinioon.jpg
    99 KB · Views: 781
  • pinion_taction_2.jpg
    pinion_taction_2.jpg
    87.4 KB · Views: 253
Last edited:
Gerry would have a good laugh if he saw me trying to check that last night... It took me about 1/2 dozen attempts to assemble the pinion shaft in the case before I ran out of time....

Here's some tips ...

-Don't fit any of the gears backwards ... or you'll be pulling it back out ( :rolleyes: )
-if you realise you haven't fitted the speedo drive ... don't pull it back out ... you dont' need to ( guess when I realised this)
-don't think on the 3rd attempt "oh refit the front bearing with the shims while the shaft isnt' there in the way"............ Yep, you can't get the last gear back onto the pinion with that in the way .... And ... It sure is a bastard of a thing to get back out. I found I had to remove the shaft and all the gears and give it a whack from inside the housing with a rubber mallet.

I reckon I'll be very well practiced at assembling/dismantling the pinion shaft inside the casing by the time the pinion spacing is set correctly (given it'll all have to come apart each time to whack the front bearing housing from behind to get it back out to try different shims).

seeya,
Shane L.
I told you that the fun was only just beginning! Once the shaft and gears are in it is not necessary to take the whole thing out again. You only need to remove the front bearing housing and bearing to make shim adjustments.
btw have you fitted the reverse gear already? Because if you have not you will find it very difficult once the pinion shaft and its gears are in place.
Fitting the pinion shaft is as follows.
A. 1st/ reverse cluster loose into the box.
B. Pinion shaft and bearing in part way from the rear.
C. Thrust bearing and thrust rings.
D. Second speed splined gear.
E. Speedo worm drive.
F. Third speed splined gear.
Now mount the box vertically in the vise and lever second splined gear up way from the thrust race.
G. Slide the half locking collars ( C rings ) into the groove one at a time. You may have to tap the pinion shaft back slightly to let the grooves line up with the space for the collars.
The second splined gear can now drop down and enclose the locking collars.
G. Fit the front bearing cage together with a stack of shims and the bearing.
H. Torque up the front nut and fit the diff slightly firm in rotation . Do not worry about back lash on the crown wheel. A lot of play at the moment is good to prevent the teeth fouling if the conic depth has to be reduced. Fit the lower front bearing cap and torque to specs.
I. Measure the conic depth.
J. Now begin making adjustments to the shim stack.
K. Only remove the bearing cage and bearing to make adjustments.

Be Patient and extra fussy!
 
Oh yeah ... I'm being patient. If I wasn't, this would have been back together 3months ago ... when this thread started. :roflmao: If I can spend a day on it at some point, I should get it back together and done (rather than 20minutes at a time).

I still haven't pulled the diff apart to see if I need some speedi sleeves.... There is no hurry, the car hasn't been on the road for at least 25years .... What's another week/month/year/decade :)

seeya,
Shane L.
 
Just as well I'm not in a hurry .... Gerry said, get the reverse idler in first .... So I figured I better do that (rather than pull it all back to bits later cos I I've dropped the bearings in the bottom of the box)....

83413d1461331174-finally-repairing-traction-gearbox-diag1.jpg


I noticed there was an inner bearing race/washer.... We'd won't to reverse that one to remove any slop too.

[ATTACH=CONFIG]88385._xfImport[/ATTACH][ATTACH=CONFIG]88386._xfImport[/ATTACH][ATTACH=CONFIG]88387._xfImport[/ATTACH][ATTACH=CONFIG]88388._xfImport[/ATTACH]

[img]http://www.aussiefrogs.com/forum/attachment.php?attachmentid=88388&d=1472283264

They oil film behind them makes them surprisingly difficult to coax off ....

attachment.php


attachment.php


That must be an oil feed slot there.... Completelly blocked off. I was looking at the bush thinking I'll need to push it out to clear the oil way ....

attachment.php


Can you believe that .......... Just as well I'm not in a hurry, I need to order in a bushes for the reverse idler.

seeya,
Shane L.
 
I think this thread should go straight to the pool room :headbang:

Cheers
Chris
 
Just as well I'm not in a hurry .... Gerry said, get the reverse idler in first .... So I figured I better do that (rather than pull it all back to bits later cos I I've dropped the bearings in the bottom of the box)....

83413d1461331174-finally-repairing-traction-gearbox-diag1.jpg


I noticed there was an inner bearing race/washer.... We'd won't to reverse that one to remove any slop too.

[ATTACH=CONFIG]88385[/ATTACH][ATTACH=CONFIG]88386[/ATTACH][ATTACH=CONFIG]88387[/ATTACH][ATTACH=CONFIG]88388[/ATTACH]

[IMG]http://www.aussiefrogs.com/forum/attachment.php?attachmentid=88388&d=1472283264

They oil film behind them makes them surprisingly difficult to coax off ....

attachment.php


attachment.php


That must be an oil feed slot there.... Completelly blocked off. I was looking at the bush thinking I'll need to push it out to clear the oil way ....

attachment.php


Can you believe that .......... Just as well I'm not in a hurry, I need to order in a bushes for the reverse idler.

seeya,
Shane L.
One more warning that I forgot about. Have the first /reverse cluster sitting loose on the bottom of the box when you fit the reverse idler. Otherwise you won't be able to get it in later. Remember when you removed it that the reverse idler had to come out first in order to remove the first reverse cluster?
No need to order a new bush! How about I just provide a spare reverse cluster with a good bush??????

Hi Gerry,

I feel bad using all your spare parts .... The bush is only 12 euro + postage.... I'd be happy to pay you the money for a bush though :) Save me waiting a few weeks for international postage
 
Well, this is embarrassing! I have just spent the morning looking for a spare reverse cluster, and find that I only have one that is part of a set to make up one gearbox. I was putting this aside to use when I am finally able to purchase a 10x31 CW and P. I had wanted to put together a higher ratio box as a spare. I am sorry Shane but it looks like you may have to order the replacement bush after all.
 
Well, this is embarrassing! I have just spent the morning looking for a spare reverse cluster, and find that I only have one that is part of a set to make up one gearbox. I was putting this aside to use when I am finally able to purchase a 10x31 CW and P. I had wanted to put together a higher ratio box as a spare. I am sorry Shane but it looks like you may have to order the replacement bush after all.

:roflmao: :roflmao: That's fine, I'd rather use a new bush either way !!! especially given it's tiny cost!
 
Top