You are using an out of date browser. It may not display this or other websites correctly.
You should upgrade or use an alternative browser.
You should upgrade or use an alternative browser.
Christian's R10S
- Thread starter c.lees
- Start date
hi christian i have just read your entire thread and am very impressed with what you have done so far.you are tackling a big job and i sincerly wish you all the best in achieving a great and rewarding end result.
regards brian
regards brian
How's it going Christian? Is your back sorted and a bit more progress happening?
How's it going Christian? Is your back sorted and a bit more progress happening?
Unfortunately there has been no progress, the back is almost better but I have been out at sea for work for the last two weeks and now I'm away until Christmas. January is pretty much a right off as well as I have to go to Japan, for work with a holiday tacked on the end.
My goal for 2014 is to get some paint on the car.
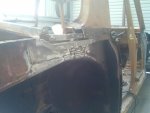
After a very long break I've started work back on the R10S with you guest it, cutting out rust. My work this weekend was stopped due to the MIG wire binding to the inside of the tip to the point that I can't get it out, bugger. I don't have any spares for this torch so I'll have to track some down this week.
Done some more work on the back right corner, filling in some of the gaping hole I created cutting out the rust. I've started to form the rear window edge, this is going to be mostly done in place, I imagine there is going to be a lot of put the window on, take the window off next weekend probably accompanied by some swearing. The bottom of the curved part is welded but it is mostly held in place for the picture by vice grips.
Luckily there are other parts of the car to work on that don't require welding.
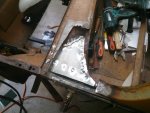


After a very long break I've started work back on the R10S with you guest it, cutting out rust. My work this weekend was stopped due to the MIG wire binding to the inside of the tip to the point that I can't get it out, bugger. I don't have any spares for this torch so I'll have to track some down this week.
I have spare tips and shrouds for my MIG for this reason. Depends on metal quality on how long they last.
It's been a productive weekend (read: the fiancé was away again)
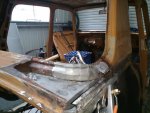
I have almost finished the right hand side mess that was the bottom of the window. I have placed the read window on and taken it off more then once over the last two days.
First, finish what I started last weekend, this is the part that involves checking the rear windscreen fit multiple times as the shape wasn't quite right the first fitting, or the second or the third. Not sure how many it took in the end. It did involve adjusting with a hammer.
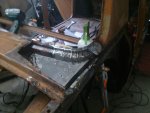
Next, tidy up the edges of the remaining hole and cut a panel to fit. This took longer then I thought it was going to because I wanted to make sure it lined up every where as its one piece and would be hard to change later. You can't see the other two vice grips under the guard.
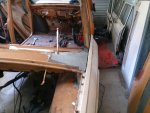
Now it's just a case of sticking it down.
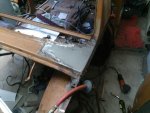
Lets call this piece the rear windscreen top right strength member, what ever its called here is the repaired one. I formed it around a piece of water pipe to get the curve in it.
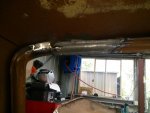
A shot of the side, only bit left is the part that wraps around the bottom edge. Also the new welding helmet, I can't recommend this one enough, 3M Speedglas 9100X, a bit pricey it cost me $390 to get it from the USA, they are about $600 here. The way I look at it is you only get one set of eyes so they are worth looking after and it's amazing being able to see what you are doing when welding, so much better then the previous $150 helmet.
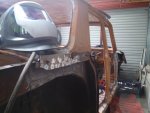
I have almost finished the right hand side mess that was the bottom of the window. I have placed the read window on and taken it off more then once over the last two days.
First, finish what I started last weekend, this is the part that involves checking the rear windscreen fit multiple times as the shape wasn't quite right the first fitting, or the second or the third. Not sure how many it took in the end. It did involve adjusting with a hammer.

Next, tidy up the edges of the remaining hole and cut a panel to fit. This took longer then I thought it was going to because I wanted to make sure it lined up every where as its one piece and would be hard to change later. You can't see the other two vice grips under the guard.

Now it's just a case of sticking it down.

Lets call this piece the rear windscreen top right strength member, what ever its called here is the repaired one. I formed it around a piece of water pipe to get the curve in it.

A shot of the side, only bit left is the part that wraps around the bottom edge. Also the new welding helmet, I can't recommend this one enough, 3M Speedglas 9100X, a bit pricey it cost me $390 to get it from the USA, they are about $600 here. The way I look at it is you only get one set of eyes so they are worth looking after and it's amazing being able to see what you are doing when welding, so much better then the previous $150 helmet.

Nice work there Christian, glad is coming along well.
Also the new welding helmet, I can't recommend this one enough, 3M Speedglas 9100X, a bit pricey it cost me $390 to get it from the USA, they are about $600 here. The way I look at it is you only get one set of eyes so they are worth looking after and it's amazing being able to see what you are doing when welding, so much better then the previous $150 helmet.
View attachment 53400
Can you advise your US supplier? I'm interested in purchasing one.
roger
Can you advise your US supplier? I'm interested in purchasing one.
roger
It was an ebay seller and it would seem he has none left. If you serach on ebay.com, not ebay.com.au you will find more just be searching for "welding 9100" There are a lot in South Korea but brought mine from a seller in the US.
I managed to swing a 3 day weekend but didn't manage as much as I was hoping to do. I finished off the top edge of the rear windscreen, only part left back there is to fix the first side I did. My sheet metal technique has improved and I think I'll cut it off and redo it. Started cleaning out the inside of the car in preparation for flipping it to do the bottom, it took a while to remove the body deadening material, heat gun and a paint scraper. Also took out the rest of the front suspension and the steering rack. One must ask, why did they use so much seam sealer, so annoying to remove. Given the state of the rest of the car I have figured its best to remove it all to make sure there is no rust under it. After I undercoat with epoxy primer I'll put it all back.
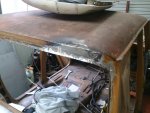

Progress, I have redone the first bit I did. Much happier with the result this time. I've even put the bent strip back on the bottom of this side, I'm yet to put it on the other side.
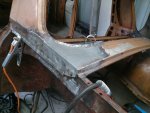
Next step, flip the car on its side, not as hard as I though it was going to be, my rotisserie splayed out a little, raising it one end at a time did some minor damage to where the bumper bar supports go though the panels, it'll be a quick fix once its on its own four feet again.
Strip off the paint, filler and very dodgy stop gap repair to asses the damage to the drivers side sill.
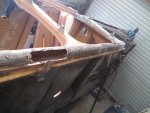
This piece of gal sheet was glued to the inside of the big hole and then bogged over. Very dodgy, it's kind of how the A pillar has held together as well. All the drain holes down this side had been bogged closed, why would you do this?
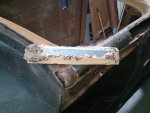
I decided to to replace it in one go as I would have trouble keeping the shape right. Now this is how it's meant to be done, cut out a section, form up a piece of sheet to be a good fit, weld it in, grind it back.
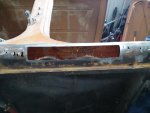
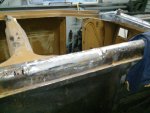
The sill shouldn't take all that long to complete.
Can anyone tell me where the drain hole is meant to be in the channel under the front boot, mine has two rusted out sections where it has obviously clogged up.

Next step, flip the car on its side, not as hard as I though it was going to be, my rotisserie splayed out a little, raising it one end at a time did some minor damage to where the bumper bar supports go though the panels, it'll be a quick fix once its on its own four feet again.
Strip off the paint, filler and very dodgy stop gap repair to asses the damage to the drivers side sill.

This piece of gal sheet was glued to the inside of the big hole and then bogged over. Very dodgy, it's kind of how the A pillar has held together as well. All the drain holes down this side had been bogged closed, why would you do this?

I decided to to replace it in one go as I would have trouble keeping the shape right. Now this is how it's meant to be done, cut out a section, form up a piece of sheet to be a good fit, weld it in, grind it back.


The sill shouldn't take all that long to complete.
Can anyone tell me where the drain hole is meant to be in the channel under the front boot, mine has two rusted out sections where it has obviously clogged up.
I think I may be coming to the end of the rust, at least what is in the body, I'll have to do a bit of work on the guards and the edge of the front bonnet. The sill is done except for the back corner, may just need a little more grinding. It is definitely going to need a layer of filler to smooth it back out. I'm sure there are people out there that could get a perfect finish and not require and filler, unfortunately I am not that good.
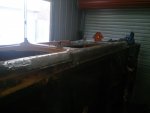

Christian, your doing a damn good job, so don't be to frustrated about having to use some bog. I had almost the same sill repair as yours on my R8G Replica and it looked great after I Tig welded it, but the first coat of primer soon showed that some bog was going to be the order of the day. Cheers Brian
I know that mine is going to need some bog, its very patchwork at the moment. In hindsight completely removing the sill and making a new one would have been better as it was impossible to get out some of the surface rust down in the bottom join. I scrapped it back where I could, used some rust converter and gave it a quick spray with some etch primer. I'll probable give it all a coat of that waxy rust inhibiting stuff when its painted, should be able to spray it in the drain holes. Can't use fish oil in the sill due to the drain holes.
Finished the right hand sill weekend just gone.
Before
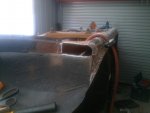
After
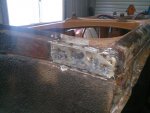
I decided to remove some more of the body deadener from the bottom of the car, this is a nasty job. I am yet to find a good way to get it off. Why is there so much of this stuff on there and why is it on parts that could not vibrate. After all it is put on panels to increase their mass so they don't transmit noise, putting it on the folded chassis rails will do nothing other then make it hard to remove from the corners.
Next up is the front channel, or what is left of it. The plan of attack is to remove the insert from the top, patch and then out the insert back. I've ordered some proper spot weld removing drill bits as I want to reuse the insert panel. I keep finding more rusted parts, some will be hard to fix which means they will have to be brazed as there is no way I'll get a MIG or a TIG in there. If I had known it was this bad I wouldn't have started but now that I have I feel the need to finish and I must be getting to the end of it. Also does anyone have a picture of where the drain hole in the channel goes?
Before

After

I decided to remove some more of the body deadener from the bottom of the car, this is a nasty job. I am yet to find a good way to get it off. Why is there so much of this stuff on there and why is it on parts that could not vibrate. After all it is put on panels to increase their mass so they don't transmit noise, putting it on the folded chassis rails will do nothing other then make it hard to remove from the corners.
Next up is the front channel, or what is left of it. The plan of attack is to remove the insert from the top, patch and then out the insert back. I've ordered some proper spot weld removing drill bits as I want to reuse the insert panel. I keep finding more rusted parts, some will be hard to fix which means they will have to be brazed as there is no way I'll get a MIG or a TIG in there. If I had known it was this bad I wouldn't have started but now that I have I feel the need to finish and I must be getting to the end of it. Also does anyone have a picture of where the drain hole in the channel goes?
On to the front channel, completely rusted out also some rust in the part that is inside the car. This took a little longer to repair then I had originally thought it would. Still need to put the drain hole in. I think I'll give it a coat of primer, smooth it out a little with some filler so water doesn't collect and give it coat of paint before I put the lid on it.
The before photos, now it doesn't look that bad on the part inside the cab, but once I removed the paint it wasn't pretty.
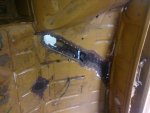
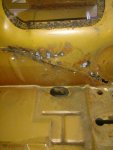
After, the front part is quite angular, I made it first then cut it down to fit. A few of the other pieces were made in place as it was easier to get the shape correct, important for the parts you can see.
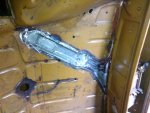
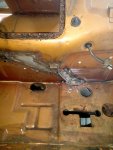
The before photos, now it doesn't look that bad on the part inside the cab, but once I removed the paint it wasn't pretty.


After, the front part is quite angular, I made it first then cut it down to fit. A few of the other pieces were made in place as it was easier to get the shape correct, important for the parts you can see.


The front channel is finished, the lid is yet to be welded on but it is all painted and ready to go. My long weekend plans were cut short due to a crash on a regular training ride on Easter Sunday. I went down and managed to break two ribs and a collar bone so work on the car has been suspended again until I grow some bones back, a mere 6 weeks. At this rate it will never get finished.
The front channel is finished, the lid is yet to be welded on but it is all painted and ready to go. My long weekend plans were cut short due to a crash on a regular training ride on Easter Sunday. I went down and managed to break two ribs and a collar bone so work on the car has been suspended again until I grow some bones back, a mere 6 weeks. At this rate it will never get finished.
Hi, just a suggestion, why not instead of welding it up, try fixing a plate over the top and bolted down with the appropriate seam strip sponge underneath which will make it easy to clean all the leaves etc during a routine maintenance? see pic below
Angelo
View attachment 55574
