Christian's R10S

c.lees

Active member
VIP Paid Subscriber
Fellow Frogger
Joined
Oct 19, 2012
Messages
665
Location
Sydney
Following on from my other thread http://www.aussiefrogs.com/forum/renault-forum/105578-when-too-far-gone-bother-fixing.html

I have decided to try and fix the body, after all I've already done the engine and gearbox. What's the worst that could happen, I can't make it any worse.

Now this is the first time I've ever welded metal this thin, and it is really thin. My MIG only goes down to 15.5A and I think I'd like it to go down a little further. After playing around with the wire speed I got it to a point of not blowing too many holes in the car. I'm also using 1mm zincanneal, which is a little thicker then what the car is made out of.

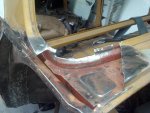
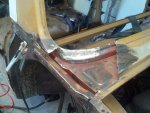
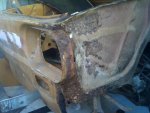
So to begin, I started on the passenger side rear, I figured I'd start with an easy one.... Step one, work out the shape of the piece to replace using cardboard, then cut out the infected area, then discover a little more to cut out. Luckily the bit down the side is flat so no template is needed. I drilled out the spot welds so I could remove the bent over strip at the bottom. You can tell it was spot welded by hand, they are not exactly in a straight line or evenly spaced.

The first patch to make is the bottom of the rear window, its actually curved in two directions, I put a curve in it longways and welded one end down then I heated it up and persuaded it into place as I tacked the rest of it down. I reasonably happy with the result as this is the first time I've done this, and you won't be able to see this one.
2013-06-30_13-29-20_875.jpg2013-06-30_14-24-13_407.jpg2013-06-30_15-11-39_533.jpg
 
hi christian,it may pay to back up the butt welds so that you dont burn thru so much. in other words ,tack a strip about 15 to 20 mm wide under the joint.half each side.plenty of little tacks about10 mm apart and weld in between.you could even spot tack closer if required. cheers brian
 
I have no expertise to offer here concerning bodywork & welding but I can offer emotional support: good luck with it; I hope it goes well & that you enjoy both process & product.
cheers! Peter
 
That's a good idea Brian, it will definitely work for the flat sections, I'll just have to grind the initial tack welds back to the panels will still but up against one another. You have to stitch weld this steel anyway, lots of little spots that eventually join up, otherwise the heat build up warps the panel.

I may require emotional support by then end of this one Peter.
 
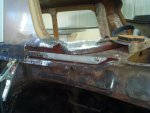
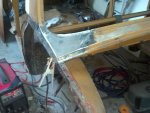
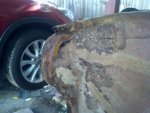
A small amount of progress has been made. I have discovered that the cars panels are even harder to weld then first thought, I found myself on several occasions chasing holes around, every time I tried to close it up it would just move. I only found out last night that my mig has a wave control knob which I assume is a modulation control, turning it down all the way should make this a little easier and blow less holes. So on the weekend I replaced half of the piece that holds the bolts that hold the guard on, that was easy enough. Next, the main panel, cutting it to shape was easy enough, welding it into place, not too bad, having the gap between the panel and guard correct, not that is a problem. The gap is a little large, so I can either add another piece of metal or cut part of it off and start again. I tried the adding another piece method, it closed the gap a little but not quite enough, this is where I have left it for now as I ran out of time.

As you can see from the picture the panel has sucked in a bit on the top, this isn't a major problem and I expected it to happen, this can just be filled as its not that deep, This MIG may not be the best tool for this job as the steel is so thin, I can try to TIG it with a silicone bronze filler rod, this will suck the welds in even further which isn't a problem if I can get the back of the panel to knock them out
.2013-07-07_10-17-39_760.jpg2013-07-07_16-06-23_910.jpg
 
Hmm! you'd better keep the welder away from the wheels, I think :)

cheers! Peter (prospective purchaser)
 
Peter, it doesn't currently have any wheels on it, so they are safe. A small amount of progress has been made, and I found some more rust and by rust I mean a spot where there should be metal but it only contains air. I've moved to 0.6mm mig wire as well which blows though much less. I should have some more pictures by the end of the weekend.
 
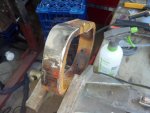
A small amount of progress, constructed most of the left hand head light surround. Unfortunately my vertical and upside TIG welding isn't very good so the rest will have to wait till I flip the car. The more I do the more I find that needs fixing, perhaps it is indeed to far gone and I should just strip it and send it to scrap and look for another body.

2013-07-21_09-48-22_357.jpg2013-07-21_09-48-36_191.jpg2013-07-21_11-56-57_752.jpg2013-08-04_12-54-24_278.jpg2013-08-04_12-54-36_115.jpg
 
I wouldn't give up just yet, it's just one of those things, the more you fix the more that needs fixing and if it's rusted it does need fixing.

You are at the hard, dirty, thankless end of the project so things will improve for you if you stay at it and once you can flip the car over you will make some progress that can't be achieved any other way.

Once the rust repairs are all done and you move onto primer, body filler and spray putty it's a different set of challenges (and dusty) but all well worth it in satisfaction and knowledge. Take hundreds of photographs and refer back to them regularly and you will see how far you really have come.

Well done.

Graham
 
With the welding ... Is that zinc coated metal your trying to weld in ?? Metal with any sort of coating is hopeless. Even the weld through spray gal makes welding to difficult on thin car panels.

Get some 0.6mm wire, turn the wire speed down as much as possible and only weld in "tacks".... If you try to run a bead of weld, you'll either a) distort the metal .... b) Distort the metal and burn nice big holes as well).

Strip both sides of the area to be welded back to shiny metal too.... any body deadeners, oil or paint on the back surfaces will also cause it to burn holes through. This is how easy it is for the pro's ....

Ferguson Coachbuilding

seeya,
Shane L.
 
It is zinc coated steel I have not been diligent enough in removing the coating from the rear. I have moved to 0.6mm wire and it does blow though a lot less, the tacking technique is what I have been doing. What is difficult in some situations is to clean the back of the car panel where the weld is to go, some sections are closed in so its difficult to get in there, impossible to get to with a dolly to knock it back out as well.

My latest theory is that this car is actually made out of sugar.
 
When I did mine, I bought cold rolled sheet from Spectrum (they may have been Jackson's Old Rubber company back then) in Dunheved (St Mary's). The panelbeater helping me advised specifically not to get zinc coated. I can't recall the thickness, but I'd probably have the receipt at home somewhere (It may have been 0.8mm??).

KB
 
0.8mm would definitely be easier to work with and bend into shape as the shapes are not what I'd call two dimensional. I'll still need the 1mm to the front pillar. I read in quite a bit on other forum and they all mentioned using zinc plated steel but now from working with it I can see why it would be better if it wasn't plated. I think I'll track some down this week before I start in earnest on the next piece.
 
I've done the ring around and I can get 0.75mm in CRS or if I want some thinner zincanneal I can go down to 0.9mm or 0.7mm, I currently have 1.1mm. I'm more then open to advice here.
 
Back in 2002 I bought :
SCR075 - 0.8mm CRS
then in 2003
SCR095 - 1.0mm CRS from Spectrum
ph 96235333

They each have another code next to them which is the same CA2SE - 0 x 0.80mm (or 1.0mm in the other case).
The business changed hands, so there is no guarantee they still stock it, but worth a call if you haven't already tried.

KB
 
After 59 Floride's advice sometime ago, I tried 1.0mm Zincanneal to make up rust sections and it is soft enough to bend and shape, but easy enough to mig weld to existing Renault 0.8mm sheet metal.I purchased a sheet (1.2 x 2.4 - they cut it in half for me) from a place in Dandenong for around $59. I used half to do all my rust repairs on my R8.I cannot recommend it more for what you are proposing. I have also used 0.6mm wire (with gas) as the 0.8mm gasless is terrible (at least compared to the quality using gas). I suppose 0.9mm would work (I was not aware it was available though). Don't give up, and don't set yourself a date to finish, as you will be disappointed many times over. Angelo
 
I've done the ring around and I can get 0.75mm in CRS or if I want some thinner zincanneal I can go down to 0.9mm or 0.7mm, I currently have 1.1mm. I'm more then open to advice here.


A couple of years ago I did rust repairs on my floride and I used 1.1 zincanneal and found it to be quite maleable and easy to work with basic equipment and welding wasn't an issue after I got the hang of spot welding and stitch welding. The only other advise I can give re welding (same advice given me) start out on low heat and slow wire feed and work your way up gradually until you find settings that suit your welding style.

Snap Angelo.
 
Last edited:
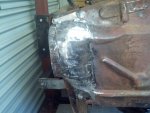
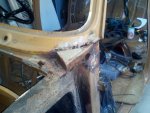
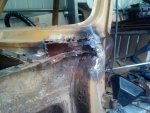
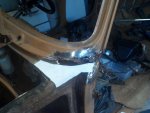
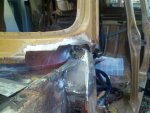
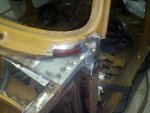
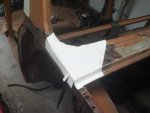
Fear not, I haven't given up I just prefer to wait until I've made some progress before posting the next lot of pictures. Unfortunately today I ran out of gas for the MIG/TIG so I may have to do some house work, or maybe just something else on the car. I have mostly finished the passenger side pillar where it meets the front guard. There was a reasonable amount of reconstructive surgery required, I still yet to make the triangle piece that goes on top. I actually resorted to the old school method today, oxy, hammer and a spray bottle of water and after a little time I got the curved panel the right shape so the curve is pretty even. I used the triangle piece I took off as a guide and even had to put the front lid back on to make sure it was in the right place.

2013-08-09_13-16-44_292.jpg2013-08-09_13-50-50_560.jpg2013-08-11_15-09-04_544.jpg2013-08-13_18-30-57_862.jpg2013-08-17_14-15-55_555.jpg
 
Last edited:
It's great to follow your progress Christian. :) I've always wondered what was under those panels too!
 
Top