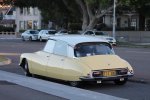
1972 Citroën D Special- "Celia"

Well- thanks all! Based on the feedback and Greenblood's excellent documentation, I've refurbished my reversing lights to refit tomorrow afternoon.

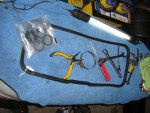
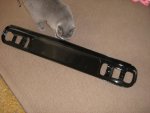
I had the brackets sandblasted along with the other stuff I got done while I was doing to boot rust repair so I etch primed and painted those up tonight. Here they are hanging in the garage waiting for the paint to dry :joker::
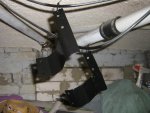
IMG_3597.jpg

And I disassembled the reverse lights, cleaned them up inside, polished the lenses using Meguiars Plast-X and a soft waffle pad on the buffing machine and reassembled ready to go back on the brackets:
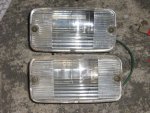
IMG_3599.jpg

And so tomorrow, I'll put the lights back onto the brackets and refit on the bar..! That'll be my works on the rear complete for the moment..!
 
Took her for a spin this afternoon to admire my reassembled rear end (refitted the reversing lights this afternoon)..

I'm happy with the result!

IMG_4481.jpg
 
Wow..

Long time no update!

Not to say there hasn't been progress.. There certainly has- but not of the magnitude that has warranted an update.

The reason?

With this as the backdrop:
IMG_4737.jpg

I got engaged..

IMG_4770.jpg

So that hugely exciting moment had absorbed the majority of the funds previously allocated to the DS. But- I'm pleased to report, that spending on Celia has resumed in earnest and, therefore, we should have pretty pictures to post shortly.

What's happened in the meantime Celia-wise:

1) Some serious panel alignment. The doors and rear guards now match properly with uniform panel lines.. What a time-consuming task! No pictures to post.. I suppose the next 'overall' shot of the car will show what's happened though.

2) New tyres.. Not XAS's (I know, I know) this time around, but Federal SS657's. They seem good, and at $140 a corner fitted, not a bad deal. Certainly much softer than the Hankooks that were fitted prior, giving much more of a magic carpet type ride. Not a bad saving of $1500.. And at this stage, I had multiple other aspects of the car I wanted to spend the cash on. Next change, I promise..!

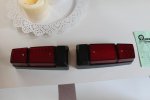
3) New rear light lenses:

IMG_8229.jpg

4) Rego renewal.. 42 continuous years of Celia roaming NSW roads!

5) Finally, after more than 12 months in the works.. I decided on, and ordered an interior!
I've opted for period-correct Targa Noir (Celia is now AC307 but was originally AC088; Targa Noir was an option for 72 with Blanc Meije) with matching door cards and new seat foam. Should top the cosmetic (and expensive) component of the 'renovation' off nicely. I'm really, really looking forward to the transformation!

6) Ordering of a replacement of the rear numberplate panel- the old one was badly rusted and not economically viable to repair. The new one will come with the seat covers and I'll have it painted 2K black to match the new front one I did a while back.

7) General service work- new oil, filter, coolant and gearbox oil. Next stop: LHM!

So- with Celia firmly selected as a wedding car for my side of the festivities, the search will have to go out for a matching bridal vehicle. Still, a year or so should give plenty of time and I really want to have Celia completed for the occasion.

With that dent in the finances, we wait for the parcels to arrive.. And the next phase of work to begin!

Sorry for the long time between drinks- As I'm sure you all appreciate- a busy 6 months!

Cheers,

Toby
 
The reason?

With this as the backdrop:
View attachment 55113

I got engaged..

View attachment 55114


Cheers,

Toby

Congratulations Toby, very romantic backdrop under which to pop the question :wink2:

Goes back to the beginning of of your D story, Celia was destined to be your wedding car.

renault12 said:
Her only condition? That Celia be used as our wedding car. I sense there may be some pressure coming up. At least I can always say she's never finished!
:nownow: :)

Cheers
Chris
 
I would have told my beloved that Hitler had stood there and then something like J'voudrai un Ricard or sanc!
bon chance! I have found fixing cars a healthy way to maintain a relationship by not being together for the period spent working on the car! Shocking....
Toby who and how much was the interior stuff? Pm if cost declaration too disturbing!
 
Last edited:
Toby who and how much was the interior stuff? Pm if cost declaration too disturbing!

Haha too true!

It's disturbing.. To my mind anyway- but then you do get a lot for your money and I'm imagining the transformation is going to be pretty huge.

I ordered it from Der Franzose- they had everything in stock, shipping was reasonable and by the reviews, the products are of good quality.

It cost me $2200ish shipped.

I'll let you know when it arrives!!
 
I would be keen to see the targa up close Toby in a photo as the product description image on their website really doesn't clarify the fabric used, a little bit of detail helps persuade people to buy things I always think!
I always get a laugh out of Franzose sending the birthday emails.
 
Congratulations Toby, very romantic backdrop under which to pop the question :wink2:

Goes back to the beginning of of your D story, Celia was destined to be your wedding car.

:nownow: :)

Cheers
Chris

Thanks Chris!

Hard to believe so much time has passed along my journey- and yours too!

I still have to make the trip up to Brisbane.. I'll make sure I do a good road trip once the seats are all finished and I can do it in comfort- I'll have to convince mnm to tag along in DecidedlySpecial!
 
I don't remember how your audio solutions ended up but this version of Celia should be in your road-going collection for sure:

 
Congrats! :headbang: As you already know there is a range of suitable vehicles in Sydney to accompany yours for wedding requirements. You could start with a streeeeeeeetched pink Hum V....

Then shoot yourself! :roflmao:
 
Well.. I had promised the next update would be my tackling of the interior..

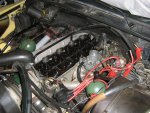
I had a couple of days off and decided I'd like to do some mechanical work on the car as a bit of relaxation therapy. I feel guilty, but in over 12 months of ownership, I hadn't found the time or motivation to check and adjust the valve clearances. Mainly because she's been a little moist tappet wise, and as my father always said, "a noisy valve is a happy valve"!

So- off with the valve cover and into the inspection. Obviously, I had to remove the front numberplate to access the hand crank socket to turn the motor over; yet another piece of ingenious design which I'm becoming used to!

Unfortunately, whomever had the valve cover off last time decided to use blue silicone sealant to refit.. So that took plenty of time to clean off as well as the valve adjustment. Otherwise, everything in there looked nice and clean with little gunk or carbon inside. Happy days. The exhaust valves were a little on the loose side (around .025mm rather than .020mm) but the inlet valves were spot on.

IMG_3606.jpg

I haven't been able to refit the valve cover yet as I'm waiting on a new gasket from Roger at Oleopneumatics.

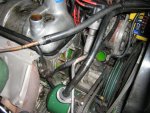
It was at this point, as always, I saw something else exciting which looked like it'd keep me busy for a few hours.. Ever since I've had her on the road, Celia's had a water leak, the source of which has been mysterious. It looked like it was from the water pump, but because of the severity of the leak, it was difficult to see where exactly it was leaking. Looked like the gasket from the water pump housing to the cylinder head may have been at fault.

So, I figured that while I had the valve cover off and the air filter housing etc., I may as well have a look at sorting this once and for all.

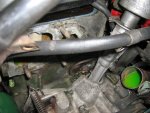
Well, once I had it all apart, I discovered where the leak originated.. Everywhere! The pump, hose from water pump to lower radiator hose, gasket from pump to housing AND the gasket from the housing to the head..!

So I pulled it all off, attacked the housing with a wire brush to clean all the corrosion off (looks like it's been leaking for quite some time!) and ordered a water pump, hose and all assorted gaskets.

IMG_3608.jpgIMG_3609.jpg

I cleaned everything as best I can.. I'm very, very reluctant to use any water though so I made do with some degreaser, brushes and rags. Things came up pretty well.

IMG_3610.jpg

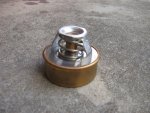
Dug out my new thermostat too- tested the old one which was cactus!

So now, I'm waiting for my goodies to arrive and cleaning things as I go. This should see the end of the cooling system rejuvenation which will be fantastic!

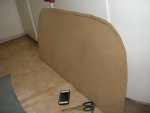
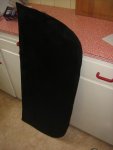
I decided to build myself a new parcel shelf- the standard one had been butchered somewhere over the last 40 years with a couple of speaker holes and some kind of horrendous carpet. I bought some 2.5mm MDF and cut it to size using the old one as a template:

IMG_3603.jpg

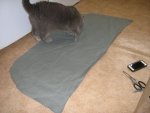
I then cut my black automotive vinyl to size- Abigail was hugely interested:
IMG_3602.jpg

And used contact adhesive to stick it all together. It was a huge improvement!

IMG_3604.jpg

Next update should have even more progress!
 

Attachments

  • IMG_3601.jpg
    IMG_3601.jpg
    95.7 KB · Views: 447
... Abigail was hugely interested:
View attachment 55669

Is your street number 96?

When you refit the pump, consider adding a little sealant to the studs on the pump mounting casting that end in the coolant. They are not all blind holes and you can have a slow weep if they are disturbed and not sealed. The same happens on the EFI where the 4 setscrews hold the air intake tubes to the side of the head.
 
When you refit the pump, consider adding a little sealant to the studs on the pump mounting casting that end in the coolant. They are not all blind holes and you can have a slow weep if they are disturbed and not sealed. The same happens on the EFI where the 4 setscrews hold the air intake tubes to the side of the head.

Thanks David. I was actually looking at that this afternoon and wondering whether that was good practice.. Sounds like it is!

Last thing I want is it to leak when I'm done!

No- not 96, although definitely should be!
 
A few really solid days work. I've been too busy 'spinning spanners' to write a proper update.. But, as I've run out of parts to refit, now's as good a time as ever.

I've fitted my new water pump with gasket, cleaned up the water pump housing and refitted that with a new gasket too. I did some serious, heavy duty cleaning while I had everything off; the leaking coolant over what looks like the last few years made quite the mess. Things look much better now, although this type of clean always results in significant further tasks as the gunk reveals the true condition of underlying parts... Read on if you dare!

The first problem was the manifold heating coolant hose (the one running from under the carburettor to the water pump housing) which was leaking quite badly from both ends. I'm becoming genuinely surprised that Celia managed to contain any water at all given my recent discoveries! Fortunate for me, I managed to track down an unused NOS hose which looked fantastic sitting on my nice clean water pump housing.

IMG_3611.jpg

It was particularly bad under the manifold.. The hose was all gooey and badly swollen; I can only surmise this occurred during the period of quite serious fuel leakage from the carburettor. Glad I rebuilt it those few months ago.. All appears fuel tight now and will remain so for many years to come thanks to Richo's snazzy fuel inlet.

It was at this point that, after refitting the water pump and trying to fit my new bottom hose, I realised I had no chance with the radiator still fitted and the bottom hose connected at the radiator end. So.. I removed the radiator, which revealed..

LEAKS!!!

You may remember; I had my radiator repaired when I first bought Celia. Well- that fixed the core.. The bottom tank now has a leak from under the bracket. I took it to a radiator place that allegedly specialises in older stuff- they were reluctant to repair it and advised I look at getting a new one.

I've since spoken to Denton at European Autocare and he is of the opinion they can be quite easily repaired from the inside after sandblasting.. I'm of two minds. Anyone got any experience? I'm really leaning towards the new/recored option from the major European suppliers. Anyone got a good radiator place in Sydney (or have a radiator to sell)? I want to spend the cash and have it done properly.

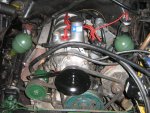
So, I repainted the alternator and HP pump braces and refitted, reinstalled a new rocker cover gasket and plug well seals after cleaning out the cover- the old one was so old and brittle it just shattered when I removed it!

IMG_3612.jpg

I then replaced the grommets in the radiator and LHM tank supports for the pump inlet hose and repainted the radiator support and refitted all I could while I attempt to find a solution to the radiator issue.

IMG_3613.jpg

And then I decided it was about time to give the gearbox the attention it deserves. It's about the only major component of fluid replacement that hasn't received attention since I've owned the car. After extensive searching on AF (Thanks AlanS :cheers:), I bought a couple of litres of Castrol VMX80 and a tube of Nulon G70 and set about changing the oil.
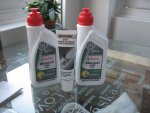
IMG_3616.jpg

All went without a hitch and, after replacing the washers on the drain plug and level checking plug, Celia's good to go once I have this radiator issue sorted.

So... My new rear numberplate panel I ordered has arrived, along with the new door cards. The panel is being painted at the moment and should be ready to fit next week- I'll make sure I document that process as it's all very exciting.. That'll complete my rear end repairs I started in November last year and should look pretty flash with the new taillight lenses and be particularly satisfying now that I know there's no rust left lurking!

Until next week- it's a busy few days of work so no time to get into the garage!

Toby
 
Hi Toby,

Lots of good work there!

Under the inlet manifold there is a small drain fitted which allows fuel to drain away if the carburettor floods. There should be a length of small diameter tubing fitted to the nipple to carry the fuel below the sump. If the tubing is missing fuel drops directly on the rubber coolant hose and the result is the sticky mess you discovered.

Make sure the tube is fitted! I suspect the lack of tube would also contribute to a ragged idle.

For radiator repairs Star Radiators in Brookvale still do old style radiator repairs and, in my experience, are not expensive.

Automobile repairs Brookvale - Star Radiators is trusted for our service and quality
 
Last edited:
Under the inlet manifold where is a small drain fitted which allows fuel to drain away if the carburettor floods. There should be a length of small diameter tubing fitted to the nipple to carry the fuel below the sump. If the tubing is missing fuel drops directly on the rubber coolant hose and the result is the sticky mess you discovered.

That, Michael, is why I started this thread and it's what AF is all about.

Thanks so much.. I'll go straight out and do that! And here I was thinking of devising some kind of protection for the heater pipe!


Thanks again,

Toby
 
Hi Toby,
You could try Alexandria Radiator Service, 522 Botany Rd, Alexandria. 9699 3725. I have always found them very helpful and willing to tackle anything others put in the "too hard basket".
Paul.
 
Great work there Toby :wink2:

You should really sort out your spark plug/coil leads though. . .

55977d1399605880-1972-citro%EBn-d-special-celia-img_3613.jpg


56028d1399699753-ds-appreciation-thread-grun-metalic-clean.jpg


Cheers
Chris
 
Hi Toby,
You could try Alexandria Radiator Service, 522 Botany Rd, Alexandria. 9699 3725.
Paul.

Paul,

They were the ones who repaired my radiator initially.. And it's now leaking again a little over 12 months (The warranty period :rolleyes:) later. So I've been referred to a guy in Marrickville who does classic car stuff and seems ok. We'll see.. Recore and tank repair coming right up!

And Chris.. Don't fret- They're only there so I can cover the holes.. They're being replaced when my next order of bits arrive. These ones are so rigid they're impossible to bend out of the (incorrectly) routed path they're on now.. I think they'd actually snap if I was too vigourous!

I was away in Melbourne all of last week with work, so no actual work has been undertaken on the car, just stuff being done by others. A lovely example of which.. My new rear numberplate panel!

IMG_3617.jpg

With the obligatory Abigail photo.. It's impossible to keep her away! This should finish up the rear end nicely.

Purists- I apologise, it's actually one of Franzose's fiberglass replacements. Why? Three reasons- one, they didn't have the steel in stock, and two, I wanted to suss out the quality of the fiberglass panels before contemplating any more.. The third? No more rust! The brackets are stainless steel, which is nice to know, and, by mine and the painters eye, the quality of the fiberglass is excellent.

Puts yet more weight behind my plan of fiberglass front wings for normal use and storage of the steel ones for eventual acid dipping and serious repair.. We'll see.

And a seriously frustrating letter arrived yesterday.. Customs have seized my seat covers pending payment of duty.. 692 Euro, on the day of my payment.. $1033. Damn. So, looks like it'll be close on $300 to actually have them released as well. I've contacted a you-beaut, cheap and expeditious broker today which guarantees 24 hour turnaround.. Fingers crossed. I was livid..! Still- my own fault, I should have verified the value would be under $1000 or face the peril! Irony is that the first package of my order (they split it for me) came through without a drama over two weeks ago, and was the more expensive of the two! Live and learn.

Job list as of today:

-Refit rear numberplate panel
-Have a chat with the customs broker to arrange clearance of my seat covers
-Wait for the radiator guy to call!
-Fit new door cards that arrived as part of my first order.
I'll keep you posted!

Toby
 
Top