GreenBlood’s D(very)Special Rejuvenation 2009>

Lamoor,
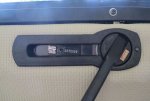
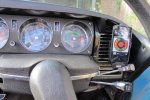
Since that post I have been in contact with Greg Fienburg who is happy to be named as the one who has brought these stalks back to life. He needs switches that are fully functional, he removes the stalks and has them chromed, replaces the ends with new (not painted) re-assembles and bench tests. The process can take a while to complete a full set with parts sourced from OS, but for me with the car off the road it was well worth the wait.

Contact Greg on doublechevron(at)bigpond(dot)com

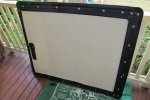
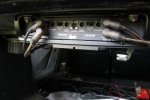
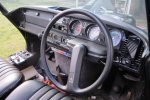
BTW, the dash I'm using is the one I bought from you, it has since been stripped and powdercoated in a finish very close to original. :)

Cheers
Chris

Surely that there would be my email address :roflmao: :clown:
 
Terrific work Chris !
What an enjoyable thread to follow.
best wishes

Ramon
 
Today after a long search and an even longer wait, a parcel arrived with 7 metres of vinyl to re-line the roof, C-Pillars and rear window hoop (a little extra to line the sliding sunroof).

<Snipped>

Cheers
Chris

Hi Chris,
Can you share with us all where you obtained the material from?
I have a '61 DS19 which needs these items recovering and you appear to have found the source!

Regards
Mick
 
Hi Chris,
Can you share with us all where you obtained the material from?
I have a '61 DS19 which needs these items recovering and you appear to have found the source!

Regards
Mick

Hi Mick,

I'll try to type this with a Yorkshire accent :)

The vinyl I'm using was sourced out of the USA, but you may find a local supplier - it is a reproduction of a VW vinyl used in the '60's

Go Westy
1119 Los Olivos Avenue, Los Osos, CA 93402

Product code: GVW-Basketweave Vinyl - Colour: Off White
http://www.gowesty.com/ec_view_details.php?id=2794&category_id=&category_parent_id=

The Off White in reality is a beige(y) light grey, it looks dark when you see it in the flesh but in situation it is remarkably close in colour to original.

Really good people to deal with, very prompt and for my money quite inexpensive. 5 metres delivered to my door for $210.00

attachment.php


The other option you should explore is via Citroen Classics in Middlesex UK
Darrin and Kris Brownhill, nice Citroen people who I believe have a product that also looks close to original.
http://www.citroenclassics.co.uk/

The only drama I have with the vinyl I have is that the weave is at 90 degrees, where the original lining was 45 degrees, the width of the roll won't accommodate a 45 degree twist. I can live with that as nothing else I'd seen came close. The VW stuff is very close in colour, depth of texture and the size of the weave.

I'm not familiar with the lining on a '61 DS19, you may need samples before committing, I'd be happy to send an offcut if needed?

I would love to hear more about your car, very rare indeed in Australia and no doubt the UK - if you need inspiration and haven't already seen this site be prepared to spend a good few hours drooling - this is a superb restoration of a '58 DS19
http://www.hjulius.com/Hjulius/Restoration.html

Cheers
Chris
 
The dash chrome kit is available through Greg Fienberg, $80.00 plus postage doublechevon(at)bigpond(dot)com [no relation to our very own Double Chevron]

Hi Chris, I'd love to get one of these kits for my car (much in need) - can I just check that email address? is it doublechevon or doublechevron (with an r)? thanks ali
 
Hi Chris, I'd love to get one of these kits for my car (much in need) - can I just check that email address? is it doublechevon or doublechevron (with an r)? thanks ali

oops, yes that should read chevron :)

Cheers
Chris
 
thanks Chris ;)
I've been getting a few things done lately (dashboard is back in) and it's made me realise how crap the dash actually looks. the chrome kit should smarten things up a bit
 
Long time between drinks

It's been a while with little to update here.

Finally managed to scrape up the readies to purchase a Retrosound Model 2 headunit. Now fitted to the dash, pretty well ready to re-fit into the car.

attachment.php


Over the last month I've been working to get the sunroof re-lined ready to refit to the roof (once painted of course).

This has been a little epic, my advice if you have the money get someone else to do it. Fussy fiddly frustrating job.

First task is to separate the inner lining from the outer, everything is pop riveted together. . .

attachment.php


This is the old lining released from the outer, a velour lining that served for 10 years or so but typical of velour the inner foam has turned to dust, the outer is threadbare.

attachment.php


The bows, rivets drilled out and released

attachment.php


attachment.php


The old lining freed from the frame.

attachment.php


Relined with new foam.

attachment.php


The replacement lining, vinyl supplied by myself and fabricated using the old lining as a template by Lee Brothers here in Brisbane. Took a while but Warren has done a masterful job, also supplied me with foam and glue for the main part of the roof lining.

attachment.php


attachment.php


attachment.php


Fitting new lining, starts at the front and work back.

attachment.php


After much cursing, re-assembled the inner and outer and re-fitted to the frame.

attachment.php


Refitted the handle trim and voila!

attachment.php


attachment.php


Probably not much use to many of you but anyone with a Webasto or Britax sunroof may find this useful?

A couple of useful links, most parts are still available out of the UK.

BRG - Britax sunroof rebuild.

Page 2

Next? Get the roof painted and re-fit. . .

Cheers
Chris
 

Attachments

  • A1 Retrosound.jpg
    A1 Retrosound.jpg
    72.1 KB · Views: 2,235
  • 1Lining removal.jpg
    1Lining removal.jpg
    64.6 KB · Views: 1,702
  • 2Lining removed.jpg
    2Lining removed.jpg
    84.3 KB · Views: 1,700
  • 3Handle.jpg
    3Handle.jpg
    96.7 KB · Views: 378
  • 4bows.jpg
    4bows.jpg
    72.4 KB · Views: 1,767
  • 5bow brace removed.jpg
    5bow brace removed.jpg
    67.1 KB · Views: 1,681
  • 6Lining released.jpg
    6Lining released.jpg
    66.8 KB · Views: 1,695
  • 7New foam.jpg
    7New foam.jpg
    98.1 KB · Views: 1,682
  • 8New Lining.jpg
    8New Lining.jpg
    57.2 KB · Views: 1,698
  • 9New lining inside.jpg
    9New lining inside.jpg
    86 KB · Views: 1,620
  • 10inside detail.jpg
    10inside detail.jpg
    84 KB · Views: 1,673
  • 11re assembly handle.jpg
    11re assembly handle.jpg
    95.7 KB · Views: 1,637
  • 12fitted to frame.jpg
    12fitted to frame.jpg
    94.2 KB · Views: 2,383
  • 13Handle trim refitted.jpg
    13Handle trim refitted.jpg
    85.5 KB · Views: 1,681
  • Britax Part Number.jpg
    Britax Part Number.jpg
    60.1 KB · Views: 2,016
Looks insane Chris... all your work is always so neat!

Matthew :)
 
Looks insane Chris... all your work is always so neat!

Matthew :)

Thanks Matthew,
I can tell you it nearly drove me insane :crazy:

It's like a Rubik cube, pulling it apart is straightforward - putting it back together has to be done in a sequence and I confess to moments of. . . well let's just say I might have let go with a little foul language and was not pleasant company for a while there :clown:

Since the photos I have made a couple of small adjustments and removed a couple of puckers ( I said puckers :nownow: :clown: ).

Good to see you back, the 'DS Appreciation' thread could use an injection of mnm, how many pics of Ds with ragtops have you got stashed on your machine?

Cheers
Chris
 
Thanks Matthew,
I can tell you it nearly drove me insane :crazy:

It's like a Rubik cube, pulling it apart is straightforward - putting it back together has to be done in a sequence and I confess to moments of. . . well let's just say I might have let go with a little foul language and was not pleasant company for a while there :clown:

Since the photos I have made a couple of small adjustments and removed a couple of puckers ( I said puckers :nownow: :clown: ).

Good to see you back, the 'DS Appreciation' thread could use an injection of mnm, how many pics of Ds with ragtops have you got stashed on your machine?


Cheers
Chris


Hmmmmm... I could come out of retirement on the DS Appreciation thread... just for you. We'll see... I would have liked to have been a fly on the wall to hear your expletives.. :D

Matthew :)
 
Now I know why you want me to fit the new interior blind to the sunroof here and use it :roflmao: It sounds like a "fun" task :clown: Luckily it doesn't need the interior part replaced if used :)
 
Next? Get the roof painted and re-fit. . .

Cheers
Chris

Very nice.

If you need another pair of hand for the re-fit the roof, let me know. Mrs is overseas until end of June :banana:

After that is ok too.
 
Very nice.

If you need another pair of hand for the re-fit the roof, let me know. Mrs is overseas until end of June :banana:

After that is ok too.

I'll be sure to sing out when I'm ready - how's this weather for painting haha ha ha

Cheers
Chris
 
Next? Get the roof painted and re-fit. . .

If you need a roof to practice on there is always my Black/Grey BX?

I cannot wait to poke around this car at an FCD in the future, your attention to detail is fantastic!
Always looking forward to new stories and pictures!
 
1/08/2013 Dash refit

It's been a while so a bit of an update - today the dash has been re-installed, the delay has been with getting a few extras and making sure everything fits and works before assembly.

I've had the head unit for a while but I wanted to run it via an external amp, Ive gone with a Response class AB 4 x 100WRMS from Jaycar. Finding a place to mount was a bit of a challenge but it found a neat home under the rear parcel shelf. This of course meant running power/trip/RCAs and front speaker wiring to the front of the car and up into the dash.

attachment.php


The rear speakers are 6 x 9s, front 4" also from Jaycar

attachment.php


attachment.php


attachment.php


The head unit wiring run, all the wiring/switches tested and tagged.

attachment.php


attachment.php


attachment.php


With the headunit providing handfree phone calls I wanted a decent phone mount, this is a Brodit, it has a direct USB connection to the headunit for both in car charging and playing music stored on the phone. It also has a windscreen mounted antenna to boost phone signal strength.

attachment.php


The other little modification has been the addition of a choke warning light. I ordered in a new choke cable from Citroworld and when it arrived found it had a built in switch.

Wired switched positive to one side of the light, the other side runs to the switch and after some head scratching I discovered the cable itself grounds once conected to the carby.

attachment.php


attachment.php


attachment.php


With only a couple of millimeters of choke the light will illuminate.

attachment.php


All back together, quite a transformation :)

attachment.php


attachment.php


A good line of sight to the phone when used as navigation etc.

attachment.php


. . . and a little tiz :clown:

attachment.php


I need to fit up the aircon evaporator and vents, and get that working at optimum, but pretty happy with the look and the added creature comforts that should make driving as daily a little safer.

Cheers
Chris
 

Attachments

  • 6 Amp front panel.jpg
    6 Amp front panel.jpg
    71 KB · Views: 4,729
  • 4 Rearspeaker install.jpg
    4 Rearspeaker install.jpg
    73.8 KB · Views: 1,462
  • 5 Rearspeaker install.jpg
    5 Rearspeaker install.jpg
    86.9 KB · Views: 4,979
  • 5a Rear speaker grill.jpg
    5a Rear speaker grill.jpg
    89 KB · Views: 4,075
  • 10 Tagged wiring.jpg
    10 Tagged wiring.jpg
    69.4 KB · Views: 1,434
  • 11 Tagged wiring.jpg
    11 Tagged wiring.jpg
    71.6 KB · Views: 1,354
  • 12 Trial fit Lights Wipers indicators.jpg
    12 Trial fit Lights Wipers indicators.jpg
    73.8 KB · Views: 1,592
  • 1 iPhone mount charger.jpg
    1 iPhone mount charger.jpg
    95.4 KB · Views: 3,925
  • 1Choke switch.jpg
    1Choke switch.jpg
    58.8 KB · Views: 1,353
  • 2Choke light wiring.jpg
    2Choke light wiring.jpg
    62.4 KB · Views: 1,345
  • 3Choke light.jpg
    3Choke light.jpg
    84.8 KB · Views: 1,319
  • 4Choke light lit.jpg
    4Choke light lit.jpg
    64.9 KB · Views: 1,375
  • 13Dash installed.jpg
    13Dash installed.jpg
    71.8 KB · Views: 2,485
  • 14Dash with phone1.jpg
    14Dash with phone1.jpg
    98 KB · Views: 1,269
  • 15Dash phone view.jpg
    15Dash phone view.jpg
    71.6 KB · Views: 3,863
  • 16Key.jpg
    16Key.jpg
    72.7 KB · Views: 1,299
Looking great AND with practical creature comforts - great job going on here Chris. Looking forward to seeing it back on the road one day.
 
There are plenty of GPS speedo apps for the iPhone. That will be a good place to watch those to.
 
Top