The "Blue Danube"

Faulty from start? I can't imagine that. :D It has a "QC checked by # 1" sticker on it..... :eek: anyway, let's see whether it helps my welds.....
 
Steering Wheel tape "rewinding"?

Question:

Has anyone ever had a go at trying to re-tape the steering wheel? Either with a new tape (if it is actually available anywhere) or reusing the existing one?

If yes, how was it done? Especially, what glue was used, how to ensure the start and finish won't come apart afterwards, etc.

Mine has got a few gaps at the top of the wheel, so you may have some tips how to close them up...

Cheers Sven

Flick Matthew a PM, he's had success re-taping

http://www.aussiefrogs.com/forum/ci...heel-can-i-change-first-type.html#post1150521

Cheers
Chris
 
How to rejuvinate the Stoneguard paint..?

And another question while I am at it...

Has anyone had any success rejuvenating the original "Stoneguard" paint in the wheel arches or floors, etc..? Mine looks still pretty good, but is grey, dirty, and hence not pretty, shiny and new. Yes, I could grind it all off and die of rubber poisoning :D and crap all over my face for days / weeks on end, but why touch it if it is still in good condition and original?

Any tricks anyone? Clean with (wire) brush and degreaser/truck wash and then paint over the top maybe?

Ideas welcome!

Sven
 
And another question while I am at it...

Has anyone had any success rejuvenating the original "Stoneguard" paint in the wheel arches or floors, etc..?
Sven

Hi Sven,

A high pressure washer brings it up really nicely.... I think the dust gets impregnated in the coating and makes it look dirty...

Cheers,

Mark...:)
 
If you are still waiting on Franzose, I was in a similar boat, ordered 1/6/15, and about two weeks ago after continued emails, they finally refunded the money to my paypal account as It was an insured shipment.
They didn't actually reply, just refunded. I have ordered from them a few times and it always took one month give or take a week up until now. The website implied the package never even left Germany.

I wrapped my steering wheel, and it is quite easy with an assistant. Darrin the UK can sell you a wheel or it.

Nice job with the restoration by the way!
 
Thanks Bryce,

I might muck around a bit with the existing steering wheel band. How is it attached at the begining and end? Is it just glued on or else? Or stuck under the chrome cover?

Re my German mates at Der Franzose: after a few ranting and raving emails, they have now finally admited that the parcel went sea freight (apparently to clear a parcel backlog after a mail strike in Germany), rather than blaming the Aussie Post. But they have gone onto the charme offensive and are resending the parts is ordered. Hopefully they arrive via airfreight ( as my second parcel did just arrive) so I can start putting new bits onto the car.

Sven
 
Thanks Bryce,

I might muck around a bit with the existing steering wheel band. How is it attached at the begining and end? Is it just glued on or else? Or stuck under the chrome cover?


Sven

There are small holes where the end of the tape tucks into the wheel. You need to cut it so it fits into the hole. I used glue and also covered the first 2 cm with black tape as it was still coming out. You hardly see the black tape at all.

For more:
Wrapping the Citroen DS steering wheel « Classic Jalopy
Update: DS Steering wheel wrap and rear trim « Classic Jalopy
 
Hi Sven

here is the thread I started about the steering wheel tape if it helps. The tape feeds into two small holes either side of the bracket. I used double sided tape at various points of the wheel to keep it in place... and secured it with masking tape as I wound it on... if you lose your grip it unwinds allllll the way back to the beginning.... don't ask how I know. :rolleyes:

http://www.aussiefrogs.com/forum/citro%EBn-forum/92334-ds-steering-wheel-tape.html

Z1HmTIb.png


Matthew :)
 
My tape seems in fine condition, just has a few gaps... Do you think it is possible to unwind the old one and rewind it without gaps?
 
My tape seems in fine condition, just has a few gaps... Do you think it is possible to unwind the old one and rewind it without gaps?

Yes it should be possible. My old tape came off easily.. it was glued on so just be careful you don't break it as you unwind it... the glue wasn't very strong though. My old tape was broken at both ends so unfortunately I couldn't rewind it. The tape will unwind but keep its shape...having been wrapped in place for 40+ years... so you will be closing up the gaps you have by re-placing the tape back in its correct position, not actually wrapping it back around if you know what I mean.

Matthew :)
 
The last two week's progress...

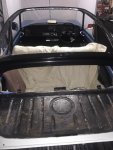
Progress has been good over the past two weekends. Have been putting Chris' welder to good use and have finished the complete roof rails, the boot panels and prepped everything ready for painting the whole boot / back end of the car.

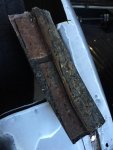
Quite proud of my work actually... especially the dodgy repair on the left backend wheel arch has turned out really well. Remember what the price looked like I cut out?

045.jpg

someone bodged the holes with plate underneath, riveted them on and just added lots of under body schutz... not pretty at all. After a fair bit of rooting around with the hammer, vice and welder, the fashioned piece was in place.

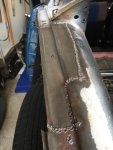
My welds..? Still not pretty...:cry:. I think the gas ran out again, so "bird droppings" it had to be...


011 (2).jpg

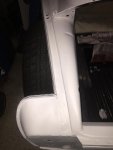
But after a few hours on the angle grinder (sorry neighbours about the noise! :blackeye::nownow: ) it looked fantastic! The thing that took me three attempts was the plug welding of the seal retainer piece... beats me: I couldn't get the welds to penetrate properly. But after playing with the welder settings it finally worked! Once painted it'll be hard to spot where the repair section is.
View attachment 74368

Now I only need to put back the boot seal retainer (on the way / both sides) and it will be like new. :D

041 (2).jpg 042 (2).jpg

And Mark, you were right: After smothering the wheel arches' bitumen in truck wash and giving it a good blast with the steam cleaner... they came out like new! Nice and black. Didn't think that would be that easy to rejuvenate the stuff... :)

Before:

View attachment 74370

After... :D

View attachment 74369

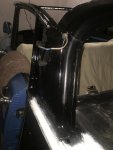
The second job I wanted to finish were the roof rails. Done the right hand side last weekend. Again, cutting out the rusty sections, make up panel sections, weld them in, grind them off (hate grinding already... dirty, noisy, boring, worse than sanding filler...:mad:), degrease, metal prep, POR 15 x 2 - bingo: Nice and black and shiny. This weekend I did the left hand side - same deal with eight patches. Looks great! And sets the standard for the rest...

View attachment 74371

View attachment 74372

View attachment 74374
043 (2).jpg
044 (2).jpg

Also been umming and ahhing what to do with cracked bitumen drumming layer on the parcel shelf. Decided to just give it a bit of a clean and leave it in place. It gets covered anyway, but also retain the originality of the car. Will just paint the surrounds and that's that.

View attachment 74373

And then I had my first attempt at spraying 2K high build primer... :nownow: I have been considering to buy a compressor and spray gun for yonks... has always been one of those items I wanted, but always worked around it with spray cans, or mates or outsourcing.

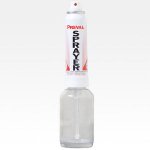
Again, I thought I give those tiny PREVAL sprayers a go...


Preval.jpg

They fit about 175ml of paint and are supposed to be OK for smaller jobs... well, they don't work on high build primer! :D:D. The poor thing was spluttering and struggling to put any paint through that nozzle. I will have another play with them on the black top coat - might work Ok on "normal" paint, not high build..

Anyway, sort of got there in the end: Used up one spray can, plus a bit of "heathen" brush work - DOH! :disappr:

Voila - one primed backend. Ready for sanding and top coat.

View attachment 74375

But I think I am only delaying the inevitable... a compressor and gun is next on the list.

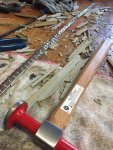
To finish off the day, I removed the steel crimping "snake" that is inside the rubber rail cover. As mentioned before, my rubber ain't rubbery any more - it is rock hard, so I had to use brute force and smash it to pieces... good fun! :D

View attachment 74376
039 (2).jpg

Rewarding... :):)

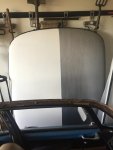
And one more: As the paint on my roof is pretty knackered anyway and needs repainting, I resorted to painting it myself. I still cannot decide whether the roof should be painted white (Blanc Cygne) or Silver (Gris Nacre).

So I painted half the roof white and half silver... using the sloppy method of a paint brush, matt ceiling white and silver metallic that I had left over (don't ask where in the house the silver has been used :D).

016 (2).jpg

Once the roof rails are 100% dry (i.e. next weekend) I will put it on and take photos from both sides to see what moves me most. To date the score is 4:0 from the neighbours/wife/kids in favour of silver. But not convinced yet, not convinced... :confused:.

576.JPG

Too common, or just pure 70s?

564.jpg

Silver roof... maybe not bad either...

572.jpg

Or complete make over: Bleu d'Orient with silver roof and a bit of "bling" (non Pallas that would be though!) Needs to remain a D Super after all...

It will come to me... one day... :wink2:

Til next week.

Sven
 
Bugger, some attachments again didn't come through - what am I doing wrong? They are there when I edit the post... but not after saving? I also always attaché the smaller thumbnails - how do I upload the full size photos?

Sven
 
Progress has been good over the past two weekends. Have been putting Chris' welder to good use and have finished the complete roof rails, the boot panels and prepped everything ready for painting the whole boot / back end of the car.

Quite proud of my work actually... especially the dodgy repair on the left backend wheel arch has turned out really well. Remember what the price looked like I cut out?

View attachment 74378

someone bodged the holes with plate underneath, riveted them on and just added lots of under body schutz... not pretty at all. After a fair bit of rooting around with the hammer, vice and welder, the fashioned piece was in place.

My welds..? Still not pretty...:cry:. I think the gas ran out again, so "bird droppings" it had to be...


View attachment 74387

But after a few hours on the angle grinder (sorry neighbours about the noise! :blackeye::nownow: ) it looked fantastic! The thing that took me three attempts was the plug welding of the seal retainer piece... beats me: I couldn't get the welds to penetrate properly. But after playing with the welder settings it finally worked! Once painted it'll be hard to spot where the repair section is.
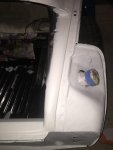
View attachment 74368

Now I only need to put back the boot seal retainer (on the way / both sides) and it will be like new. :D

View attachment 74383 View attachment 74384

And Mark, you were right: After smothering the wheel arches' bitumen in truck wash and giving it a good blast with the steam cleaner... they came out like new! Nice and black. Didn't think that would be that easy to rejuvenate the stuff... :)

Before:

View attachment 74370

After... :D

View attachment 74369

The second job I wanted to finish were the roof rails. Done the right hand side last weekend. Again, cutting out the rusty sections, make up panel sections, weld them in, grind them off (hate grinding already... dirty, noisy, boring, worse than sanding filler...:mad:), degrease, metal prep, POR 15 x 2 - bingo: Nice and black and shiny. This weekend I did the left hand side - same deal with eight patches. Looks great! And sets the standard for the rest...

View attachment 74371

View attachment 74372

View attachment 74374
View attachment 74385
View attachment 74386

Also been umming and ahhing what to do with cracked bitumen drumming layer on the parcel shelf. Decided to just give it a bit of a clean and leave it in place. It gets covered anyway, but also retain the originality of the car. Will just paint the surrounds and that's that.

View attachment 74373

And then I had my first attempt at spraying 2K high build primer... :nownow: I have been considering to buy a compressor and spray gun for yonks... has always been one of those items I wanted, but always worked around it with spray cans, or mates or outsourcing.

Again, I thought I give those tiny PREVAL sprayers a go...


View attachment 74389

They fit about 175ml of paint and are supposed to be OK for smaller jobs... well, they don't work on high build primer! :D:D. The poor thing was spluttering and struggling to put any paint through that nozzle. I will have another play with them on the black top coat - might work Ok on "normal" paint, not high build..

Anyway, sort of got there in the end: Used up one spray can, plus a bit of "heathen" brush work - DOH! :disappr:

Voila - one primed backend. Ready for sanding and top coat.

View attachment 74375

But I think I am only delaying the inevitable... a compressor and gun is next on the list.

To finish off the day, I removed the steel crimping "snake" that is inside the rubber rail cover. As mentioned before, my rubber ain't rubbery any more - it is rock hard, so I had to use brute force and smash it to pieces... good fun! :D

View attachment 74376
View attachment 74377

Rewarding... :):)

And one more: As the paint on my roof is pretty knackered anyway and needs repainting, I resorted to painting it myself. I still cannot decide whether the roof should be painted white (Blanc Cygne) or Silver (Gris Nacre).

So I painted half the roof white and half silver... using the sloppy method of a paint brush, matt ceiling white and silver metallic that I had left over (don't ask where in the house the silver has been used :D).

View attachment 74390

Once the roof rails are 100% dry (i.e. next weekend) I will put it on and take photos from both sides to see what moves me most. To date the score is 4:0 from the neighbours/wife/kids in favour of silver. But not convinced yet, not convinced... :confused:.

View attachment 74393

Too common, or just pure 70s?

View attachment 74391

Silver roof... maybe not bad either...

View attachment 74392

Or complete make over: Bleu d'Orient with silver roof and a bit of "bling" (non Pallas that would be though!) Needs to remain a D Super after all...

It will come to me... one day... :wink2:

Til next week.

Sven

Even weirder... when I reply to myself with quote the photos are there again... let's see what happens when I press the post button - do they disappear again or remain in place..!?
 
Hi Sven,

For your high build primer you will need a compressor, even a small unit will do for spot priming. You'll need a gun with at least a 1.8 tip, I would recommend a HVLP gravity feed gun, can be had for under $50.00 and for this type of work is adequate. Most of what is applied will be sanded off - of course not so with your top coats, but for chassis etc. this would still do the job.

Again, to gain experience you are welcome to borrow my second compressor, I rarely use it these days. It will give you a little experience before you invest in a serious unit.

Not sure what is happening to the missing attachments? Are they maybe too big in file size? You seem to have success with some images and not others. . . Showing your images in full size, if you click on the thumbnail, then click on the opened image it will open in a new tab - go to the address bar and copy the url - paste this into your post and add
after. You can 'preview' your post before committing and edit as necessary - you can of course edit your reply at any stage after committing.

74387d1442145097-blue-danube-011-2-.jpg


74383d1442144863-blue-danube-041-2-.jpg


These images although only 84k are over 1000 x 1300 - for web 600 x 800 at 150dpi is more than enough.

Looking good :approve:

Cheers
Chris
 
Hi Sven,
I hope you have eventually had success with Der Franzose. They are very frustrating people. Many people have had good service, but I have heard of many who have also been messed around.

They send you a bill, and you pay it and then they come back with another, to pay their bank fees. And they sent me the wrong pressure plate for a R10 and the wrong thrust bearing, and then wanted me to pay freight again when they sent the right parts out to WA. Just bad customer service, and it held my customers car back 6 weeks.

I like your Citroen project, brings back great memories of my Dad's passion for them, he had 4.
 
Ray,
all good I think now with Der Franzose. After a decent tiff they have seen the light (being able to switch into German seemed to finally make them move...) and are resending my first order and have paid for the freight on a third one... Should be here within the next two weeks.
After that? Not sure whether I stay with them or use the Dutch crowd more. We will see...

Sven
 
I have had good experiences with Franzose, prompt communication and no secondary bank charges, my only gripe is the quality of some of the rubber pieces thry source and perhaps the translations of parts in their catalogues/site! I think they need to employ me to overhaul that! Springlement in the upper front rear beautification.
 
Top