The "Blue Danube"

The Der Franzose saga continues...

Remember the sea freight excuse that I got why my first order still has not arrived after two months? Well, the latest is that it is now lost... and after another rant, they have now decided to not even answer my emails :nownow:.

As I believed their first, "sea freight" excuse, I placed a second order on the 19th, at the same time I placed one with Citroworld in Holland: Guess what?! The Dutch order arrived today! :eek: Very impressive! Thank you Ronald.

The Germans are still in the trenches, not answering and haven't even dispatched my second order! :cry: They are probably that p$&@$ed off with me that they are sitting on it, waiting for me to whinge some more. :D

Let the saga continue...
 
Sven,
My MIG is yours for a loan if you would like to experiment, I'm pretty well finished with rust repairs for a good time I hope.

Spraying 2K is a hazardous pastime, get the biggest compressor you can run from home. Again, I have an airflow mask at your disposal, it draws a fair wack of air and should ideally be run through a filter. Running your gun and the mask is a big ask from a home compressor. Painting single panels at a time works to get you to primer stage. I see gumtree now have a few options in Brisbane for booth hire and not too expensive if you are organised - these should have plenty of air at your disposal. Likewise with a gun for final coats, I have a SATA 3000 runs at 2bar ready for finish coats, when you're ready sing out :wink2:

Cheers
Chris

DOH! An offer too good to refuse? I might get a colleague's help first wih the welding, watch him what he does, then rip the welder out of his hand and burna few holes into the car...:D:D

Appreciate the offer with the paint gear... Might take you up on it at some stage!

Sven
 
Balki, bit of home turf advantage :D : I run a business that has an anodising plant, so my guys had a go at the b-pillar ones first and are doing the c-pillar ones next... Trying to get a softer finish next... We will see.

Sven

Sven,
I have NOS external 'B' and 'C' pillar covers you can use to see how they should look, your photo looked spot on though, a frosty silver. :approve:

Cheers
Chris
 
... I'm pretty well finished with rust repairs for a good time I hope....

And I thought I had a paddock pig lined up for you! :tongue:

With the back end repairs, remember the gutters do have a slight sweep in towards the rear. The repro gutters I've seen are not adequately swept and could get you into trouble if you are not careful. For a very rotten rear where most of it is being replaced, tack it up and do a trial fit of the bootlid and rear guards before fully welding it up.

This is also the ideal time to alter the boot aperture to take a pinchweld seal instead of the big rubber stuck to the bootlid. It needs to be fairly tall and they are easily scrounged from the door or tailgate of a recent car being wrecked.

I also have a NOS c-pillar cover panel (for an ID - very fine striations) and it's a frosty looking thing as Chris says.

p.s. I have some spare instrument cluster rings and I assume other do too. Maybe, we should get a few together and have them refinished as a lot. I take it they've been stripped and replated from the bare plastic. What about other parts of the dash where we tend to use the chrome stick ons?
 
Last edited:
And I thought I had a paddock pig lined up for you! :tongue:

WOW! You just broke my dream, I was driving around all night in a rust free '69 DS21 BVH, looking over it and saying "score! she's in really good nick. . ." No wonder I had trouble waking this morning :roflmao:

Cheers
Chris
 
Hmm, now you've got me worried about Der Franzose, first order came within 2 weeks second then took 4, now a Citroworld order has come in first after being ordered afterwards and it's been a month...
 
Hi Sven,

I've been fiddling with these cars since I was a teenager and still make lots of mistakes... I've redone the c-pillar repair in my head a number of different times as I am 50/50 on the approach I took....but it's done...

I think the important thing is to have a go - and eat the elephant one bite at a time....:) I think what you are doing by sorting the roof are rear chassis is a good place to start. The body can then be done at a later time....

I think 2k is a good thing, but there is nothing wrong with a good quality zinc based primer and semi gloss top coat particularly on a garaged classic not out in the weather. I've used Wurth semi gloss as a finish and it looks great and comes in a spray pack.

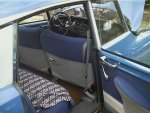
My vote for colour/trim combination attached...:) With a white roof it will look sensational.

Cheers,

Mark...:)

bleu danube bleu.jpg
 
Forgot to add...

If you want both superb service and advice as well as decent parts (many of the repros from others are not decent) both Darrin Brownhill (Citroen Classics) and Andre Pol (Citroen-Andre) have always been fantastic to deal with over the many years I've been buying parts over the internet. Can't say enough good things about these guys - both are Citroenists and can offer good solid advice as well as getting parts to you in a reasonable time.

Citroworld have always been good to deal with also though their service does not offer any real advice with the parts.

Cheers,

Mark...:)
 
Last edited:
... Citroworld have always been good to deal with also though their service does not offer any real advice with the parts. ...

Geert replies to e-mails promptly, always tries to be helpful in my experience and was happy to correct a couple of problems that arose. Darrin is also most helpful. I've not had a problem with Franzose.
 
Last edited:
Bit more "elephant eating" this weekend...

Another productive weekend completed... tackled a couple of jobs: Rust removal, panel fabrication and finally... welding! Thanks to Chris' welder I had a go at it.

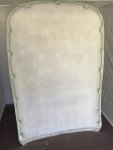
But that further down, first job was the respray of the head liner. Bought three more cans of the SEM Off White vinyl paint, which was just enough to cover the roof.

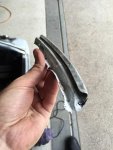
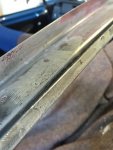
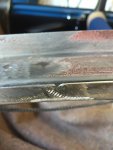
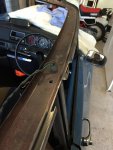
I had the c-pillar cover done the weekend before - they came out very well:

View attachment 73873

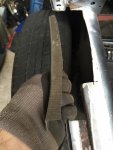
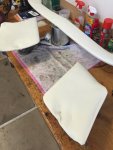
The headliner had a few bubbles where the liner had come off the roof. I tried to get at it from the side, but as soon as I tried to cut/pry/weasel the rubber liner off the roof it started breaking, so that was a no-go option.

So to get the Kwik Grip glue into the bubble I opted to cut a vertical incision into the bubbles that I afterwards glued shut again and filled with Selley's no more gaps. I put the cuts on the "rear side" of the bubbles, which should not be visible when you were to look back from the front seats at the liner.

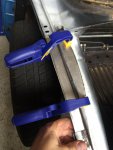
I used a steel ruler to shove the glue into the bubbles, closed them up and put the clamps on for half an hour (with plenty of padding, to not leave marks in the rubber). Seems to have worked well.. i.e. they haven't open up yet :wink2:.

View attachment 73874

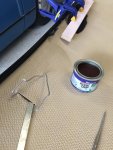
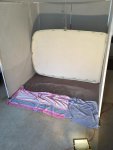
Then off into the "spray booth :D" and applied the first can of paint... looked horrible! Especially on the back end (bottom of the photos) where someone stuck the cross member on with red silicon the paint didn't take up well first up and the whole roof looked very stripy.

View attachment 73875View attachment 73876

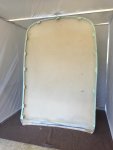
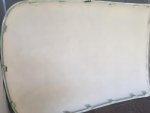
But after two more cans, varying the spray pattern, filling more gaps and little nicks with "no more gaps" and then turning the roof 90 degrees to spray across the previous work - it came out well. Nice and light, pretty even and I think once installed it will be hard to make out any variations in colour. Very happy with the result.

View attachment 73877View attachment 73878

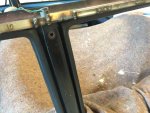
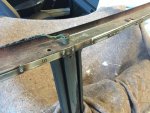
So the roof is pretty much ready for painting... the steel frame has been POR 15'ed, all the old sealer crud is off. But will wait until the roof rails are repaired and the roof seal arrives (if it ever does - it is in the lost package... ):cry:. Then trial fit it and decide on colour: White or silver?

Part 2 of the weekend was more metalwork:

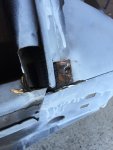
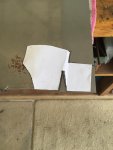
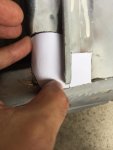
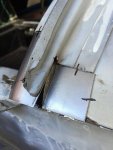
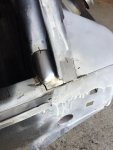
Cut out the bottom corner of the wheel arch where someone previously did a pretty rough repair. As it quite a tricky shape, I cut it out in paper first to at least get a rough shape.

020.jpg037.jpg038.jpg

After a bit of bending, hammering, dolly work and the like the shape was fairly decent - at least better than what had been there. Once that panel is welded in, I put the extension of the seal retainer on top of it. Should then look reasonably good - especially once it is all painted.

040.jpg041.jpg

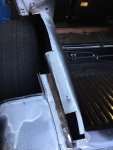
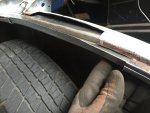
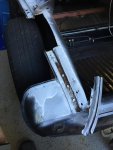
I then mulled over the left hand side of the wheel arch/seal retainer/guard seal holder channels, etc. It has been badly patched with sheet metal pieces inside the wheel arch. It had holes and crap welds... so I bit the bullet and decided to cut it out and fabricate the piece myself... DOH :evil:! Not the easiest shape to bend and shape as there are a lot of 3D curves.
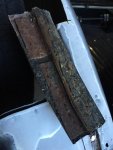
044.jpg045.jpg046.jpg

Once I had the widths and radii of the channel about right, I tried to put the wheel arch curve into it... that wasn't too hard on the rubber seal outside: At least I could get a hammer onto it.

050.jpg051.jpg

The inner side is still a tad wonky, but I think once welded into place, a little filler and it will then look OK. The section will be covered by the boot carpet as well, so not thaaaat important to get it 100% (excuses, excuses already...:D).

052.jpg

The only bit I need to reorder is the left hand boot seal channel. It is rooted and too hard to replicate. Plus the part is available as a repro part for a few Euros - might even get both sides.

Unless someone out there has a spare they don't need anymore? Happy to take it off your hands for a small donation... :)

054.jpg

Part 3 of the weekend:

Well, I went over to meet Chris and his wife and have a sticky beak at his D Super - fantastic work to date and it will be even better to see it all painted, shiny and new - and drivable! With 5 speed and air con... hmmmm, like it!

So Chris sent me his welder... as mentioned before, how hard can it be :clown::D.

Sunday morning I mucked around (after watching a number of You Tube MIG videos of course :approve:) blowing holes into test panels and try to do a half decent spot weld. Needs a lot more work, but got to start somewhere..

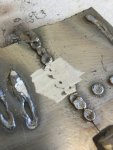
Here a few shitty panels - experienced welders: Please look away now!!!!

055.jpg057.jpg056.jpg

Still can't form a nice mound - mine all seem to have a crater shape... anyway: Let's just have a crack at a live patient. After two hours of tests I am surely ready for open heart surgery on the "real thing" :D:D.

What can go wrong...

Well, it actually looked OK to my amazement...

058.jpg060.jpg

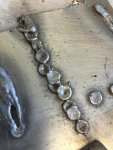
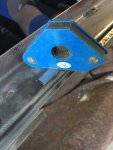
Did I mention shitty looking welds? Started with a tiny flat patch, then got onto the bent rail side. After grinding it all back it looked fair, not great, but fair. Still need to tidy up a few spots, like the upper edge of the roof rail where I blew a hole in (but have now played with the heat sink concept of sticking a piece of alu/copper behind it - seems to work)

061.jpg062.jpg

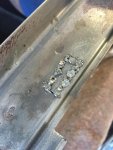
So I got cocky and did another five patches.. all look pretty good bar one where the one side shifted a tad. But it is behind the chrome cover and I will be able to blend it in Ok I think.

063.jpg064.jpg059.jpg

All good fun! More next weekend - will be nice to get the roof rails finished on both sides, so they can be painted and the roof put back on. Then onto the boot pieces - that'll be a bit trickier. Have to learn how to do clean welds by then. Will talk to the guys at work to see what I need to change and get a lesson...

Sven :D
 
Bugger, the roof pictures didn't upload...

Copy and paste again:

Another productive weekend completed... tackled a couple of jobs: Rust removal, panel fabrication and finally... welding! Thanks to Chris' welder I had a go at it.

But that further down, first job was the respray of the head liner. Bought three more cans of the SEM Off White vinyl paint, which was just enough to cover the roof.

I had the c-pillar cover done the weekend before - they came out very well:

Attachment 73873009.jpg

The headliner had a few bubbles where the liner had come off the roof. I tried to get at it from the side, but as soon as I tried to cut/pry/weasel the rubber liner off the roof it started breaking, so that was a no-go option.

So to get the Kwik Grip glue into the bubble I opted to cut a vertical incision into the bubbles that I afterwards glued shut again and filled with Selley's no more gaps. I put the cuts on the "rear side" of the bubbles, which should not be visible when you were to look back from the front seats at the liner.

I used a steel ruler to shove the glue into the bubbles, closed them up and put the clamps on for half an hour (with plenty of padding, to not leave marks in the rubber). Seems to have worked well.. i.e. they haven't open up yet :wink2:.

Attachment 73874036.jpg

Then off into the "spray booth :D" and applied the first can of paint... looked horrible! Especially on the back end (bottom of the photos) where someone stuck the cross member on with red silicon the paint didn't take up well first up and the whole roof looked very stripy.

Attachment 73875Attachment 73876042.jpg043.jpg

But after two more cans, varying the spray pattern, filling more gaps and little nicks with "no more gaps" and then turning the roof 90 degrees to spray across the previous work - it came out well. Nice and light, pretty even and I think once installed it will be hard to make out any variations in colour. Very happy with the result.

Attachment 73877Attachment 73878047.jpg048.jpg

So the roof is pretty much ready for painting... the steel frame has been POR 15'ed, all the old sealer crud is off. But will wait until the roof rails are repaired and the roof seal arrives (if it ever does - it is in the lost package... ):cry:. Then trial fit it and decide on colour: White or silver?
 
Hi Sven,

You've done well with your first attempts with the MIG.

Couple of things you could try, plug the welder directly into a power socket - don't use an extension lead. When starting a weld have about 6 - 8mm of wire at the tip. Always start a new weld with the wire snipped.

Spend more time playing with power and wire speed settings.

As above have a good look at the tutorials on this site - MIG Welding Tutorial, Techniques and Practical
The videos are excellent, listen to the sound of a good weld.

Your first welds are far better than mine were, but at that time I was welding gassless - now that's fun :crazy:

Cheers
Chris
 
Hi Sven,

Good on you for having a go... just a couple of tips to add to Chris's...

1. Get a stainless wire brush for a drill bit and clean the metal at the join till its bright before welding - this helps with conductivity.

2. Avoid doing small replacement patches - go for a larger area or whole panel if you can as small patches concentrate the heat and potential blow through.

By the look of your blobs I would turn the wire speed down a bit - it looks like there is too much wire going through too quickly. Also turn the gas up a little when your learning as it helps.

It's very hard to do nice straight welds in sheet metal - it's very unforgiving. I've never been completely happy with my work. It's much easier on thicker stuff. I was disappointed with how my repair to the C-pillar panned out but that's life....

If I could weld like Chris I'd be over the moon...:)

Also - just my opinion - seeing the rust under the those gutters in the pictures I'd consider replacing the rain gutters both sides as they are available as a pattern part. Darrin has them as a stock item.

If you want to drop over you can see what I did to the 71. It was very straightforward and easy to do.

Cheers,

Mark...:)
 
Yes, I think you are right - might replace both sides of the boot.

Also worked out why my welds look so poor... the regulator didn't open up properly and was sticking, so not enough gas flowed. The guys at work tested the welder, got a new regulator and once that was installed the welds looked a lot better!

Will trial it at home some time this week.

Sven
 
Parcel shelf covering..?

On a different note:

I know everyone sells a parcel shelf covering - normally I think black vinyl or brown... seems to be more the vinyl that the boot liners are made from?

a) do they fit 100% if I get one from Europe?

b) why didn't Citroen use the same patterned vinyl from the D Super sills for its parcel shelf as well so it actually matched the interior of the car (I know this is a rethorical question... not expecting any serious answers here :))? I would think that might actually look quite good. Not period original, but an option? Not sure its even available in that width, but as an idea?

What have others used?

Sven

Hi Sven,
Slow down, slow down you are making me feel so slack!

Re parcel shelf my '74 has a felt backed vinyl plus a grubby shag pile rug bonded on top but I'm replacing it with foam backed vinyl (Spotlight) with similar grain to the upholstery trims I got from Citro-Classique. This was what was on a 73 Pallas I used to own and it looked good.
 
Also worked out why my welds look so poor... the regulator didn't open up properly and was sticking, so not enough gas flowed. The guys at work tested the welder, got a new regulator and once that was installed the welds looked a lot better!

Will trial it at home some time this week.

Sven

Wonder how long it's been like that :eek:

Cheers
Chris
 
Top