
You are using an out of date browser. It may not display this or other websites correctly.
You should upgrade or use an alternative browser.
You should upgrade or use an alternative browser.
Scenic tranny questions
- Thread starter RINGER
- Start date
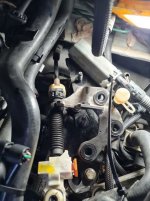
Thanks Jaahn I have the/that Haynes manual but no help & why I posted the top end pix. BTW bottom is also different to manual shot.
Thanks for help ~ Pic looks right compared with Haynes but I think I'll need to hear from someone who has actually removed the cable before.
I don't wish to break or destroy the clamp [looks like a spring clip] when pulling off & I can't do what I'm planning without having on the bench.
Don't suppose there would be an exploded view in a parts book?
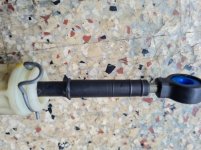
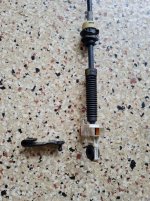
GOT IT, JUST NOW, nothing broken or damaged, never say never but persevere!
Pic 1 Removed bracket, then when there was room to move, with needle nose pliers squeezed together spring clip ends & cable came straight out. Pic 2 Tried this first off yesterday, with bracket in place & a no go. Just goes to show.
I don't wish to break or destroy the clamp [looks like a spring clip] when pulling off & I can't do what I'm planning without having on the bench.
Don't suppose there would be an exploded view in a parts book?
GOT IT, JUST NOW, nothing broken or damaged, never say never but persevere!
Pic 1 Removed bracket, then when there was room to move, with needle nose pliers squeezed together spring clip ends & cable came straight out. Pic 2 Tried this first off yesterday, with bracket in place & a no go. Just goes to show.
Attachments

Now for the bottom cable end without pulling the other 1/2 of the car apart?
I had thought I still had a shift cable from the Meg 2 i stripped after it was totally by hail, but looks like i was more ruthless with culling stuff to move here than i thought!
I still reckon you'll find a cable for it somewhere. Most of these in Oz were autos and a wrecker somewhere will have one.
I still reckon you'll find a cable for it somewhere. Most of these in Oz were autos and a wrecker somewhere will have one.
This type problem is common with many new marques of EU origin plus Ford Falcons & some Holden.
Problem is these components get so hot under the hood that these ball type connection's fittings become brittle & once removed for any type service, they're kaput. Refitted they just fall off when you don't want them to.
Auto & manual cables & rods are all the same.
There are some kits that repair some models, but this doesn't include the froggy ones & NEW cables are unobtainable.

 shop.powerwin.com.au
Used will be expensive & they are extremely difficult to remove especially in a U Pull It salvage yard unless fully elevated plus will be in similar deteriorated condition
So here's the $43 perfect permanent adjustable fix, new bellows & all. Ensure overall length is exactly the same & ends are @ right angles as when fitted to the vehicle ~ https://marinecontrolsystems.com.au/


Problem is these components get so hot under the hood that these ball type connection's fittings become brittle & once removed for any type service, they're kaput. Refitted they just fall off when you don't want them to.
Auto & manual cables & rods are all the same.
There are some kits that repair some models, but this doesn't include the froggy ones & NEW cables are unobtainable.
Transmission Shifter Cable Bush Repair Kit - Under Console.
Easy to fit Automatic Transmission Shift cable end replacement bush to fit various models. COMPATIBLE DIMENSIONS: EYELET Inner Dimension: 10mm SHAFT Outer Dimension: 8mm Will fit various models with the same dimensions or same shifter bush housing including : CHRYSLER 300 (2005 – 2010) SEBRING...
shop.powerwin.com.au
Used will be expensive & they are extremely difficult to remove especially in a U Pull It salvage yard unless fully elevated plus will be in similar deteriorated condition
So here's the $43 perfect permanent adjustable fix, new bellows & all. Ensure overall length is exactly the same & ends are @ right angles as when fitted to the vehicle ~ https://marinecontrolsystems.com.au/
Last edited:
Good one John, I see you have shortened the cable length by a couple of inches, hopefully the bracket can still reach the DPO or are you modifying the the mounting bracket as well?This type problem is common with many new marques of EU origin plus Ford Falcons & some Holden.
Problem is these components get so hot under the hood that these ball type connection's fittings become brittle & once removed for any type service, they're kaput. Refitted they just fall off when you don't want them to.
Auto & manual cables & rods are all the same.
There are some kits that repair some models, but this doesn't include the froggy ones & NEW cables are unobtainable.
Transmission Shifter Cable Bush Repair Kit - Under Console.
Easy to fit Automatic Transmission Shift cable end replacement bush to fit various models. COMPATIBLE DIMENSIONS: EYELET Inner Dimension: 10mm SHAFT Outer Dimension: 8mm Will fit various models with the same dimensions or same shifter bush housing including : CHRYSLER 300 (2005 – 2010) SEBRING...
Used will be expensive & they are extremely difficult to remove especially in a U Pull It salvage yard unless fully elevated plus will be in similar deteriorated condition
So here's the $43 perfect permanent adjustable fix, new bellows & all ~ https://marinecontrolsystems.com.au/
View attachment 213158View attachment 213159View attachment 213160View attachment 213161
Ensure you post the final solution as this will be an issue for similar problems with other shift cable with stupid ball connection joints
Not shortened as far as I know. Will advise.
The repairer was reminded that centre to centre holes must be the same [& ends @ right angles], before I left.
Right angles can be easily rectified by slight adjustment of heim end.
Looks like just longer bellows @ first glance [I HOPE], but anything is fixable as us old timers were always doing before the plug in diagnostics era, computer only type tradesmen, replacement only, entered the scene.
Released the bellows on the heim end & looks like no extension but plastic broken away giving quite a bit more length before threading to receive the female end.
If not long enough or different slightly less length it's EZ to alter by fitting a 6mm male type heim with 6mm joiner cut to appropriate length & locknuts used.
No mods needed just use what we have easily accessible.
Lot of work for a reasonably simple oil change!
That's why many really good ones are being scrapped!
Last edited:
Google is your friend. I've finally worked out that a heim joint is a rose joint. Heim joints seem to be sold in Imperial units, and then of course I discovered it is an American company. We went metric more than 50 years ago of course.Released the bellows on the heim end & looks like no extension but plastic broken away giving quite a bit more length before threading to receive the female end.
If not long enough or different slightly less length it's EZ to alter by fitting a 6mm male type heim with 6mm joiner cut to appropriate length & locknuts used.
No mods needed just use what we have easily accessible.
Lot of work for a reasonably simple oil change!
That's why many really good ones are being scrapped!
Had interesting WW2 German beginnings when patents didn't matter:
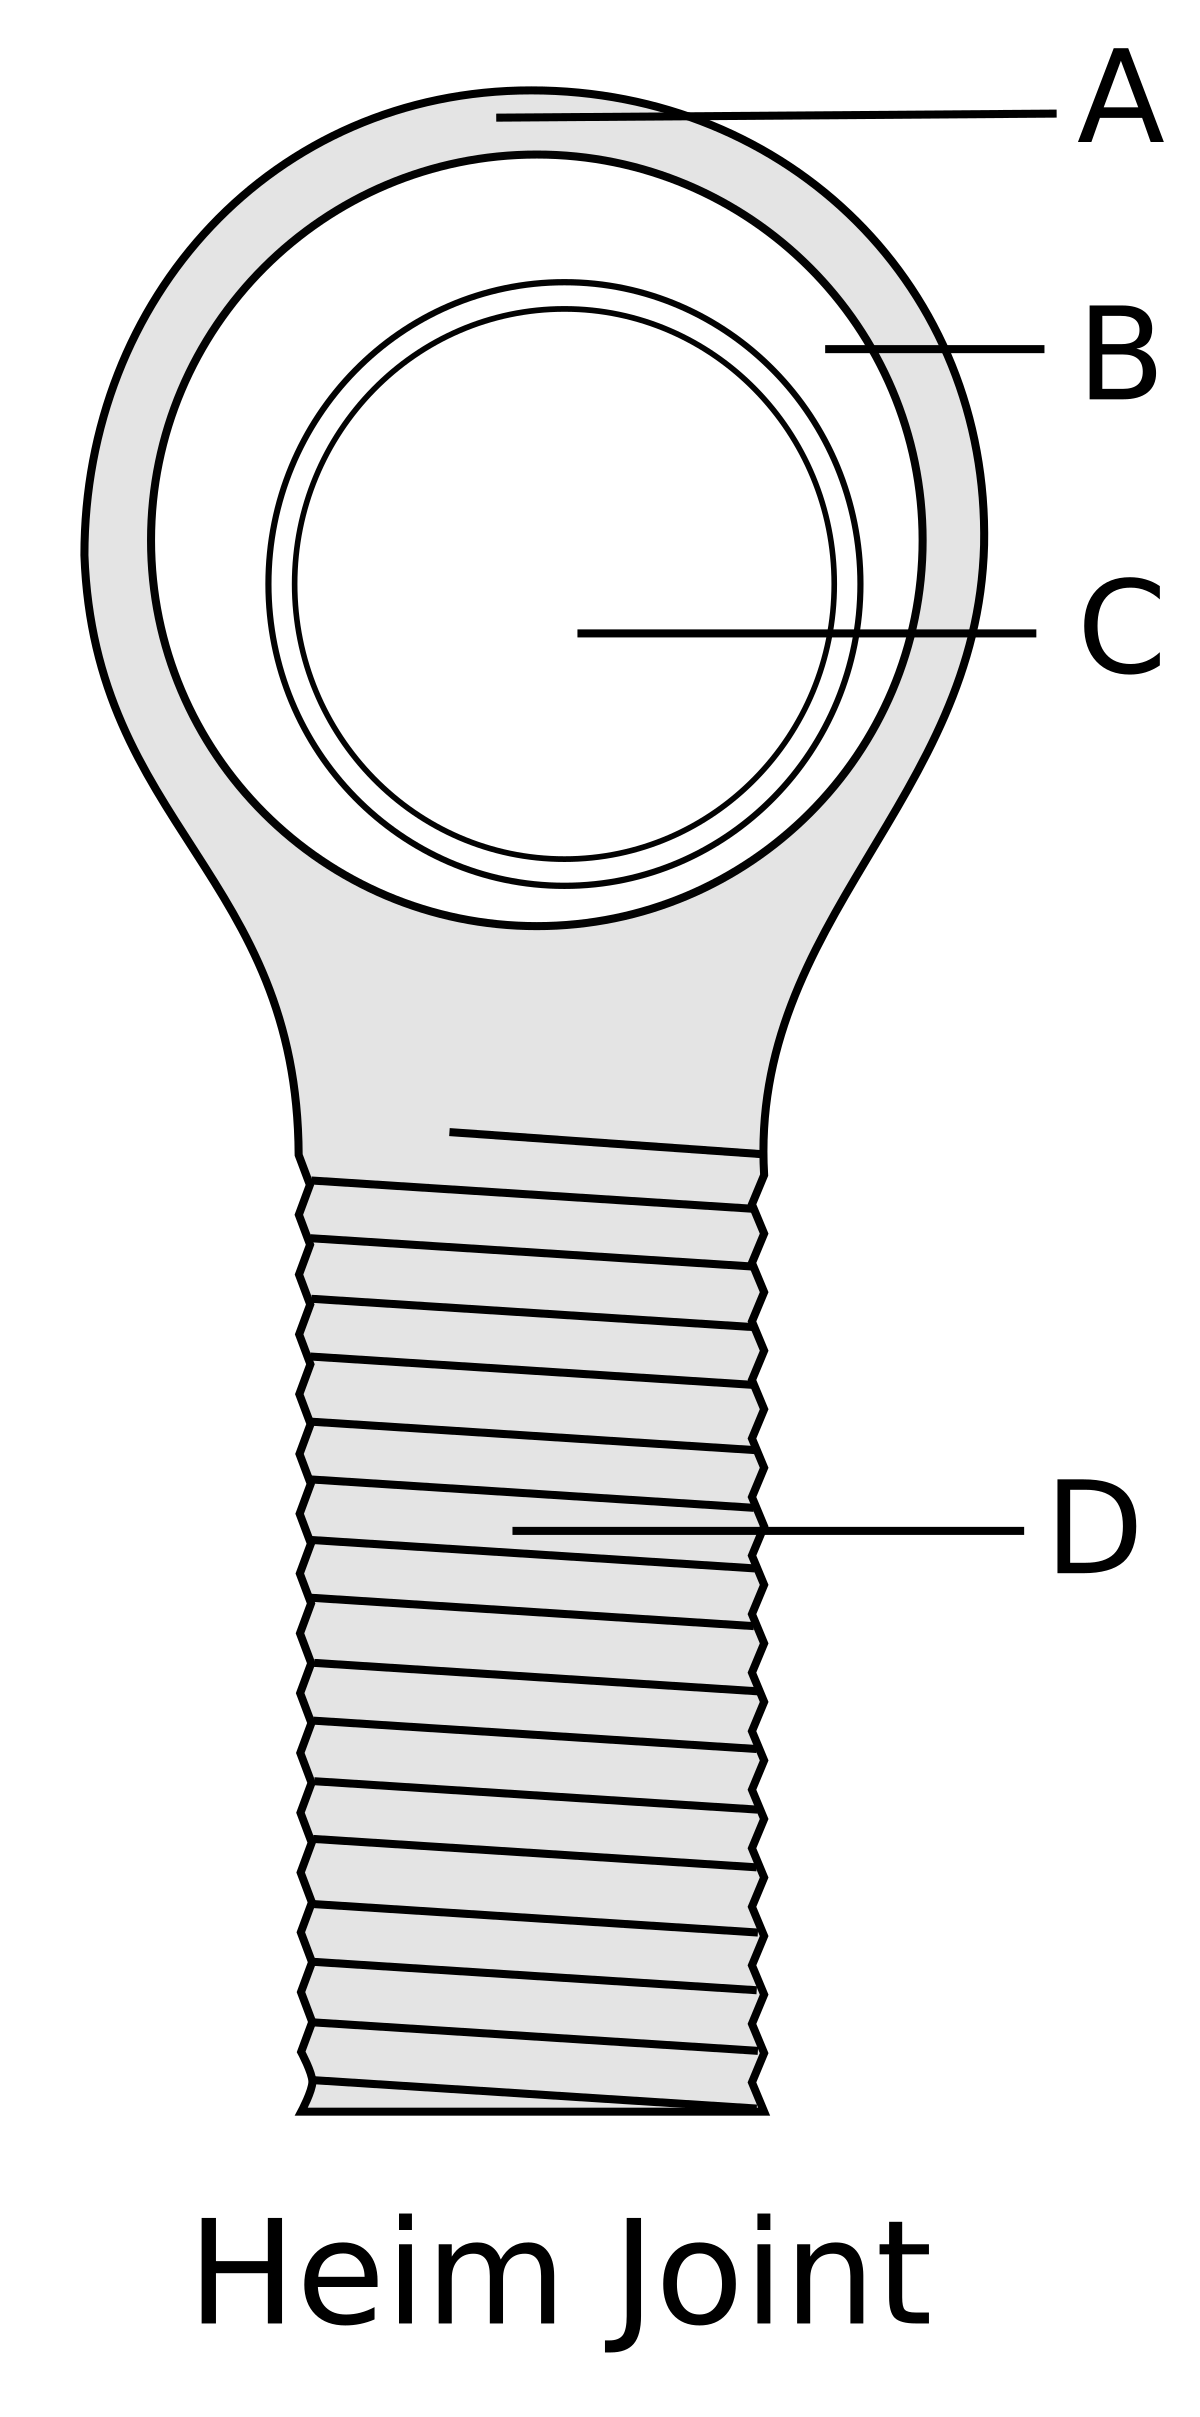
Spherical Rod End, Heim, Rose or Johnny joint depends where one lived, earned their trade & were taught or learned through their readings. Thread metric or SAE is not too important as all are made in both.
 en.wikipedia.org
Spherical Rod End, Heim, Rose or Johnny joint depends where one lived, earned their trade & were taught or learned through their readings. Thread metric or SAE is not too important as all are made in both.
Rod end bearing - Wikipedia
It was a breeze putting back together.
Lever in P & transmission in P the new cable heim end needed 1/2 a turn to slip right on 6mm lever stud. Tightened 6mm nyloc nut & covered with rubber boot to alleviate any wearing of the myriad of hoses it may contact.
Ready to bolt all up underneath, fit battery, re-check all then restart to set the transmission oil level, after a run.
Nice work.
My DPO exploits have been a little more fraught. Turns out the rattle on the one I rebuilt is probably the converter rattling because its locked on. It stalled when drive is engaged, so it of a giveaway.
I made a rookie error and didnt automatically replace both lockup and pressure regulation solenoids. Whoops. I was lulled into a false sense of security by being told they were replaced 30K kms ago. Forgetting to realise that they fail often and the pressure reg failure was probably behind the E2 clutch burning out that was the ultimate undoing of this trans.
So it seems that dead (or blocked..) solenoid was reassembled into the lock up position when i stripped, cleaned and reassembled the valve body. sigh.
Anyhoo. New genuine solenoids were $100 a pair from eBay, a strip and clean of the valve body again and ill fit is later in the week. Wish me luck!
I didn't like the "they fail often"! That's ridiculous. Is this the Siemens transmission?
Magnifique!
Runs beautifully, nice really smooth changes when it should & feels like a brand new car.
Not that it was totally unacceptable before but now streets ahead & well worth the effort.
Thanks to all who helped & offered information & advice.
DPO Transmission fluid flush & change.
Some do not have the same plug arrangement, so adapt tools etc to suit y'all's transmission
Here is the routine that I would follow next time, on an early Scenic or similar - remove the air to filter tube is necessary.
1. Assemble all you need as far as tools incl. fluid drain container etc. ready to start ~ 10mm square bar & shifter or 3/8" drive to 10mm plug socket for fill plug, 19mm ring or socket & 27mm ring or socket.
2. Get tranny fluid hot & here in this Gold Coast climate its a couple of times around Glen Eagles Drive ~ about 5-6km ~ will get fluid to about 60°C. It was when I measured 1st time & after that I didn't bother
3. 27mm ring spanner or socket ground flat & held tightly in place loosen drain plug & drain the transmission fluid into suitable container. You may wish to also just loosen the 19mm central plug so it is not so tight later.
4. Once drained, I left overnight, replace the 27/19mm plug & tighten
5. Remove the fill plug [10mm square female] inboard 1/2 way, near the selector lever after cleaning this area & tying off all hoses etc. with cable ties to expose the plug.
6. I did this with a 10mm square bar about 300mm long turned with a Crescent shifting wrench.
7. Refill, without spilling, using full container 4l of Penrite Multi Vehicle full synthetic ATF FS Auto trans fluid about $45 trade ~ check on web there are big variances & have Supercheap or any of the big boys price match.
8. Replace top fill plug & bottom plugs for torque & take car for a good warm up, around Glen Eagles a couple of times.
9. Do 3 to 8 again ~ some may do this 3 to 8 twice, but I did not think that necessary in my case.
10. With oil nice & hot again WITH THE ENGINE RUNNING in PARK remove the 19mm central plug & level checker letting excess fluid drain into a suitable container ~ mine was between 500 - 750ml.
11. Don't wait forever just re-install the 19mm plug, tighten up, replace everything & remove cable ties.
12. It's all done after you've checked out on your road test.
This change cost without labour 2 times <$100 3 times <$150 & labour should be about 1.5 hours max. if your chosen mechanic does the job. Much less expensive than running the unit until fail as many transmission places suggest!
Yep. Bloody krauts…I didn't like the "they fail often"! That's ridiculous. Is this the Siemens transmission?