My R12 POS Arrived!

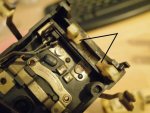
The spring is there to keep the cable ferrule located in the lever.

The slot in the bottom of the lever is only big enough for the cable to out, so you need to move the ferrule to the rear of the car and also take the spring pressure off the lever and the cable will come out the lever easily.
 
That's right!
I use a biggish screwdriver in my left hand on the lining to push the outer shoe towards the front of the car.
At the same time in the right hand a pair of vice grips at the cable end can get the cable clear of the fulcrum.
Drum brakes are a PITA
OncE the cable is clear, access to all other bits are straightforward.
 
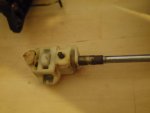
I'm trying to get to replace the rear trailing arm, and of course the handbrake cable passes through it.

So out comes the Haynes and it directs me to remove the Hub to gain access to the cable. View attachment 78975 Now I didn't know what I'd find here but I had hoped there was some way to release the cable so I can pull it back through the trailing arm..
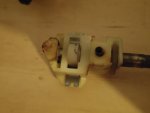
The cable end appears to be crimped on, and It doesn't look like the entire thing will pass through the gab in the rear of the hub. How do I.. undo this? :blackeye:

Apart from agreeing with Col, shouldn't both shoes be held down by clips? The shoe on the right has the spring clip on top of it, with the off-centre adjuster rod obvious, as I'd expect. But... the shoe to the left seems to be on top of the retaining clip, and I can't see the adjuster. Is there only one adjuster? It's been a while since I had an R12 rear drum off..... Nice to see clean wheel bearing grease!

Best wishes with it.

Everything is as it should be, the other brake shoe adjuster is hidden behind the hand brake lever on the left.
 
Clean wheel bearing grease is a must! I've spent way to much time packing bottom brackets on old bicycles to allow a dirty bearing now..

Actually If I'm honest it is the first time the hub has been off. Previous owner looked after it it seems :)

And thank you everyone :) I'll have another look in the morning.
 
Well I ran out of time again :(

So instead, time for that polish and to remove those weather strips that were kinda holding on, but kinda not also..

I won't tell you how look it took to polish the dirt marks out of where the glue once sat.. :S

smPXK55988.jpg
smPXK55989.jpg

So chic. :D


Anyway glad I had a good look at her, the passenger head light is not really attached! The plastic light cover that was over it, was actually holding the light in! It seems someone tried to make sense of the adjuster mechanism, but most of it has rusted out.. Hmmm cable ties to the rescue for the moment.
 
GOOD NEWS EVERYBODY!

I found where the smoke came from.

IMGP3816.jpg

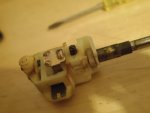
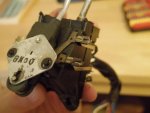
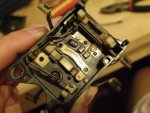
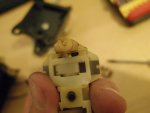
You are looking at the underside the light arm in an early combined unit. That copper plate came loose, and that spring was being dragged around the terminal(s) reserved for the copper plate. HOW RUDE!

This is great though at it means this indeed was where the smoke came from. Note the orange burn marks and melted housing directly under the spring.

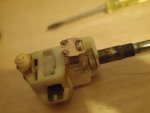
When I took it apart I was very confused. the copper plate, which should sit like this,
IMGP3815.jpg

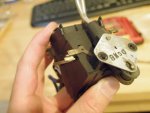
Was found at the complete other end!
IMGP3801.jpg

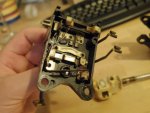
Look at him with his arms out reaching for another circuit to short! What a sneaky sod! I'd hate to think how long he was apart like that. There is enough dirt and geese in there that I'd be confident it would start a fire if left... :S

It's a pretty fun little unit actually, but lets back up a bit and I'll show you how to get into it.

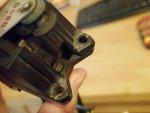
First get a dremmel and grind out the rivets. Oh I got a dremmel for Christmas. They are great! I managed to not destroy the housing and I think I'll be able to take it to my friendly bolt store and with a series of spacers install a replacement that will allow to me mount it back correctly!

IMGP3797.jpg

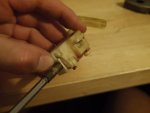
Then bend the terminals 90 degrees do you can slide the ends out of them. Lastly there are two boring clips on the other end that pooped of easily enough, Didn't bother to show that here.
IMGP3794.jpg
IMGP3795.jpg

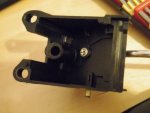
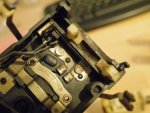
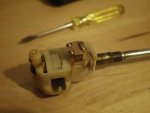
From here you can gaze upon the boring blinker side, which is really nothing but a case. The circuits on the outside seem to control the indicator, well report it's position to the switch.
IMGP3798.jpg

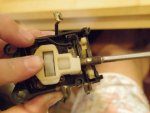
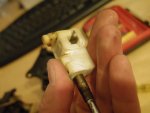
Turning the lights on, actually moves a small arm on the lever that pushes on a plate within the housing, When its it's in configuration it looks like this;
IMGP3804.jpg

The high beam flashing circuit (pushing the arm in) is controlled but the cap expanding into the sprung lever, Shown at the bottom of the image. That bar simply gets pushed into the terminal
IMGP3809.jpg

The high beam switching circuit.. well I'm not exactly sure. There is a sliding plastic piece that moves between to the left and right position but has no contacts and connects not a thing. I have a feeling there were small springs that provided tension on the leaver and returned it into position. The circuit is control by the plate what failed above on mine. You can also clearly see the wear on the terminals from the copper plate traveling previous.

IMGP3803.jpg

So I think I'll spray a lot of WD40 in there and clean it out as best I can. Apply a little more grease to the moving components, and think carefully about how the high beam circuit was supposed to be support by some small springs, and just how they connected.

This was the part that failed a pink slip actually. The sloppy lever was not welcomed by the mechanic. :p

Someone take theirs apart so I can see which bits I'm missing :D

I'm glad I confirmed this is where the fire came from, I'm feeling a little easier about the wires under the dash now.

Bonus other pics of the arm below.

IMGP3799.jpg
IMGP3800.jpg
IMGP3811.jpg
IMGP3812.jpg
IMGP3813.jpg
IMGP3817.jpg
 
GOOD NEWS EVERYBODY!

I found where the smoke came from.

View attachment 79174

You are looking at the underside the light arm in an early combined unit. That copper plate came loose, and that spring was being dragged around the terminal(s) reserved for the copper plate. HOW RUDE!

This is great though at it means this indeed was where the smoke came from. Note the orange burn marks and melted housing directly under the spring.

When I took it apart I was very confused. the copper plate, which should sit like this,
View attachment 79175

Was found at the complete other end!
View attachment 79182

Look at him with his arms out reaching for another circuit to short! What a sneaky sod! I'd hate to think how long he was apart like that. There is enough dirt and geese in there that I'd be confident it would start a fire if left... :S

It's a pretty fun little unit actually, but lets back up a bit and I'll show you how to get into it.

First get a dremmel and grind out the rivets. Oh I got a dremmel for Christmas. They are great! I managed to not destroy the housing and I think I'll be able to take it to my friendly bolt store and with a series of spacers install a replacement that will allow to me mount it back correctly!

View attachment 79186

Then bend the terminals 90 degrees do you can slide the ends out of them. Lastly there are two boring clips on the other end that pooped of easily enough, Didn't bother to show that here.
View attachment 79188
View attachment 79187

From here you can gaze upon the boring blinker side, which is really nothing but a case. The circuits on the outside seem to control the indicator, well report it's position to the switch.
View attachment 79185

Turning the lights on, actually moves a small arm on the lever that pushes on a plate within the housing, When its it's in configuration it looks like this;
View attachment 79180

The high beam flashing circuit (pushing the arm in) is controlled but the cap expanding into the sprung lever, Shown at the bottom of the image. That bar simply gets pushed into the terminal
View attachment 79179

The high beam switching circuit.. well I'm not exactly sure. There is a sliding plastic piece that moves between to the left and right position but has no contacts and connects not a thing. I have a feeling there were small springs that provided tension on the leaver and returned it into position. The circuit is control by the plate what failed above on mine. You can also clearly see the wear on the terminals from the copper plate traveling previous.

View attachment 79181

So I think I'll spray a lot of WD40 in there and clean it out as best I can. Apply a little more grease to the moving components, and think carefully about how the high beam circuit was supposed to be support by some small springs, and just how they connected.

This was the part that failed a pink slip actually. The sloppy lever was not welcomed by the mechanic. :p

Someone take theirs apart so I can see which bits I'm missing :D

I'm glad I confirmed this is where the fire came from, I'm feeling a little easier about the wires under the dash now.

Bonus other pics of the arm below.

View attachment 79184
View attachment 79183
View attachment 79178
View attachment 79177
View attachment 79176
View attachment 79173

I have never had one of those switches apart. I have always been lucky with my cars and never had a problem with one.

I have a couple of old switches that are very suspect here, so when I'm bored one day I will dismantle one.
 
TOUCH WOOD!

But yes I'd love to know where and how springs held the arm in place :S
 
Hello Col,

I guess most people would be reluctant to pull apart a good switch just to see how it's supposed to look.

But I'm pretty sure that the two yellow pieces of the switch in this photo are supposed to be joined together.
This would be causing the lever to flop about.


R12 light switch.jpg

How you'd successfully join a couple of pieces of plastic like those is something I can't answer.
That piece leads a very hard life as it slides in the indents to hold it in the off-on-high beam positions.

(I've got at least one switch that's also broken in the same place).
40 year old plastic plus heat make the plastic very brittle.
Maybe the only cure is another switch, that's what I did to mine.

Cheers
Ren
 
Morning

Well I just may be convinced,

So I wake this morning, sit down coffee in hand to have a quick look at this collection of bits sitting in front of my keyboard and what? No plastic bracket thingy? :S

#groan..

Do not have time to crawl around under my desk before work this morning.

But intriguing about it sitting around the switch arm... perhaps that then shows the mounting points for the springs.

Meca will have it delivered for $93. bugger, anyone else need anything whilst I'm paying 20% Vat. 84mm x 84mm kit perhaps? :D
 
Hello Col,

I guess most people would be reluctant to pull apart a good switch just to see how it's supposed to look.

But I'm pretty sure that the two yellow pieces of the switch in this photo are supposed to be joined together.
This would be causing the lever to flop about.


View attachment 79191

How you'd successfully join a couple of pieces of plastic like those is something I can't answer.
That piece leads a very hard life as it slides in the indents to hold it in the off-on-high beam positions.

(I've got at least one switch that's also broken in the same place).
40 year old plastic plus heat make the plastic very brittle.
Maybe the only cure is another switch, that's what I did to mine.

Cheers
Ren

The two yellow pieces were probably originally white, and yes they were joined together originally. The have a thin "WW" or "MM" shaped band joining them that flexes down when the light lever moves between the off-low-high positions and holds the lever in each of the said locations. I did manage to make one once with an oxy, a bucket of water, some sheet stainless steel, some very small drills and screws, and a lot of patience because I was (and still am really) a super tight-arse and didn't want to pay for a new switch while I had the time on my hands.
 
Let the world know I'd love one if anyone has one kicking around. :)

But I will try and fix this because I too would like to avoid spending $93 on a high beam switch. At worst, I'll throw it back together, lock the arm in place, and install a foot dimmer switch.
 
Morning

Well I just may be convinced,

So I wake this morning, sit down coffee in hand to have a quick look at this collection of bits sitting in front of my keyboard and what? No plastic bracket thingy? :S

#groan..

Do not have time to crawl around under my desk before work this morning.

But intriguing about it sitting around the switch arm... perhaps that then shows the mounting points for the springs.

Meca will have it delivered for $93. bugger, anyone else need anything whilst I'm paying 20% Vat. 84mm x 84mm kit perhaps? :D

Why would you be paying VAT? The parts are for export and use outside the suppliers country and should be VAT free!
 
No idea, but that's what the basket says. "shrugs"
 
There should be plenty of these switches floating around second hand, .
Yes, there were a lot of them.


should not be hard to find a good one.
As mentioned earlier, the plastic parts are getting brittle now so finding a good one is not so easy.

Maybe the later types with the separate blinker switch are more robust and/or easier to find

But $93 for a new light switch is good value.
What would you pay for a new light switch for a late model Renault?
A lot more than $93 I'd wager, even for a used one.
$93 and then forget about it for another 40 years.

Cheers
Ren
 
Yes, there were a lot of them.


As mentioned earlier, the plastic parts are getting brittle now so finding a good one is not so easy.

Maybe the later types with the separate blinker switch are more robust and/or easier to find

But $93 for a new light switch is good value.
What would you pay for a new light switch for a late model Renault?
A lot more than $93 I'd wager, even for a used one.
$93 and then forget about it for another 40 years.

Cheers
Ren

I have quite a few here but am keeping them spares for my cars.

Yes when you compare what a light switch for a modern Renault would cost $93 is good value.
 
Top