GreenBlood’s D(very)Special Rejuvenation 2009>

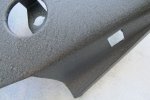
They are on my watch list saw them a couple of days back. I have a set of NOS that I bought maybe 6 or 7 years ago but find I am missing one of the front guard pieces.

attachment.php


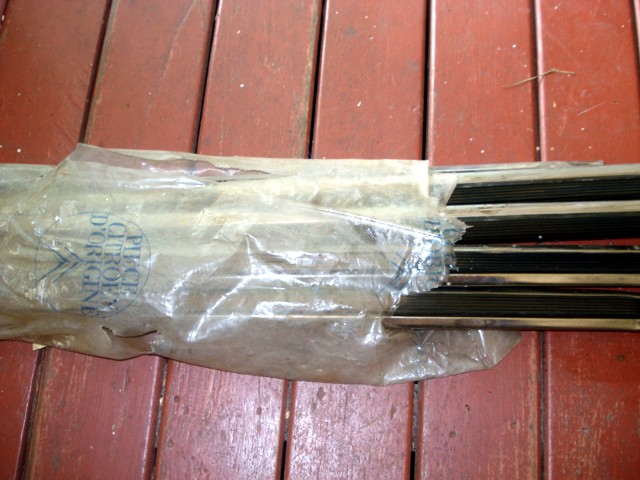
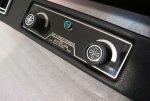
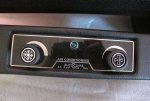
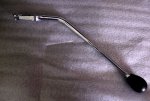
I'm after very good condition chrome shaft stalks (wiper/ indicator/ headlight) and gear shift.
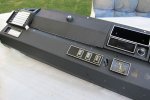
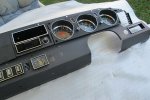
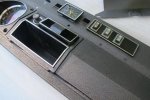
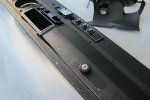
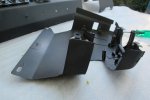
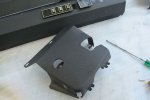
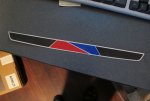
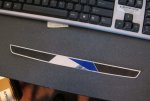
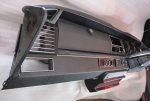
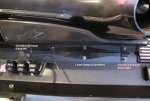
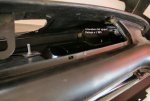
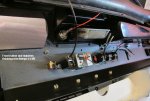
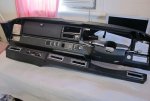
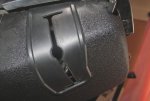
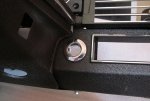
The dash components went in for powder coating today so in a couple of weeks I'll want to reassemble with better than what I have removed if possible.

Cheers
Chris

Hi Chris

have you seen these on eBay.fr?

http://cgi.ebay.fr/baguette-aile-ci...ultDomain_71&hash=item20c8cab0a8#ht_500wt_922

Not as new but might scrub up ok.

Matthew :)
 
6th. August - Powdercoated Dash :>)

Picked up the dash pieces from Roberto's Powdercoating this morning...

When I first saw the various parts I thought eek :eek: they're very black, on getting them home this afternoon and sitting them together with other dash trim switches etc. I'm blown away. Roberto has really excelled the finish is fantastic - huge thanks to Mark for pointing me in the right direction.

Anyone considering going down this path I can't recommend these guys enough, they are used to shipping interstate, very prompt, and for my money quite reasonable :headbang:


attachment.php


Oops, my greasy finger marks on the glovebox lid :nownow:

attachment.php


attachment.php


attachment.php


attachment.php


attachment.php


This was the panel I welded in a patch, the camera has picked it out but it is barely visible in reality.

attachment.php


attachment.php


attachment.php


Like I say, I'm blown away, what a transformation, the finish matches the instrument cluster in texture and colour.

I also coated my original dash with the headunit din cutout and a spare glovebox lid, which now look equally superb, I'll post pics. If anyone is interested they are now for sale.

Cheers
Chris
 

Attachments

  • Dash2.jpg
    Dash2.jpg
    78.2 KB · Views: 1,764
  • Dash1.jpg
    Dash1.jpg
    88.1 KB · Views: 1,704
  • Dash10.jpg
    Dash10.jpg
    58.6 KB · Views: 1,752
  • Dash9.jpg
    Dash9.jpg
    87.6 KB · Views: 2,995
  • Dash8.jpg
    Dash8.jpg
    64.7 KB · Views: 1,658
  • Dash6.jpg
    Dash6.jpg
    67.8 KB · Views: 1,667
  • Dash5.jpg
    Dash5.jpg
    82.3 KB · Views: 1,703
  • Dash4.jpg
    Dash4.jpg
    57.9 KB · Views: 1,627
  • Dash7.jpg
    Dash7.jpg
    90.6 KB · Views: 1,681
2nd September 2012 - Dash Assembly

This is just a post for posterity, more a reference for those that may want or need to go down this path.

There were a few mysteries to me that have now been solved in going through this process - The glovebox lid cannot be removed without the whole dash, likewise the rubber trim strip that runs across the dash or the side vents. If these have worked loose over time (mine had) the only fix is to pull the dash out. I'm going to put a dab of locktite on the fixings to ensure they won't work loose in my custody.

Firstly a little bit of tizz, heater control panel,the red on mine had completely faded away, you can buy new but my solution was to computer cut a transparent red vinyl and fit in place. Anyone interested in this fix I have also cut the blue and these can be had as a set, I dare suggest these would outlast the original ink.

attachment.php


Cleaned and polished the alluminium

attachment.php


attachment.php


I've used a replacement dash panel (no DIN hole for headunit) so need to pre-drill fixings for the underdash Autoclima aircon unit. Much easier with the dash out and the aircon unit is quite a precise fit, it has about 5mm play sideways to fit correctly. I needed the stalk binnacle and heater control panel in place to get this right.

attachment.php


attachment.php


For those that may be interested, I have made reproductions of the Autoclima control panel - screenprinted in 2 pack black onto laser-cut stainless, far better than the original and available for a small donation or exchange of parts PM me for serious negotiations :clown:

attachment.php


Back to the point of the post, a few images taken of the rear of the dash to show the fixings for the glovebox and the rubber and stainless trim across the dash. As you can see there is no way that these can be reached without the dash coming out.

attachment.php


attachment.php


The side vents will also need the dash removed to replace if damaged.

attachment.php


I have scored the stainless trim that runs under the rubber that runs across the dash, and fitted to complete the chrome look. My understanding is that for the last cars brought into Aus all this chrome was deleted to comply with design rules? My car had black binnacle stalks, gear lever and no chrome/silver on the dash dials etc. even the wiper arms are matt black. Being a rebel :clown: I have returned the dash to how Mr Citroen intended.

Internal fixings.

attachment.php


attachment.php


Gearshift gusset, Richo produced a couple of batches of these for RHD cars, this one I fitted when they first became available and as you can see has lasted well.

attachment.php


I've sourced new knobs and a nice green bezel LED for the Autoclima control panel.
LED through RS Online, great service cheap and free postage, spent too much time trying to find something suitable for the 10mm hole - the original light was a square finish but the green had virtually faded away.

attachment.php


attachment.php


...and fitted the resin domed sticker(s) I have made for the choke knob.

attachment.php


attachment.php


Chrome bits - Gear Lever and Ignition Key Bezel.

attachment.php


attachment.php


attachment.php


I've had three sets of new keys cut, door and boot locks now have new barrels. My favorite keyring kind of mirrors the chevron gear that set all this in motion.

attachment.php


Dash is now ready for installation, I've run wiring for the headunit (Retrosound Model 2, release delayed until the end of the year now :( ). This will fit into the original center radio pocket and can be customised to have a nice retro '70's look but with current technology - USB/SD/Aux/Bluetooth hands free etc.- worth waiting for I guess. It will be easier to organise the mounts for the headunit with the dash out, so I'll wait until it becomes available.

I have been continuing with panel preparation but don't have too much to show for my efforts at this stage...

Cheers
Chris

Edit: Added a few more images and info
 

Attachments

  • Heater panel After1.jpg
    Heater panel After1.jpg
    64.4 KB · Views: 1,906
  • Heater panel before2.jpg
    Heater panel before2.jpg
    68.4 KB · Views: 1,360
  • Heater_Control_Panel Scan.jpg
    Heater_Control_Panel Scan.jpg
    15.6 KB · Views: 1,293
  • Autoclima control panel.jpg
    Autoclima control panel.jpg
    69.2 KB · Views: 1,729
  • Dash assembled1.jpg
    Dash assembled1.jpg
    39.3 KB · Views: 1,346
  • Dash stainless trim.jpg
    Dash stainless trim.jpg
    69.3 KB · Views: 1,675
  • Glove box lid fixing lower.jpg
    Glove box lid fixing lower.jpg
    77.4 KB · Views: 1,347
  • Glove box lid fixing upper.jpg
    Glove box lid fixing upper.jpg
    65.4 KB · Views: 1,351
  • Rubber and stainless fixings.jpg
    Rubber and stainless fixings.jpg
    76.6 KB · Views: 1,542
  • Under dash aircon.jpg
    Under dash aircon.jpg
    69.5 KB · Views: 4,697
  • Side vent fixings.jpg
    Side vent fixings.jpg
    72 KB · Views: 1,314
  • Autoclima knobs and LED.jpg
    Autoclima knobs and LED.jpg
    62.3 KB · Views: 2,037
  • Autoclima knobs and LED2.jpg
    Autoclima knobs and LED2.jpg
    72.9 KB · Views: 2,715
  • Choke knob.jpg
    Choke knob.jpg
    80.2 KB · Views: 1,803
  • Choke knob2.jpg
    Choke knob2.jpg
    78.6 KB · Views: 1,430
  • Gear Shift Gusset.jpg
    Gear Shift Gusset.jpg
    70.1 KB · Views: 1,320
  • Gear Knob.jpg
    Gear Knob.jpg
    59.8 KB · Views: 1,167
  • Gear Lever.jpg
    Gear Lever.jpg
    87.4 KB · Views: 1,176
  • Ignition Key Bezel.jpg
    Ignition Key Bezel.jpg
    66.8 KB · Views: 1,166
  • Keyring & Keys.jpg
    Keyring & Keys.jpg
    79.5 KB · Views: 1,242
October 4th 2012

...added a bit more info and pics of the dash ^^^

Another month...

Slowly working through the panels, boot lid is now ready for top coat and safely put away.

I won't turn this into a painting thread there have been a few excellent threads already. This is just an outline on how I am approaching my preparation.

This is my left rear guard, on the car it looked pretty good. Closer inspection reveals a flat spot and crease, must have reversed and brushed against a post or tree at some stage. :confused:

attachment.php


Removed all rubbers and fixings, lifting this crimp made easy with door skin pliers.

attachment.php


attachment.php


Looks nasty but again this work is timely, mostly muck and surface rust.

attachment.php


Stripped the panel using stripping discs recommended by Shane, they certainly work ripping the paint and bog from previous repair.

attachment.php


At this stage I used a shrink disc and have to say this is almost magic, shrunk the highs where I could detect them. The panel still needs fill (I didn't get a pic of the first fill after deoxidine).

attachment.php


...and deoxidine. The long flexible stick you can see is great for checking the curvature of the panel in all directions. I'm amazed at how complex the shape is on what appears to be a straight forward panel, just beautiful when you get this close.

attachment.php


A few coats of high build primer and guide coat.

attachment.php


Blocked off using 120grit dry.

attachment.php


Then found the fold line was a bit wobbly, at this stage because it is quite close I've used Cam Ultrafine Glazing putty, this stuff is only for finishing but is beautiful to sand very fine and no air bubbles.

attachment.php


attachment.php


Another couple of coats of primer, guide coat and blocked dry using 320grit.

attachment.php


I'll finish blocking and then use 400 wet, and it too can be put away for top coat.
Whilst waiting for drying etc. I've cleaned up the removed rubbers brackets etc.

attachment.php


I'll work down the left side, but at this rate progress will be sloooow...

More later

Cheers
Chris
 

Attachments

  • 1Damage_Left_Rear_Guard.jpg
    1Damage_Left_Rear_Guard.jpg
    70.7 KB · Views: 1,409
  • 2Remove Rubber.jpg
    2Remove Rubber.jpg
    70.6 KB · Views: 1,504
  • 3Door Skin Removal Pliers.jpg
    3Door Skin Removal Pliers.jpg
    82.9 KB · Views: 1,859
  • 3Peg Mount Ruber.jpg
    3Peg Mount Ruber.jpg
    88.2 KB · Views: 1,346
  • 4Left Rear Stripped.jpg
    4Left Rear Stripped.jpg
    75.8 KB · Views: 1,361
  • 5Shrink Disc.jpg
    5Shrink Disc.jpg
    69.5 KB · Views: 1,397
  • 6Left Rear Deoxidine.jpg
    6Left Rear Deoxidine.jpg
    81.2 KB · Views: 1,401
  • 7Left rear guard guide coat.jpg
    7Left rear guard guide coat.jpg
    80.3 KB · Views: 1,356
  • 8First sand 120grit.jpg
    8First sand 120grit.jpg
    74.8 KB · Views: 1,357
  • 9CAM Ultra Fine Glazing Putty.jpg
    9CAM Ultra Fine Glazing Putty.jpg
    83.9 KB · Views: 1,353
  • 10CAM Putty2.jpg
    10CAM Putty2.jpg
    44.9 KB · Views: 1,347
  • 11Left Guard final blocking.jpg
    11Left Guard final blocking.jpg
    72.8 KB · Views: 1,315
  • 12Rear mount brackets.jpg
    12Rear mount brackets.jpg
    58.1 KB · Views: 1,310
Amazing!. How do you treat or get rid of the rust in the little nooks? Powder blast or sumthink'?
 
Amazing!. How do you treat or get rid of the rust in the little nooks? Powder blast or sumthink'?

I wish Stew, no I use a set of metal bristle tooth brushes - I think they were from Supercheap, stiff steel/soft steel/brass and nylon. Then treat using deoxodine - often using one of the brushes whilst wet to get as much loose rust as possible. Wash down, dry and hit with etch as soon as possible after.

Most of what you see there (above) comes away quite readily and considering it's taken 30 odd years to develop, the above process should hold it for some time to come.

Would love a small sand blast gun though to get into tight spots... :wink2:

Cheers
Chris
 
Nice work Chris...

I m dying to start work on my D... next week daylight savings start and I ll be at it as well... Would love to have the thing ready by the time I get my licence back... I ve been flat chat with work so havent had any time... Your thread (and others) has been inspirational... Its well worth taking all the time needed to get the prep right... The human male is often so keen to get the paint done and looking glossy its to easy to accept that which we know can be done better... Its good to see you are patient and willing to put the "extra" work done to get it right.

:cheers:

dino

ps... for those tight spots I ve found my electric dremel invaluable... with the right attachments its fast, effective and light ie. doesn't cause any unnecessary damage and offers superb control...
 
I wish Stew, no I use a set of metal bristle tooth brushes - I think they were from Supercheap, stiff steel/soft steel/brass and nylon. Then treat using deoxodine - often using one of the brushes whilst wet to get as much loose rust as possible. Wash down, dry and hit with etch as soon as possible after.

Most of what you see there (above) comes away quite readily and considering it's taken 30 odd years to develop, the above process should hold it for some time to come.

Would love a small sand blast gun though to get into tight spots... :wink2:

Cheers
Chris

I think I have an old sand blasting gun over Mum's and Dad's place that you can try on your small compressor if I can find it. Let me know. It's been resting 25 years in-between repaints.

I second Dino on the Dremel, my most used tool. Get a kit with the flexible drive, increases versatility enormously.

Firstly on the Dremel, I have one with a flexible drive but I've had no success getting quality attachments for it. The stuff I've bought in kits have been next to useless for any serious work, the wire brush wouldn't clean my teeth. Any tips on where to buy decent brushes etc.?

I now have my big(ger) compressor at home, can't remember it's capacity but it's a 15 amp jobby. Not great if I'm using the air sander, but when painting a panel like that rear guard I can pretty well get a couple of coats on without it needing to cut in. It should be able to keep air up to top coats if I am painting a couple of panels at a time.

I would love to give your sand blasting gun a work out - with another 7 panels to go it would be great to clean up the nooks and crannies and all those brackets etc. Definitely speed things up and probably more thorough than I'm able to achieve at the moment.

Cheers
Chris
 
Amazing!. How do you treat or get rid of the rust in the little nooks? Powder blast or sumthink'?

Simply put ... You won't ...... Just clean it up as good as you can and keep air and moisture away. The way the DS hulls and panels fold together makes them impossible to to clean. At least you can fill a lot of areas with oil and let it wick its way into the seams and joins :)

Try the drill type wire brushes for limited space areas.... I've found dremel type tools hopeless. Likely because I haven't spent enough on the attachments to get quality.

I don't think the old compressor used with siphon feed guns will work with some of the modern spray guns. I have a 16CFM clisby compressor (all aussie made ...even the electric motor). It runs an air sander slowly, struggles to run a small sandblaster.... but easily runs any spray gun I've tried. I've found everything runs well with a 2nd compressor hammering away at the same time as it.... An old McMillon US made thing I found at the tip, (gee's I'd hate to see the power being drawn by the shed with 2 compressors hammering away :clown: ).

I thought GB would like the shrinking disc.... Bloody amazing things right ........ How do you neighbours like it :roflmao:

seeya,
Shane L.
 
I'll check for the sandblaster over the weekend. It's only ten minutes away.

I agree with you on the the wire brushes for the Dremel. I use the little round sand paper drums (Dremel call them sanding bands), they come in two diameters, the smaller one is quite tiny, but seem to last reasonable well, but gentle pressure is the key.

http://www.dremel.com/en-au/Accessories/Pages/SubCategories.aspx?catid=2033

Individually they can be expensive, but various kits I have bought from Bunnnings offer better value. I have only used the sand bands on the above link.

I also like the aluminium oxide grinding stones

http://www.dremel.com/en-au/Accessories/Pages/SubCategories.aspx?catid=2031

These also look interesting

http://www.dremel.com/en-au/Accessories/Pages/SubCategories.aspx?catid=2026
 
I don't think the old compressor used with siphon feed guns will work with some of the modern spray guns. I have a 16CFM clisby compressor (all aussie made ...even the electric motor). It runs an air sander slowly, struggles to run a small sandblaster.... but easily runs any spray gun I've tried.

I thought GB would like the shrinking disc.... Bloody amazing things right ........ How do you neighbors like it :roflmao:

seeya,
Shane L.

I've tried the air speed file on the bigger compressor but found it a waste of time, poor compressor just couldn't cope. I've found I can get more control by hand and now rarely use power tools on panel prep.

The shrink disc is great, if I were more sensitive to feeling the highs and lows I probably could have got that rear guard to a point of needing little to no fill. Noisy!!! Hell yeah, I'll have to limit it's use to when I know the neighbors are out.

I'll check for the sandblaster over the weekend. It's only ten minutes away.

I agree with you on the the wire brushes for the Dremel. I use the little round sand paper drums (Dremel call them sanding bands), they come in two diameters, the smaller one is quite tiny, but seem to last reasonable well, but gentle pressure is the key.

http://www.dremel.com/en-au/Accessories/Pages/SubCategories.aspx?catid=2033

Individually they can be expensive, but various kits I have bought from Bunnnings offer better value. I have only used the sand bands on the above link.

Thanks for the links, I have a few of those sanding bands etc., I'll have to give them a go.
With the sand blaster what media and where do I get it?

Cheers
Chris
 
I'll have talk to you after I find the blaster. Dont spend any money until I am sure I can find it. Others may have helpful tips with regards to media.
 
I've tried the air speed file on the bigger compressor but found it a waste of time, poor compressor just couldn't cope. I've found I can get more control by hand and now rarely use power tools on panel prep.


Cheers
Chris

Air speed file ?? There maybe a problem with your speed file. I didn't think they worked the compressor very hard. I can't remember any problems running the cheap dody supercheap one here. The D/A sander is the one that works my compressor to death :( It does it, but the sander doesn't spin hugely fast.

If your getting a sandblaster and can't keep up .... Maybe just get a smaller tip for the blasting gun :confused: If your planning on using it in the open on the hull. Think MESSY ... really, really messy. You need titanium skin to cope with the reflected abbrasive too.

You need garnet for the rusty stuff and paint stripping, and glass beads for gentle stuff/alloy :) The glass beads are almost like talcum powder

attachment.php


seeya,
Shane L.
 
The coarse grit is available in tubs from SuperCheap.

I also use Baking Soda in my cheap gravity feed sand blaster. It is really good for more fragile parts such as carburettor bodies and alloy parts. The residue can be washed away with water.
 
Air speed file ?? There maybe a problem with your speed file. I didn't think they worked the compressor very hard. I can't remember any problems running the cheap dody supercheap one here. The D/A sander is the one that works my compressor to death :( It does it, but the sander doesn't spin hugely fast.

If your getting a sandblaster and can't keep up .... Maybe just get a smaller tip for the blasting gun :confused: If your planning on using it in the open on the hull. Think MESSY ... really, really messy. You need titanium skin to cope with the reflected abbrasive too.

You need garnet for the rusty stuff and paint stripping, and glass beads for gentle stuff/alloy :) The glass beads are almost like talcum powder

seeya,
Shane L.

I'll have a look at the speedfile, may just need a little light oil?

I have an Air Random Orbital but could only get a 6" backing pad for it locally and for use only with the sticky back sanding discs - which within minutes of use, proceeded to launch the discs like flying saucers (once used they no longer stick - rubbish). I'll look out for the smaller backing pad and velcro style sanding discs.

With the sand blaster, just little bits and pieces (brackets etc.) and tight corners etc., on panels just those small awkward jobs.

The coarse grit is available in tubs from SuperCheap.

I also use Baking Soda in my cheap gravity feed sand blaster. It is really good for more fragile parts such as carburettor bodies and alloy parts. The residue can be washed away with water.

Thanks Michael, I'll hold off until I hear from Fivedoor.

Cheers
Chris
 
I'll have a look at the speedfile, may just need a little light oil?

I have an Air Random Orbital but could only get a 6" backing pad for it locally and for use only with the sticky back sanding discs - which within minutes of use, proceeded to launch the discs like flying saucers (once used they no longer stick - rubbish). I'll look out for the smaller backing pad and velcro style sanding discs.

With the sand blaster, just little bits and pieces (brackets etc.) and tight corners etc., on panels just those small awkward jobs.


Thanks Michael, I'll hold off until I hear from Fivedoor.

Cheers
Chris

That's strange, maybe try some quality sanding discs :confused: I only buy this sort of stuff from the local auto-paint store. I figure they'd never sell crap 'cos the tradies would come down on them like a ton of bricks :)

Yep, sandblaster is perfect for what your trying to do. It's a shame you live so far away, I have the exact setup you need to do just this (actually, that's the exact reason I built it). Paint stripping of entire panels is hopelessly slow, but doing all the areas you can't get to is easy. It'll fit every panel except the roof and bonnet in.

seeya,
Shane L.
 
Top