GreenBlood’s D(very)Special Rejuvenation 2009>

Hi Chris,

Give Roberto from Roberto's Custom Powder a call (0738999832) located in Morningside.

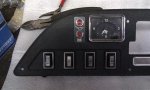
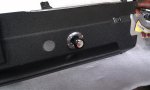
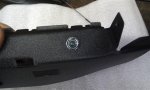
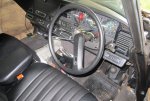
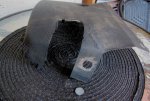
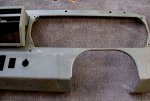
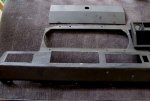
Top bloke to deal with and can replicate the crinkle finish "exactly" as original. It just looks fantastic and was not too expensive IIRC. I have had several dash's done by them.

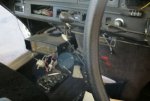
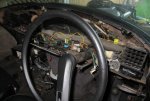
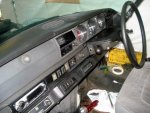
It's not a lot of work to pull the dash out - just take a few pics of the pipework etc. before you disassemble.

The chrome looks fantastic...! I have a kit here for the 71 waiting to be put on - (when I get the 69 done LOL).

All the best,

Mark...:)

That's the answer I was hoping for, most I've spoken to tell me I won't get close to original finish, if you are happy with the result you have achieved then I certainly will be - and how good to find someone virtually in my backyard. :wink2:

Thanks Mark :cheers:

Cheers
Chris
 
Hi Chris,

Here are some examples of Roberto's work - I was impressed....!

Cheers,

Mark...
 

Attachments

  • IMAG0579 (Small).jpg
    IMAG0579 (Small).jpg
    54.2 KB · Views: 632
  • IMAG0583 (Small).jpg
    IMAG0583 (Small).jpg
    88.2 KB · Views: 587
  • IMAG0575 (Small).jpg
    IMAG0575 (Small).jpg
    96.1 KB · Views: 604
21st July 2012 - Dash Removal

Made a start on the dash, as suggested once I committed it took around an hour.

Most of that time was wondering if I had in fact removed all the fixings as the dash didn't want to let go, the culprit was the tar based insulation had a firm grip on the hose plastic casing, a good firm tug and it eventually let go. Pleased to report nothing broken, heeded warnings and made sure the side vents were free.

This is sort of a before shot...

attachment.php


I dropped the aircon unit and detached the under dash vent to give me plenty of access.

attachment.php


Dash out.

attachment.php


So, what have I learned :clown:

You are removing with the metal dash, the top rubber padding, side vents, glovebox and centre radio/cigar lighter console all as one unit.

The glove box lid cannot be removed without dash removal. My glovebox inner is broken at the bottom where it fixes to the dash, one glovebox hinge was loose as a consequence - with the dash out I will be able to fix properly before re-assembling. Anyone have a good spare glovebox, to suit the locking glovebox door?

Many of the wire connectors were frozen with corrosion, very difficult to separate, I can more readily attend to these now. I found a couple of free wire connectors which are possibly the factory connections for the clock? I'll investigate further.

With the dash removed it is going to be much easier to fit the chroming kit to the side vents etc. I did the left vent today, used a clear nail varnish on the vent vanes and before it fully set, applied the chrome stickers, I feel more confident this will be a longer lasting solution.

Access to re-wiring for the headunit is now fantastic, I'll run new heavier gauge speaker wiring etc., and replace the headunit with something like this...

attachment.php


...a more period look, with modern inards, Aux/USB ports, drop down face for CD, remote so I can veto the passengers choice of music :clown:

The other option is a unit by RetroSound that fits nicely into the centre radio cubby. I have an unmolested dash if I decide to go with this option - it is a look I prefer.

attachment.php


During the week I'll drop the various parts off to be powder coated, main dash, glovebox lid, lower stalk binnacle, and the radio/ashtray console. That way I should get a consistent finish, hopefully close to original.

Special thanks to Bill (Hotrodelectric) for very concise instructions on dash removal, also found very good reference in the workshop manual 814-2 Op 520-1. Somehow I think Bill may be hearing from me when time comes to re-assemble :wink2:

Cheers
Chris
 

Attachments

  • 1Before.jpg
    1Before.jpg
    94.8 KB · Views: 1,734
  • 2Aircon out.jpg
    2Aircon out.jpg
    61.6 KB · Views: 1,745
  • 3After.jpg
    3After.jpg
    81.6 KB · Views: 1,763
  • Becker style headunit.JPG
    Becker style headunit.JPG
    29.4 KB · Views: 1,724
  • Retrosound headunit.JPG
    Retrosound headunit.JPG
    34.6 KB · Views: 1,841
Hi Chris,

Good work...!

I probably have a late glovebox kicking around if you want one...?

Otherwise you can have the old one reflocked...? There is a guy down south that can do that if required - I can show you the end result - very impressive.

All the best,

Mark...:)
 
Hi Chris,

Good work...!

I probably have a late glovebox kicking around if you want one...?

Otherwise you can have the old one reflocked...? There is a guy down south that can do that if required - I can show you the end result - very impressive.

All the best,

Mark...:)

Hi Mark, yes please to the govebox inner, the lower three fixing points on mine are broken, if nothing turned up I was thinking a fibreglass repair and then flock. Yours would be a better option :wink2:

Cheers
Chris
 
I'll see if we have a lid floating around anywhere ................................ That doesn't entail me having to pull the dash from a car :rolleyes:

Are you sure you have to pull the whole dash to get the lid out ??

seeya,
Shane L.
 
I'll see if we have a lid floating around anywhere ................................ That doesn't entail me having to pull the dash from a car :rolleyes:

Are you sure you have to pull the whole dash to get the lid out ??

seeya,
Shane L.

Hi Shane,
I don't need a lid I need the plastic inner, Mark seems to think he can help so I should be OK.

Yes, there is no way I can see that you would be able to get to the fixings for the glovebox lid without removing the dash - it bolts from the inside as does the rubber padding that runs across the dash. The glovebox inner is fixed by one 8mm nut at the bottom and two at the top. Absolutely no way they can be accessed without dash removal.

Cheers
Chris
 
Ok, let me know if you get desperate, I'll pull the dash from the wreck here (the dash is the main reason it hasn't gone to scrap metal, I want it out as it doesn't have holes hacked into it! So I'll need to pull it someday either way :) ).

seeya,
Shane L.
 
Chris,
I saw these today, they're not the cheapest but, they're the "original after market" rubbing strips. For your car.

http://www.ebay.com.au/itm/JEU-BAGU...ltDomain_71&hash=item20c88104c9#ht_500wt_1180

They are on my watch list saw them a couple of days back. I have a set of NOS that I bought maybe 6 or 7 years ago but find I am missing one of the front guard pieces.

attachment.php


I'm after very good condition chrome shaft stalks (wiper/ indicator/ headlight) and gear shift.
The dash components went in for powder coating today so in a couple of weeks I'll want to reassemble with better than what I have removed if possible.

Cheers
Chris
 
29 July 2012

I've been mostly cleaning a myriad of bits and pieces ready to reassemble the dash, have found time to start making some slow progress on the body.

Thanks to Mark, I now have a replacement glovebox inner, and right side vent in very good condition :wink2:

This post is really about how things looked, the before shots, and why the dash needed to be re-finished.

This is an unflattering shot which does highlight how bad the original finish had become... notice a non original switch/ button installed on the stalk binnacle. Must have been a dodgy fix for a failed ignition switch which was rectified later. The button was no longer connected to anything and when removed left a very ugly hole...

attachment.php


I've cut a patch and welded into place but forgot to get a finished picture :clown:
Factory was not too fussy about the finish on the underside, huge sag. :eek:

attachment.php


Couple of shots of the removed dash parts that I'm re-finishing, along with an un-butchered dash I have, I'll fit the the one without he 'headunit DIN' cutout.

attachment.php


attachment.php


At the powder coaters I have 2 x main dash panels (one with the DIN cutout) 2 x glovebox lids, 1 x lower binnacle and 1 x centre console. The DIN dash and gloveox lid I'll offer for sale - pics once I have them.

I've started stripping the boot lid I purchased from ebay France, removed the paint on the outside and a small start on the inside, it's looking really good, the rust is restricted to surface breaks it should come up really nicely :)

attachment.php


attachment.php


...and a start on the inside. Hope to find time during the week to finish and put a holding coat of 2k primer on.

attachment.php


...and, and :clown:
I have to make some progress on the roof, stripped the foam and glue off the inside. Not a job I would want to do with a roof fitted to the car. Had to resort to thinners to get the glue off - progress shot.

attachment.php


I've started stripping the outside, slow and careful, once finished I'll fit new bolt clamps and get it ready for paint.

With luck I'll have the dash back later this week so will post the finished results :wink2:

Cheers
Chris
 

Attachments

  • Dash1.jpg
    Dash1.jpg
    47.8 KB · Views: 1,758
  • Binnacle hole.jpg
    Binnacle hole.jpg
    99.1 KB · Views: 1,645
  • Dash before1.jpg
    Dash before1.jpg
    95.4 KB · Views: 1,693
  • Dash before2.jpg
    Dash before2.jpg
    88.1 KB · Views: 1,663
  • Boot stripped1.jpg
    Boot stripped1.jpg
    80.8 KB · Views: 1,655
  • Boot stripped2.jpg
    Boot stripped2.jpg
    85.5 KB · Views: 1,651
  • Boot stripped3.jpg
    Boot stripped3.jpg
    48.6 KB · Views: 1,609
  • Stripping roof.jpg
    Stripping roof.jpg
    94.4 KB · Views: 1,717
Good work Chris.
I had the same job to do on the Safari roof and that didn't have a sunroof cutout!

Wow, that boot lid is a bloody ripper, I still can't get over what a good score that turned out to be.

Keep at it mate and get yourself off the ceiling, the thinners does give you a headache, eh.

cheers
richo
 
Greenblood

Something little for the shed. Only requires a short road trip... oh and bit of cash. cheap though...

http://www.aussiefrogs.com/forum/showthread.php?t=99006

...you forgot, the cash I could find, the road trip I could enjoy, but, but what about the shed :confused: :rolleyes: :clown:

We need an Aussiefrogs communal shed in Brisbane, I've learned of a car that needs saving with most of my wish list ticked but where to store and work on it? :(

Cheers
Chris

did you find a 604 ???
 
I'd still buy that hoist, even if I didn't have the space.... what is the chance of ever finding another near to you at a reasonable cost :confused: Then again, I'd just stick it in my fathers shed for now. His shed has a huge amount of roof height.

seeya,
Shane L.
 
Great work Chris... very nice... that boot lid looks superb...
keep up with the updates...always good reading and lots to learn...

:cheers:

dino
 
Top