R8 upgrade project

Hi Ross,

You could be very right.

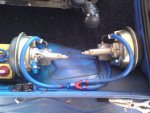
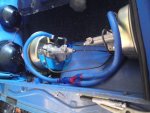
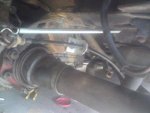
I searched the net everywhere to get a R8/10 etc drivetrain weight originally but no go.

I just sort of had a stab of about 150kg but it had been so long since i pulled any of that stuff out (like 20 years ago) i just couldnt remember.

Does anyone know a rough figure?

ta

BR
 
The front brakes and ducting project.

Trying to finish the brake system by Sunday i thought it prudent to do the easy bit last night and put on all the new mecapart stuff, also install the brake ducting and take the chance to repack the bearings.

As the factory was going for all round driving etc they have no venting on their discs at all - probably good to keep water / mud / grit / rocks etc off but shocking for preventing brake fade.

R8 discs are a decent diameter, the swept area is not that great and an agressive disc compound / pad material should make up for that, but not being vented discs and not having any venting through the backing plate is an issue.

On the Gordini's they placed the air ducting strakes into the front apron sides to try and allow some air to the discs.

Actually i have to change my comment above - really the discs and calipers etc are pretty rubbishy compared to most modern setups (especially my evo 10!) but the car makes up for this by a low weight. So dont put 4 of your huge mates into an R8 and take a spirited drive through the snowies, first you get very scared (if you are still on those 135's) and then you will get very dead, probably while going backwards.

Back on track though I think the best solution is to duct from the mouth, cable tie to the chassis rail then finish off cable tying the duct to the sway bar which allows a bit of movement to follow a cut out made in the backing plate.

In my knowledge the whole theory of brake fade is that the disc becomes so hot a gaseous layer is formed on the disc face. The pads cannot permeate this micro sized gaseous layer and this is the reason why you press like hell and you dont stop - because the pads arnt really making contact with the disc. There is also fluid boiling fade but with disc brakes, alloy caliper - prob ok on an R8.

Scat high temp tubing is rediculously priced but as there is no real workable (unless you go down to approx 2" tubing) solution for a duct mount to the backing plate due to space constraints so i used some hardware store 4" aluminium exhaust tubing - $26 for a compressed metre compared to $65 / metre expanded - mini cable tied to the mouth it is as tough as hell in there.

The front tyres will be some soft 215/50/13 v70a Kuhmo's so they should really test out the fronting venting with some track / climb etc work.
 

Attachments

  • DSC01495.jpg
    DSC01495.jpg
    51.2 KB · Views: 612
  • DSC01496.jpg
    DSC01496.jpg
    48.6 KB · Views: 643
  • DSC01499.jpg
    DSC01499.jpg
    34.9 KB · Views: 679
  • DSC01500.jpg
    DSC01500.jpg
    36 KB · Views: 609
  • DSC01494.jpg
    DSC01494.jpg
    53.8 KB · Views: 629
Brakes

:D
Trying to finish the brake system by Sunday i thought it prudent to do the easy bit last night and put on all the new mecapart stuff, also install the brake ducting and take the chance to repack the bearings.

As the factory was going for all round driving etc they have no venting on their discs at all - probably good to keep water / mud / grit / rocks etc off but shocking for preventing brake fade.

R8 discs are a decent diameter, the swept area is not that great and an agressive disc compound / pad material should make up for that, but not being vented discs and not having any venting through the backing plate is an issue.

On the Gordini's they placed the air ducting strakes into the front apron sides to try and allow some air to the discs.

Actually i have to change my comment above - really the discs and calipers etc are pretty rubbishy compared to most modern setups (especially my evo 10!) but the car makes up for this by a low weight. So dont put 4 of your huge mates into an R8 and take a spirited drive through the snowies, first you get very scared (if you are still on those 135's) and then you will get very dead, probably while going backwards.

Back on track though I think the best solution is to duct from the mouth, cable tie to the chassis rail then finish off cable tying the duct to the sway bar which allows a bit of movement to follow a cut out made in the backing plate.

In my knowledge the whole theory of brake fade is that the disc becomes so hot a gaseous layer is formed on the disc face. The pads cannot permeate this micro sized gaseous layer and this is the reason why you press like hell and you dont stop - because the pads arnt really making contact with the disc. There is also fluid boiling fade but with disc brakes, alloy caliper - prob ok on an R8.

Scat high temp tubing is rediculously priced but as there is no real workable (unless you go down to approx 2" tubing) solution for a duct mount to the backing plate due to space constraints so i used some hardware store 4" aluminium exhaust tubing - $26 for a compressed metre compared to $65 / metre expanded - mini cable tied to the mouth it is as tough as hell in there.

The front tyres will be some soft 215/50/13 v70a Kuhmo's so they should really test out the fronting venting with some track / climb etc work.

It seems to me you are trying to get race type handling out of your current brakes rather than change to suit the conditions. If you purchase the right discs then would you need to make up an elaborate duct system ? please advise as I am considering changing the brakes totally to a modern type set up using 2000 tech.
Wayne
 
Hi Wayne,

This is my thinking and it could be very wrong.

If you have your intended tyre for your "use" and it is up to its maximum "sticky" temperature and when at that point if you can lock your brakes in a progressively applied brake pedal motion from 140k+ then i theorise that the brakes can exert enough power to do the braking (these speeds are easily obtainable in your local back streets at night for testing purposes).

Therefore if you can keep the assembly cool enough then it can continually provide your stopping power.

Multi pot brakes give better feel and multiple surfaces for pad to piston contact and therefore heat to fluid transfer areas and also therefore cooling areas etc etc.

Vented discs give 4 surface cooling compared to solids, etc etc.

Tonight i am probably going to pull it all down again and completely cut my backing plates off following the caliper mounting bracket - i was in two minds last night but it is a one way street that cut. I think this makes more sense than just a small cut out duct and also if a rock flicks up in their they make an awful noise until you get them out.

And the ducting is easy to run - holesaw two 4" holes from the front apron side if you are running no bumper sides or two 4" in the spare swing down if you have no spare - you know it may be possible even with the spare at the sides of the swing down.

You can also squish the tube so it becomes 6" wide and 2" high and start them at the main rails where the bumper bolts so as not to lose clearance.

Those main ducts are a simple job - i will be running two from either side of the gearbox and then right angled out along the swing arm tubes to the rear discs as well - easy and cheap.

I also will be running a dual circuit 21.6mm master cylinder and two VH44's and in cabin pressure limter in my setup (with a hydraulic handbrake to boot) - the mecaparts calipers are still only 38mm front but the rear replacements are 38mm as well (compared to 32mm) but i will be running kumho v70a 235/45/13 rear tyres which will allow a fair bit of rear bias too. I spose i will put mecaparts claims to the test - they say the setup is practically equiv to the R16 setup - i mean the special material they say is in the rotors may be a softer steel to improve the bite but increase the wear, who knows?

I also looked at mx5 front stubs which looked fairly close to R8 ones but that was before i got the car - maybe the go is to find a compatible stub axle assembly and change the ball joints or re reem stub to accept R8 ball joints etc etc etc.

Once again i have never run any heat guns or anything like that on surfaces after mods (i just feel it out) and do most things from experience or what just seems to make sense - and by the way im a computer programmer so what would i know about cars?

And seriously, its only the brakes - what could go wrong?

BR
 
- and by the way im a computer programmer so what would i know about cars?

And seriously, its only the brakes - what could go wrong?

BR
Ha.. same thing Xerox said.. " Seriously, Jobs only wants a quick look through the factory, what could go wrong.":D
 
R8 brakes

This is my thinking and it could be very wrong.

If you have your intended tyre for your "use" and it is up to its maximum "sticky" temperature and when at that point if you can lock your brakes in a progressively applied brake pedal motion from 140k+ then i theorise that the brakes can exert enough power to do the braking (these speeds are easily obtainable in your local back streets at night for testing purposes).

Therefore if you can keep the assembly cool enough then it can continually provide your stopping power.

Multi pot brakes give better feel and multiple surfaces for pad to piston contact and therefore heat to fluid transfer areas and also therefore cooling areas etc etc.

Vented discs give 4 surface cooling compared to solids, etc etc.

Tonight i am probably going to pull it all down again and completely cut my backing plates off following the caliper mounting bracket - i was in two minds last night but it is a one way street that cut. I think this makes more sense than just a small cut out duct and also if a rock flicks up in their they make an awful noise until you get them out.

And the ducting is easy to run - holesaw two 4" holes from the front apron side if you are running no bumper sides or two 4" in the spare swing down if you have no spare - you know it may be possible even with the spare at the sides of the swing down.

You can also squish the tube so it becomes 6" wide and 2" high and start them at the main rails where the bumper bolts so as not to lose clearance.

Those main ducts are a simple job - i will be running two from either side of the gearbox and then right angled out along the swing arm tubes to the rear discs as well - easy and cheap.

I also will be running a dual circuit 21.6mm master cylinder and two VH44's and in cabin pressure limter in my setup (with a hydraulic handbrake to boot) - the mecaparts calipers are still only 38mm front but the rear replacements are 38mm as well (compared to 32mm) but i will be running kumho v70a 235/45/13 rear tyres which will allow a fair bit of rear bias too. I spose i will put mecaparts claims to the test - they say the setup is practically equiv to the R16 setup - i mean the special material they say is in the rotors may be a softer steel to improve the bite but increase the wear, who knows?

I also looked at mx5 front stubs which looked fairly close to R8 ones but that was before i got the car - maybe the go is to find a compatible stub axle assembly and change the ball joints or re reem stub to accept R8 ball joints etc etc etc.

Once again i have never run any heat guns or anything like that on surfaces after mods (i just feel it out) and do most things from experience or what just seems to make sense - and by the way im a computer programmer so what would i know about cars?

And seriously, its only the brakes - what could go wrong?

BR

Hey BR
I am doing some homework on a total change and looking at bringing together components to advance my brake system. As I gather the info I will share the outcome but so far it is doable. The key to my success is the manufactured hubs and the caliper support to the disc, once I have those bases covered job done.
Wayne :D
 
Why not just take the backing plates off? If it is only a track car you won't need dust covers.

I only use metal king pads and synthetic brake fluid as the standard always boils! Looks like a very cool car.
 
I'm also upgrading the brakes to more modern brakes with more availability on spares.
Wanted to go the VW route on calipers for the front and Citroen CX for the rear with Vectra discs but since I had brand new Fiat Uno pads and disks lying in the cupboard from a previous car I owned I figured they might work. So I'm using Uno Pacer in front and Uno Turbo at the rear. Since the front lock up quickly I figured Uno would be up to the job with the standard setup in front.

Since the pots is bigger than R8 they might put more preassure on the disks = more stopping power in the end. The R8 hubs will be machined down to 117mm so that the Uno disks can fit over them leaving 4 lug holes for studs and some new wheels.
 
I might be sticking my head into a beehive, but this is my opinion....and everybody is entitled to my opinion :joker:

Do not under estimate standard R8/R10 brakes. If your rotors are in good condition, skimmed or new they will be good for a lot of punishment. Make sure you use a competition brake fluid, it can be a Dot 4 or Dot 5, doesn't matter. If I compare my racing conditions here in NZ and in ZA, and Ross's escapades doing the Targa twice, that is about 650km of special stages in each, doing the NZ Toyo Tyre series twice and be runner up in both, and Rod Slater's comment else where Rallying in Aus with a G using standard brakes, and 750frog's comment below and nobody complained about brake fade.

I must admit that I have gone bigger on brakes and it has improved my lap times but the issue I had was boiling brake fluid. That was No Name brand from Supercheap in any case. Brettr mentioned that if you can get a lock up then you have what you need, very true and to add to that, I enjoyed the standard brakes with racing tyres very much because it couldn't lock the wheels and I didn't need to worry about lockups at all. It just stopped very well and compared to most of the field and outbraked many of the rest.

It sounds to me that the cars in question in this thread will do mostly public roads and where will you push the brakes that hard on public roads.

Then again I should be careful saying the above because it is a safety improvement and one cannot have enough or too much safety.

That was just a thought and I had to say it in defense of R8/R10 designed brakes 47 years ago.

Regards
Frans.
 
Yes I totally agree Frans, there seems to have been a lot a R8/R10/A110 brake bashing going on recently on this forum. IMHO they are fantastic brakes, I have standard brakes in my road going R8 just with good fluid and a cut out in the front backing plates to act as an air scope and they are more than adequate.

In my race car (Dauphine with all R8/R10 running gear) I had the same as my road car but with the addition of Mintex pads. Absolutely fantastic brakes for the power and weight of the car (120hp and 800kg)

The new car will have the big brake upgrade only because of the increased power but even with this upgrade there will be no vented discs, not necessary on a car only wieghing 650-700kg.

You have to keep things in perspective. I have done a lot of racing in a GTR Skyline and sure with 500hp and 1600kg you need vented discs, ducting, multi pot calipers etc etc. But on our little light low power cars you dont need all that guff, in fact you end up increasing unsprung weight and hurting the handling.
 
Frans and Ross, I totally agree with you my R8 brakes worked excellent. The only problems where rebonded pads with cheap linings that didn't really work all that well.

The only reason I'n changing the brakes on my R8 is due to availability and cost of spares between more modern setups and the standard setup.
Import costs and the R/$ exchange rate makes importing very expensive in ZA. I can get disks and new pads for the same price one set of imported pads would cost me.

If they work the same or better it's an added bonus.
 
R8 Brakes

Yes I totally agree Frans, there seems to have been a lot a R8/R10/A110 brake bashing going on recently on this forum. IMHO they are fantastic brakes, I have standard brakes in my road going R8 just with good fluid and a cut out in the front backing plates to act as an air scope and they are more than adequate.

In my race car (Dauphine with all R8/R10 running gear) I had the same as my road car but with the addition of Mintex pads. Absolutely fantastic brakes for the power and weight of the car (120hp and 800kg)

The new car will have the big brake upgrade only because of the increased power but even with this upgrade there will be no vented discs, not necessary on a car only wieghing 650-700kg.

You have to keep things in perspective. I have done a lot of racing in a GTR Skyline and sure with 500hp and 1600kg you need vented discs, ducting, multi pot calipers etc etc. But on our little light low power cars you dont need all that guff, in fact you end up increasing unsprung weight and hurting the handling.

Frans and Ross

I am upgarding my brakes at the car rebuild stage as once licenced I intend to go turbo. My car will only be a weekend street car but I think and this is my opinion, if you make a little car go quicker my peace of mind is the ability to stop on a dime hard and straight.
I will also drop the car and weight up the front all in the name of making the car safer on the road.
Wayne :D
 
Last edited:
The Front Brakes Project Part 2

OK, got a bit motivated and stripped the backing plate and gave the whole lot a bit of a freshen up.

Finished the main 4" ducting for rotors and also ran a 2" scat duct straight into the calipers piston / pad area secured by a little aluminium bracket to the hub.

In one pic it shows how thin the current rotors were.

It runs mintex racing pads and motul racing brake fluid. I think the asembly should stay cool enough to provide consistent top line brake power.

I think an important note for anyone working with 8 / 10 brakes is that quite often the recess holes in the pads for the piston / caliper lugs are not deep enough and the pad end up wearing incorrectly and the braking is not effective when they run not true. i always used a broken drill bit put in the drill with the broken side out and then use that like a mini mill to chew out the excess pad material so they sit perfectly in the caliper on their lugs.

Then topped it off with some 7071 aluminium wheel nuts.
 

Attachments

  • DSC01520.jpg
    DSC01520.jpg
    44.8 KB · Views: 505
  • DSC01548.jpg
    DSC01548.jpg
    36.7 KB · Views: 490
  • DSC01547.jpg
    DSC01547.jpg
    52.4 KB · Views: 491
  • DSC01546.jpg
    DSC01546.jpg
    42.8 KB · Views: 477
  • DSC01545.jpg
    DSC01545.jpg
    60.8 KB · Views: 504
  • DSC01514.jpg
    DSC01514.jpg
    30.3 KB · Views: 488
  • DSC01512.jpg
    DSC01512.jpg
    28.7 KB · Views: 516
  • DSC01503.jpg
    DSC01503.jpg
    40.3 KB · Views: 482
  • DSC01501.jpg
    DSC01501.jpg
    40.9 KB · Views: 509
The Master Brake System Project

This thing has been been a major pain in my back door but is now done a little over schedule.

So it runs a 21.6mm dual master cylinder, toyota hilux remote resevoir with low level warning, two 19mm vh44 remote boosters, an in car dash mount proportioning valve and a hydraulic handbrake after the prop valve - the standard prop valve in the rear is removed - the front and rear calipers are both 38mm pistons.

Im not going to say much more because the memories of the job are too painful but this is the wrong way to do this - the best way would be to mount a top hinged pedal bar in the boot - a bit of cutting and fabbing and rooting around but ANYTHING is better than working in that pedal bar area under the car, there is just no space and its even worse with a front mount radiator.
 

Attachments

  • DSC01529.jpg
    DSC01529.jpg
    60.2 KB · Views: 505
  • DSC01542.jpg
    DSC01542.jpg
    54.2 KB · Views: 505
  • DSC01537.jpg
    DSC01537.jpg
    45.7 KB · Views: 469
  • DSC01534.jpg
    DSC01534.jpg
    71.4 KB · Views: 470
  • DSC01533.jpg
    DSC01533.jpg
    65.1 KB · Views: 472
  • DSC01532.jpg
    DSC01532.jpg
    59.1 KB · Views: 452
  • DSC01528.jpg
    DSC01528.jpg
    27 KB · Views: 478
  • DSC01527.jpg
    DSC01527.jpg
    55.4 KB · Views: 479
  • DSC01524.jpg
    DSC01524.jpg
    18.4 KB · Views: 456
  • DSC01522.jpg
    DSC01522.jpg
    74.5 KB · Views: 500
  • DSC01543.jpg
    DSC01543.jpg
    46.9 KB · Views: 486
  • DSC01544.jpg
    DSC01544.jpg
    49.1 KB · Views: 464
  • DSC01588.jpg
    DSC01588.jpg
    35.3 KB · Views: 457
  • DSC01589.jpg
    DSC01589.jpg
    29.6 KB · Views: 448
  • DSC01591.jpg
    DSC01591.jpg
    35.5 KB · Views: 460
  • DSC01595.jpg
    DSC01595.jpg
    34 KB · Views: 442
  • DSC01603.jpg
    DSC01603.jpg
    36.2 KB · Views: 460
The Rear Brakes Project

Mecaparts 38mm rears and new rotors etc etc etc in the kit.

When the rear wheels came off the current calipers were just stuffed, same for rotors and the best part was that the split pins that hold the calipers in, well they obviously couldnt find the normal big split pins so just put in a little shitty one - great stuff - the mecaparts pins are huge by the way, a little paranoid maybe?

Ofcourse the passenger side wheel bearing was toast so its changed, i got two new nut and cones before the job because its a good idea to change them - but someone had not changed / tightened properly the one of the drivers side before and the nut is flush aginst the hub when i looked - and the actual hub was still a bit loose.

The down side here is that it has worn the hub - the new nut and cone just clear the hub so i will weld it up at some stage and cut a new taper in.

The brakes were put in (de backing plated - will see how they go without the preload spring) and just tidied up and then ducted using the 4" flexi alu tube mounted to the control arm - it scoops from under body and dumps straight on the rotor.

Also took the opportunity to cut the drop straps down so the rear end never goes positive camber - this was always a great perf upgrade as it also basically operates like an anti roll bar as when the inside wheel hits the limit the body stops rolling and it starts loading the outer wheel much earlier (ofcourse the body still roll further the more and more load you put onto the outer until its hits the bump stop).

And with the Mecaparts stuff came a new handbrake cable so that's in - works great too.
 

Attachments

  • DSC01570.jpg
    DSC01570.jpg
    34.3 KB · Views: 438
  • DSC01571.jpg
    DSC01571.jpg
    32.5 KB · Views: 468
  • DSC01578.jpg
    DSC01578.jpg
    38 KB · Views: 476
  • DSC01597.jpg
    DSC01597.jpg
    29.9 KB · Views: 437
  • DSC01583.jpg
    DSC01583.jpg
    36.1 KB · Views: 434
  • DSC01568.jpg
    DSC01568.jpg
    39.5 KB · Views: 455
  • DSC01569.jpg
    DSC01569.jpg
    25 KB · Views: 424
  • DSC01555.jpg
    DSC01555.jpg
    39.5 KB · Views: 421
  • DSC01560.jpg
    DSC01560.jpg
    38.5 KB · Views: 429
  • DSC01557.jpg
    DSC01557.jpg
    36.2 KB · Views: 396
  • DSC01599.jpg
    DSC01599.jpg
    30.9 KB · Views: 440
  • DSC01602.jpg
    DSC01602.jpg
    32 KB · Views: 421
Last edited:
The Exhaust Project

The 4 into 2 into 1 isnt my favourite 4 cylinder extractor. The best results ive always had with exhausts on 4's is 4 into 1 with about 80cm - 100cm in the primary - but this differs for all engines - bore to stroke ratio, inlet systems, cam timing, at what rpm you want you peak power etc etc affects the tuned length of the pipe.

So this was just to clean it up as it was just rusty from sitting around and also to thermally wrap it. For this type of engine this is probably worth 1-2HP at max rpm.

The hotter the column of gas can stay at the walls of the pipes will allow a wider column to travels through with less impedence.

So its had the rust scale knocked off the can and the headers and gave them a quick 300C paint for a tart factor and then spent 2hours wrapping the pipes - it has to be tight and right.

You do this with the fibreglass based tape after it has been soaked in water. I would recommend baking the exhaust on the car when the wrap is still wet rather than let it dry normally.

Also on this header the head plate had been cut out very nicely to match the ports but then had the tubes placed inside before welding so it created a gas step for the exhaust - just 30 minutes of work with the high speed rasp in the drill and now the gas has a much smoother exit to follow.

With such a short exhaust, big cam and carburettors im really looking forward to the down through the gears flames out the pipe - the big orange glow in the side mirror at night is very cool.
 

Attachments

  • DSC01572.jpg
    DSC01572.jpg
    37.5 KB · Views: 426
  • DSC01580.jpg
    DSC01580.jpg
    41.9 KB · Views: 392
  • DSC01577.jpg
    DSC01577.jpg
    44.5 KB · Views: 395
  • DSC01575.jpg
    DSC01575.jpg
    41.3 KB · Views: 395
  • DSC01573.jpg
    DSC01573.jpg
    50.8 KB · Views: 404
  • DSC01567.jpg
    DSC01567.jpg
    46.4 KB · Views: 425
  • DSC01565.jpg
    DSC01565.jpg
    35.6 KB · Views: 415
  • DSC01564.jpg
    DSC01564.jpg
    31.4 KB · Views: 424
  • DSC01562.jpg
    DSC01562.jpg
    25.1 KB · Views: 402
  • DSC01561.jpg
    DSC01561.jpg
    46 KB · Views: 407
  • DSC01586.jpg
    DSC01586.jpg
    33.1 KB · Views: 401
The Steering Project

Pretty basic really - just puilled the rack and put in a 2.5 turn rack and pinion (standard 3.7 turns) and new rag joint (the old one just crumbled to pieces), and new ties rods and boots.

The tie rods were mecaparts parts - now i know the car is lower but not rediculously as the tie rods seemed way to long. At the current ride height the tie rods sit horizontal (at their max width).

I just took at them with the angle brinder and cut about 15mm off either end and now they are only just ok to get the aligment alright.

In any event i have a rack height adjuster and rack booster coming which will re correct the angles and also improves steering response (and also recorrect what i did with dropping the steering wheel).
 

Attachments

  • DSC01552.jpg
    DSC01552.jpg
    66.6 KB · Views: 494
  • DSC01551.jpg
    DSC01551.jpg
    39 KB · Views: 425
  • DSC01550.jpg
    DSC01550.jpg
    47.6 KB · Views: 411
  • DSC01506.jpg
    DSC01506.jpg
    45.7 KB · Views: 423
  • DSC01505.jpg
    DSC01505.jpg
    48.7 KB · Views: 426
  • DSC01549.jpg
    DSC01549.jpg
    50.2 KB · Views: 413
The Odds and Sods Project

These cars were pretty much so falling apart 20 years ago - now it seems that everything you touch is rooted or needs some mod to make it work properly.

In some instances where there was a rubber item it simply doesnt even exist, it has returned to the earth from whence it came obviously.

Sway bar rubbers.
Top bump stop rubber.
When i went to my dads to look around i found an original windscreen washer bottle!
Accelerator pedal rubber.
Engine mounts.
Fabbed a bracket to guide the clutch cable true and a spring for return as the arm one was broken.
All the heater hoses.
When at my dads garage i also found an ariginal gordini dash pad in great original condition so that went in.
Replaced every engine hose (which is alot when its front radiator mount and also a nightmare when that R16 engine waterpump is hidden). To do this i had to buy a crap load of pipes from Supercheap and cut up segments and join them with little aluminium mandrel bends etc to plumb the system to and acceptable standard.
 

Attachments

  • DSC01581.jpg
    DSC01581.jpg
    30.3 KB · Views: 389
  • DSC01590.jpg
    DSC01590.jpg
    32.7 KB · Views: 431
  • DSC01582.jpg
    DSC01582.jpg
    36.1 KB · Views: 374
  • DSC01579.jpg
    DSC01579.jpg
    34.3 KB · Views: 409
  • DSC01554.jpg
    DSC01554.jpg
    38.9 KB · Views: 385
  • DSC01530.jpg
    DSC01530.jpg
    22.6 KB · Views: 372
  • DSC01526.jpg
    DSC01526.jpg
    21.9 KB · Views: 385
  • DSC01525.jpg
    DSC01525.jpg
    20.5 KB · Views: 377
  • DSC01517.jpg
    DSC01517.jpg
    27.9 KB · Views: 389
  • DSC01516.jpg
    DSC01516.jpg
    38.1 KB · Views: 397
  • DSC01596.jpg
    DSC01596.jpg
    35.6 KB · Views: 425
The instant 20HP upgrade project

Well maybe not physical HP but it certainly adds 20HP of bling to the engine bay.

While in there doing the valve clearances i noticed it must be a fairly high lift cam as the valve springs are almost coil bound at full lift.

It certainly makes the bay look pretty trick and the vehicle is really starting to come together.
 

Attachments

  • DSC01611.jpg
    DSC01611.jpg
    20.9 KB · Views: 419
  • DSC01609.jpg
    DSC01609.jpg
    30.1 KB · Views: 443
  • DSC01610.jpg
    DSC01610.jpg
    30.1 KB · Views: 431
  • DSC01612.jpg
    DSC01612.jpg
    51.3 KB · Views: 429
  • DSC01615.jpg
    DSC01615.jpg
    42.8 KB · Views: 480
  • DSC01621.jpg
    DSC01621.jpg
    45.4 KB · Views: 435
  • DSC01622.jpg
    DSC01622.jpg
    45.5 KB · Views: 455
Brett,
Have had a quick read of my "bible". Phil Irving's Automobile Eng Tuning.
On the subject of valve spring binding he suggests a gap of 1/16" between the coils of a compressed spring to prevent this occuring at high revs.
 
Top