My new XM

Air con oddity

Have noticed that the XMs air con compressor cuts in and out - just like the hydraulic pump! Perhaps it's a Citroen thing, but my Xantia doesn't do it :confused: - at least not in the current mild-warm conditions.

Ambient temp today in low 20s. If I set cabin temp slightly lower, compressor runs for 15 secs, then rests for just under 10 secs. If I reduce cabin temp to 15C, the run time extends to 30-35 sec, with rest time about 5 sec.

If I manually set cabin fan to maximum speed, the compressor will keep running, but if I reduce the cabin fan speed even one notch, it resumes cycling. Yesterday afternoon was significantly hotter, and I noticed then that it was cycling.

Can anyone shed any light? Even with the cycling, the air con seems reasonably effective, but surely the cycling behaviour must shorten the life of components such as compressor clutch, relays etc...

Cheers

Alec

this is quite normal and it is how they are designed to run. Yikes will vary with ambient temperature
 
The A/C cabin temp sensor is in the overhead console near the interior light. They can get blocked with dust. It's worth cleaning it occasionally. I recall you pop the light cover out or something. Last time I would have done that is 2009!
 
Last edited:
Alec,

If the Xantia one isn't cycling, it is probably low on refrigerant. They are deigned to cycle so the evaporator in the car doesn't get so cold that its ice up the condensation that forms on the evaporator and then stops the airflow through it.

If it is hot hot outside and I stop my Xantias for a short while, when I restart the car, the refrigerant pressure rises above the high level of the pressure switch which turns the cooling fans into high speed for a while while the system settles down. I think that is a sign that the refrigerant level in still good.

If refrigerant level get too low, the pressure switch will not allow the compressor clutch to pull in and there will be no cool.

Cheers, Ken
 
Well this is a most remarkable situation! Surely a first when an XM is seen as the gold standard, and every other car is wrong! I agree that Ken's and Peter's explanation sounds plausible - it just doesn't match my experience.

The XM cycling caught my attention because it did not sound "normal" to me. Just to be sure I have just re-checked the Xantia SII, a 605, a 406 (D9) and a 307 (T6). None of them show that cyclic behaviour. I am not saying it doesn't happen when everything has been running for long enough that the cabin temperature has dropped & measured temp is equal to or below target temp, but this is happening (in the XM) right from startup, when the cabin is still hot.

I presume there is a temperature gauge (thermistor?) close to the evaporator which controls this behaviour?

Craig - thanks, I hadn't spotted that the cabin temp sensor was up there - my other cars have it in the dash. You were right - pop off the light cover, then remove 2 x self tappers and the whole unit drops down. However I didn't expect to strike blue tack! The screws came out covered in it, and the temp sensor unit had been "glued" into place with it :rolleyes:. Anyway, you were right - there was a nasty blob of sticky dust coating the little temp sensor. I'll bet the little fan just behind the sensor is cactus too.

Interestingly (to me anyway) the air con behaves just the same without the cabin temp sensor connected! Curious...

Cheers

Alec
 
Well, well, well, the little fan in the cabin temp sensor still spins, and does so smoothly and quietly!

Also I managed to disconnect the security key pad without breaking anything!! And the car still starts (& keypad is now disabled)!!!!
 
Last edited:
As documented elsewhere, fixed my first XM LHM leak this week (elbow connecting front height corrector to return line disintegrated) with Bunnings 4mm plastic drip irrigation tube.

Today I replaced the spring in the brake pedal linkage with an equal length of copper pipe - dramatic difference in pedal feel. Don't ask me to document how to do it - I may swear profanely or burst into uncontrollable hysterical sobbing.

Removed mud flaps etc. and washed out all the dirt & crud accumulated in the front wings.

Changed auto trans fluid (2nd time). Still don't have replacement level plug, so just added 3.5 litres. OK, 3 litres would probably have been enough, but hey - previous owner just put back exactly the same volume as he drained out - 4.7 litres each time!!!). Maybe someone misread the manual - 4.7 litres is roughly what is left in the transmission after draining, and refill should be about 3 litres.

As soon as the new level plug arrives, the old one can be removed by any means possible, and I'll be able to actually set the right level. Apparently excess fluid causes overheating, which in turn causes thumps!

Cheers

Alec
 
I must look into this brake pedal mod you talk about. I dont find the pedal feel as "nice" as the BX I have ..A bit of a "dead spot" , right on initial braking, if that makes sense. I have bled them all again (recent fluid change) as I have read that air in the rear calipers can give a delayed braking effect, but it made no difference. Don't get me wrong, they are very powerfull stoppers, but its just the light braking feel that I am not enamoured with.
 
I must look into this brake pedal mod you talk about. I don’t find the pedal feel as "nice" as the BX I have ..A bit of a "dead spot" , right on initial braking, if that makes sense. I have bled them all again (recent fluid change) as I have read that air in the rear calipers can give a delayed braking effect, but it made no difference. Don't get me wrong, they are very powerful stoppers, but it’s just the light braking feel that I am not enamoured with.


OK, I think I've recovered enough to revisit this issue. I will give an overview for those who just switched over to this channel. I owe my knowledge of the existence of this spring, and fact that it can be replaced, to Shane (Double Chevron), who documented the process when he carried it out on the green diesel XM that he owned about a decade ago.

I know nothing about BXes, but a DS has a "mushroom" - a large button - instead of a brake pedal, that presses directly onto the brake unit activation 'switch'. This switch has only a tiny range of movement, so you brake by just resting your foot on the mushroom, and increase the pressure to increase brake force. The XM and Xantia, trying to seem a bit less weird, have a conventional looking brake pedal, but still have essentially the same brake unit as a DS. So to try and make the brake pedal feel "normal", Citroen introduced a spring between the brake pedal and the brake unit activation switch, so that the pedal would move when you pressed it, just like in a normal car.

I can remember Shane (Double Chevron) describing the effect as only he can, but much of his timeless prose on such subjects was alas lost in the great GoDaddy crash of 2010. Basically the spring allows light pressure on the pedal to produce a small braking effect, but steadily increasing pressure simply compresses the spring, without noticeably affecting the braking effect, until suddenly the spring runs out of compression, and your increasing pressure just as suddenly gets transmitted to the brake unit, with predictably dramatic effect!

In both the Xantia & the XM, the spring is contained in a plastic capsule, but naturally they are quite different.

The Xantia has a relatively simple setup. The brake unit is positioned where a conventional master cylinder would be, and the brake pedal, when depressed, pushes the capsule forwards, which in turn presses on the brake unit switch. The capsule is found above the driver’s feet, inside the cabin. The disadvantage is that when (not if) the brake switch boot fails, your driver's footwell floods with LHM (under the carpet, where you can’t see it).

The XM is (naturally) far more complex. The brake unit is in the scuttle, with the switch facing the wheel arch. This has the advantage that when the boot fails, the LHM may drain away relatively harmlessly, in the same way that rainwater does. However the rods and levers required to get the brake force from your foot into the brake unit are of course far more complex!

Here is the diagram from Service Box:

attachment.php


In brief, when you depress the brake pedal, you push a vertical rod upwards. This presses on the capsule that contains the spring, which in turn acts on "rocker arm", which finally activates the brake unit switch.

The vertical rod does not have a separate part number but is shown as the highest part of the brake pedal (part # 1). It pushes through a hole, up into the scuttle. The capsule is part # 4, and is found up in the scuttle. The rubber (plastic) boot (5) provides weather sealing of the hole in the scuttle - the capsule is fitted into the upper part of it (the diagram is misleading at this point).

When the brake pedal is depressed, the rod pushes the capsule up against the lower RH part of the rocker (7), which pivots towards the left. The bolt head (8) finally applies pressure to the brake switch!

Jut in passing, the pivot point of the rocker (bush # 9 and bolt # 16) requires lubrication. Probably a rare issue in Australia, in the UK I have read reports of brakes dragging/jamming on, with the cause being the seizing up of this pivot. I applied a little copper grease to mine. The rocker unit is of course held in place by the bracket (6).

To eliminate the spring, and give the brakes a true Citroen feel, proceed as follows.

1. Remove scuttle. This of course starts by unclipping the fancy little pieces of trim that cover the ends of the scuttle, breaking off the mounting lugs in the process. Don't forget to check for little screws in the rear ends of these covers, only visible with the doors fully open (hint - don't start this job inside a garage that prevents doors opening fully). I have yet to reinstall mine, but I think it will involve silastic.


2. Remove raincoat from wiper motor – slightly improves access and prevents damage to plastic raincoat.


3a. It has only just occurred to me (being a bear of little brain), that it might just be possible to undo the pivot and remove the rocker arm (& thence the capsule) without removing the bracket. This could potentially be a quicker solution. It requires a T40 torx key (fits through an access hole in the far side of the bracket – where you can touch it but not see it), and a 13mm open ender. Pretty sure this was assembled with Loctite, so you may just end up rounding off the nut with the open-ender spanner. It may also be possible to release the bracket from the scuttle (3b.ii below), and then remove the pivot without separating the bracket from the brake unit, but this would likely put stress on the high pressure LHM lines connected to the brake unit.


3b. In the event that 3a doesn’t work, remove bracket (part # 6).
i. The brake unit is mounted onto this bracket by 2 bolts (11 mm heads). They are very tight (assembled with Loctite), and access to the lower one is very limited. Because they are very tight, you really need to at least loosen them while the bracket is firmly fixed to the scuttle, to prevent too much stress on the high pressure LHM tubes attached to the brake unit.
ii. The bracket is held in place by three bolts with torx heads – 2 at the front, and one at the back, under the lip of the scuttle. They are difficult to get at, and are tight (also assembled with Loctite). I purchased a flexible drive for my cordless driver, but of course it is a bit too bulky and inflexible, especially for the back one.


4. Once bracket is removed, you can pull out the capsule. It is tightly held in the bellows that seals the access hole into the cabin. I assumed that the bellows had been pushed into place from below, and levered the capsule out. Later I discovered that the bellows was installed from above – just glued in place by dried out mastic or equivalent sealer – I just pulled a bit harder, and out it came!


5. To find the spring, remove the base from the capsule. Mine was just held on with dried goo – no clips of any kind.


6. I replaced the spring with a piece of copper tube (because I just happened to have a short length of copper tube of the right diameter). I doubt that the material is critical, so long as it is non-compressible and will not deteriorate over time. As you will see, it does need to be tubular to fit correctly. The replacement tube cannot be even 1 mm longer than the spring, or you won’t get the capsule back together.


7. Reassemble capsule – I glued the base on with silastic, then left it in the sun for a few hours to cure.


8. Disassemble the pivot for the rocker arm, clean, lubricate and reassemble.


9. Reinstallation is of course the reverse… Fit the capsule to the bellows, then reinstall as a single unit. I used mastic to hopefully seal the base of the bellows where it is seated into the hole in the floor of the scuttle. At this point I found the rod from the brake pedal very annoying. Not sure if it has a spring, or if was just the weight of the brake pedal, but while I was trying to press the combined capsule and bellows into place, that rod was actively thwarting me!


I didn’t investigate ways of keeping the rod out of the way – just placing something under the brake pedal may have been sufficient – I managed to juggle everything into position, and get some bolts started. Note that the rod has to be located into the centre of the capsule before tightening anything up.


Don’t forget to reinstall the wiper motor’s raincoat!


Was it worth the effort? I seem to have correctly reassembled everything – nothing left over, and most importantly, the brakes work! The pedal feel is completely transformed – no longer that mushy, springy feel, it now barely moves. In true Citroen fashion, you just rest your foot on it, then squeeze steadily to activate the brakes, so I think the answer is “yes” (so long as the scuttle doesn’t now leak).

Cheers

[FONT=&quot]Alec[/FONT]
 

Attachments

  • XM brake pedal diagram.png
    XM brake pedal diagram.png
    427.3 KB · Views: 434
Big day Monday - I paid other people to work on the XM for the first time in the 12 months of ownership.

First it was off to the tyre service - in this case K-Mart (now MyCar). The tyres that came with the car were old (but clearly not original) Michelin XM1+ - so hard that they would squeal on corners, and getting fairly worn.

As Peter (4cvg) would confirm, there is very limited choice of quality tyres with good wet weather grip in the 205x65R15 range. One tyre in his size that he does recommend is the Dunlop FM800. I have them on my 605, and they are perfectly satisfactory - I have had 2 sets, and neither have needed balancing, which is wonderful, given how hard it is to get wheels without centre holes balanced.

So I decided to get something else. I wanted V-rated tyres for the XM, and it came down to a choice of Pirelli P6 or Continental UC6. Pretty much a flip of the coin, as K-Mart could supply either at very reasonable cost (about $115 per tyre fitted and balanced - they gave me a discount as they couldn't balance them). I have had Continentals before, and didn't like them (Comfort Contact - no grip), so decided to try them again :rolleyes:.

I hope I'm not going to regret the choice - on the way home I tested the brakes (via the now very firm brake pedal), and got wheel lockup. Now I know about the need to scrub off the slippery finish before the tyres work properly, so hopefully all will be well after a few hundred km. What is worrying me is the lack of interest from the ABS - why didn't it prevent wheels locking :confused:.

I also let K-Mart do the wheel alignment. It clearly needed doing, as the old front tyres were very worn on the inside edges. I have attached the printout from their machine - can anyone offer comments? Rear wheel toe (for example) is outside the standard range - does it matter?

View attachment XM wheel alignment March 2020.pdf

Cheers

Alec
 
While the car was in town on Monday, I also took it to the local exhaust shop. This is a very low-key affair - no fancy paint job, nor queue of hoons getting cannons fitted.

Peter diagnosed the buzz on trailing throttle as being from the cat - collapsing internals. I also asked him to replace the centre resonator, as the one fitted looked to be little more than a hot-dog, and the connection behind it was held together with wire and a muffler bandage :rolleyes:. He also noticed that there was no central support for the muffler system, so created one.

My vision was to enhance the 'q-ship' nature of this car - I wanted it to be fast and quiet. Well one out of 2 ain't bad - performance does seem to have improved (logical if cat was partially blocked), but I would not say it is quieter! I don't think the insulation/sound proofing of the passenger compartment is as good as it is in my 605 and 406 - maybe one day the dash will have to come out and I can improve the insulation (as Shane did to the green diesel XM many years ago).
.
My experience with french car exhausts is that the pipes usually last very well - but occasionally you need new mufflers - esp. if like my 605, the car has only done short trips in it's previous life. So it's puzzling to me that the previous owner let a muffler shop replace the entire rear section of the exhaust. The problem is that the parts book shows a new design of rear exhaust, introduced with the ES9J4 motor in 1997. The replacement system is the older style, designed for use with the PRV motor! Oh well, it fits and it looks fine, so it is what it is...

Cheers

Alec
 
I must look into this brake pedal mod you talk about. I dont find the pedal feel as "nice" as the BX I have ..A bit of a "dead spot" , right on initial braking, if that makes sense. I have bled them all again (recent fluid change) as I have read that air in the rear calipers can give a delayed braking effect, but it made no difference. Don't get me wrong, they are very powerfull stoppers, but its just the light braking feel that I am not enamoured with.

I used a short length of hardwood dowel in the Xantia to replace the spring. Vast improvement.
 
The LHM pump on this car works well - it reprimed itself very quickly after I disconnected the suction line, and doesn't muck about when asked to lift the car.

However, looking down on the pump from above with engine running, the pump pulley looks to be rocking from side to side as it spins. I looked at my Xantia's pump for comparison, and it's pulley wheel looks to be perfectly true.

I can't hear any unexpected noises, and with engine stopped, I couldn't make the pulley rock sideways at all. However I have not loosened the accessories belt, so may not be a fair test.

Is it possible that I have a slightly out of true pulley, or is this a sign that the pump bearings are shot (even though there's no rumbling or grinding noises)?

Cheers

Alec
 
Have been working on removing the PAS RAM (bushes are shot of course). According to UFO, I don't need to remove the whole rack, but all the "how to" guides I have found are for taking out the whole rack. I have been pottering away at this for several days, but getting sick of LHM dripping in my eyes.

I was procrastinating so much that I actually finished a job from last year, just to avoid pushing on with the RAM. Since the rear was already up on jack stands, I pulled out the spare wheel, removed the carrier, dropped the rear part of the exhaust system, and removed the heat shield from above the transverse muffler.

I was now ready to have a serious crack at replacing the anti-sink sphere! No evidence that the old one was stuffed, but without a pressure tester, how was I to tell? Besides, I had bought a new one last year, as part of a full set of 8 IFHS spheres.

BTW, Sphere Shop (who I ordered the spheres from last year) is now closed. A good alternative (according to UK members of the Club-Xm forum) is AEP (aepdirect.com).

As someone from Club XM explained, partially dropping the sub-frame makes the job easier, so I decided to have a go - even though I've never previously interfered with a sub-frame. Just loosened the 2 x bolts on the right, put a jack under the LHS, removed the LHS bolts, then lowered the jack very gently until I had enough room for my handy-dandy chain wrench. Amazingly all the pipes and wiring harnesses flexed sufficiently - except that the height-corrector leak-back return line pulled out and started dribbling. Turned out that the original joiner had been replaced with a short length of rubber pipe, which in turn was now perished. I replaced it with a slightly longer piece of my go-to solution - plastic irrigation tubing from Bunnings!

Theoretically I should have hardly needed my chain wrench, as the sphere is held in place by a giant lock-nut. However the only tool I have that will open that wide is my pipe wrench, and there's no room in there for that! The pipe union on the back of the sphere is of course 9mm - luckily I already had a 9mm flare spanner - purchased specially for changing a Xantia anti-sink sphere.

It took longer than the same job on the Xantia, but was straightforward enough. I did have a bit of trouble getting the LHS rear subframe bolt started into it's hole, but used a scissor jack to push things into place. My trusty Ozito rattle gun soon had everything nice and tight.

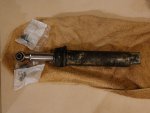
Oh and the ram? At some point this fell out:

DSC03364.JPG

Cheers

Alec
 
no excuses this weekend Alec! just be VERY safety conscious crawling around underneath. Put stuff under the car to stop it from dropping.
 
Thanks Steven - I'm going to pay someone else to press the old bushes out and the new ones in. Then the fun can start! Weather here was most unpleasant today, and the car is stranded on the paving in front of the garage (parts & tools safely in the garage), so I wimped out. But yesterday I had the car on 4 stands, the trolley jack under the front, and the front tyres under the sides. Makes it almost impossible to find a gap to crawl in there!

The ram removal was quite simple - in retrospect. Apart from the stud at one end, and the nut at the other, there's just two hydraulic pipe connectors to undo. But it seems to have taken days... Apart from everything being so tight, there was the LHM in the eyes (and having to regularly clean my glasses), and the pipe unions were very slow to fully undo.

Two annoying problems (plus a third I created for myself):

1. The two LHM pipes connected to the ram are positioned one above the other. I undid the bottom one, but then realised that I couldn't move the pipe, so still couldn't access the top one. Solution was to undo the other end of the lower pipe (it connects to the driver's side end of the steering rack housing), and remove it.

2. The problem I created: by the time I was able to access the upper pipe connector, I had removed the stud that retains the fixed end of the ram, so it was not stable enough to be able to undo the very tight pipe fitting. Refitting the stud was not easy - nothing wanted to line up. I completely removed that pipe as well, which I now assume was not necessary.

3. The moveable end of the ram wouldn't come off the post. I found a comment by DavidS that it was necessary to loosen the large bolts that clamp the rack onto the subframe to make enough room to get the eye off and the ram out, but that they should not be removed, as there were spacers. I loosened them, but still could not get that eye off the post, even with a breaker bar to lift the rack. I started to worry that I would damage something - there are rack boots and fine hydraulic tubes just waiting to cause mischief - so I removed the nearest rack bolt completely (but left the other just loose). The ram then came out - but left behind the heat shield, which seems to just clip onto the ram. The rack bolt went back in easily - the spacer wasn't dislodged :dance:.

I didn't even remember to pull the leakback line out of the flexible connector, but it seems to have just pulled out without damage. The leakback collar is a bit sticky, but is not really leaking.

As it has been for everyone else that's reported on this, the bush in the fixed end is totally stuffed, while the moveable end bush seems fine (but will be replaced anyway). Thanks to those on here who warned of the damage a stuffed bush can cause - a fracture in the connected LHM pipe that is not designed to take much movement, a problem I seem to have avoided.

Cheers

Alec
 
Last edited:
Question arising:

Has anyone noticed an improvement in the steering feel just from those bushes? I was noticing a lot of vibration in the steering wheel when travelling over rough surfaces - not pleasant. Could that be because the ram was able to move, or should I be looking at ball joints, lower control arm bushes etc.?

I am pretty confident that the strut tops are OK - for a start the bellows/dust protectors stay in place, and furthermore the front suspension spheres are retaining their 'social distance' from the scuttle cover.
 
Alec,

One could write a whole book on that topic. I will just make some comments.

The power steering should be a bit more responsive with the new bushes and maybe it will rattle a bit less without the metal to metal contact. However there are lots of ball joints in steering that can wear and develop play. So next time your front wheels are off the ground, depressurised and best sitting at normal driving height, waggle the front wheels from side to side the top to bottom to see if you can find any play in the 2 tierod or 1 bottom balljoints on each side. Other ball joints to look at (feel for movement) are the droplink ball joints that go to the anti-roll bar as you move the wheel up an down on the trolley jack.

As you know good steering and front suspension should not have any rattles in it and no clicks and pops as you turn from lock to lock. Now that is a challenge on an older car.

To see what the strut top rubbers look like, you have to take the dust covers down from the top so you can see inside.

Cheers, Ken
 
Thanks Ken - the car is currently up on stands, with wheels off - but suspension was put on high before the stands went in, and the anti-sink valves are now keeping the height locked. I did put a jack under a brake disk, and watched the strut top move up a bit as the weight came on, then the whole front of the car started to lift. Moving the cabin lever to normal height naturally did nothing.

I did try using a breaker bar to lever joints, but realise now that with everything being at full stretch I was unlikely to find any movement.

So once I get new bushes pressed in and the ram refitted, I will be able to start the engine and unlock the anti-sink. Then I can work out how to get the front end off the ground, but at normal height with the system depressurised!

Seems logical that the shaking I was feeling through the steering wheel would at least partly be down to that destroyed bush. However the sides of the front lower control arm bushes look cracked, so there might be a story there.

Cheers

Alec
 
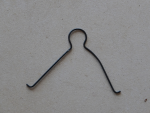
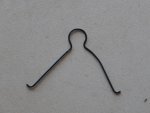
OK - P/S ram back in (my hands are cut to ribbons by the heat shields), but I have a problem - a wire slip has fallen out, and I don't know where it goes :cry:.

I believe it's come from the lower part of the steering column - if I were to drive without it, would I lose control and run into a tree?

DSC03489.png

Mr Russek is no help - his diagrams don't seem to illustrate anything vaguely similar, and of course I can no longer while away the hours poring over the Service Box diagrams (well I can - at a price). Can anyone help?

Alec
 

Attachments

  • DSC03489.JPG
    DSC03489.JPG
    2.1 MB · Views: 129
Last edited:
Top