My 504 Daily Driver Project

It runs!!!!
Big grins tonight.

Not without it's teething problems, but she has fired up (eventually) and sounds mean! I only have the centre muffler on at the moment, and then the exhaust exits just past the rear axle. I have to fit the rear muffler, and sooner rather than later! The idle is perfectly smooth and when you open the throttle, the response is brutally instant!

Problems:

  • Water leak where the temperature sender - easy fix.
  • Water leak from heater core - harder fix, need to find another one.
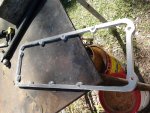
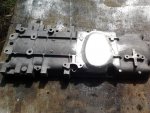
  • Oil leak from LH rocker cover. It seems that the tin cover cover does not have enough height to clear the rocker pedestals. I will try doubling up the rubber gaskets to see if that gives me the necessary clearance and a good seal.
  • MAP sensor does not seem to be responding. More research required. Megasquirt is currently set to run in Alpha-N mode, so the MAP sensor is not required for now.
  • Coolant temp and air temp readings are a bit haywire, I need to calibrate them.

Still to do:
  • Wire in idle control valve.
  • Finish instrumentation wiring.
  • Convert from batch to semi-sequential ignition (components are on back-order).

Again, I'm celebrating tonight!
 
2015-10-21 10.26.08.jpg2015-10-22 10.12.01.jpg


Hi Scott, For the laguna motor in my 505 I used an early RH valve cover so I could mount the AC compressor. The same problem with rocker clearance existed there also. My solution was to plasma cut a spacer out of 6 mm aluminium plate. I don't use gaskets, just seal it with Permatex "THE RIGHT STUFF" and that works fine. Also removed the oil filler from RHS cover.

Chris.
 
View attachment 82475View attachment 82476


Hi Scott, For the laguna motor in my 505 I used an early RH valve cover so I could mount the AC compressor. The same problem with rocker clearance existed there also. My solution was to plasma cut a spacer out of 6 mm aluminium plate. I don't use gaskets, just seal it with Permatex "THE RIGHT STUFF" and that works fine. Also removed the oil filler from RHS cover.

Chris.


G'day Chris,

Thanks for your post. Interesting that you went for a 6mm spacer - is that what you measured to be necessary, or is there a good safety margin built in there? It seems to me that I only need about 1.0-1.5mm more clearance than currently available. I'll measure again more accurately tomorrow.

My rocker covers are the tin ones from non-AC vehicles. I have not measured how they compare to the cast aluminium ones for clearance.
 
:cheers:


BTW, is that heater core an original 1970 one ? It's only 46 years old !

No, it isn't. I've gone for a later model, with the plastic thermostat. Regretting that decision right now, I'm sure there was nothing wrong with the earlier one!
 
Scott,

I allowed for a good safety margin. Can't remember exact measurements, but did quite a bit of measuring with straight edges and depth gauges and decided on the 6mm. I am fairly sure there is only a very small amount in it but felt happier with a solid spacer than doubling up on gaskets as the cover was supporting the AC comp, otherwise I may have just used 2 gaskets. Also I happened to have an off cut of 6mm handy at the time, which is often a factor in deciding what to use.

Chris.
 
Scott,
Have you seen where the heater core is actually leaking ? Because where the on/off valve bolts on, it can leak from the O-rings. If you have fitted non-standard O-rings, it may be leaking from them.....the original ones are square-shouldered.
 
Oil leak and coolant temp sensor leak fixed.

Two gaskets under the RH rocker cover solved the oil leak problem. I measured it up as needing less than 1mm additional clearance - each gasket is 3mm uncompressed. Seals well now with very little tension on the screws.

A little thread tape on the coolant temp sensor sorted that out.

Tomorrow I will add another muffler and see how it sounds. It's a bit rude to the neighbours to be running it as is.
 
It's getting crowded in here!
WP_20160501_008.jpg

Engine bay is basically done, except for lighting looms. Engine is running, and all the functionality of the motor is there now.

For better or for worse, I have plumbed the idle speed controller into the crankcase ventilation system. The idle speed controller breathes directly through the crankcase vent/oil filler. This is then T-ed off to the venturi I have created in the inlet tract. Hopefully this will provide the most vacuum available under all engine conditions to keep the crankcase ventilated properly.

The downside is that the oil vapour flowing through the idle speed controller may clog it up. I'll keep an eye on that.

So, I've been playing with the Megasquirt getting all of the inputs and outputs behaving properly. I have now got all the functions working, including control of the cooling fan and instrumentation.

You can sit in the driver's seat, turn the key and it fires up every time within 2 revolutions of the motor. And I quite enjoy doing so! I haven't fitted any brakes yet, so I haven't had it in gear yet, but it really feels like it wants to leap out of the garage and hit the road!!
 
Couldn't find a source for the connectors to the dashboard, but since I never liked them anyway, I decided to eliminate them from the system :)

WP_20160502_001.jpgWP_20160502_004.jpg

I've always disliked cars that don't have enough cable to be able to remove the instrument cluster easily.... so I have arranged it all so that there is an adequate coil of loom to withdraw the cluster far enough to comfortably disconnect the connectors.

The plugs are arranged into two connectors - one for power and instrumentation, the other for lighting.
 
Couldn't find a source for the connectors to the dashboard, but since I never liked them anyway, I decided to eliminate them from the system :)

View attachment 83910View attachment 83911

I've always disliked cars that don't have enough cable to be able to remove the instrument cluster easily.... so I have arranged it all so that there is an adequate coil of loom to withdraw the cluster far enough to comfortably disconnect the connectors.

The plugs are arranged into two connectors - one for power and instrumentation, the other for lighting.

I haven't seem manually done cable lacing since Larkspur Military wireless sets.

Good to see lacing skills are still alive. Much less bulkly than cable ties.

What did you use, looks like narrow cotton/ polyester/ nomex tape, in the old days it would be (bee) waxed linen thread.
 
I haven't seem manually done cable lacing since Larkspur Military wireless sets.

Good to see lacing skills are still alive. Much less bulkly than cable ties.

What did you use, looks like narrow cotton/ polyester/ nomex tape, in the old days it would be (bee) waxed linen thread.

It's Nomex. Strong and flame-proof.

Lacing cables is a throwback to my aviation background - I have probably done hundreds of thousands of them in my time. To use a Star Wars reference, laced spot-ties are to plastic cable ties as a light-saber is to a blaster: a much more elegant solution. The lacing is longer lasting, stronger, neater, causes less damage to the wiring and I can tell you that the bowels of aircraft that have used plastic cable ties are littered with the carcasses of broken ties, whereas the lacing will outlast the aircraft.

Plus, a skilled lacer can make a bunch of the floppiest of wires become it's own self-supporting, semi-rigid loom. The nomex provides an element of abrasion resistance, and there's something very satisfying in the appearance of a neatly-loomed wiring harness that you can see each wire following a deliberate path. Takes time, but in my mind it adds to the visual appeal, as well as preventing cable failure through kinking.
 
Yes, I've taken to lacing my alarm and access control stuff at home.

I used cotton cord and obligatory bees wax block.

Probably, for the reason, because I could and time was longer an issue..

However there is a downside, it is not as easy to add wires to an existing harness, with cable ties it's just a case of clipping the ties and replacing them.

But for looks and a self supporting loom and secure hold of wires, lacing has it all over cable ties.

In the early days, before heat shrink, we used to use silicon rubber sleeves applied with the three prong expander tool.
 
In playing around with the tuning, I had been unable to get the thing to idle smoothly. Then I realised that the cooling system was over-pressurising, and without the radiator cap would pump the coolant out in spectacular fashion.

So, I have a cylinder head problem. This engine was assembled 13 years ago, and I suspect that the fact that I never started it after that has somehow allowed the glue on the head gasket to go off, and it has not sealed.

Right! Out with the engine:
WP_20160617_003.jpg
Thanks to fellow-frogger Matthew who was kind enough to offer his assistance to remove it on Wednesday night.

The engine came out without much fuss, took about 90 minutes in total.

I will pull this motor down and rebuild it in preparation to turbo it. Whether this will entail different pistons or a decompression plate, I haven't yet decided.

In the meantime, I am preparing another V6 to slot into the 504 in its stead. It is a 604 V6 with a Renault 30 manifold and carby, which today I have converted from coolant/wax canister operated choke to the electric choke from a Falcon. I have fitted an electronic distributor and the manual flywheel and clutch. Certainly a step down from the 3 litre V6, but better than no engine!
 
Do you still want that glove box and do you need a heater core?

Ian, I thought I had replied to your PM, but I can't see it in my sent items! I have another lead on getting all of the bits that I need in one place, if that falls through I'll let you know.

I replaced the two O-rings that fit between the heater core and the heater tap, and it seems to have stopped the leak. I'll check it again once I get the replacement engine up and running.
 
Replacement engine is fitted. It seems so small and primitive compared to the EFI 3-litre!
WP_20160619_001.jpg
WP_20160619_002.jpg
A few more things to hook up before I kick it in the guts!
 
Scotty,

The engine you have just fitted to your 504 is similar to what I have in my old 505. I am interested to know what carburettor you have fitted the electric choke to.
I first used a 38DGAS but the automatic choke was kaput. Now have a 38 DGMS which is manual choke. Can I fit a Falcon electric choke to it?

Norm
 
Top