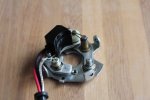
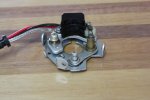
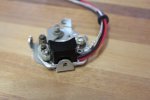
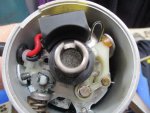
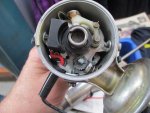
I have my cheap Chinese knock off pointless conversion mounted up on the points plate.
This did not come with instructions so I made my own up") .
.
I have just mounted the electronics in place of the points, I had to remove the little plastic bit that supports and insulates the black spring for the points. I also added an earth braid because I don't trust the sliding contact onto the points plate for the vacuum advance.
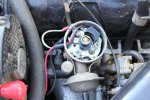
When I get time I will install it in the car and see if it works, but so far so good.
This did not come with instructions so I made my own up
.I have just mounted the electronics in place of the points, I had to remove the little plastic bit that supports and insulates the black spring for the points. I also added an earth braid because I don't trust the sliding contact onto the points plate for the vacuum advance.
When I get time I will install it in the car and see if it works, but so far so good.