2CV Chassis Replacement

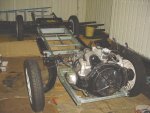
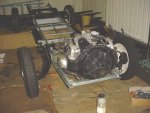
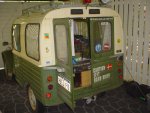
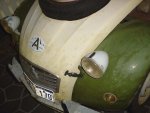
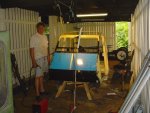
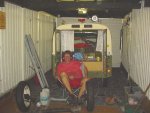
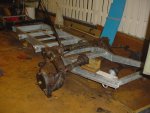
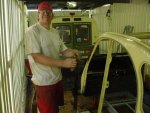
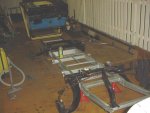
Peter arrived here in Brisbane yesterday after his epic journey from Perth in his AK400 2CV Viking van. The distance was about 4200k's :eek:
I will take a picture of the van tomorrow actually.

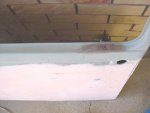
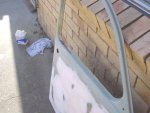
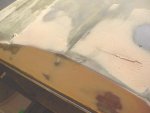
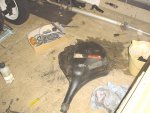
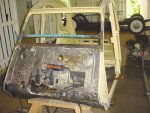
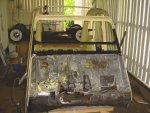
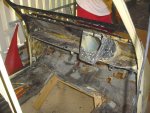
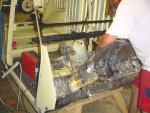
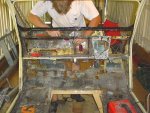
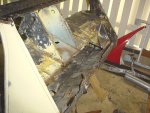
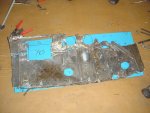
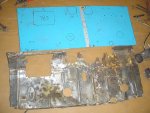
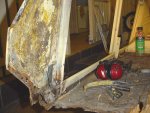
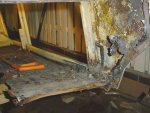
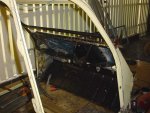
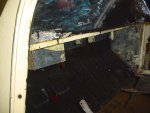
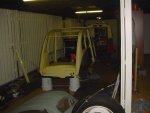
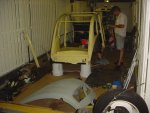
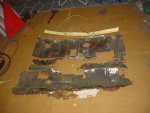
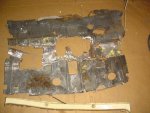
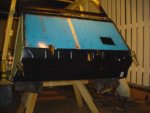
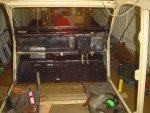
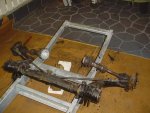
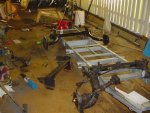
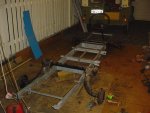
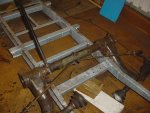
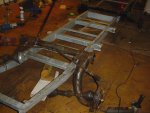
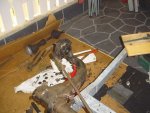
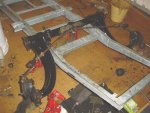
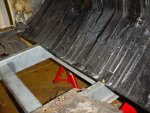
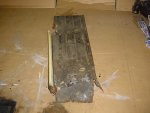
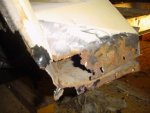
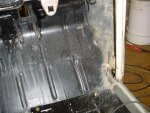
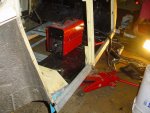
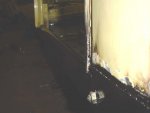
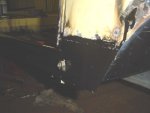
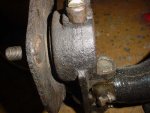
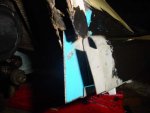
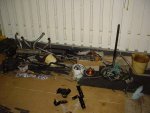
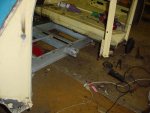
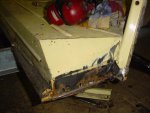
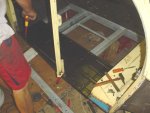
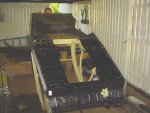
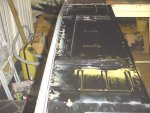
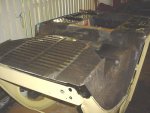
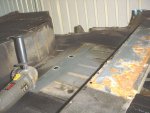
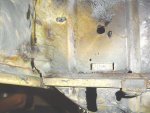
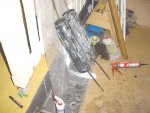
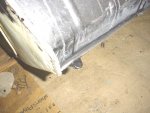
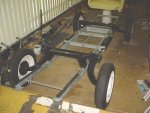
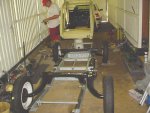
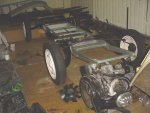
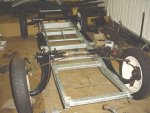
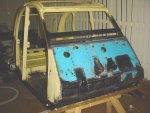
As you can see from all the pictures, a 2CV can certainately hide rust very well :disappr:

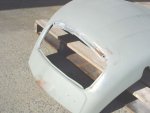
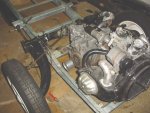
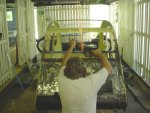
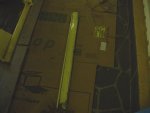
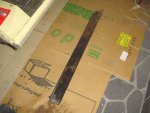
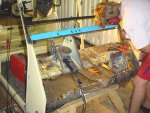
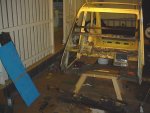
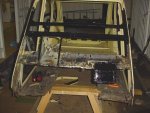
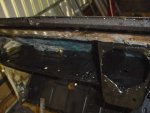
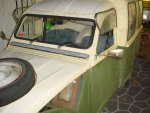
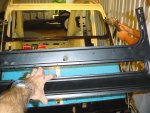
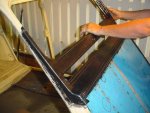
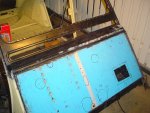
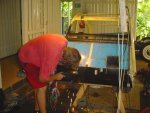
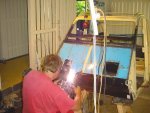
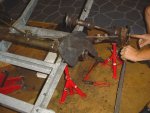
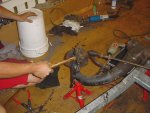
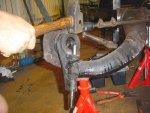
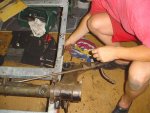
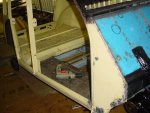
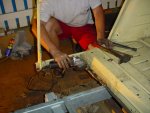
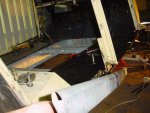
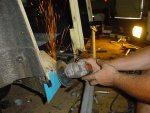
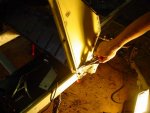
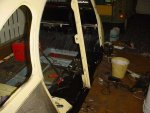
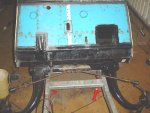
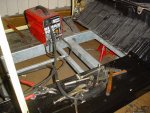
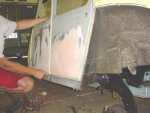
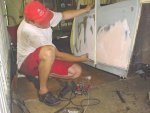
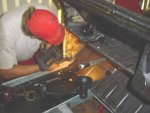
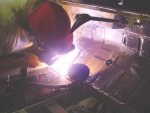
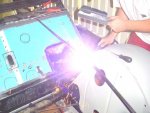
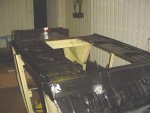
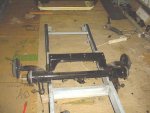
Peter first started on the windscreen frame, removal of the old one & reinforcing the boxtubing the screen sits on. There were a few holes in it.
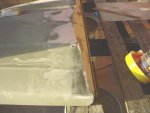
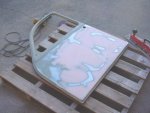
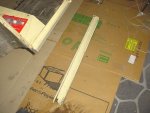
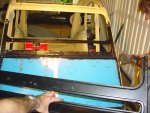
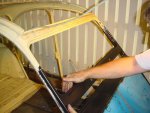
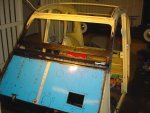
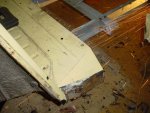
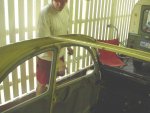
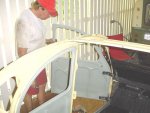
The new windscreen panel incorporates the bonnet hinge & goes half way up the windcreen pillar.

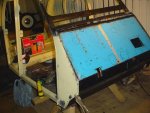
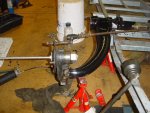
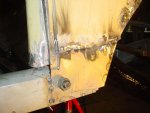
Peter has it pretty much ready to be welded in however we are getting the new firewall panel in correct alignment before proceeding.
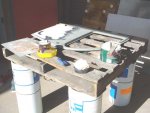
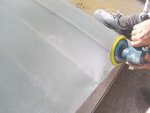
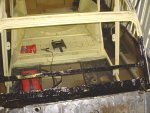
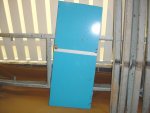
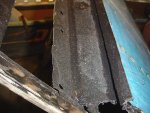
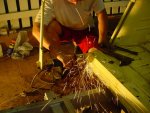
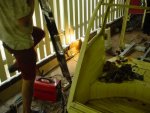
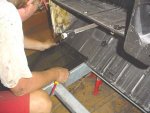
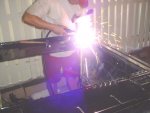
Every face of metal is being prepared & painted with POR15 as we go along.
There are lots of faces that are sealed away from view & access on these cars.

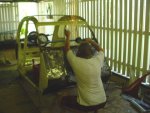
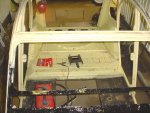
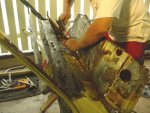
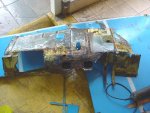
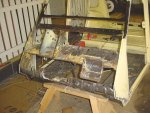
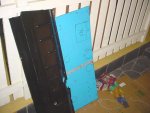
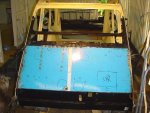
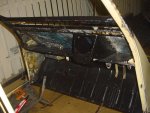
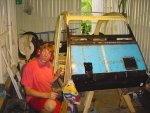
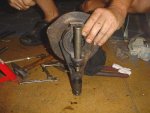
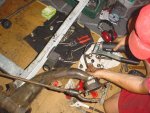
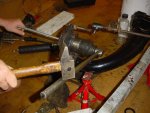
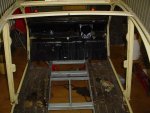
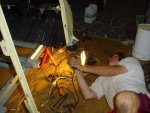
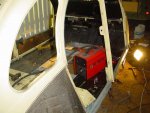
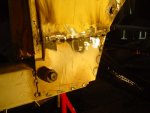
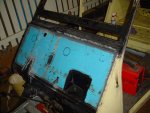
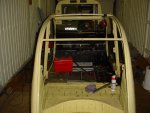
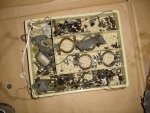
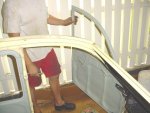
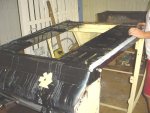
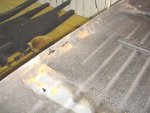
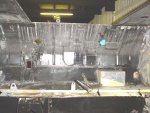
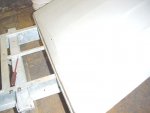
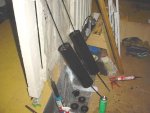
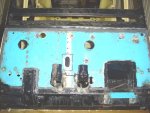
With the windscreen panel sitting in comfortably, Peter removed the upper firewall.
The metal in these cars is so thin!!!!

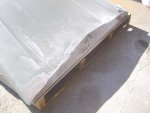
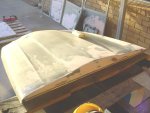
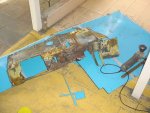
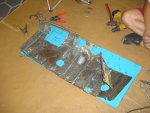
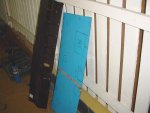
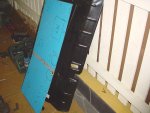
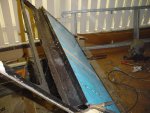
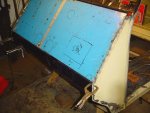
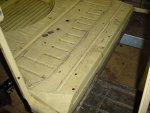
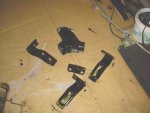
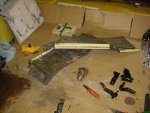
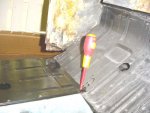
I created all the metal replacement pieces & new upper firewall from a sheet of 1mm using an angle grinder. This is a bit more rigid but also does weigh more.

The new upper firewall does not have all the ridges & bumps like the original but I'll add these later using bog :) Gotta be perfect.

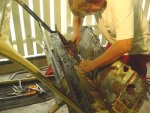
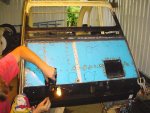
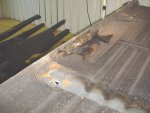
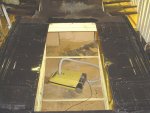
Using the old upper firewall as a template, we copied all the holes onto the new firewall for cutting or drilling out. Some of the cuts & holes need to be exact!

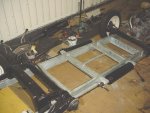
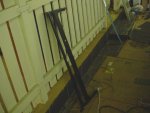
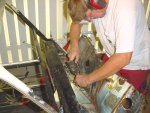
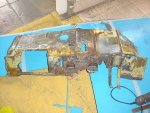
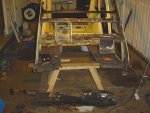
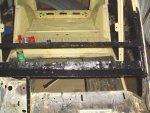
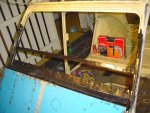
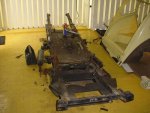
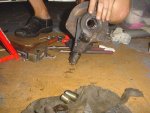
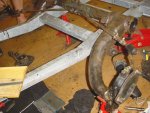
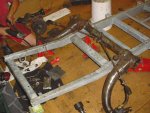
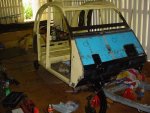
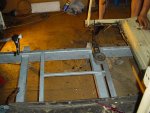
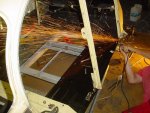
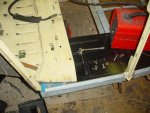
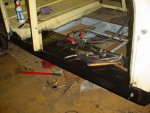
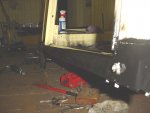
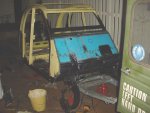
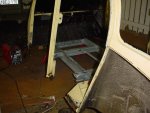
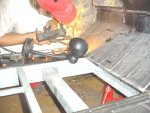
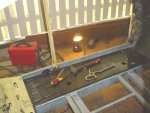
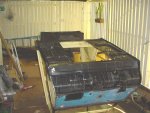
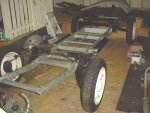
Peter removed the lower firewall late this afternoon. This is easily replaced with a pre-made panel that Peter stocks. With this gone it was apparent that both sills are rotten & need to be replaced as well. Both floor panels are being renewed because it's easier & cleaner than replacing the front quarters.

Tomorrow we are hoping the windscreen panel, upper firewall, lower firewall/ pedal floor will be all welded in as we need this to support the body when the floors & sills are removed.

Hope my sentences are OK as I am a bit knackered & it's late :crazy:
I changed the picture uploading conditions to suit myself :) to have all 41 images from today in one post too :evil:
 

Attachments

  • chassis156.jpg
    chassis156.jpg
    78.3 KB · Views: 332
  • chassis157.jpg
    chassis157.jpg
    66.6 KB · Views: 324
  • chassis158.jpg
    chassis158.jpg
    59.1 KB · Views: 327
  • chassis159.jpg
    chassis159.jpg
    50.5 KB · Views: 315
  • chassis160.jpg
    chassis160.jpg
    79 KB · Views: 323
  • chassis161.jpg
    chassis161.jpg
    77.2 KB · Views: 330
  • chassis162.jpg
    chassis162.jpg
    87.3 KB · Views: 319
  • chassis163.jpg
    chassis163.jpg
    76.8 KB · Views: 291
  • chassis164.jpg
    chassis164.jpg
    98.3 KB · Views: 352
  • chassis165.jpg
    chassis165.jpg
    89.6 KB · Views: 317
  • chassis166.jpg
    chassis166.jpg
    93.8 KB · Views: 318
  • chassis167.jpg
    chassis167.jpg
    87 KB · Views: 343
  • chassis168.jpg
    chassis168.jpg
    96.7 KB · Views: 301
  • chassis169.jpg
    chassis169.jpg
    83.6 KB · Views: 302
  • chassis170.jpg
    chassis170.jpg
    84.5 KB · Views: 319
  • chassis171.jpg
    chassis171.jpg
    84.7 KB · Views: 345
  • chassis172.jpg
    chassis172.jpg
    95.4 KB · Views: 336
  • chassis173.jpg
    chassis173.jpg
    55.6 KB · Views: 328
  • chassis174.jpg
    chassis174.jpg
    92.8 KB · Views: 329
  • chassis175.jpg
    chassis175.jpg
    89 KB · Views: 321
  • chassis176.jpg
    chassis176.jpg
    91 KB · Views: 308
  • chassis177.jpg
    chassis177.jpg
    86.1 KB · Views: 336
  • chassis178.jpg
    chassis178.jpg
    66.5 KB · Views: 322
  • chassis179.jpg
    chassis179.jpg
    94 KB · Views: 332
  • chassis180.jpg
    chassis180.jpg
    80.5 KB · Views: 318
  • chassis181.jpg
    chassis181.jpg
    82 KB · Views: 306
  • chassis182.jpg
    chassis182.jpg
    86.5 KB · Views: 330
  • chassis183.jpg
    chassis183.jpg
    95.5 KB · Views: 323
  • chassis184.jpg
    chassis184.jpg
    85 KB · Views: 319
  • chassis185.jpg
    chassis185.jpg
    74.8 KB · Views: 323
  • chassis186.jpg
    chassis186.jpg
    46.2 KB · Views: 321
  • chassis187.jpg
    chassis187.jpg
    41.7 KB · Views: 306
  • chassis188.jpg
    chassis188.jpg
    77.7 KB · Views: 312
  • chassis189.jpg
    chassis189.jpg
    51.9 KB · Views: 308
  • chassis190.jpg
    chassis190.jpg
    59.1 KB · Views: 324
  • chassis191.jpg
    chassis191.jpg
    51.6 KB · Views: 308
  • chassis192.jpg
    chassis192.jpg
    74.4 KB · Views: 304
  • chassis193.jpg
    chassis193.jpg
    66.7 KB · Views: 328
  • chassis194.jpg
    chassis194.jpg
    46.2 KB · Views: 297
  • chassis195.jpg
    chassis195.jpg
    62.6 KB · Views: 326
  • chassis196.jpg
    chassis196.jpg
    73.8 KB · Views: 317
A Dollasectomy!!!

hubba hubba, poor ol' Dolly :eek:

Wish I could be there, all those power tools, sparks, noise, hmmmm :approve:
Look forward to the progress pics - Peter dosen't mess around does he?

Cheers
Chris
 
What a bugger I'm so busy at present or I'd be down there in a flash just to watch him.
There's nothing better to watch than a good tradesman in action and any of them from Europe are usually always fascinating.
Great pics, keep 'em coming and I'll go through them all first chance I get.


Alan S

P.S. How's the neighbours coping????
 
Lookin' real good today!

Peter is doing a fantastic job & even putting up with my perfectionist ways (with a bit of a snigger at times).
Every surface has POR15 applied & Wurth sealent in all joins so this baby aint gonna rust too quick!

Windscreen frame is complete now as is the top & sides of the firewall as far as welding goes. There's still some tacking to do along the "oddments tray" from the inside & along the seam between the lower & upper firewalls. On this seam we will be welding a drip bracket as per the original.
I'm guessing the old firewall was around 0.6mm, the new one is around 1mm.

Tomorrow will see the new galvanised chassis take some shape as we need to ensure the floor pans & lower firewall line up with the body mount holes. We also need to create a hole in the right spot for the steering which is very crucial too.
 

Attachments

  • chassis197.jpg
    chassis197.jpg
    59.7 KB · Views: 299
  • chassis198.jpg
    chassis198.jpg
    57.1 KB · Views: 282
  • chassis199.jpg
    chassis199.jpg
    37.7 KB · Views: 299
  • chassis200.jpg
    chassis200.jpg
    56.2 KB · Views: 297
  • chassis201.jpg
    chassis201.jpg
    51.9 KB · Views: 297
  • chassis202.jpg
    chassis202.jpg
    65.8 KB · Views: 317
  • chassis203.jpg
    chassis203.jpg
    49.1 KB · Views: 282
  • chassis204.jpg
    chassis204.jpg
    42.6 KB · Views: 305
  • chassis205.jpg
    chassis205.jpg
    52.1 KB · Views: 277
  • chassis206.jpg
    chassis206.jpg
    39.8 KB · Views: 316
  • chassis207.jpg
    chassis207.jpg
    52.9 KB · Views: 306
  • chassis208.jpg
    chassis208.jpg
    56.4 KB · Views: 290
  • chassis209.jpg
    chassis209.jpg
    61.8 KB · Views: 286
  • chassis210.jpg
    chassis210.jpg
    63.2 KB · Views: 310
  • chassis211.jpg
    chassis211.jpg
    64.5 KB · Views: 283
  • chassis212.jpg
    chassis212.jpg
    51.3 KB · Views: 316
  • chassis213.jpg
    chassis213.jpg
    50.1 KB · Views: 296
  • chassis214.jpg
    chassis214.jpg
    38.8 KB · Views: 303
  • chassis215.jpg
    chassis215.jpg
    50.9 KB · Views: 298
  • chassis216.jpg
    chassis216.jpg
    49.4 KB · Views: 295
  • chassis217.jpg
    chassis217.jpg
    59.1 KB · Views: 296
  • chassis218.jpg
    chassis218.jpg
    45.5 KB · Views: 287
  • chassis219.jpg
    chassis219.jpg
    46.3 KB · Views: 273
  • chassis220.jpg
    chassis220.jpg
    57.7 KB · Views: 285
  • chassis221.jpg
    chassis221.jpg
    30.1 KB · Views: 280
  • chassis222.jpg
    chassis222.jpg
    52.4 KB · Views: 281
  • chassis223.jpg
    chassis223.jpg
    54.8 KB · Views: 291
  • chassis224.jpg
    chassis224.jpg
    62.9 KB · Views: 276
  • chassis225.jpg
    chassis225.jpg
    47.4 KB · Views: 271
Peter created some holes in the firewall for the major components taking most of the day to complete. Placement was crucial.
The master cylinder & clutch mounts are now finished. These needed to be moved as the lower firewall panel was for a left hand drive model 2CV.
The lefthand drive holes have been filled with plate beautifully.

Gear lever hole lines up & works a treat.

The battery tray is sitting in place as per the original & we intend to strengthen this area with a bracket at the front to improve it's weight carrying. Previous welds here were not rusty but breaking from the battery's weight on the firewall.

The firewall & lower firewall are both welded into place now.
 

Attachments

  • chassis226.jpg
    chassis226.jpg
    62.5 KB · Views: 324
  • chassis227.jpg
    chassis227.jpg
    59.5 KB · Views: 270
  • chassis228.jpg
    chassis228.jpg
    51.3 KB · Views: 294
  • chassis229.jpg
    chassis229.jpg
    56.1 KB · Views: 260
  • chassis230.jpg
    chassis230.jpg
    53.2 KB · Views: 275
  • chassis231.jpg
    chassis231.jpg
    53.6 KB · Views: 300
Gee's,

what a project !!! Can you send that guy my way when he's finished :evil: Looks like bloody good work going by the pictures (the sort of stuff I dream about doing with my projects, but could never pull off in a 1000atttempts !!).

seeya,
Shane L.
 
I gave Peter the day off today so he headed up to a CCCQ meeting at Narangba to say hello.

Meanwhile back at AF headquarters I prepared the chassis with the swing arms including grinding back & removing all old paint & grease on both lower sides & painted with POR15.

I've also buffed most of the top on the front arm assembly for completion tomorrow.

Tommorrow is a quiet day but Peter is replacing the kingpins. I already have them but I could get the old ones out when i tried a few months ago.
 

Attachments

  • chassis233.jpg
    chassis233.jpg
    49.3 KB · Views: 273
  • chassis234.jpg
    chassis234.jpg
    58.6 KB · Views: 296
  • chassis235.jpg
    chassis235.jpg
    61.2 KB · Views: 311
  • chassis236.jpg
    chassis236.jpg
    61.9 KB · Views: 303
  • chassis237.jpg
    chassis237.jpg
    49.9 KB · Views: 305
  • chassis238.jpg
    chassis238.jpg
    57.9 KB · Views: 279
  • chassis239.jpg
    chassis239.jpg
    58.9 KB · Views: 286
  • chassis240.jpg
    chassis240.jpg
    65.8 KB · Views: 306
  • chassis241.jpg
    chassis241.jpg
    49.6 KB · Views: 297
  • chassis242.jpg
    chassis242.jpg
    57.9 KB · Views: 286
  • chassis243.jpg
    chassis243.jpg
    54.2 KB · Views: 269
  • chassis244.jpg
    chassis244.jpg
    52.1 KB · Views: 306
Kingpins have been replaced & we decided to replace the front wheel bearings which were pretty stuffed. Only had time to do the left side, the right side will be done first thing tomorrow.

Peter made the removal of the old kingpins look very easy, however when dad & I attempted to replace them a few months ago they wouldn't even budge!
5 sharp blows from a small lump hammer from above & they were on their way.

Everything Peter does is to a very high standard. There appears to be a bit of an art to installing the new kingpins correctly & it would be VERY possible to easily mess it up with the wrong technique. It was quite obvious Peter knew exactly what he was doing & although he is not undertaking any real mechanical work on my car, you could be sure he would really look after any 2CV that came into his workshop.

The top side of the swing arms have been wire brushed back to metal & POR15 has been applied. POR15 has also been painted on the underside of the floor panels that are hopefully going in tomorrow or Tuesday.

I am really happy with the way it's all going :)
 

Attachments

  • chassis245.jpg
    chassis245.jpg
    57.3 KB · Views: 292
  • chassis246.jpg
    chassis246.jpg
    55.5 KB · Views: 304
  • chassis247.jpg
    chassis247.jpg
    60.6 KB · Views: 270
  • chassis248.jpg
    chassis248.jpg
    52.4 KB · Views: 292
  • chassis249.jpg
    chassis249.jpg
    57.2 KB · Views: 286
  • chassis250.jpg
    chassis250.jpg
    60.9 KB · Views: 285
  • chassis251.jpg
    chassis251.jpg
    61.2 KB · Views: 295
  • chassis252.jpg
    chassis252.jpg
    66.8 KB · Views: 286
  • chassis253.jpg
    chassis253.jpg
    72.6 KB · Views: 276
  • chassis254.jpg
    chassis254.jpg
    66.8 KB · Views: 305
  • chassis255.jpg
    chassis255.jpg
    59.8 KB · Views: 281
  • chassis256.jpg
    chassis256.jpg
    33.8 KB · Views: 274
  • chassis257.jpg
    chassis257.jpg
    58.2 KB · Views: 265
DoubleChevron said:
Gee's,

what a project !!! Can you send that guy my way when he's finished :evil: Looks like bloody good work going by the pictures (the sort of stuff I dream about doing with my projects, but could never pull off in a 1000atttempts !!).

seeya,
Shane L.

Shane, Peter wants to visit you on his way out of Melbourne :)
 
When he's heading down to Melbourne ?? I'm heading upto the Cit-in in a few weeks time so might not be home :)

I'll have to tell Dad to clean the 2CV .... Though I'm kinda scared of it now after seeing yours :eek: :eek: I'll have to make sure my parents are home so he can have a look at the Traction and 2cv and Dads tired old D's :)

seeya,
Shane L.
 
You might come home to a pile of body panels neatly stacked in a heap by the garage wall.
I'd reckon Gerry now is praying Peter doesn't get a phone call to go home at short notice and leaves with the words that strike fear into any owners heart "well you saw how it all came apart, just slip it all back together now and she's all finished" :eek: :eek: :cry:

Tell you what, he sure knows these things inside out by looks of it. Scares me just looking at the pics.

Alan S:joker:
 
Today was very exciting!

After finishing off the right hand bearing from yesterday we lifted the body onto the chassis to line up the new floors. The lower firewall bolt holes fitted without too much drama as did the rear bridge bolts.
Peter removed the right floor & sill & spent some time cleaning the rear door post & the bottom of the A panel for the new sill. The new floor fitted & bolt holes to the chassis lined up.

With the sill removed Peter discovered some more rust at the rear section of the sill. He cut out the offending piece of metal & welded in a new plate.

To ensure the new sill was in the right place & the rear door post was straight, we had to refit the front & rear doors to check operation & clearances.
Front door first, when right Peter tacked the front of the sill & moved to the rear door post. Rear door on, checked, clamped, rear door off & post tacked.
The rear of the sill needed the jack under it to get it in place. The replacement sill wasn't a perfect fit (they never are apparently) so it had to be modified a little.

Peter spent some time welding the front & around the A panel including welding in a replacement panel at the bottom. All the top of the right floor pan has been welded, & once the left hand side is done we'll turn the body over & weld the under side as well.

The rear of the sill still need a small piece of tubing to fill in that gap tomorrow.

All the welding has been treated with POR15 & is drying as I type.

Peter's wife Lorraine wants more pictures of Peter!
Hello Lorraine :)
 

Attachments

  • chassis258.jpg
    chassis258.jpg
    67.5 KB · Views: 255
  • chassis259.jpg
    chassis259.jpg
    55.7 KB · Views: 247
  • chassis260.jpg
    chassis260.jpg
    59.6 KB · Views: 258
  • chassis261.jpg
    chassis261.jpg
    54.8 KB · Views: 265
  • chassis262.jpg
    chassis262.jpg
    53.6 KB · Views: 245
  • chassis263.jpg
    chassis263.jpg
    71.3 KB · Views: 243
  • chassis264.jpg
    chassis264.jpg
    50.6 KB · Views: 242
  • chassis265.jpg
    chassis265.jpg
    45.3 KB · Views: 268
  • chassis266.jpg
    chassis266.jpg
    60.3 KB · Views: 239
  • chassis267.jpg
    chassis267.jpg
    49.5 KB · Views: 262
  • chassis268.jpg
    chassis268.jpg
    59 KB · Views: 225
  • chassis269.jpg
    chassis269.jpg
    39.7 KB · Views: 254
  • chassis270.jpg
    chassis270.jpg
    61.2 KB · Views: 255
  • chassis271.jpg
    chassis271.jpg
    55.3 KB · Views: 249
  • chassis272.jpg
    chassis272.jpg
    69.1 KB · Views: 263
  • chassis273.jpg
    chassis273.jpg
    51.3 KB · Views: 257
  • chassis274.jpg
    chassis274.jpg
    60.1 KB · Views: 251
  • chassis275.jpg
    chassis275.jpg
    57.1 KB · Views: 249
  • chassis276.jpg
    chassis276.jpg
    60.5 KB · Views: 246
  • chassis277.jpg
    chassis277.jpg
    66.4 KB · Views: 243
  • chassis278.jpg
    chassis278.jpg
    46.9 KB · Views: 256
  • chassis279.jpg
    chassis279.jpg
    39.5 KB · Views: 249
  • chassis280.jpg
    chassis280.jpg
    41.3 KB · Views: 269
  • chassis281.jpg
    chassis281.jpg
    62.5 KB · Views: 269
  • chassis282.jpg
    chassis282.jpg
    44.8 KB · Views: 250
  • chassis283.jpg
    chassis283.jpg
    51.4 KB · Views: 250
  • chassis284.jpg
    chassis284.jpg
    58 KB · Views: 251
  • chassis285.jpg
    chassis285.jpg
    21.1 KB · Views: 239
  • chassis286.jpg
    chassis286.jpg
    27.1 KB · Views: 234
  • chassis287.jpg
    chassis287.jpg
    35.2 KB · Views: 257
  • chassis288.jpg
    chassis288.jpg
    39.4 KB · Views: 257
  • chassis289.jpg
    chassis289.jpg
    54.6 KB · Views: 254
  • chassis290.jpg
    chassis290.jpg
    55 KB · Views: 244
  • chassis291.jpg
    chassis291.jpg
    53.1 KB · Views: 243
  • chassis292.jpg
    chassis292.jpg
    65 KB · Views: 258
  • chassis293.jpg
    chassis293.jpg
    31.1 KB · Views: 244
  • chassis294.jpg
    chassis294.jpg
    66.5 KB · Views: 252
  • chassis295.jpg
    chassis295.jpg
    54.5 KB · Views: 240
  • chassis296.jpg
    chassis296.jpg
    45.8 KB · Views: 255
  • chassis297.jpg
    chassis297.jpg
    67.5 KB · Views: 251
  • chassis298.jpg
    chassis298.jpg
    49.1 KB · Views: 262
Today pretty well finished the welding. There are still some small items to do on Thursday.

The left hand side floor & sill came out & were replaced. You can see there is a bit of lining up to do putting in the sill using the doors as a guide.

Peter welded the front guard bolt tabs onto the firewall after we lined them up using each of the front guards.

Body off & on it's roof to finish the welding on the underside & treat all metal with POR15.

What a great welding job :)
 

Attachments

  • chassis299.jpg
    chassis299.jpg
    73 KB · Views: 238
  • chassis300.jpg
    chassis300.jpg
    53.2 KB · Views: 239
  • chassis301.jpg
    chassis301.jpg
    51.7 KB · Views: 239
  • chassis302.jpg
    chassis302.jpg
    50.3 KB · Views: 244
  • chassis303.jpg
    chassis303.jpg
    45.6 KB · Views: 250
  • chassis304.jpg
    chassis304.jpg
    52.9 KB · Views: 262
  • chassis305.jpg
    chassis305.jpg
    53.5 KB · Views: 251
  • chassis306.jpg
    chassis306.jpg
    41.5 KB · Views: 256
  • chassis307.jpg
    chassis307.jpg
    55.3 KB · Views: 240
  • chassis308.jpg
    chassis308.jpg
    47.4 KB · Views: 256
  • chassis309.jpg
    chassis309.jpg
    51.5 KB · Views: 246
  • chassis310.jpg
    chassis310.jpg
    49.1 KB · Views: 257
  • chassis311.jpg
    chassis311.jpg
    46.3 KB · Views: 256
  • chassis312.jpg
    chassis312.jpg
    48.7 KB · Views: 243
  • chassis313.jpg
    chassis313.jpg
    44.3 KB · Views: 234
  • chassis314.jpg
    chassis314.jpg
    34.7 KB · Views: 247
  • chassis315.jpg
    chassis315.jpg
    40.1 KB · Views: 251
  • chassis316.jpg
    chassis316.jpg
    59.3 KB · Views: 252
  • chassis317.jpg
    chassis317.jpg
    51.9 KB · Views: 266
  • chassis318.jpg
    chassis318.jpg
    46.4 KB · Views: 241
  • chassis319.jpg
    chassis319.jpg
    48.4 KB · Views: 236
  • chassis320.jpg
    chassis320.jpg
    47.9 KB · Views: 258
  • chassis321.jpg
    chassis321.jpg
    60.6 KB · Views: 278
  • chassis322.jpg
    chassis322.jpg
    56.3 KB · Views: 259
  • chassis323.jpg
    chassis323.jpg
    50.8 KB · Views: 236
  • chassis324.jpg
    chassis324.jpg
    61.1 KB · Views: 283
  • chassis325.jpg
    chassis325.jpg
    32.3 KB · Views: 261
  • chassis326.jpg
    chassis326.jpg
    60.3 KB · Views: 265
  • chassis327.jpg
    chassis327.jpg
    52.5 KB · Views: 241
  • chassis328.jpg
    chassis328.jpg
    43.7 KB · Views: 239
  • chassis330.jpg
    chassis330.jpg
    61.1 KB · Views: 257
  • chassis331.jpg
    chassis331.jpg
    62.9 KB · Views: 263
Peter has started on the other Brisbane 2CV today. I paid him a visit this morning. There'll be a thread the other 2CV's welding project as well so I'll let you know the URL when it is updated.

Today I cleaned the spring pots back to metal & applied the 2 coats of POR15 including the rods & bush caps as well.

Also the bonnet hinge has been wire brushed back to metal so Peter can have a go at re-welding it to give it more strength tomorrow.

I hit the chassis with wax & grease remover to bring it up schmick.

Tomorrow, Peter will return to finish the firewall, set the spring pots correctly on the new chassis & weld on a battery tray support, plus a few other things.
In the arvo I will refit shockies, road wheels, gearbox, engine, fuel tank & exhaust system!
 

Attachments

  • chassis332.jpg
    chassis332.jpg
    59.9 KB · Views: 231
  • chassis333.jpg
    chassis333.jpg
    32.3 KB · Views: 230
  • chassis334.jpg
    chassis334.jpg
    57.1 KB · Views: 243
  • chassis335.jpg
    chassis335.jpg
    51.6 KB · Views: 231
  • chassis336.jpg
    chassis336.jpg
    45.3 KB · Views: 250
  • chassis337.jpg
    chassis337.jpg
    53.2 KB · Views: 223
  • chassis338.jpg
    chassis338.jpg
    50.6 KB · Views: 231
  • chassis339.jpg
    chassis339.jpg
    52 KB · Views: 237
The welding is complete!

Peter Fosselius did a fantastic job & is a damn nice bloke as well :D
Thanks Peter!!

Heater directors, battery tray reinforcement & bonnet hinge repairs welded & more holes drilled or cut in the firewall this afternoon.

Peter mounted the spring pots to the chassis & connected them to the knife edges. They look great painted with POR15, so I am painting everything that is black with POR15 from bare metal base.
Incidently, customer service at PPC (POR15 people) is first class. Thanks to Rob at PPC.

Just in the middle of replacing the engine mounts before I decided to call it a day, so the engine & gearbox refit will have to wait until tomorrow.
 

Attachments

  • chassis340.jpg
    chassis340.jpg
    51.7 KB · Views: 217
  • chassis341.jpg
    chassis341.jpg
    59.7 KB · Views: 227
  • chassis342.jpg
    chassis342.jpg
    50 KB · Views: 224
  • chassis343.jpg
    chassis343.jpg
    56.4 KB · Views: 224
  • chassis344.jpg
    chassis344.jpg
    49.5 KB · Views: 214
  • chassis345.jpg
    chassis345.jpg
    58.1 KB · Views: 229
  • chassis346.jpg
    chassis346.jpg
    39.6 KB · Views: 253
  • chassis347.jpg
    chassis347.jpg
    52.7 KB · Views: 238
  • chassis348.jpg
    chassis348.jpg
    66.3 KB · Views: 221
Gerry

This is an amazing documentation of the job. Far more interesting than a respray of some weirdo CX :D

Is this pic
attachment.php


Of the famous 2CV rubber band - you can see it hanging behind the shroud.:roflmao: Would that be the shroud of tourin'

(sorry, must be late on a Friday night)
 
BTW Gerry, when this is all over you should make up a dedicated series of web pages documenting the job. You have done very well on the photographic and written records and it should be somewhere that in later times will be easier to find.:2cents:
 
UFO said:
Gerry

This is an amazing documentation of the job. Far more interesting than a respray of some weirdo CX :D

(sorry, must be late on a Friday night)

Gee's we finally agree on something UFO :D :roflmao: :roflmao: It's also a hell of a lot scarier than the weirdo's CX paitjob (after all how hard is it to just blow a bit of paint onto a car :tongue: ).

seeya,
Shane L.
 
I was beginning to think people weren't reading this thread, although the thread views are up around 2.5k now.
If nothing else, I can look back on it in a few years & laugh (or cry).

The documentation doesn't really show step by step, it just shows & tells what I (or we, when applicable) have successfully undertaken on any day, but it's possible to elaborate on it later with the basic process written out.
 
Chris & I were back into the sanding/ bogging etc this afternoon & the day was very productive. Although we have not bogged for a week & a half now, everything flowed quite nicely today.

The bonnet is damn near ready for another etch. We grinded back Peter's mig welding & a few taps here & there, then a filling/ keying layer of fibreglass filler over the top. This was smoothed out & normal filler bog over the top. The result is superb. Not done yet however. The underside of the hinge will get a hit of POR15 & before it dries, a layer of fibreglass at 45 deg to really hold it together.

The front of the bonnet where the catch goes & near the top grille bolt hole also saw same fibreglass bog today.

Looks like we have 2 doors ready for etch & possible first coats of primer on the weekend!

The engine & gearbox are in place after replacing the 3 mounts. I am currently trying to remove the crud from the outside of the fuel tank.

I have another litre of POR15 arriving on Monday & I intend to paint all black items with it. I am also going to try POR Patch for the small holes below the number plate panel at the rear next week. As POR15 product is non porous, I also need to apply Tie Coat before any painting (etch, top coat etc) unless I want to wet sand the whole work prior. This would prove impossible in some areas.

I forgot to mention on Thursday & Chris thought it was worthy, while the body was upside down I took the opportunity to spray lanolin down (which is normally up) all the door posts & pillars, under the rear seat box section, & the windscreen frame. This means gravity let the stuff drip towards the roof section & it was able to dry there. I will be doing the same again with the body the right way up to complete the job.
 

Attachments

  • chassis349.jpg
    chassis349.jpg
    51.2 KB · Views: 218
  • chassis350.jpg
    chassis350.jpg
    39.3 KB · Views: 234
  • chassis351.jpg
    chassis351.jpg
    45.7 KB · Views: 214
  • chassis352.jpg
    chassis352.jpg
    27.1 KB · Views: 218
  • chassis353.jpg
    chassis353.jpg
    48.9 KB · Views: 218
  • chassis354.jpg
    chassis354.jpg
    47.3 KB · Views: 235
  • chassis355.jpg
    chassis355.jpg
    35.8 KB · Views: 202
  • chassis356.jpg
    chassis356.jpg
    43.3 KB · Views: 230
  • chassis357.jpg
    chassis357.jpg
    36.7 KB · Views: 216
  • chassis358.jpg
    chassis358.jpg
    40.6 KB · Views: 231
  • chassis359.jpg
    chassis359.jpg
    62.1 KB · Views: 207
  • chassis360.jpg
    chassis360.jpg
    45.6 KB · Views: 210
  • chassis361.jpg
    chassis361.jpg
    52.5 KB · Views: 249
  • chassis362.jpg
    chassis362.jpg
    62.6 KB · Views: 220
  • chassis363.jpg
    chassis363.jpg
    58.5 KB · Views: 237
  • chassis364.jpg
    chassis364.jpg
    51.2 KB · Views: 229
  • chassis365.jpg
    chassis365.jpg
    50.4 KB · Views: 216
Top