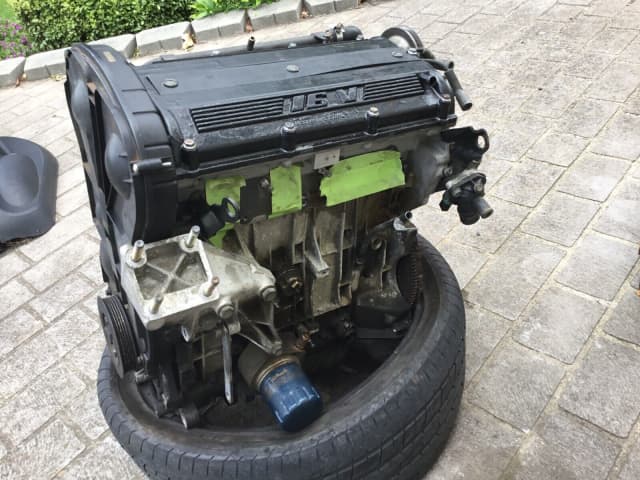
205 Si 1.6L Auto Rescue

Day 11 - Off in a Dash

Today was a continuation of yesterday. I've finished patching the top cover - there was a three way fracture that I needed to fix with Araldite and a bit of fiberglass mat to keep it rigid but it looks and feels solid now

View attachment 202213
The small top box in the dash has a rubber gromit - looks like a previous owner had a gauge or similar and used the gromit to neatly plug the hole.

While the dash is in pieces I'm looking at another fault listed on the last service receipt

"The horn is not working and suspect the switch on the horn pad. Would require an auto electrician to diagnose correctly"

I've tested every single fuse I can find and they are all OK. The Horn fuse should be 25A, but someone has installed a 30A which isn't smart and from looking through the Haynes workshop manual the 205 does not use a horn relay but switches 12V directly form the horn 'button' on the steering column.

I do however have a theory ...

Alarm, Alarm ...

There was a loose wire dangling out of the lower storage bin next to the drivers right knee. It 'led' up to a LED mounted in the dash, so it would appear that a previous owner had a car alarm installed that was later removed. One of the wires just ended in mid air connected to nothing, while the other trailed off via the centre console (changing colour) and exited via the firewall into the engine bay. That end was just a bunch of frayed wires, so it looks like whatever was there was torn away.

View attachment 202214
You will note that someone had previously wrapped the wires with gaffer tape after twisting the ends together, and decided to change colours from red to black.

There was another pair of wires wrapped in electrical tape protruding from the instrument pod on the steering column. I pulled the plastics apart (not the first person here - it was held together with black silicon, and include an old rubber band and a ring pull for luck). According to the Workshop manual the wires were connected to the left and right indicator circuits, which makes sense if the alarm needed to flash the blinkers. I removed and re-insulated the wires to return it to match the manual.

I also found the ECU screwed in its correct place up under the dash. Interestingly someone has tapped into part of the ECU loom (quite heavy gauge wire so possibly power) and the cables were wrapped in electrical tape and routed through the firewall into the engine bay. They terminate on a relay near the fusebox by the bonnet hinge (definitely not original) so possibly the alarm was able to kill ignition or the entire car as well.

So following Occam's razor my working hypothesis is that there is either an in-line relay to the horn that has failed or damaged wiring that has deactivated the horn. I've got the car up on ramps at present so I'll hopefully get this sorted tomorrow.

Wheels, Tyres & Suspension

I rotated the tyres today to put the best tread at the front. Not completely happy with this as they are dated 2008 so well beyond manufacture recommended lifespan so it looks like I need four new tyres and better rims to match.

Looking at the fantastic stiff on the '205.si' site I think a set of 15" rims would do the trick. There are some great looking pugs with these in pictures on the 'net so will probably do that.

The suspension is definitely getting old. The front looks and feels fine at present (Record Maxigaz dampers) but the rear are unknown - no markings visible.

View attachment 202217
I'm guessing these are the originals.

Keys

Well surprise - in Hobart getting keys for a Peugeot is not as simple as a Holden. I currently have just one key, so a couple of extras would be a smart thing to do.

The young lady at Jacksons Locksmiths was very helpful. She wasn't 100% sure what blank to use, so she cut me a key for free to take home and try. Turns out it works perfectly, so I'll go back for the second and pay for them both. It's nice together such good service these days.

Thanks guys for all your help and suggestions on this.

Sean
Standard rear shocks are made by AP in Yugoslavia and are actually quite good and do give a bit more travel than the GTI ones.
 
Sorry guys - I didn't want to start a fight. I'll keep the Si power steering (just need to get the rack repaired). I've done a fair bit of driving in a GTI without power steering - it's definitely heavy when parking but not prohibitively so. If I need to delete the air conditioning at least the climate in Tassie doesn't make it essential.

As mentioned before, the brakes are currently a bit 'vague'. Something happens, but not what I want and when. I've checked the front discs - rotor is fine with a worst case of 0.34 of the 1.5mm of surface used and the pads have plenty to go. Brake fluid at the front had dropped a bit (no warnings but I added 1cm to the front reservoir to come up to level) so they may just need bleeding to sort them out. Service receipts indicate that the rotors have been replaced at least once, but no mention of the rear brakes.

I haven't popped the drums off the back to check yet.

I remember the GTI handbrake - definitely not one of the finest aspects of the car and I expect adjusting it was a standing item on all scheduled services.

Re plastics - yes, I'm beginning to see this as a battle somewhere on the horizon (I found more broken bits today). This car is going to be a road vehicle (not a track car) and I'd like to keep as much of the 'Pug character as possible (just enough of a pickup to rule out the 'Mums Taxi' look). A steel dash (or part thereof) would definitely fix the problem once and for all, but aesthetics would be a bit of a challenge and I lack talent in that area.

Sean
Si brakes are terrible, never had one where they worked well. The calipers have too small a piston I think. You can fit 247 mm vented discs and calipers from an early 1.8 306 or from a four door 206, these will make a huge improvement, or go up a size as Peter suggests.
 
No fight of your doing. Petert likes to keep petering in his usual rude manner as always.

Regarding the iffy brakes you have, I would suggest you check the rubber hoses. These may be perished internally and at worst you may see a bulge forming when you're standing on the pedal if you have an assistant to check. A good overhaul can't go amiss.

I have done the brake upgrade on my GTI and found that 247mm rotors and 306 calipers like Graham suggests is more than plenty for a road car. I also replaced my MC with a new one and from memory it is from the same model.

As for plastics, I think broken and missing dash plastics reflect the true character of the car so I'm going with it. They don't do much apart from rattle and squeak anyway. If I had an entire set of intact dash plastics I would probably go to the trouble of installing rubber grommets in every screw hole and hope for the best. Something like the buffers you see in DVD players on the laser mechanism.
 
Being an Si, you can fit any 206 or 306 brake package to the front. The most common is 266mm Bosch or Lucas. The 266mm rotor is the cheapest of all, as it's fitted to so many PSA cars.

The rear brakes do very little in a 205, other than give you a high, firm pedal when adjusted properly.

Fit some 266mm brakes, matching 22mm master cylinder along with braided hoses and your brakes will be fantastic.
Thanks Peter. Any issue with clearances inside the rims or other issues to be wary of?
 
No fight of your doing. Petert likes to keep petering in his usual rude manner as always.

Regarding the iffy brakes you have, I would suggest you check the rubber hoses. These may be perished internally and at worst you may see a bulge forming when you're standing on the pedal if you have an assistant to check. A good overhaul can't go amiss.

I have done the brake upgrade on my GTI and found that 247mm rotors and 306 calipers like Graham suggests is more than plenty for a road car. I also replaced my MC with a new one and from memory it is from the same model.

As for plastics, I think broken and missing dash plastics reflect the true character of the car so I'm going with it. They don't do much apart from rattle and squeak anyway. If I had an entire set of intact dash plastics I would probably go to the trouble of installing rubber grommets in every screw hole and hope for the best. Something like the buffers you see in DVD players on the laser mechanism.
Thanks for the advice.

Step 1 (as mentioned earlier) is to bleed the brakes and see if it's just a bubble or leak. If that doesn't improve matters, I'll replace the brake hoses (if for nothing else as a basic maintenance precaution) and see what happens. If it's something else (callipers, master cylinder, etc.) its probably time for Step 2 and do as Peter suggests.

Thanks for the useful suggestions,

Sean
 
Thanks Peter. Any issue with clearances inside the rims or other issues to be wary of?
Not with 15” or 14” Speedline. 14” SMR yes.

You’ll need new hoses anyway, which are causing most of your issues. Braided makes them rock solid.
 
Being an Si, you can fit any 206 or 306 brake package to the front. The most common is 266mm Bosch or Lucas. The 266mm rotor is the cheapest of all, as it's fitted to so many PSA cars.

The rear brakes do very little in a 205, other than give you a high, firm pedal when adjusted properly.

Fit some 266mm brakes, matching 22mm master cylinder along with braided hoses and your brakes will be fantastic.
This is what I did (fit 266 brakes) although I only fitted a like for like replacement MC. I’ve got working brakes now but since it’s the first time since owning the car that they have I don’t have much to compare it to. Any issue with running the smaller MC and would it just be that I won’t get the most out of the brakes?
 
Day 12 - Finally some noise

Not everything went according to plan, but I did manage to fix the horn. There as a short, simple and very useful post on 205gtidrivers.com explaining how to find and get access to the horn. Short version - remove the passenger side headlight and you have easy access. The use of the wire clips by Peugeot to hold the headlight in is (if you excuse the pun) brilliant. Compared to my Holden where you need to get the spanners out to change a lightbulb, the Peugeot design is very convenient.

Anyway, taking the horn out and giving it 12 volts made the expected noise - so the problem must be further back. (note the 'performance enhanced induction' where someone made a larger hole for the air intake - I wonder what it adds ? )

1648108695195.png

I temporarily connected an extension wire to the horn connection at the front of the car, disconnected the horn switch assembly on the steering column and probed all of the pins with a multimeter to see if there was any continuity. Turns out there was, so the issue is not the horn, or the cabling from it to the steering column. I reconnected everything and gave the horn a couple of gentle taps - and eventually got a very brief squat from the horn. I removed the horn assembly and gave the connectors a small shot of electrical contact cleaner. Reconnected and the horn works.

It's always the simple things that get you :-(

Brakes

Thanks to @PeterT for the advice re braided lines, larger rotors, master cylinder and 306 callipers. Tomorrow I'm going to order a complete set of HEL braided lines for a "1984-1997 Peugeot 205 1.6 (Rear Drums)" so that's the next step in getting some proper stopping power. If they work it's a good holding position until I can sort the master cylinder and on-axel hardware.

Thanks everyone for your help with this

Seam
 
How about this? In Tassie as well

Yes - thanks for pointing that out.

I've gotten some very good advice from the forum, and I've given this a fair bit of thought and I'm pretty much convinced that the best move is to 'stroke' my existing 1.6 out to 1.9 using a MI16 crankshaft, DKZ pistons, sump spacer and all the other ancillary bits. I get to keep the existing alloy block, and should end up with a car that is similar to a 1.9GTI under the bonnet but with a few upgrades like better engine management and induction.

I can get the existing engine rebuilt and keep the same engine block number so the registration details don't change.

I don't know what would be needed to get that motor into shape - and I'm trying to squeeze my dollars so I don't end up eating my budget for interior, paint and bodywork :)

There's that old saying - "Don't let perfect be the enemy of done"

That engine would probably be great in 'the next' pug, but I don't focus my attention on this one there is a risk I'll end up with a backyard full of partial projects and no running 205 in sight. While I'd like to find a nice boneyard full of Peugeots to strip I don't want to turn my backyard into one :)

Thanks,

Sean
 
How about this? In Tassie as well

Oh - and sorry but I've been meaning to ask:

How did you remove the side 'bump' strip from your 205 ? Violence, heat gun, chemicals ?

Any suggestions?
 
Advice on suspension - GTI vs non-GTI dampers & springs

Hi everyone.

I'm about ready to start buying new suspension, but I'm confused on the separation of springs and dampers into GTI and non-GTI packages. From looking in the Haynes workshop manual the difference between the two is the GTI towers have fixing points for the link arms that go to the anti-roll bar, while the non-GTI towers do not. Also the rear ride height on the GTI is documented as 17mm lower.
  • Would I have problems with the car if I buy and fit GTI dampers and springs now ?
Thanks,

Sean
 
Good Evening,

Here are a couple of pictures of your car around 7 years ago when I saved it from being crushed! I put the wheels on it as I had them from another SI wreck and I think I changed the hubs on it. I had grand plans for putting it back on the road but passed it on to someone else!

I've got a heap of odds and sods from both 205 and 405 here if I can be of any help!

Cheers
Ben

Hi Ben,

Would you have an 206 or 306 front brake caliper sets we could come to an arrangement over?

I'm looking at putting bigger rotors on the front of my Si as suggested by @PeterT

Thanks,

Sean
 
I've gotten some very good advice from the forum, and I've given this a fair bit of thought and I'm pretty much convinced that the best move is to 'stroke' my existing 1.6 out to 1.9 using a MI16 crankshaft, DKZ pistons, sump spacer and all the other ancillary bits. I get to keep the existing alloy block, and should end up with a car that is similar to a 1.9GTI under the bonnet but with a few upgrades like better engine management and induction.
I wouldn't be using DKZ pistons. This will only end up with the standard 9.2:1. Just adding 300cc isn't going to set the world on fire. Combining the DFZ/Si piston (they're the same part) with the small chamber head has been done many times and gives 10.5:1 minimum. Do some searches on here or 205 Forum.

eg Reply #7

You'll need to change the camshaft was well, or it will have too much dynamic compression.

Your pistons have a 9cc dish. Do the maths if you're unsure.

Given you're considering an aftermarket ECU and combining with 98RON, you will have a sweet engine and be able to control pinging.

I'm currently building two 8V 1.9L road engines for customers and they're both 11:1.
 
Thanks Peter,

Can you suggest a particular model/part number for the cam and a supplier ?

Also, confirming my read of your post the current head on the Si's XU5M3 is suitable (and should probably just be reconditioned?

Thanks,

Sean
 
How did you remove the side 'bump' strip from your 205 ? Violence, heat gun, chemicals ?

I first pulled off the strips. They are stuck on pretty hard, but some off with some force. This does however leave behind a dried and hardened glue line. Thinking about it, perhaps I should of used the heat gun at this stage rather than just pulling them off, as more of the glue might have come off. I then tried to heat up the glue with the heat gun and used prepsol and a rag, no joy. I found prepsol on a non marking scourer and lots and lots of lots of scrubbing, dipping in prepsol, softening the glue and picking it off. It took me absolutely ages to get it all off both sides, and scraping off with finger nails was the only thing that didn't scratch the paint off underneath.

I had to get it all removed and perfectly clean, as there is a multi-coloured PTS pinstripe here for the Rallye that is a major part of the look so I had to do it right.

If you are painting the car you may want to just use some mechanical way to remove the glue and paint, as it will be getting redone anyway.

Attach files
sidestrip.jpg
 
Advice on suspension - GTI vs non-GTI dampers & springs

Hi everyone.

I'm about ready to start buying new suspension, but I'm confused on the separation of springs and dampers into GTI and non-GTI packages. From looking in the Haynes workshop manual the difference between the two is the GTI towers have fixing points for the link arms that go to the anti-roll bar, while the non-GTI towers do not. Also the rear ride height on the GTI is documented as 17mm lower.
  • Would I have problems with the car if I buy and fit GTI dampers and springs now ?
Thanks,

Sean
Gti struts have a drop link tab welded to the strut tube and si ones don't. Si has no front sway bar (it has radius rods) gti does. Also I think gti struts are marginally longer than si (approx 15mm)

basically if your keeping the original si front end use non gti struts. If your going firmer suspension and/or a gti front end later you can probley buy gti struts and run in si frontend but the drop link tab fouls on the si brake hose mount that's on the body. I modified my si brake hose mounts by moving them when I fitted the gti front end. That way I could use 205 si 205 gti or 306 struts. 306 struts put the drop links in a slightly twisted position due to the position of the tab on the strut but they still worked fine for me. The reason I used 306 struts was because they came from a xu10j4 car that had only done 60000km.
 
To get rid of sticky goo the best method is to use one of these:


After having dealt with this kind of crap for a lifetime, this thing is just wonderful. It wipes off the residue very easily, no scraping, no drama. Spray on a rag, wipe crap off.

If you want to keep the original paint I recommend trying it out first, but in my experience it doesn't affect any paint. It does affect some of the older ('50s-'60s) serigraphic paint on circuit boards, but then again, that stuff is what? 60 years old or so? Clean with isopropyl alcohol to take off any of this solvent left over.

If you don't want to dish out, WD40 works on some of these sticky goos, but not all of them. It does take a bit more effort though to soak the goo first and then yes, you can wipe it off but if it doesn't dissolve completely, the residue will smear everywhere and you'll have a big mess on your hands.
 
Thanks for the advice on the side holding - I'll follow it when it's time and hopefully I have an easier time of it.

I've had similar battles with old Commodores, and that generally started with much swearing and ended with a disappointing result - but @matara 's 209 is pretty gorgeous so his advice is worth listening to.

I am going to get the Si painted (unless my mechanical bills eat up that part of the budget) - keeping the original colour scheme but having all the "shopping trolly kisses" and "zebra stripe detailing" removed. The interior is holding up quite well for its age, and if I can get the seats reupholstered in something sympathetic but retain the carpet and door cards I'll be happy. I think that whoever worked on the 205 design also worked for NASA on the lunar lander - paint was seen as dead weight and to be reduced or avoided where necessary.

Sean
 
Top