1959 4cv Restoration in North Carolina USA

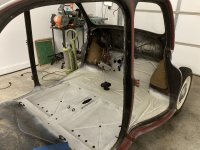
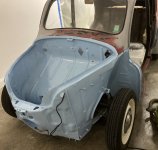
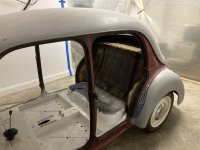
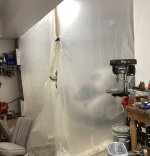
The boot and front wheel wells are painted! Yesterday I played golf without the front doors. It was very convenient. Today I finished my "paint booth" and started taking things apart to paint the rest of the main body shell. The paint booth draws air from the house, through filters and exhausts out of the garage. I am using an old house air handler fan on low speed (three speed fan).

Img3104s - Copy.jpgIMG_3123Copys.JPGIMG_3124Copys.JPGIMG_3125Copys.JPGIMG_3126Copys.JPG
 
That thing is so cute.

What if you left all the hinged panels, front panel and wheel arches off? It would definitely help your gas mileage for one. Wonder if you could drive it like that around. I mean on the streets. Might need lights, but I'm sure you could make something up.
 
Have you any idea how many hours Stan has spent reshaping and prepping those panels? Of course he wants everyone to see them!!
 
One of my goals is to have the finished car very close to new condition (with a few improvements). When I finished my MGA projects, it was like having a new car. I loved just sitting in them with everything looking and working as if the car had just come from the factory. I didn't just sit in them though, I drove them a lot. I could slide the rear end around corners in second gear and control the slide with the accelerator. Visualizing the goal of having a "new car" was what kept me going through all the grunt work. It is the same with the 4cv. The one I restored back in the 70's was nice, but this one will be the way I would have liked to do it if I had more skill and money back then. I took the front and rear windscreen out today and continued with prep on the inside. The MGA projects each took about twice as long as the 4cv.
 
One of my goals is to have the finished car very close to new condition (with a few improvements). When I finished my MGA projects, it was like having a new car. I loved just sitting in them with everything looking and working as if the car had just come from the factory. I didn't just sit in them though, I drove them a lot. I could slide the rear end around corners in second gear and control the slide with the accelerator. Visualizing the goal of having a "new car" was what kept me going through all the grunt work. It is the same with the 4cv. The one I restored back in the 70's was nice, but this one will be the way I would have liked to do it if I had more skill and money back then. I took the front and rear windscreen out today and continued with prep on the inside. The MGA projects each took about twice as long as the 4cv.
Does you credit. I'm in awe of the metal work. We have a restoration friend in Perth whose R10 is like sitting in a new one in Renault Australia's showroom back in 1968.

I can't claim anything in this class - ours haven't ever been restored, but maintained and repaired as necessary.
 
I'm loving following your step by step, restore as you drive process Stan. A random question though. Where does the demister get its air from? My early 4CV doesn't have them at all, but it has the pop-up climate control/rain acceptor vent, between the wipers that was deleted on your model.
 
I'm loving following your step by step, restore as you drive process Stan. A random question though. Where does the demister get its air from? My early 4CV doesn't have them at all, but it has the pop-up climate control/rain acceptor vent, between the wipers that was deleted on your model.
About 1954 the cars got air vents at the bottom corners of the windscreens, driven by the same radiator shrouding system. They also got a third hot air (well, lukewarm air) vent under the back seat. My experience is that you know it works when you get out of the car and discover it is colder outside.......

Mine is like yours, flaps on the floor just behind the wheel arches.
That's a lot of cold metal for it to run through before it reaches the windscreen John :unsure: hence the not so roastie toastie 😁
Guessing the flap by the back seat base would have the only chance of being remotely warm having the shortest path.
 
That's a lot of cold metal for it to run through before it reaches the windscreen John :unsure: hence the not so roastie toastie 😁
Guessing the flap by the back seat base would have the only chance of being remotely warm having the shortest path.
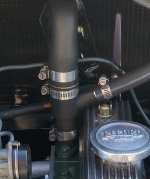
That's it in a few words. You do get warm air at the front after a few km. If I hadn't thrown the radiator blind away in about 1968 it might have helped!! I have a thermostat modification for the top hose and must fit it sometime.
Senn thermostat components.jpg
Thermostat fittings exposed sml.jpg
 
The rocker area doesn't even seem to be properly sealed up at the front - maybe the trim piece below the sill helps. It does seem very optimistic that the air would be warm enough to demist. I have not seen a thermostat adapter like that before. It is nice that it uses a typical modern thermostat. I just used the factory thermostat setup with hoses made to accept the thermostat and with tees for hoses to the sofica heater.
IMG_2714 - Copy.JPG
 
The rocker area doesn't even seem to be properly sealed up at the front - maybe the trim piece below the sill helps. It does seem very optimistic that the air would be warm enough to demist. I have not seen a thermostat adapter like that before. It is nice that it uses a typical modern thermostat. I just used the factory thermostat setup with hoses made to accept the thermostat and with tees for hoses to the sofica heater.
View attachment 134572
I'd forgotten that. Yes, there's an unhealthy gap in the metalwork somewhere down there from the immaculate assembly in 1950!

The thermostat holder was machined up by a friend of mine.
 
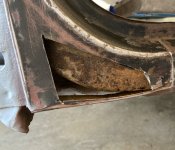
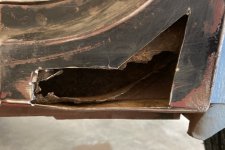
The gap does not actually go into the channel for the demister. There is a thin piece of metal almost like an elbow that connects to the channel going up to the demister outlet. I know this because I found a few pinholes today and had to cut the area open. I will fix it and weld it back up tomorrow. John - a car that has been maintained is often preferable to a totally restored car.

IMG_3133Copys.JPGIMG_3134Copys.JPG
 
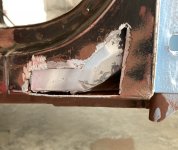
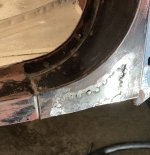
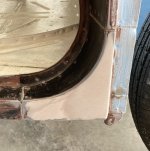
The front corners are now repaired. I glued in some thin aluminum to repair the demister duct elbow on the right side.
IMG_3136Copys.JPGIMG_3137Copys.JPGIMG_3141Copys.JPG

The 4cv windscreens sit on the inside of the body flange. It seems to me that the cord one puts in the gasket should be pulled from the outside, not the inside. This would require a helper on the inside holding the glass in place. It is opposite the Dauphine where the windscreen sits on the outside of the flange. The book seems to indicate pulling the cord from the inside. Who has done this recently?
 
The front corners are now repaired. I glued in some thin aluminum to repair the demister duct elbow on the right side.
View attachment 134610View attachment 134611View attachment 134612

The 4cv windscreens sit on the inside of the body flange. It seems to me that the cord one puts in the gasket should be pulled from the outside, not the inside. This would require a helper on the inside holding the glass in place. It is opposite the Dauphine where the windscreen sits on the outside of the flange. The book seems to indicate pulling the cord from the inside. Who has done this recently?
Thanks for the photos - I'll bet mine has some rust in there but it hasn't ever emerged since the fishoil flooding....

My windscreen has never been out of the car (rubber still OK, believe it or not) but I'm pretty sure the windscreen goes in from the inside with the cord pulled from the outside. If you do it the other way, as the odd one here has been fitted, they look terrible and it's obvious once done the wrong way!
Peugeot 203 ( same era ) had windscreen fitted inside out , helper on inside screen pushed out and fitter on outside pulled cord. When I fitted a laminated screen to a 203 had a problem with flat glass cracking in the middle because inside pusher was not able to control speed at which it all went together. Really should have had suction cup clamps on a frame to keep it all flat.
 
Peugeot 203 ( same era ) had windscreen fitted inside out , helper on inside screen pushed out and fitter on outside pulled cord. When I fitted a laminated screen to a 203 had a problem with flat glass cracking in the middle because inside pusher was not able to control speed at which it all went together. Really should have had suction cup clamps on a frame to keep it all flat.
I've never been brave enough to learn on the job with this one!
 
Is the fishoil flooding similar to waxoyl? That stuff works well and you shouldn't have a problem. I have used a similar product on most of my old cars once the paintwork was finished. The only reason I was not considering it for the 4cv was that it might make the demister smell bad.

Thanks for the windscreen info. I have done this quite a few times, just not with a car where the glass it fitted from the inside. The 4cv windows are relatively small. The hardest one I did was the curved one piece back window on my Nash Metropolitan. The replacement windscreens are usually thinner than original and crack more easily. Fortunately, I can re-use my glass.
 
Top