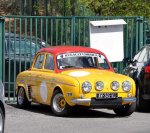
The Gecko Dauphine !!!

geckoeng

Well-known member
VIP Paid Subscriber
1000+ Posts
Fellow Frogger
Joined
Oct 31, 2010
Messages
2,446
Location
Perth, WA
This is actually for "J-man" who asked quite a while ago to start on the project thread.

The Gecko Dauphine
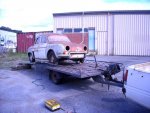
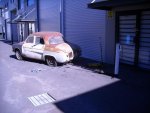
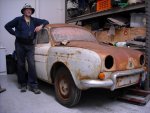
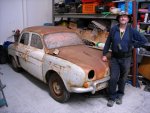
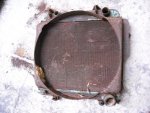
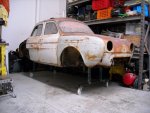
The Dauphine actually came as a pair. 3[SUP]rd[/SUP] March 2010, I contacted a guy in Albany WA about a Dauphine I had heard about. Then I was told there were 2 in the shed. So I went down to see them. Left early in the morning and arrive at 10:30pm (4:10Hrs drive). Phoned Greg Marchesi and organised to meet at the shed. The one car was almost a runner and in decent condition to be a good project. The other was a younger car but in real neglect, but almost complete. And as much it had a lot of surface rust, none that could be seen was any kind of ”tin worm”.
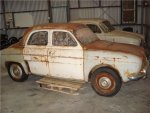
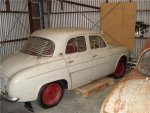
Albany Dauph 1.jpgWayne Dauphine.jpg
 
The Decissions and the Purchase and Getting it Home

Now started the debate. To buy or not to buy?? To start a major project or turn your back and walk away. Greg had changed the deal a bit by the time I got there. He now wanted both cars gone at the same time. I wanted the derelict car, as my project was from the ground up, and half the car was not wanted.
I had been in my workshop about 4 months, so I had place to start the project. And all my tools and equipment were in one place. I had been saving a lot of ”bits” for the car for some time, so they could come out of storage as well. And it would be a fantastic way to get away from sitting in front of TV after work. End of April I found somebody who wanted the other Dauphine.
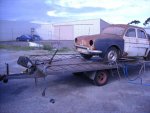
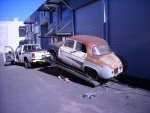
So it was all done, we would each take a trailer down and collect the cars. 28[SUP]th[/SUP] April we collected the cars. As Greg was shutting up his sheet metal shop he had moved the cars to a container at the end of the property. It was great to open the doors and release the cars to a new life. The other Dauphine rolled out and onto the trailer easy. Mine had seized brakes, and needed to be dragged 20m to the hard standing to be loaded on the trailer. I used the Rodeo ute to pull it out the container and get it to the hard standing. Quite a feat in the conditions. Then put the trailer in position and hand ratchet winched it on, and all tied down.
Stopped in town to get some food and provisions for the road home, it was 15:30 when I got going. It actually felt great to actually have a Dauphine again. The trip home was a bit arduous as the trailer did not like the load and over 100Kph would wonder a bit, so stayed at 95-98 and it drove well. It was about 21:30 by the time I unhitched the trailer at the workshop yard, and went home.

Albany Dauph 2.jpgAlbany Dauph 3.jpgAlbany Dauph 4.jpgAlbany Dauph 5.jpgAlbany Dauph 6.jpg
 
In Its New Home !!!

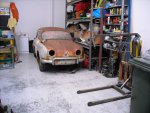
Next morning there early doors open, wheel trolleys at the door, but the seized brakes would make it difficult to unload. But outside each workshop door were steel bollard to stop people running into the buildings. Aligned the trailer, tied the back of the Dauph to a bollard, and slowly drove away. The dauphine came off perfectly. Jacked each wheel and put a trolley under each tyre, and my son Danial, who had come to see and help, helped push it in the workshop and into it dedicated corner.
The Dauphine was in its workshop, and start the rebirth process !!!

Albany Dauph 7.jpgAlbany Dauph 8.jpgAlbany Dauph 9.jpg
 
Yay! Thanks Ray, love it! :headbang: Thought you'd forgotten me :cry::D

Can't wait to see the progress . The one you let go looked like a ripper :tongue:. Hopefully that one sees the roads again too. Thanks for the update :approve:
 
Is this one to be restored to standard specs or are you planning something special 1.1 - 1.7 litre ?

Either way it seems to be a good solid car to start with.
 
It's a "gecko" car. Are you seriously asking about standard specs????? :roflmao:

It's pretty sound by the way John. Nice shell.

And Ray, now you've opened the thread, for which many thanks, people will have expectations of progress, in your abundant spare time. More :roflmao:.....
 
Not wishing to offend any purists, but thinking of a Giocattolo, I personally hope it is mid-engine with a PRV V6 and maybe a slightly longer wheelbase that nobody would notice. All done to Ray's usual standard of engineering and presentation.:eek:

I just cant decide, yellow or blue.
[h=1][/h]
 
Not wishing to offend any purists, but thinking of a Giocattolo, I personally hope it is mid-engine with a PRV V6 and maybe a slightly longer wheelbase that nobody would notice. All done to Ray's usual standard of engineering and presentation.:eek: I just cant decide, yellow or blue. [h=1][/h]

I suspect I agree this is broadly what will happen, except I doubt that Ray will change the wheelbase and he can do quite enough with a Renault 4-cylinder for any Dauphine shell.... I'm with yellow. :)
 
Thank you for the good giggle. I can put out a bit of cheese and the second mouse always gets it.

OK !!! All of what is here is not set in stone, and change with the breeze.

Colour : Blue, Yellow is a good one, how about both, but in Mild Seven colours ????

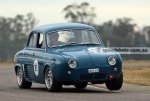
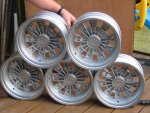
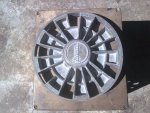
Body pretty standard : slightly flared arches, enough to cover 15x6 wheels (2 piece). More on those later. I lust after the UCV-031 look.
Nice Dauphine wheel up.jpg That is just Dauphine-Awsome !!!!

The only body mods will be the bonnet to have 2 outer "7 inch" X-rays on the outers, and 2 Dauph/R8 lights just inside with 100W spot bulbs. Front will have a bumper "airdam" at the height of the spare wheel openingonly sticking out 25mm, well shaped, and 125mm off the ground, with a 25mm thick splitter (Carbon) about 30mm broad, but not sitting out beyond the bumper/airdam above. Rear will also have a full bumper sticking out from the body only 25mm and flowing back under the car, with a full defuser tray then sticking out to the vertical bodyline.

Power and drive train : not in final decision yet. But initial has been a 1647 807/843, 10.5:1 CR, big valves, Alconi 701 (road) profile, fully balanced, Fuego T rods, ported and polished. Jenvey throttle bodies, 46mm x4, Megasquirt management. Stainless exhaust manifold and silencer across the back. I have nearly everything for the motor. Gearbox will be a big 5 speed 330+385, have all the parts already.

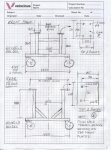
Front end will be R10 balljoint, crossmember about to be welded in. All 4 corners will have hand made Bilstein replica (but better) single shocks, all parts already designed and drawn and some parts already made.

Enough BS for now, need to go prepare dinner.

Take Care, and time,

Ray
 
Explanations :

7" X-Rays
Free-form Headlight Inserts - Xray Vision These fit into BMC light buckets with chrome trim rings.

It takes a while to build a car, the planning is important, you only buy what you need !!!

RAY
 

Attachments

  • Deltamic Centre 8.JPG
    Deltamic Centre 8.JPG
    72.2 KB · Views: 444
  • Steven Wheep Plug.jpg
    Steven Wheep Plug.jpg
    93.6 KB · Views: 363
Last edited:
The Cabin Insde :

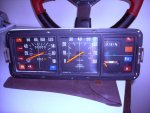
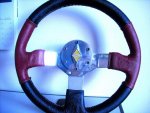
Exfrogger very kindly gave me a Dauph dash panel. So I have made a plug and mould, to produce a Carbon dash. I have a R5 Mk2 GTT instrument panel, unfortunately not the "orange" one, but in Spain they came with the "orange" and the TS type. And mine is the TS type. I also have a GTT steering wheel. Both are already refurbished.

Dash Plug 2 sml.jpgDash Plug sml.jpg Making the Plug (to make the mould)

Dauph Dash.jpgRebuilt Steering sml.jpg

I also have a set of Renault "boutique" seats from the classic era and they will be rebuilt in fancy cloth and leather. And to look like a modern GT3 interior. All door cards will be Carbon. Full harness belts.
 
Stripping the Car
The first thing once the car was in my workshop, was to get all of the stuff I didn’t want off the car.
That was, engine gearbox and back suspension. Fuel tank, all the interior leaving the dash. All the front suspension, and steering mechanism.
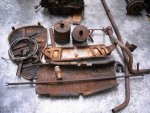
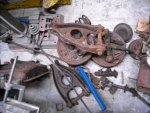
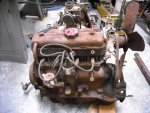
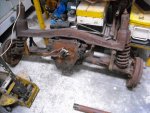
What surprised me was how good so much of the stuff like, engine and gearbox, were. Front suspension was in very good condition, only rubber bushings were very perished.
All the stuff I wanted to keep for the project was removed and stored on the project shelves. Only the main body parts and doors were left attached. All was cleaned and vacuumed . It was surprising how good the car was for a ’59-’60 model (presumed)
After advertising free parts on Gumtree and Aussie Frogs, all the unwanted was put in the skip.

Dauph Good Parts 1.jpgDauph Good Parts 2.jpgDauph Good Parts 3.jpgDauph Good Parts 4.jpgDauph Good Parts 5.jpg

As the car was now on axle stands, I needed some way to move it around, so the roller stands were made to attach to where the front and rear suspension mounted. The shell was mobile and at a decent height to work on.

Dauph on Roller Stands.jpgRenault Trans Trolleys.jpg

And the re-build had started.

Ray
 
Final Stripping and Starting Body Repairs
Now that I had all the unwanted parts off the car, I started stripping the parts I wanted to keep for the project. This I felt was the start of the serious part. I had made good space on my racking to put all the good parts out of the way while the body was sorted. Doors, bonnet, engine cover, mudguards, glass, all stored on the top shelf.

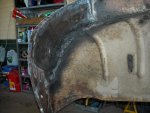
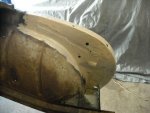
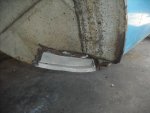
To my surprise the boy was in very good condition, and only had a few (normal) corroded places. The only damage was the RH rear corner, which had had a very poor repair after accident damage. The RH side of the back panel was filled with a lot of body filler, and the inner and outer panels of the sub-structure (monocoque) was very poorly straightened. This was a good place to start body repairs. So spot welds were drilled and the inner structure was cut out. The outer panel was beyond repair, but determined the final shape so it was left in place for now. Once the inner panel was in reasonable shape again, it was tacked back in place, and then the outer was cut out and a replacement panel made to replace all the damaged. All was tacked into place and fully welded. Welds ground and final sanded. This was so good to get back into body repair.


One thing I had made a transformation from gas welding body to TIG welding body. I liked it very much, and developed a very good technique to hammer weld my joins while still hot. Very satisfactory.


I also cut the rust out of the rear inner fender where it is joined to the chassis rail that comes up from the floor pan. They always rust in this area. The inner chassis rail was in good condition, so it was treated with rust converter and primed with epoxy etch primer and the cover panel was treated as well and then all welded together.


This was good work and it made me feel the project had really started. The work was done after work every evening, and I would knock off at about 21:00.

DSCN0032.jpgDSCN0033.jpgDSCN0034.jpg

Ray
 
Dauphine Attitude

This is the look, just as good as UCV-031. They are the standouts at the moment and the direction I will take.

9db548ad55190c390dae1754c018f541.jpg
 
Top