retightening 505 xn1 cylinder head bolts after initial running

aero grade hylomar is in a tube you can also use silicon sealer for the base seals.
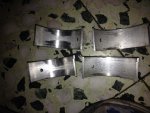
Liner protrusion is impotant i use the thicker shims most times and the liner clamps are not 100percent necessary if you are fitting the head right away fit the inner pistons first turn the crank to bottom pulls the liners down as you turn fit pistons 1 and4 then fit the head
 
2pac,
Just to add to the confusion. The head gasket fitted, was it for an 1800cc XM7 engine or 2 litre XN1 ?
There is a difference in the bore diameter. They also have a different part no.
The simplest way of securing the liners is to use 4 large washers that will overlap the liners. Hold them down with suitable bolts or use head bolts with spacers.
Your proposed purchase of tools is a bit of a luxury.

ianrobbo,
Did you find when re-torquing the head to 70 ft lbs that only some of the studs appeared to tighten up where the remainder didn't move?
This, to me is where the revised torquing method comes in to play. The slackening and tightening ["shit"] using a final angle pull in one movement overcomes the "stickacity" [my word] of the threads.

Back in the day and being a pedantic sod I've always stuck with the makers methods re the revised torquing methods. I can't claim 50 engines and the alternative methods used but the best of British luck to those that have.:wink2:
 
Back in the day and being a pedantic sod I've always stuck with the makers methods re the revised torquing methods. I can't claim 50 engines and the alternative methods used but the best of British luck to those that have.

FWIW, I'd suggest getting one's torque wrench calibration confirmed would be money better spent that purchasing an "angle gauge" tool.

From 403s onward, I've lubricated the head bolt threads with copper kote, after chasing the block with a tap.

And then pull the bolts to 70 lb/ ft in three stages. As suggested to me by the very late Brian Thomas .

The very fact that the procedure changed mid engine production, suggests to me if a repair procedure has worked perfectly fine in the past why should it be changed.
 
After blowing out the bolt holes with compressed air and spraying a little bit of RP7 in them I've tightened the head bolts in stages as per the book. I've used the same procedure on 403,404 and 504 heads.

Of course, I've always paid very close attention to the block face and the head face, making sure they are both as pristine as possible. I've never had a Peugeot head skimmed.

I've always checked liner protrusion with the aid of a spirit level with a milled edge and a feeler gauge. I check the head for distortion the same way.

I've also used Hylomar on the head gasket faces and can't recall ever having had a head gasket leak.
 
Last edited:
2pac,
Just to add to the confusion. The head gasket fitted, was it for an 1800cc XM7 engine or 2 litre XN1 ?
There is a difference in the bore diameter. They also have a different part no.

Good point.

2pac....did you examine the parts carefully and notice which cylinder got the water going through it ?
Or was it all too new and still clean for you to see that ?

To sum up :

...Clean your head bolt holes with a chaser or a tap.....you'll get 6 tons of clamping force as a result, whereas without cleaning you'll get as little as 2 tons.

.....Get a steel ruler and check straightness of head.

.....Use steel ruler and feeler gauge to check liner protrusion.

.....Clean head bolt threads with a wire wheel and lubricate them and the bolt holes with a very small amount of copper or moly grease.

....Check the exhaust-side rear bolt hole thread.....it must be perfect as it is the first one to degrade from heat. If necessary, helicoil it.

......Tighten bolts in stages, and try to do the last bit (from 40 or 50 to 65 or 70) in one swing of the torque wrench.

.......Use a different brand head gasket...."Meillor" brand is a little softer than other ones. (Hard is bad, very slightly soft is good).


Apologies if I missed anyones suggestion.
 
Last edited:
Wildebeast- it was for 2.0 liter.

Beano- i've done most of that... but for the liner seals i just used the thickest ones as per the recommendation here...
and tightened with degrees, which should equals to only about 50, this time i will go up to 70.
i had a meillor gasket, but when i opened the bag the fire rings were corroded, so i used a spanish Ajusa gasket.
 
Personally, if the overflow bottle emptied so fast, I'd suspect a leak between inside a liner and the water jacket.

Which usually amounts to cylinder head surface condition/corrosion in where the "ringed" area of the head gasket mates with the head.

But we really need to wait for forensics from 2pac before double guessing.

And in spite of my varied methods of tensioning XN cylinder head, on one occasion without a torque wrench, on the side of the road, tensioning by guesstimate with a ratchet handle with plug spanner over it for more leverage.

I've never had a leak on start up nor when I come to think of, ever.

So I 'd suggest torquing is less important than the condition of the mating surfaces.

A nice spread of hylomar helps I'd think.

2pac, as Robmac is probably the most experienced member here, I'd tend to go with what he says. I always used to go and see older mechanics because they had so much experience.

And what he says rings true.

Mostly people don't need to chech liner protrusion (just use the thickest liner seal), but since your rebuild failed you really should do that this time. Do everything perfectly.

Did you get the head skimmed ?

(And by the way, when you do that to 504 and 505 engines, you have to tell the machine shop to take off the absolute minimum).
 
I removed 2 pistons today, and these are the bearing shells.
I guess it's no ok.
Maybe the coolant that got into the oil ruined them? image.jpg
 

Attachments

  • image.jpg
    image.jpg
    97.1 KB · Views: 395
Last edited:
I removed 2 pistons today, and these are the bearing shells.
I guess it's not ok.
Maybe the coolant that got into the oil ruined them?
View attachment 93729

Doesn't look good.

Back to Square one I suspect.
Crank should still be OK but I'd get it measured just to be sure.
Get the head checked to make sure its flat at the same time.

Cheers
Roland
 
I removed 2 pistons today, and these are the bearing shells.
I guess it's no ok.
Maybe the coolant that got into the oil ruined them?View attachment 93731

2pac,
The bearing shells in the lower picture appear to have been damaged by dirt?
The top picture, were they new shells when fitted? That shell appears to be showing high mileage wear, anyone?
I don't think the coolant/oil mix would have caused much damage over the short period you mentioned.
 
Were the bearings the correct size, eg oversize instead of standard, for the crank? Were the backs of the bearing shells coated with oil instead of nothing on installation?
 
Yes, that my theory too. Or caps not in alignment with rod 1/2 bore.

The wear in the bearing white metal is at the split in the shells, in post #30

In post #29, I'd suspect the shells are too big for the crank diameter. And the crank has been "hammering".

Did the engine knock when running ?
 
Moreover, does the bearing shell wear relate to the water loss problem ?

There is something very odd going on here.

A bit of water in the oil will create mayonnaise but only a bit will not cause the effect we see in those bearing shells.

I may be digressing a bit, but :

2pac, I seem to recall saying that the cylinder head was a secondhand one. This is an unknown quantity, and I'm always suspicious of unknown quantities.

Have you checked the exhaust ports ? If coolant was not used in the engine that head came from, corrosion may have occurred and a small hole may have developed in an exhaust port between the water jacket and port. This would cause water to get sucked out of the exhaust ports, and it may be why you lost so much.

This happened to me with a Japanese car.

Please just check the exhaust ports carefully. Is the colour the same in each one ? Is one of them very clean.....like water has been coming out and into a hot port ?? Or does it look like they have been ground out and enlarged by someone ?
 
Last edited:
The bearings are new and std size, the backs weren't oiled, the crank was inspected by a workshop.
In one piston the upper shell just fell when I removed the cap.
I still didn't check the mains. Would you remove the crank again?

three of the spark plugs had some white powder on the electrode, the fourth one had something like oil.
 
Last edited:
The bearings are new and std size, the backs weren't oiled, the crank was inspected by a workshop.
In one piston the upper shell just fell when I removed the cap.
I still didn't check the mains. Would you remove the crank again?

Yes - it would give you peace of mind to check it all again.

Cheers
Roland
 
A lack of lubrication? I'd also remove the crank and check everything. I don't think the later cranks had removable screw in journal plugs. Regardless, I'd check very carefully to make sure the crank galleries are clear of built up sludge.
 
Also, when the shells were installed was everything spotless?

Were the bearing caps torqued down correctly?

What were the oil and filter like?
 
You didn't mix up the bearing caps by accident, did you ? Each cap has to go on the same conrod, the same way around as when you took it off.

And when you first cranked the engine, did it turn over easily ?
 
i didn't mix the bearings, but at first i torqued them to 45 nM by mistake instead of 40.
 
45 is probably within tolerance.

And did the engine turn over easily ??
 
Top