The skills are in making the new panels. I gotta say he is bloody skilled...

You are using an out of date browser. It may not display this or other websites correctly.
You should upgrade or use an alternative browser.
You should upgrade or use an alternative browser.
Renault Floride body rebuild.
- Thread starter 56 Fregate
- Start date
More repairs...
GB I have been working hammer and tong on this for 2.5 months..every night after work and every weekend to get to this point and applied the paint finish last weekend.
I am about to put the shell back on the rotisserie so will post some more pics then.
That guy in the UK sure is good.
GB I have been working hammer and tong on this for 2.5 months..every night after work and every weekend to get to this point and applied the paint finish last weekend.
I am about to put the shell back on the rotisserie so will post some more pics then.
That guy in the UK sure is good.
Attachments
Last edited:
Rats...
Or mice maybe.
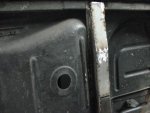
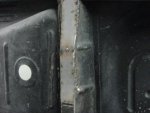
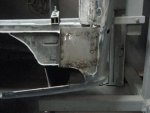
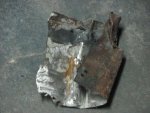
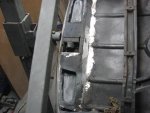
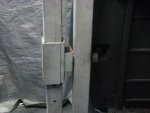
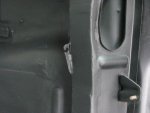
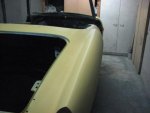
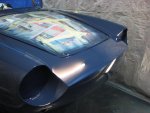
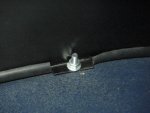
This is an air vent that was used to feed clean air to the carby on early Florides, long since made redundant by the caravelle conversion.
The purists will hate it but the rusted gauze has to go, I am of the opinion that this rust may stand in the way of a future roadworthy inspection.
So it was cut out, cold galved and plated over.
Or mice maybe.
This is an air vent that was used to feed clean air to the carby on early Florides, long since made redundant by the caravelle conversion.
The purists will hate it but the rusted gauze has to go, I am of the opinion that this rust may stand in the way of a future roadworthy inspection.
So it was cut out, cold galved and plated over.
Attachments

Last edited:
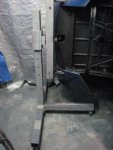
The rotisserie
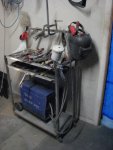
The rotisserie is made out of scrap from a demolishion site and only cost me my time and a bit of MIG wire.
It allows for 360 degree rotation to gain access for repairs that can't easily be done from below.
The welder I am using is a 200 amp chinese brand purchased on ebay for $400 and since I have never owned a welder before I have nothing to compare it to so can't advise if it is good or bad...but it does what I need it to.
Attachments
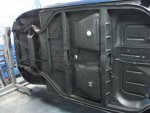
Now that the under body repairs have been done and looking tidy all the panel joints were seam sealed and the whole underside was sprayed with a thick coat of underbody deadener.
Attachments

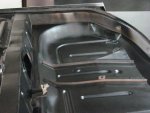
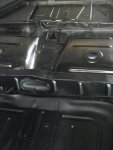
Correct, underbody deadener followed by matt black enamel, the guards received the same treatment.
Architectural detail
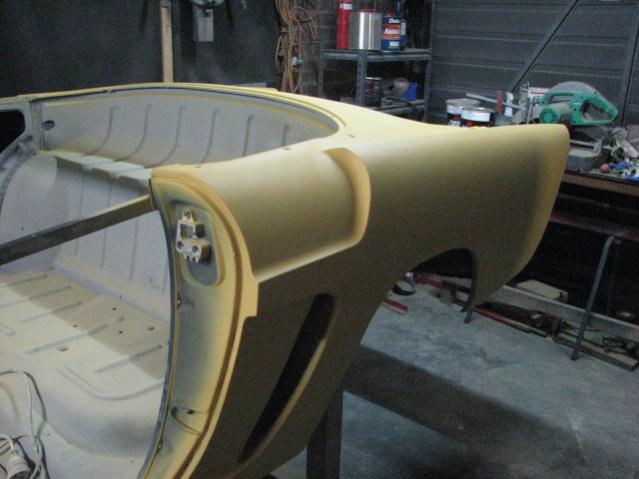
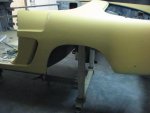
After the repairs had been completed the shell was given a good clean down with wax and grease remover, the primer was sanded and three good coats of spray putty was applied.
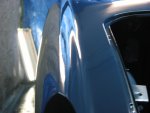
All the way along much attention has been given to getting the body lines sharp, straight and even. It is this architectural detail that will make or break a body rebuild.
If these body lines are crooked or rounded over or uneven the car will never look sharp no matter how good the paint job is.
Long flexible straight edges, good lighting and long sanding blocks are essential for a good straight body.

After the repairs had been completed the shell was given a good clean down with wax and grease remover, the primer was sanded and three good coats of spray putty was applied.
All the way along much attention has been given to getting the body lines sharp, straight and even. It is this architectural detail that will make or break a body rebuild.
If these body lines are crooked or rounded over or uneven the car will never look sharp no matter how good the paint job is.
Long flexible straight edges, good lighting and long sanding blocks are essential for a good straight body.
Attachments
Last edited:
Finish coat
Spraying a car at home is challenging when dust is the enemy, especially after weeks of grinding out old bog in the same garage.
Bog dust is very fine and gets into every nook and cranny so it is important to control it.
Using compressed air I blew down all surfaces (including the ceiling), vacuumed and repeated the process several times to get rid of as much dust as possible.
Cheap plastic tarps were used to line the garage walls to help curb as much hidden dust as possible before the spraying could begin.
A watering can was used to saturate the garage floor so that whatever hit the floor stayed there and was not blown around by the spray gun.
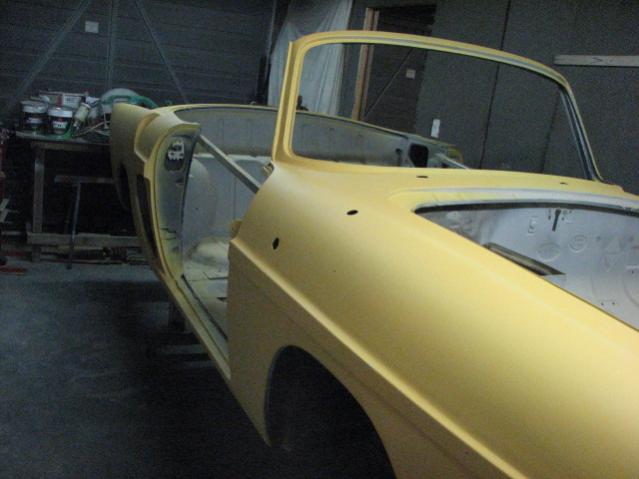
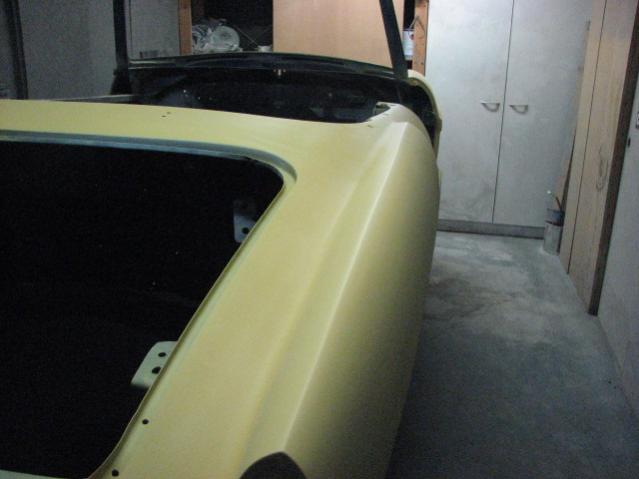
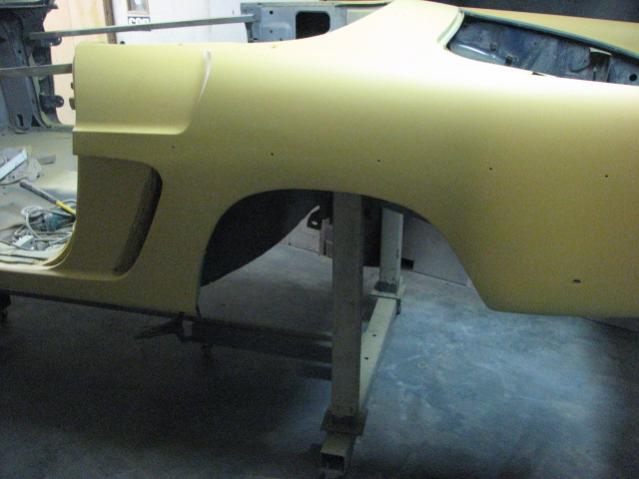
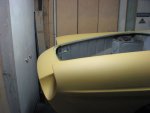
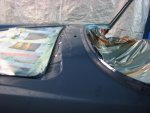
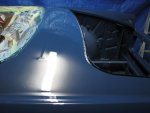
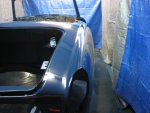
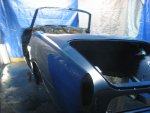
I gave it three coats of acrylic enamel which was suggested by someone from this forum so as to be in keeping with the period in which this car was created, and hopefully the finished gloss level will reflect the type of paint used.
I am quite happy with the overall result. Even though there was some atmospheric dust stuck to the final coat I am not too concerned as I intend to color block the paint in a couple of weeks after it has hardened.
The gloss level straight off the gun was surprisingly good which will make the color blocking process so much easier.
Spraying a car at home is challenging when dust is the enemy, especially after weeks of grinding out old bog in the same garage.
Bog dust is very fine and gets into every nook and cranny so it is important to control it.
Using compressed air I blew down all surfaces (including the ceiling), vacuumed and repeated the process several times to get rid of as much dust as possible.
Cheap plastic tarps were used to line the garage walls to help curb as much hidden dust as possible before the spraying could begin.
A watering can was used to saturate the garage floor so that whatever hit the floor stayed there and was not blown around by the spray gun.
I gave it three coats of acrylic enamel which was suggested by someone from this forum so as to be in keeping with the period in which this car was created, and hopefully the finished gloss level will reflect the type of paint used.
I am quite happy with the overall result. Even though there was some atmospheric dust stuck to the final coat I am not too concerned as I intend to color block the paint in a couple of weeks after it has hardened.
The gloss level straight off the gun was surprisingly good which will make the color blocking process so much easier.
Attachments
Last edited:
Like was said earlier, you're truly a dark horse.
That looks bloody great, especially straight off the gun. And in such a small garage.
Gotta take me 'at off to ya.:headbang:

Mike.
That looks bloody great, especially straight off the gun. And in such a small garage.
Gotta take me 'at off to ya.:headbang:
Mike.
Thanks Mike,
There is plenty to keep me amused while the paint hardens........
Some components receive the 'White Knight' satin black treatment...
Lots of mechanical components to polish up, tidy up the wiring loom...
etc. etc. etc.
There is plenty to keep me amused while the paint hardens........
Some components receive the 'White Knight' satin black treatment...
Lots of mechanical components to polish up, tidy up the wiring loom...
etc. etc. etc.
Attachments
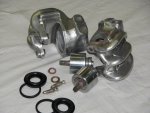

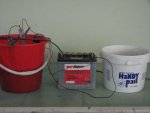
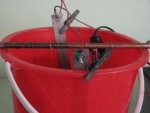
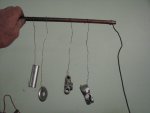
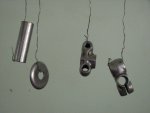
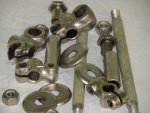
Nickel plating....
Some suspension components deserve some rust protection from my home nickel plating gizmo.
Some suspension components deserve some rust protection from my home nickel plating gizmo.
Attachments
Last edited:
Nickle plating
Could you please tell more on the nickle plating setup as i'd like to have a go at that myself.
Cheers Peter.
Could you please tell more on the nickle plating setup as i'd like to have a go at that myself.
Cheers Peter.
Like was said earlier, you're truly hung like a dark horse.
That looks bloody great, especially straight off the gun. And in such a small garage.
Gotta take me 'at off to ya.:headbang:
Mike.
I've been over and he is good, but then all us Floride boys are a special breed.
Yep, that's the expression I've been strugglin' to find.
Most folk would just call you a shower of......
All the best for the coming year,
Mike.
Most folk would just call you a shower of......
All the best for the coming year,
Mike.
Last edited:
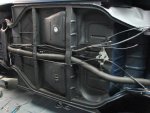
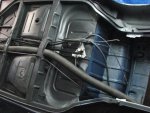
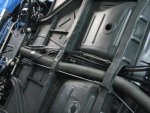
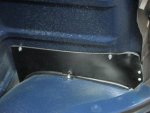
Refitting the Umbilicals
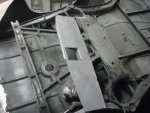
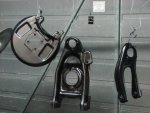
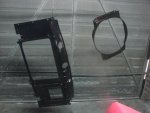
A new heater duct was installed and I can say this would be a difficult job if you tried it laying on your back on a workshop dolly.
The gear lever was cleaned up and a new sacrificial bush made up to replace the worn one.
The hand brake assembly was also cleaned, repainted and lubed before reinstallation.
A few new securing clips were made to secure the cables just as renault had intended (except for the zip ties).
Original workshop and parts manuals are really helpfull when doing this work.
Attachments

Last edited:
Like was said earlier, you're truly a dark horse.
That looks bloody great, especially straight off the gun. And in such a small garage.
Gotta take me 'at off to ya.:headbang:
Mike.
Nice work and thanks so much for the posts and photos. Wow. You've done all the things I avoid, and well!
Very impressive. Hope to see you at Junee at Easter 2013 then......... Or are you coming on the Daisy Tour in May?
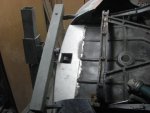
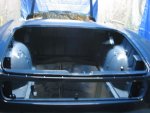
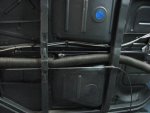
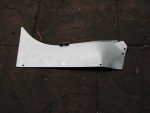
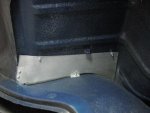
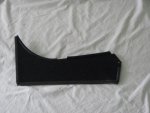
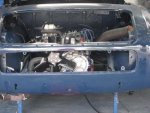
Because the side air vents have been opened up again (just for appearance) a baffle was installed on the inside before the motor and trans axle assembly was installed so overall cooling is not affected.
I have kept a template of these and a full size copy can be mailed to whoever is interested. I will also post a copy in the 63-1092 Floride/Caravelle thread.
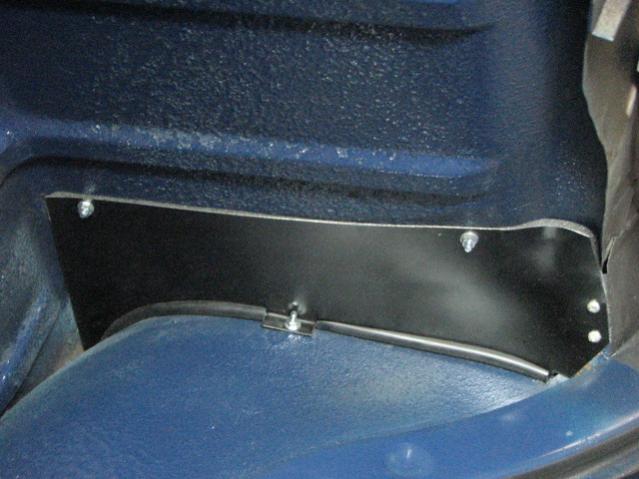
I have kept a template of these and a full size copy can be mailed to whoever is interested. I will also post a copy in the 63-1092 Floride/Caravelle thread.
Attachments
Last edited:
Hey Graham,
A fantastic job!....I thought my little Flouride was pretty sound when I had it back in the 70's....there was some bog I found after some paint flaked around the haedlight recesses and on the front panel on top near where the bonnet meets if I remember.....a light front ender maybe? there was a small hole in the floor on the LHS near the place where the inner guard meets the floor right on the curve.....still away with my work but very keen to catch up with you when I finally get home..MM.....keep up the good work...vey jealous BTW
A fantastic job!....I thought my little Flouride was pretty sound when I had it back in the 70's....there was some bog I found after some paint flaked around the haedlight recesses and on the front panel on top near where the bonnet meets if I remember.....a light front ender maybe? there was a small hole in the floor on the LHS near the place where the inner guard meets the floor right on the curve.....still away with my work but very keen to catch up with you when I finally get home..MM.....keep up the good work...vey jealous BTW
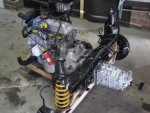
Right side up
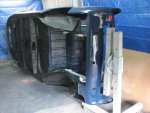
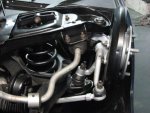
The front suspension and steering is fitted while upside down, boy this is an easy way to fit suspension.
The motor and whole rear end goes in in one go, the car is jacked up and the rear end assembly is wheeled under, also an easy way to fit a motor.
Now we are almost on four wheels again it soon will be time to start installation of the interior wiring, dash and fitout.
Attachments
Last edited: