Hoogy's DS 23 Pallas

Gerry,

I reseal racks/pumps/regulators/CRC's etc., for a living here in the States and feel that I need to set things a bit straight about steering rack repair.

gerry freed said:
You can recon the rack yourself, I have done several BUT by now most have them have be reconed once and perhaps twice and are not easy to do again because it is no longer a simple case of changing seals.

Not so. As long as the power piston is not compromised and the rotating union shaft not grooved from the RU body, the seals can be replaced any number of times. The real problem, these days, is that replacement seals kits available are not made to the exact specifications the factory designated. The Teflon wear strips are a bit thicker and the rubber backing strips are a bit thinner. This is not a good combination. I machine my own seals and do two things.

1) The Teflon wear strips are made exactly to the factory specifications.

2) The backing rings are made 0.005" thicker than the originals out of a very high strength Buna-N rubber (LHM units). This ensures proper 'squeeze' + the backing rings do not take nearly the compression set the ones in the seal kits do.

gerry freed said:
There is only one special mechanical tool needed, to undo the nut on the piston. I made one up. You will need a fitting and gauges to set up and test the cross over pressures. Again I made one and it is probably still in the NSW Club tool stock. If the valves are worn, lapping in new pistons is not for the faint hearted and best to get a recon unit. My preferred source for these and rebuilt racks is Citrogaz but with the postal charges these days it is not a cheap way to go. http://www.citrogaz.com/

Again not the whole story. One does needs a socket on a hollow extension to remove the internal control rod from the pinon after the power piston has been removed from the rack body. In addition you need a special extractor for the pin connecting the control rod from the outside end of the power piston unless you want to run the very real risk of screwing that end by using a hammer and drift. Add to that non-marring lockable wrenches to actually take the rack apart. The slide valves in the Cit are all 0.2505" +/- 0.00008" (2 microns). Lapping new valves - you have got to be kidding.

As to setting the cross-over pressures. The best way do to so is on tester prior to putting the unit back in the car. Unless the rack had a problem with center flickering or oscillation prior to being removed from the car, it is really best to just leave that adjustment alone. As I have the proper test set up I check them after a rebuild while on the bench being pressure and leak check. Typically I only have to fool with that adjustment in maybe 10% of the racks I have done. It sounds sexy to some one who does not understand what is being done, but without some experience in doing it you can get into a heap of problem.

gerry freed said:
Once in the rack, if it has been left standing and unused for a long period you may well find that the centre of the cylinder is badly pitted. Also the piston could have corroded. If either is the case you are facing some precision engineering to resleeve the cylinder or rechrome the piston and I would consider it a throw away item. If the cylinder is perfect, requiring a little or no honing then your next challenge is to get a set of seals. My Indian friends made up several sets but had a lot of difficulty identifying the materials to copy them. They don't come straight out of a hydraulics parts catalogue. Again Michel at Citrogaz can advise on current supplies.
Note that there are two diameters of cylinder, the early ones were smaller and the parts as rare as hen's teeth.

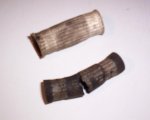
LHS racks are the ones quite prone to internal corrosion. LHM racks, so long as they have been protected from the elements, are almost invariably good to prefect inside. If the power piston cylinder is corroded one is not going to sleeve and rebore/grind. For the cost of that one could buy a new rack. Typically all power piston cylinder needs is cleaning with a circular brass wire brush so the walls are smooth. Not sure what your Indian friend's problem was. The sliding/rotating seals in the entire unit are Teflon, the backing rings are either Buna-N or EDPM rubber (depending on fluid) as are the 4 0-rings. The two anti- extrusion seals in the power piston are Nylon as are the two center spacers for the power piston.

But to the real problem. There are a some special mandrels one needs to either get the seals in position or after they are in position getting the parts together. If you don't have these tools, about 3 out of 4 times (maybe 2 out of 3) you will rip the Teflon wear strips apart or worse create a crease in the surface that will cause the rack to start leaking soon after it has been assembled and put into service.

As to the older and later racks. There are two differences. Earlier racks (pre 7/67) used a 21mm diameter power piston. Later racks use a 19mm power piston. Prior to 1965 the RU had 5 0-rings in it - after 1965 there are 4 Teflon wear strips for the HP ports and 1 0-ring that seals off the return port. Actual internal dimensions for both power piston end and RU remained the same. The reason the factory decreased the size of the piston is that by doing so it increased the amount of force available to assist in steering. All they had to change from a sealing standpoint was to change the OD/ID of the Teflon seals and the backing rings. If one does not have the facilities to make them, Western Hemispheres in Watsonville, CA carries seals for both types of racks - Miles gets them from the usual suspects in Europe.

Prior to 1963 things get a bit more complicate as the factory had 2 major revisions to the power piston assembly in 5/58 and 12/63.

Steve
 
Last edited:
This knowledge is stunning. We will have to make sure this post doesn't get "lost". I'll see if we can move it to a Wiki page here.

Thanks Steve!
 
Gerry is the site under construction? I can't get to their parts department:confused:

Maby it's because im iliterate in French:rolleyes: Translator is on though...

Cheers
Corne

It's his new site and apparently not functional. He can be found at
CLISSON JEAN MICHEL
Adresse : LE MOULIN DES ISOLES, 79420 Clavé
Téléphone : 05 49 64 12 34
email : contact@citrogaz.com

He does not speak English but is fluent in DS.

but if Roger Parker has the parts your logistics are much easier.
In far off days there was a company in Unanderra that did work for BHP and had a lahe with precision chrome plating for repairing mill rollers. They remade a piston for me and a rocker shaft for a DS.
I also had a mandrel for the seals. The Indian seals were OK, they identified the PTFE and nylon but got the rubber wrong.
Water in he LHS2 fluid was a nightmare but I chucked away two LHM racks through corrosion in the centre from cars that had hung around unused for yars. Had a CX rack like that as well, even though or because it was in alu.

The most important rule in preserving a hydropneumatic car is to drive it, they hate sitting still. Memo to self: must take the GS shopping today.
 
re-using lhm

Whilst on the subject of lhm leaks, I always meant to ask:
Is it ok to re-use fresh lhm you have just poured through the system and lost again due to the leak you are trying to locate if collected in a container underneath the car?
Which is the best way to filter it before re-introducing to the system? pantyhose?

Could I be so brave as to suggest that removing the pantyhose first would be essential and potentially more fun. But seriously, running it through some filter paper (maybe a couple of layers of coffee filter) should be OK, remembering there is a filter in the tank to pick up really fine crud.

Ensure there is absolutely no water contamination of the LHM though.
 
Thanks Citroenfan,

I know a bit about engineering but that post blew me away. I think the problem is that I have never taken one of these units apart and therefore can't visualise the parts you're talking about and their relationship to each other.
The clear impression I do get is that I should extricate the steering rack from the car and let a professional do the work. Is this a fair summary?:confused:
Again thanks for the awesome info.
 
gerry freed said:
in far off days there was a company in Unanderra that did work for BHP and had a lahe with precision chrome plating for repairing mill rollers. They remade a piston for me and a rocker shaft for a DS.
I also had a mandrel for the seals. The Indian seals were OK, they identified the PTFE and nylon but got the rubber wrong.
Water in he LHS2 fluid was a nightmare but I chucked away two LHM racks through corrosion in the centre from cars that had hung around unused for yars. Had a CX rack like that as well, even though or because it was in alu.

The most important rule in preserving a hydropneumatic car is to drive it, they hate sitting still. Memo to self: must take the GS shopping today.

Gerry,

As mentioned previously the only time LHM racks get screwed up is when exposed to the elements. Under normal conditions they will not corrode internally. LHS units were/are a completely different animal. And agree completely that hydraulic Cits need use to maintain the system. On that same subject is periodic changing of the fluid. The anti-wear/anti-oxidation chemicals degrade with age and use. The viscosity control polymers are physically degraded by the shearing action of the pistons in the pumps. In the long run it is false economy to not change out the fluid every 24 months or 24,000 miles when using LHM. With brake fluid cars I would suggest every 12,000 miles or 1 year if the car is used in damp climate or where the RH is on the high side year-round.

Hard chroming a steel shaft is totally different from the procedures needed to make the slide valves in the car. Typically hard chroming adds around 0.003- 0.004" material to the surface. The shaft is first ground about 0.002" under sized, hard chromed and then ground back to the original size. Places that do this type of work on a regular basis typically do so on precision centerless grinders if working with an existing part. Once close to the original size the part is then polished.New parts are a different matter.

With the slide valves - the surface of those pieces is not left perfectly smooth. Typically surface 'roughness' is in the RA 8 to 12 range. The reason is that by having those microscopic ridges/valleys in the surfaces of the valves and cylinders aids in maintaining pressure integrity when no sealing rings are being employed. If those little parts had been hard chromed and basically almost perfectly smooth (such as the surfaces of the crank journals/power piston) they would leak like a sieve under 2500 psi of pressure. Also the reason for the factory's recommendation to use 600 grit paper to renew the surface of those little parts.

It is good that you have the proper mandrels for the seals. It would have been helpful if that had been mentioned previously. Rebuilding a DS rack is not complete rocket science, but with out all the proper tools and knowledge of how the rack is suppose to work, one is asking for problems. As the old saying goes, "every once in a while the mouse will get the cheese" - the same is true in repairing/resealing Cit hydraulic parts. Even with experience and the proper tools every once in a while things do not work out as one intended.

Steve
 
Thanks Citroenfan,

I know a bit about engineering but that post blew me away. I think the problem is that I have never taken one of these units apart and therefore can't visualise the parts you're talking about and their relationship to each other.
The clear impression I do get is that I should extricate the steering rack from the car and let a professional do the work. Is this a fair summary?:confused:
Again thanks for the awesome info.


Hoogy,

Do first things first. Is the external leak your are experiencing actually coming from the rack? If so then it needs to be removed, disassembled, completely and thoroughly cleaned, new seals installed, reassembled and tested prior to re-installation. If not find the source of the leak, fix, and then worry about the rack.

A PS rack will only leak, externally, from one or sometimes both, of two areas. If the leak in under the rack in line with steering column then the leak is most likely coming from the RU. If you also have fluid on the top of the tranny it can be either the RU or the inside seal on the power piston or sometimes both. If the leakage is coming out of the rack on the opposite side from the steering column, then the outboard PP seal is leaking.

If the unit has no visible external leakage, but one can hear a 'hissing' sound when turning the steering wheel the usual cause is internal leakage in the RU - hp fluid is escaping from one of the internal ports to the return port or from one hp port to the other hp port. This is also the typical cause of a rapid pump cycling time that increases dramatically when the PS is blocked or disconnected from the system. Internal leakage pass the center seal in the power piston just reduces somewhat the total force available to help turn the wheels.

Steve
 
Gerry,

As mentioned previously the only time LHM racks get screwed up is when exposed to the elements. Under normal conditions they will not corrode internally. LHS units were/are a completely different animal. And agree completely that hydraulic Cits need use to maintain the system. On that same subject is periodic changing of the fluid. The anti-wear/anti-oxidation chemicals degrade with age and use. The viscosity control polymers are physically degraded by the shearing action of the pistons in the pumps. In the long run it is false economy to not change out the fluid every 24 months or 24,000 miles when using LHM. With brake fluid cars I would suggest every 12,000 miles or 1 year if the car is used in damp climate or where the RH is on the high side year-round.

Hard chroming a steel shaft is totally different from the procedures needed to make the slide valves in the car. Typically hard chroming adds around 0.003- 0.004" material to the surface. The shaft is first ground about 0.002" under sized, hard chromed and then ground back to the original size. Places that do this type of work on a regular basis typically do so on precision centerless grinders if working with an existing part. Once close to the original size the part is then polished.New parts are a different matter.

With the slide valves - the surface of those pieces is not left perfectly smooth. Typically surface 'roughness' is in the RA 8 to 12 range. The reason is that by having those microscopic ridges/valleys in the surfaces of the valves and cylinders aids in maintaining pressure integrity when no sealing rings are being employed. If those little parts had been hard chromed and basically almost perfectly smooth (such as the surfaces of the crank journals/power piston) they would leak like a sieve under 2500 psi of pressure. Also the reason for the factory's recommendation to use 600 grit paper to renew the surface of those little parts.

It is good that you have the proper mandrels for the seals. It would have been helpful if that had been mentioned previously. Rebuilding a DS rack is not complete rocket science, but with out all the proper tools and knowledge of how the rack is suppose to work, one is asking for problems. As the old saying goes, "every once in a while the mouse will get the cheese" - the same is true in repairing/resealing Cit hydraulic parts. Even with experience and the proper tools every once in a while things do not work out as one intended.

Steve
I have not got them any more. I worked on these cars when they were current in the 1960's and then again in Australia in the 1990's.There, I got the tools together by making some and discovering others among club members. When I left in 1999, I gave the tools to Club members in NSW. and after that I know not. I agree entitrely about the material and surface finishes on the valves. I used the chroming facility for the long piston in the steering rack, which worked like a charm. One of our members found in the boot of a DS a set of well made tools for restoring the main pumps. It had a jig for mounting the assembly and clips for holding the springs, a tool for removing the other casing etc. It also had a set of containers of different grades of very fine paste for lapping the pistons. The Club invested in tooling to have the pump bodies made in steel and a number were reconditioned but I do not recall anyone who attempted lapping ther pistons or replacing them.

When I had the rocker shaft rechromed, I refitted it on the head and started the engine to get some oil circulating before I set the tappets. As soon as it built up pressure the radiator fan distribute oil with great efficiency around the garage and my face. After a clean up I had a close look at the problem. The workshop had drilled a hole at each end of the rocker shaft to centre it on the lathe. they didn't know that it was hollow to circulate the oil and I never thought to look/ Things don't always work the way you want!
Anyway I would not really advise anyone to try to recon the hydraulic parts with just the resources of a small home workshop. There were two specialists in Australia and several here in France and the price of the work is IMHO fully justified.
 
Just a word of basic explanation. The principal of the steering is that there is a cylinder with a piston that drives the steering arms. It has a central seal and can push them in either direction via a rack depending on which end has the hydraulic pressure applied. That decision is made by two tiny spool valves on the rotating union at the base of the steering column. In the central position the valves are adjusted to leak slightly so that there is a low holding pressure on both sides of the piston to overcome a dead spot in the centre. When you turn the wheel the union pushes on one of the valves and releases the other, with a small yoke. The effect is to apply pressure to one side of the main piston and to return fluid from the other side to the reservoir. The rack piston then turns the wheels and rotates the body of the union to copy the rotation of the steering wheel. When they align the pressures are again balanced. There is a tiny dead space as the yoke moves which you can feel by pushing the wheel rim each way with one finger and should be buffered by two rubber tubes in the link between the column and the pinion.
So what you have are valves which carry both high pressure fluid and low pressure returns in different grooves and if they are incorrectly set or worn out, the pump just occupies its time in circulating fluid to no effect. Similary, in the rack the central seal has pressure and return on opposites sides and if it is not a seal the pump is forced to circulate fluid to no effect. To make sure that the point of crossover of the pressures in the valves coincides with the dead ahead position, there is a heart shape cam on the column with a spring loaded roller. That encourages the wheel to sit in the centre and provides a small artificial feel to the driver. If that is not correctly set in conjunction with the wheel alignment and the valves the system is overworked on the road.
If your hydraulics run out of power then the rotating union has two pins which engage through the rubber bushes on to two holes in a yoke that turns the pinion. You can then directly steer by brute force.
 
Could I be so brave as to suggest that removing the pantyhose first would be essential and potentially more fun.

Thanks Craig for this very wise advice, but whilst searching the internet, I found I think a type that you can strain LHM through while wearing, I suggest. And then aim it directly into the tank while standing!
Let me know if you want one, so we can place a joint order.
 

Attachments

  • images.jpg
    images.jpg
    4.7 KB · Views: 436
The only way to depressurise the hydraulic system is via the bleed screw at the pressure regulator which is what I have outlined in my suggested procedure.

The low position of the height lever will only succeed in depressurising the suspension system, which in this case is unlikely to be of benefit, given the unknown condition of the rest of the system.

Hope this explains.

Thanks.. I'd remembered being told in a service manual to do this before working on the system..
now I know why
 
Thanks.. I'd remembered being told in a service manual to do this before working on the system..
now I know why


It is imperative that the bleed screw on the PR be opened about a 1/2 turn prior to doing any work on the hydraulic system - even if the car has been sitting for a few days.

At full system pressure cracking open a line connection can let hydraulic fluid come out at near supersonic speed. If you have a body part near that connection, fluid can be injected into you. The consequences can be deadly.

As to depressurizing the suspension. Just because the lever is in the low position is no excuse NOT to open the PR bleed screw. On that same note - in many cases putting the car in the low position will not remove all residual pressure from the front units. The reason is a calibrated wire shoved into the end of the pressure exhaust line that connects the exhaust port of the front height corrector to the T where it connects to the fluid exhaust from the rear HC. That wire greatly reduces the flow of fluid from the front units - its purpose is to prevent the front of the car from dropping like a stone when the lever is pushed to the lowest position. The problem is that over time crud and corruption can get stuck between that wire and the walls of the exhaust line leading to some residual pressure in the front suspension units.

The way to tell if all pressure is really exhausted is just try and wiggle the front units. If the sphere/suspension cylinder feels rock solid there is still pressure in the front units. When it is all gone, the front sphere/suspension cylinder can be easily 'wiggled' a bit back and forth. The reason for this is that the front cylinders are held in place against a machined collar on the cylinder and corresponding flat on the underside of the frame where the cylinder is inserted. The two set screws that hold the cylinder in position are only tightened sufficiently into the notches on the cylinder to prevent it from rotating when the sphere is attached. System pressure is what is suppose to hold the cylinder in its proper position.

If you cannot wiggle the front units after depressurizing the system, lifting the front of the car with a floor jack just a few inches will overcome the problem.

Steve
 
Last edited:
Gerry - The operation of the steering is not quite as you explained.

Just a word of basic explanation. The principal of the steering is that there is a cylinder with a piston that drives the steering arms. It has a central seal and can push them in either direction via a rack depending on which end has the hydraulic pressure applied. That decision is made by two tiny spool valves on the rotating union at the base of the steering column. In the central position the valves are adjusted to leak slightly so that there is a low holding pressure on both sides of the piston to overcome a dead spot in the centre.
The "holding pressure" is not as you have suggested done with having the spool valves set to provide a bit of leakage. The holding pressure in the system is the result of the proper set up of the X-over pressures and by design - not 'leakage'. Its internal design is a bit more complicated than that. When the yoke on the RU is in its neutral position the high pressure ports in the unit are closed off by the little slide valves. Keep in mind that the TOTAL movement of those valves is about 0.11 to 0.12" or around 2.8 to 3mm. However the actual amount of movement needed to fully open and close the internal ports is about 1/4 of that. The rest of the movement is a safety feature built in to prevent the little control rods bearing on the pistons from being bent when the steering is use without hydraulic pressure.
When you turn the wheel the union pushes on one of the valves and releases the other, with a small yoke. The effect is to apply pressure to one side of the main piston and to return fluid from the other side to the reservoir. The rack piston then turns the wheels and rotates the body of the union to copy the rotation of the steering wheel. When they align the pressures are again balanced. There is a tiny dead space as the yoke moves which you can feel by pushing the wheel rim each way with one finger and should be buffered by two rubber tubes in the link between the column and the pinion.
It is the floating yoke that bears on the pistons, not the rotating union. And once the system is pressurized there is no 'dead' spot. Any movement of the steering column provides an immediate response at the wheels unless there is excessive wear in the only rubber bushes in the system - the ones that attach the control arms to the moving trolley on the rack or worn ball ends in the connecting rods. The two rubber bushes you are referring to are there to provide a cushion for the yoke ends when turning the steering with no hydraulic power.
So what you have are valves which carry both high pressure fluid and low pressure returns in different grooves and if they are incorrectly set or worn out, the pump just occupies its time in circulating fluid to no effect.
Only in extreme cases. Those little valves would have to absolutely sloppy in their bores to cause this condition. The rack would have been pulled long before this due to excessive fluid leakage from the yoke/control piston area of the RU. The cause of steering system not holding pressure in the vast majority of cases is that the Teflon wear strips in the RU have worn out. Having excessively worn control pistons will lead to problems of setting the X-over pressures correctly and external fluid leakage from the RU yoke area. Pressure loss is going to be the lest of ones problems.
Similary, in the rack the central seal has pressure and return on opposites sides and if it is not a seal the pump is forced to circulate fluid to no effect
.
Partially true though not nearly as dire as you are making it. Even if the center Teflon seal is completely gone, the two nylon spacers and the rubber back up ring greatly reduce the effect of fluid flow from the high to low pressure sides of the piston on turning. From the drivers viewpoint this problem would be noticed as less assist. If one where to have excessive overall leakage in cars hydraulic system or a duffed main accumulator it could also cause the low pressure light to flicker.
To make sure that the point of crossover of the pressures in the valves coincides with the dead ahead position, there is a heart shape cam on the column with a spring loaded roller. That encourages the wheel to sit in the centre and provides a small artificial feel to the driver. If that is not correctly set in conjunction with the wheel alignment and the valves the system is overworked on the road
Not true. X-over pressure setting has absolutely nothing to do with the cam's position in relationship to straight ahead driving. While the heart shaped cam assists in providing a hands free straight ahead position it in no way affects valve operation anymore than driving in a very large circle would. The only time those little control valves are being pressed on by the yoke is when you are consistently turning the wheel and one side of the yoke is being forced in a downward position. As soon as the steering wheel stops rotating (as in a constant diameter circle) those valves come back to their neutral position by the action of the return springs that bear against the bottom of the dash pots for each valve. If the system was not designed this way you would have to fight the steering to maintain a circle as the car would want to constantly decrease its turning radius.

The force on the cam by its follower is very strong. If the center position of the cam does not correspond with the actual straight ahead position of the car the cam follower is forced up on the slope of the cam by the action of the driver. If the driver were to remove his/her hands from the steering wheel the cam follower will rotate the steering column slightly. The steering system itself could care less if that cam is there on not or if it is in the right position. For the driver, OTOH, if not position correctly it is a PITA. But that is all. It has no effect on the internal workings of the RU/steering other than to make the car want to travel in a really large diameter circle if not corrected for by the driver.
If your hydraulics run out of power then the rotating union has two pins which engage through the rubber bushes on to two holes in a yoke that turns the pinion. You can then directly steer by brute force.
True - however the description is backward. It is the floating yoke that is attached to the steering column that has the pins and rubber bushings that engage bores in the RU.

Steve
 
X-Over Pressures

More than a bit has been mentioned about this so I thought it best to explain what is actually meant by the term 'X-over pressure' with regards to the D power steering.

When one turns the steering on a D one of two little pistons in the rotating union (RU) is forced down by this action. The other piston is allowed to rise up due to action from a return spring. Reversing direction causes the latter piston to be forced down and the former then rises due to action from its return spring. In the process of either moving up or down those little pistons uncover either a high pressure port or a pressure exhaust port in the body of the RU. In addition the settings of those pistons also provides a constant pressure in the power piston of the steering so that any changes in pressure coming from the RU results in an immediate reaction in that piston.

The setting of the X-over pressure is nothing more than ensuring that when the steering is turned in either direction the power piston sees the same pressure differential and that in the non movement state both sides of the power piston have equal pressures. This is irrespective of actual wheel position. The X-over pressure(s) have specific values depending on whether the rack has a 21mm or 19mm power piston.

The actual values are calculated by attaching a set of gauges to the pressure input for the power piston. The steering is then turned very slowly under resistance from the front wheels either right or left. Depending on the direction one gauge will show a pressure increase the other a pressure decrease. When the pressure difference is about 850 psi between the high and low gauge readings the steering is turned slowly in the opposite direction. The figure one is looking for is the pressure indicated on the gauges as one side loses pressure while the other side is gaining pressure. IOW when they are equal, or where they cross over. In the case of the 21mm piston racks that value is 750 psi +/- 60psi. 19mm piston units are 920psi +/- 60 psi. If not within the right range the value is change by very small changes (typically around 1/12th of a turn) to the setting nuts in the yoke that bear on the little piston rods that control the movement of the slide valves in the RU.

Proper set up of those pressures ensures that the rack will see the right system pressure when turned and that the power piston has balanced pressure on either side when the RU is in its neutral position. If not an oscillation can start to occur. Note that in this case 'neutral' does not refer to 'straight ahead' steering per say. It refers to anytime there is no physical pressure being applied to the pistons in the RU. This happens in either straight ahead or constant radius turns.

Steve
 
Does this car have EFI? If so, be very careful about the fuel hoses. The injector hose pictured is from an old rail and wasn't about to go back in. The rubber was perished and split under the braiding although the braiding looked quite OK and there weren't radial cracks at the hose ends. The middle was a bit swollen, so that may be a reasonable telltale other than hardness, but any original hoses still on a car are long overdue for replacement. So, if the car has the original braiding, don't trust the hoses. It is however, possible to carefully remove the braided sleeve, which is slight expandable, and fit it to new hoses for that original look!
 

Attachments

  • OriginalHose.JPG
    OriginalHose.JPG
    21.9 KB · Views: 310
Just starting to take the car apart, I'll put up some pictures soon.

Can anyone tell me how to take the window winders off. The fixing method is cleverly hidden.

I need to take the door cards off so I can push some of the dents out.
 
Hi there

if you push the black plastic collar back from the handle base (there should be a spring behind the door card so there will be some tension) you will see a small pin in the neck of the winder.. push that out with something and the handle will come off... on my car anyway. I assume they are all the same.

Matthew :)

Just starting to take the car apart, I'll put up some pictures soon.

Can anyone tell me how to take the window winders off. The fixing method is cleverly hidden.

I need to take the door cards off so I can push some of the dents out.
 
Top