1956 Renault Fregate restoration...Project Geneviève

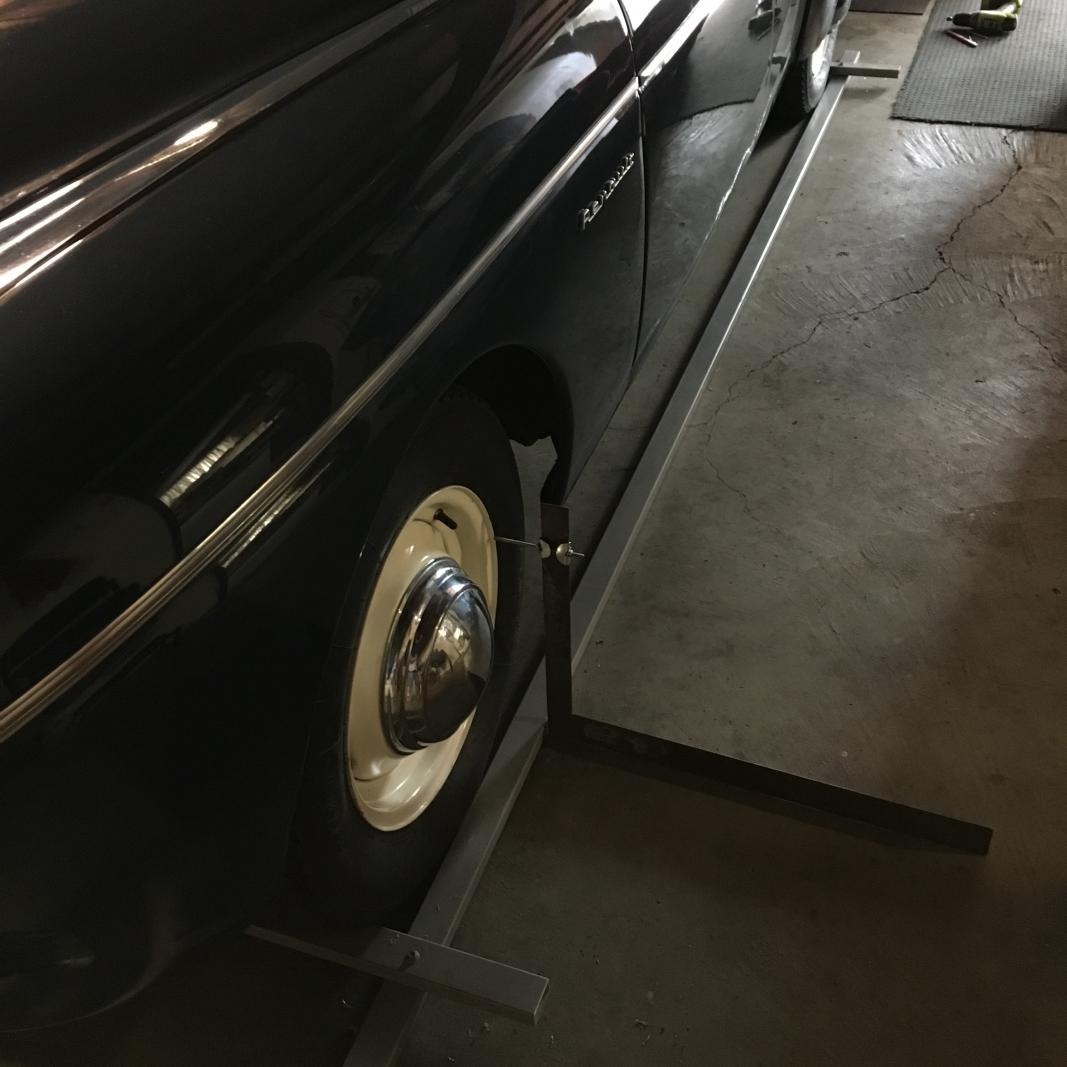
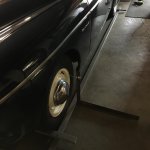
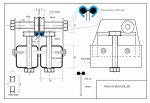
Toe-in measure and adjust..

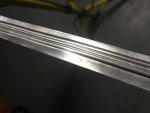
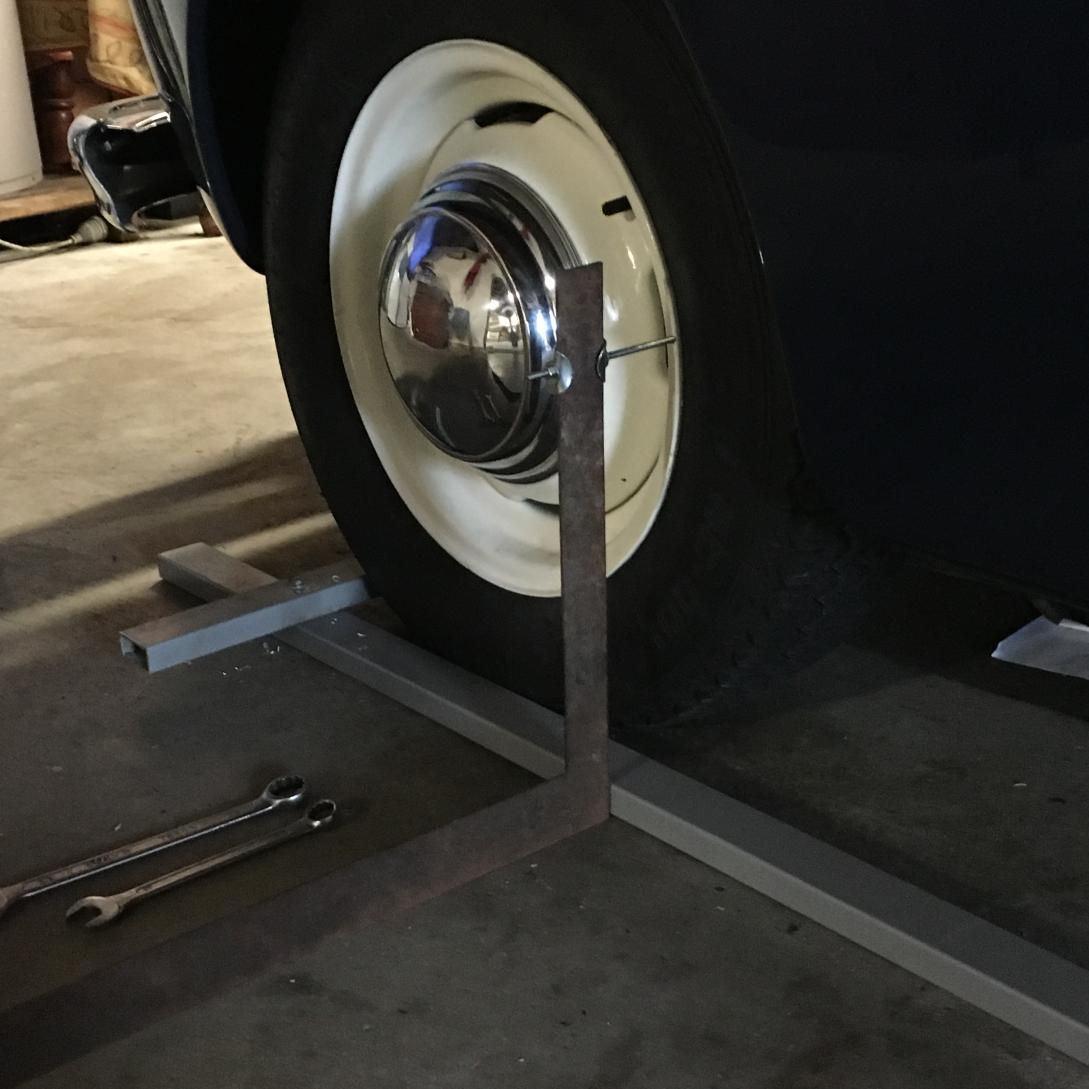
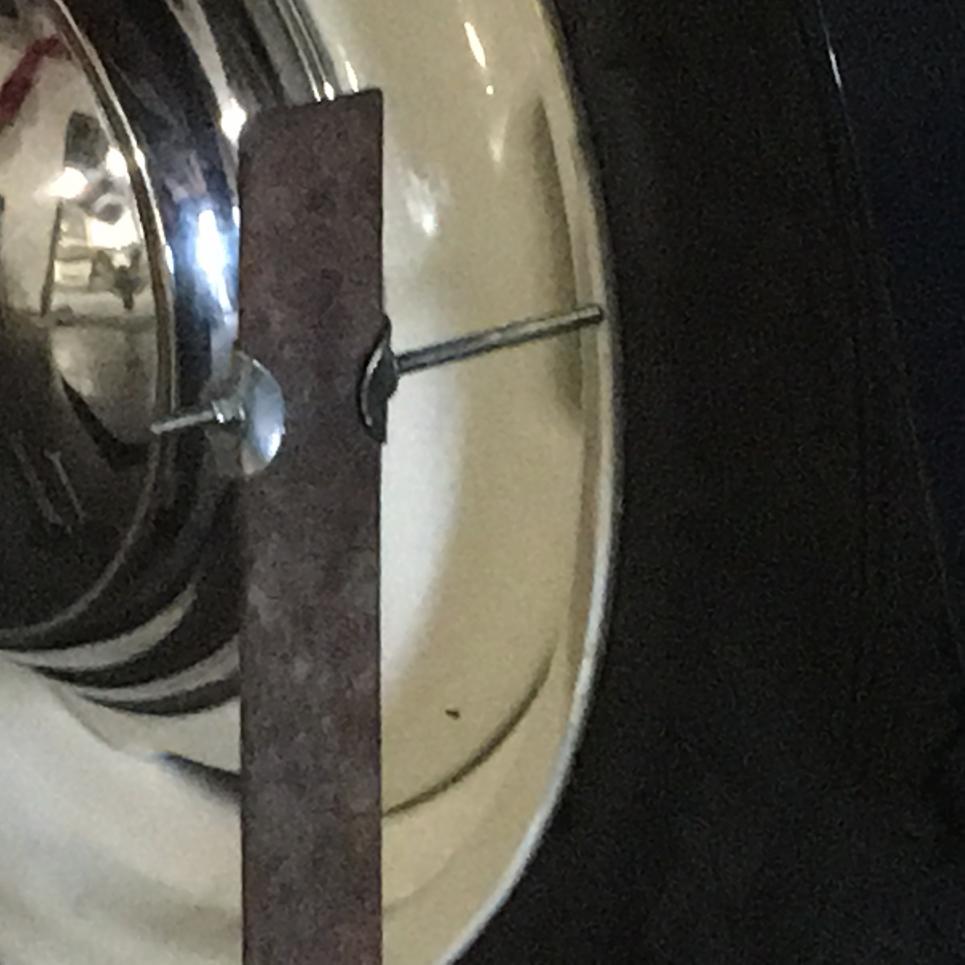
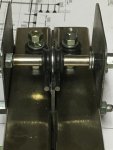
This is the only accurate way I could come up with.

Four aluminium straight edges fixed into an accurate parallelogram, a builders square and some threaded rod.

attachment.php
attachment.php
attachment.php
 

Attachments

  • IMG_4804.jpg
    IMG_4804.jpg
    92.6 KB · Views: 930
  • IMG_4805.jpg
    IMG_4805.jpg
    79 KB · Views: 913
  • IMG_4810.jpg
    IMG_4810.jpg
    85.9 KB · Views: 961
How do you know when the wheels are in the straight ahead position for you to take measurements or make corrections?
 
The steering wheel or the steering rack/box? The Ackerman steering effect can throw your calculations right out if it's not centred....
 
When I fitted the steering wheel initially I made sure to centre it with the steering box from the outset. With the rig above I can lay flat on my back and reach my burley arm under the car, loosen the steering arm locknuts and adjust toe-in in situ.
 
That's rather better than my stretched piece of string, lined up along the back wheels. Mind you, I have a few mm of toe-in as required, more or less dead straight steering. I don't think my wheels are straight enough for your very good system.....

Nice work.
 
Last edited:
Yes I've had a devil of a job getting the wheels straight because they are built somewhat stronger than a RER, but I'm getting there, I've fitted better tyres all round and the front wheels are good now but I'm still battling with the left rear, I'll have another go at straightening it tomorrow.
 
Vive la France

Found some rocking horse poop of my own.

This pristine horn button has just enough patina to look period and special enough to warrant the expense of extraction from the mother country. It's testament to the mild northern hemisphere sun. I have three faded examples from Oz but this one I really like.:approve:

attachment.php


attachment.php
 

Attachments

  • IMG_4866.jpg
    IMG_4866.jpg
    100.1 KB · Views: 811
  • IMG_4868.jpg
    IMG_4868.jpg
    85.6 KB · Views: 865
Last edited:
Waiting, waiting, waiting, since 18th October last year.
Patience was in order as of the 2nd of January, but for F sake it's the middle of February and it's coming up to four months, really, your not that old, yet.
What are the nails for?
And what is that thing?
 
Oh very well, I'll make a concerted effort to reveal all sometime over the weekend. I've been enjoying some quiet (ish) time.

Stay tuned Grasshopper.
 
It's a bead roller..

Waiting, waiting, waiting, since 18th October last year.
Patience was in order as of the 2nd of January, but for F sake it's the middle of February and it's coming up to four months, really, your not that old, yet.
What are the nails for?
And what is that thing?

One thing my Fregate lacks is the original pinch moulds that fit between the mud guards and the body, they are somewhat unique to the Fregate/Domaine models.

attachment.php


I have 1 original, the rest are destroyed beyond repair and naturally they are a bit thin on the ground. So I'll make some, though I've been putting it off for months. Here goes the first attempt.

It should be fairly self explanatory and I'll post some more pics through the week as I work through it, there are 8 pieces of various lengths needed.

attachment.php


attachment.php


attachment.php


93938d1487493711-1956-renault-fregate-restoration-project-genevi%E8ve-hi0.png


90196-1956-renault-fregate-restoration-project-genevi%E8ve-img_4176.jpg


attachment.php
attachment.php
attachment.php
attachment.php
 

Attachments

  • Capture.jpg
    Capture.jpg
    52.2 KB · Views: 818
  • 6a8f061b-9f3e-4daf-8ac4-99214e47cb5d.jpg
    6a8f061b-9f3e-4daf-8ac4-99214e47cb5d.jpg
    22.1 KB · Views: 747
  • FREGATE 2.jpg
    FREGATE 2.jpg
    88.7 KB · Views: 814
  • hi0.png
    hi0.png
    28.9 KB · Views: 538
  • IMG_4186.jpg
    IMG_4186.jpg
    86.3 KB · Views: 822
  • IMG_4530 (002).jpg
    IMG_4530 (002).jpg
    89.5 KB · Views: 771
  • IMG_4882.jpg
    IMG_4882.jpg
    98 KB · Views: 777
  • IMG_4887.jpg
    IMG_4887.jpg
    86.1 KB · Views: 799
  • IMG_4892.jpg
    IMG_4892.jpg
    100.1 KB · Views: 759
Last edited:
You don't surprise me anymore.
You'll have to do something special to surprise me now, like getting married again. Now that would blow me away.
All I can say is more of the same, quality!

Well said John! That moulding does look EXACTLY like the one used to cover the joint between an early model 4CV dashboard and the body. Great work, but we'd expect no less!! :)
 
Top