1959 4cv Restoration in North Carolina USA

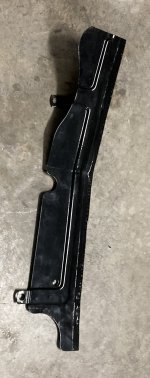
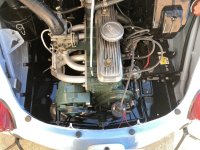
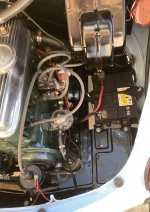
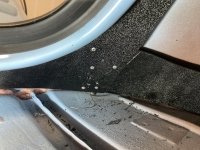
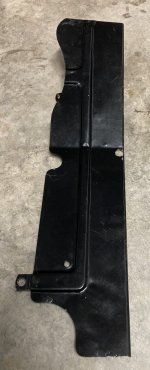
I am still making progress on the 4cv. I fixed an exhaust leak that was making the heater stink and fixed some minor leaks on the carburetor. I finally got around to putting the engine compartment "splash pans" back. The one that fastens to the engine on the right side was a good bit too wide. Apparently, this piece must have come from a 1954 or earlier car that had the battery in the front. I came to this conclusion after looking at many pictures. I cut 30mm off the outer edge and it fit properly. The large left side piece was very hard to get in the car. I suspect it may have been installed before the engine at the factory.

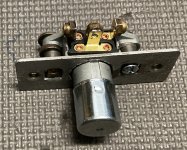
The US spec 4cvs have a foot dipper switch for the headlights. My switch shorted out. I took it apart and decided that I did not like the design and that a used switch would not likely be reliable. I used a Ford switch which is readily available at a very reasonable price. All of these switches are three terminal, so one from just about any make would work. I fastened it to the mounting plate of the original switch.
IMG_3483Copys.JPGIMG_3488 - Copy.JPGIMG_3489 - Copy.JPGIMG_3492Copys.JPGIMG_3493Copys.JPG
 
Nice. Yes, the RH shield is a real fiddle to get in.

HD Rogers used to have a genuine Renault dipper switch for sale - today's useless information.

Best wishes for Christmas and the New Year.
 
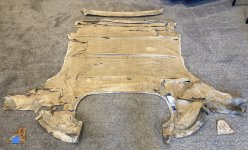
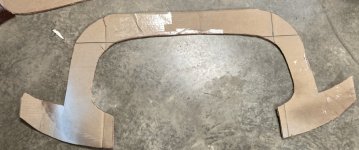
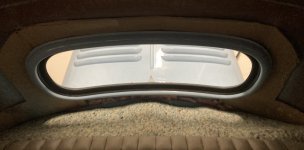
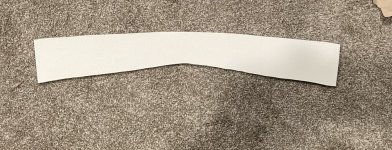
I am finally getting around to working on the headliner. I was delayed by a kitchen cabinet refinishing project and rebuilding a rusted mower deck. I have the original headliner (and metal bows), but the original is only good for a rough pattern. It is torn in many places and is VERY fragile. I am in the process of making a pattern for the rear window cardboard piece. I will be using thin ABS plastic sheet. I have read JP Delaunoy's headliner instructions, but I am not sure I completely understand the part about the metal plate added to the rear shelf below the window. I think the "wings" on the cardboard extend to overlap the inner panel rearward of the door opening. Can anyone confirm this?

IMG_3550Copys.JPGIMG_3543Copys.JPGIMG_3544 - Copy.JPGIMG_3549 - Copy.JPG
 
I am finally getting around to working on the headliner. I was delayed by a kitchen cabinet refinishing project and rebuilding a rusted mower deck. I have the original headliner (and metal bows), but the original is only good for a rough pattern. It is torn in many places and is VERY fragile. I am in the process of making a pattern for the rear window cardboard piece. I will be using thin ABS plastic sheet. I have read JP Delaunoy's headliner instructions, but I am not sure I completely understand the part about the metal plate added to the rear shelf below the window. I think the "wings" on the cardboard extend to overlap the inner panel rearward of the door opening. Can anyone confirm this?

View attachment 199728View attachment 199725View attachment 199726View attachment 199727
I honestly don't know, regarding the cardboard piece. Someone in Oz sorted this exact problem last year, or at least found a motor trimmer who sorted it out. I've never seen mine dismantled.

I admire you even tackling that one yourself!! I baulked at it and paid.
 
I honestly don't know, regarding the cardboard piece. Someone in Oz sorted this exact problem last year, or at least found a motor trimmer who sorted it out. I've never seen mine dismantled.

I admire you even tackling that one yourself!! I baulked at it and paid.
I made a new headliner for my Dauphine in 1977. Nobody told me it was difficult, so I just made a new one using the old as a pattern. It looked great installed. The rear part of the dauphine headliner is secured with a wire (I think) and is easier to fit than the 4cv.
 
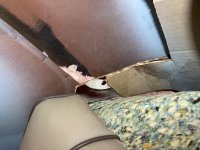
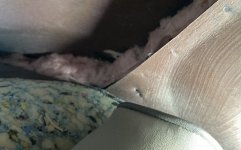
That is the area just to the side of the parcel shelf. I stuffed some insulation down the hollow areas to try to make the car a little more quiet.
I thought so Stanley. We call them pink bats that go in the roof cavity. That's not going to hold moisture in there is it? They like to rust down there from the condensation running down. Guessing you have well protected the metal down there anyway :approve:
 
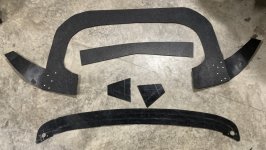
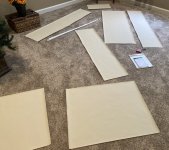
I cut out all the replacement pieces for the cardboard. The piece around the rear window is really hard to get in place. I might trim it down a little so I don't ruin the headliner when installing. As for the metal where the insulation is - I did coat it thoroughly with protective paint.

I have been thinking hard about how to install the fabric around the rear window. The original fabric is stapled to the cardboard around the window opening, but not on the "wings". I think the fabric was glued to the wings during installation. There was no evidence of staples and there was some old glue. That makes more sense to me, it seems impossible to get it smooth if the fabric is fastened to the "wings" before installation. The first piece to cover is the front board that goes under the sunvisors. It will be the part that holds tension on the center of the headliner.IMG_3562Copys.JPG
 
The lower edge of the window surround will be held in place by a piece of safety wire wrapped around a screw (see picture). I found holes near the top of the back seat showing that the "wings" were nailed to the sheet metal. This makes sense and also indicates that the fabric was not attached to the "wings" before installation. I trimmed the big piece a little to make it go in more easily. I had to re-adjust the wings down a bit. I drilled out all rivets except one and adjusted the wings in place. I took it back out and added rivets. It fits quite well now.

I have finished one piece! The board below the window is covered with fabric. I am working on the board above the front windscreen. I am making sure the glue is totally dry before installing the plastic tube and wrapping fabric around it.

IMG_3564Copys.JPGIMG_3566 - Copy.JPGIMG_3568Copys.JPGIMG_3569 - Copy.JPGIMG_3570Copys.JPG
 
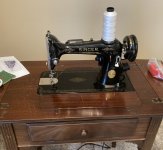
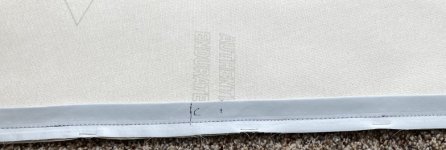
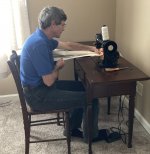
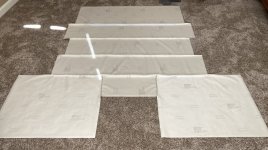
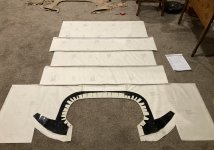
I finished the piece above the front windscreen. I cut and ironed the listings (pockets that hold the bows) and cut out the material for everything but the parcel shelf. I will start sewing after marking the seams on the fabric. My sewing machine is about 10 years older than the 4cv.

IMG_3571 - Copy.JPGIMG_3572Copys.JPGIMG_3573 - Copy.JPGIMG_3574 - Copy.JPG
 
Hehehe! You are multi talented, Stan. Nice work.

That sewing machine brings a smile to my face every time. Everybody had one. I remember I managed to stitch leather on my grand mother's. Truly unkillable, those things. Truly not made like that anymore.
 
One of the first genuine multi-national manufacturers! Singer, that is..... Great work, Stan. I'm in awe of you tackling that fiddly job.
 
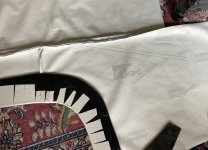
The pieces are now all sewn together and glued to the back piece. The sewing went very quickly once I figured out that I could baste the seams with staples instead of pins. I thought of it myself, but found that a few other people have done the same thing. The bows fit the pockets perfectly. I need to buy lots of little metal paper clips for installing the headliner.

IMG_3577Copys.JPGIMG_3578Copys.JPGIMG_3580Copys.JPGIMG_3582Copys.JPG
 
Great work Stan. I wish I had your patience. ;)
Jaahn
PS If anybody is inspired by this sewing I have a similar old sewing machine that folds into the cabinet, that was being used up to some years ago. Free to a home !:cool:
 
Great work Stan. I wish I had your patience. ;)
Jaahn
PS If anybody is inspired by this sewing I have a similar old sewing machine that folds into the cabinet, that was being used up to some years ago. Free to a home !:cool:
Me too. I know when I should not tackle a job (well, sometimes) and this is one of them. I'm so impressed!!
 
Thanks! I encountered my first installation problem. There was too much material on each side of the rear window. I did not have enough of the original headliner to know the shape of the rearmost piece. I cut out a triangular piece to give a 4.5 inch taper at the outer edges where the last piece joins the one in front of it. I cut out that part of the seam and sewed it back. I think I can get a smooth installation now, but I don't expect it to be quick. The headliner is in the car, hopefully I won't have to take it out again.

IMG_3584Copys.JPG
 
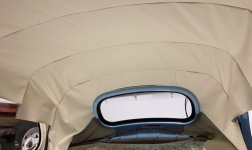
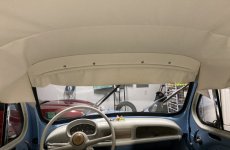
Here are pictures of the headliner in the car. The piece above the front windscreen is holding tension on the headliner. The tension may need to be increased as I go. I am starting to understand the method of making plates on either side of the rear parcel shelf to hold tension on the headliner. It is not practical to try to glue the material to the "wings" on the back piece around the window. The slow iterative process of getting out the wrinkles starts now.

IMG_3585Copys.JPGIMG_3586Copys.JPG
 
Top