Gawd, another R8 upgrade

There hasn't been much to report over Christmas while I pondered the rust repairs required, and took a break over Xmas. If the weather had been better I might have started, but here we are.

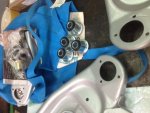
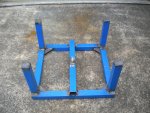
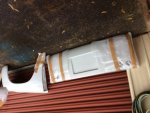
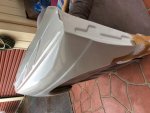
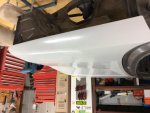
Despite a miserable day weather wise in Sydney today, these goodies arrived at work to brighten up the day!

You'll have to turn your monitor or head as I have no idea why they have been inserted upside down

Or wait patiently while I try to figure it out.......brb.

I took them on an iPad. Maybe Aussiefrogs is against Apple products - I can't get them to insert the correct way up no matter what I try. Disclaimer - I am not liable for any Chiropractic treatment required as a result of viewing these files :wink2:
 

Attachments

  • photo 4.jpg
    photo 4.jpg
    93.6 KB · Views: 500
  • photo 2a.jpg
    photo 2a.jpg
    96.2 KB · Views: 472
  • photo 1A.jpg
    photo 1A.jpg
    95.1 KB · Views: 475
  • photo 5.jpg
    photo 5.jpg
    91.5 KB · Views: 487
Last edited:
Thanks Graham,
I assume you hosted them elsewhere, rather than attached them?
I couldn't get it to work as attachments.
 
Thanks Graham,
I assume you hosted them elsewhere, rather than attached them?
I couldn't get it to work as attachments.

Wow. A full set of polyesters. Will you weigh them please and compare with the metal ones you are replacing?

Be interested to see how well they fit of course. The bonnet looks pretty good. The rear guard seemed to have a bit of curve, maybe to clear wider tyres?

Very nice.
 
I'll see what I can do John.
The individual guards probably don't save much, the std guards are pretty light when off the car but I guess when you add them altogether it would add up with the bonnet and rear jupe panel etc. they don't do a boot lid strangely.

The guard pictured is left front, and yes has a reasonable flare inbuilt! :tongue:
 
How exciting! :tongue: Looking forward to seeing the progress on this one :approve:
My neck is starting to come good again after post #22 :clown:
 
How exciting! :tongue: Looking forward to seeing the progress on this one :approve:
My neck is starting to come good again after post #22 :clown:

Yeah I agree J-Man, I looked a bit silly doing a hand-stand on my desk at work but it was worth it!!:cheers:
 
Thanks Kevin. They look so good.

The grill might be the issue I suppose, on the rear lid. Just a detail but maybe an expensive detail.

Cheers
 
mmm, they're able to do the "grill" on the bonnet though no problems.
I'm still to decide if I drill and cut out the slots on that, or leave it blanked off - thoughts?
 
mmm, they're able to do the "grill" on the bonnet though no problems.
I'm still to decide if I drill and cut out the slots on that, or leave it blanked off - thoughts?

You will need the slots opened up for correct airflow to the heater/demister and vents to avoid a foggy windscreen. Best option is a Dremel and some careful hand sanding and filing.

I agree, can’t understand why they don’t do a rear lid. It’s more important to get weight off the rear than the front if you are after improved handling.

Yes, I'd definitely open the vents on the bonnet. You might consider whether you want to make a hole and put neat but coarse mesh over the hole rather than trying to reproduce the slotting though.
 
Small bit of progress to report.
I've rebuilt the front upper and lower control arms with new bushes, and this afternoon started tackling the dreaded task of cutting those bonnet vent slots. Not finished yet, but coming along.
 

Attachments

  • DSCN2450.jpg
    DSCN2450.jpg
    88.1 KB · Views: 484
  • DSCN2451.jpg
    DSCN2451.jpg
    90 KB · Views: 523
  • DSCN2455.jpg
    DSCN2455.jpg
    85.5 KB · Views: 479
  • DSCN2456.jpg
    DSCN2456.jpg
    91.9 KB · Views: 475
  • IMG_0725.jpg
    IMG_0725.jpg
    41.2 KB · Views: 522
Hi Kev, if you are still having problems sourcing or repairing the rusted panel, I have a contact who can fabricate the necessary replacement sections. He is highly skilled, able to form a sheet of Aluminium into a Ferrari body panel complete with complicated compound curves etc. He also does one off mild steel sections such as the ones you are after. He now teaches some of those skills at TAFE. If you are interested, send me a pm.
 
Hi guys.
Currently away at the 4cv muster in Forbes.
Chris, I'll chase up a fellow after Easter but if I can't get him or if he falls through, I'll get in contact with you.

Cheers
Kevin
 
Small bit of progress to report.
I've rebuilt the front upper and lower control arms with new bushes, and this afternoon started tackling the dreaded task of cutting those bonnet vent slots. Not finished yet, but coming along.

Sorry for my ignorance - what are you doing to the slots? And may I also ask where you bought the suspension bits from?
 
It's a fibreglass bonnet that doesn't have the slots cut, so I've had to drill and Dremel them out.
The control arms I had bead blasted and painted myself, the bushes etc came from Mecaparts.

I'm halfway through pressing the bushes in. I've done the lowers, just have the uppers to finish. And of course, the rest of the restoration.

thanks mate! Looks the goods well done.

RE Bushes - didnt go for DIY nolathane?
 
I'm ashamed to say that this has had so few updates this year that it dropped off the site.
Unfortunately the panelbeater/spray painter that I'd been waiting on since Easter dropped out so I was forced to start from scratch trying to locate someone to assist on the body repairs. Consequently the shell sat in bare metal with a phosphine coat for far longer than I would have liked. This caused me to lose a bit of motivation to get on with the other bits and pieces.

I eventually found a panelbeater and I'm due to ring him on the 4th to sort out when the shell is to go off to him. He will only do it to primer for the budget I've allowed, so I will still have to work out getting it painted. I also hope to start the gearbox freshen up in the new year, so it looks like there will be multiple streams happening - the shell, the gearbox, the fibreglass panels and the nickel or zinc plating of parts using my new kit all happening with a bang in the new year. Consequently, the motivation to get going again is up at present so hopefully a bit of progress will keep the spirits high.

I also built a small trolley for the body shell which will help lift it up to attach/detach from the rotisserie over Christmas which I will post some photos of as an update to this post.
 

Attachments

  • DSCN2533.jpg
    DSCN2533.jpg
    100.3 KB · Views: 352
  • DSCN2534.jpg
    DSCN2534.jpg
    99.9 KB · Views: 351
  • DSCN2535.jpg
    DSCN2535.jpg
    99.6 KB · Views: 364
  • DSCN2552.jpg
    DSCN2552.jpg
    96.9 KB · Views: 324
  • DSCN2553.jpg
    DSCN2553.jpg
    99.7 KB · Views: 355
  • DSCN2554.jpg
    DSCN2554.jpg
    95.4 KB · Views: 339
Last edited:
Any progress is progress.... Your welding skills definitely trump mine!!

Happy New Year - always shout if you are missing something I might have for the R8 too.
 
Top