BX Time - '89 16v project

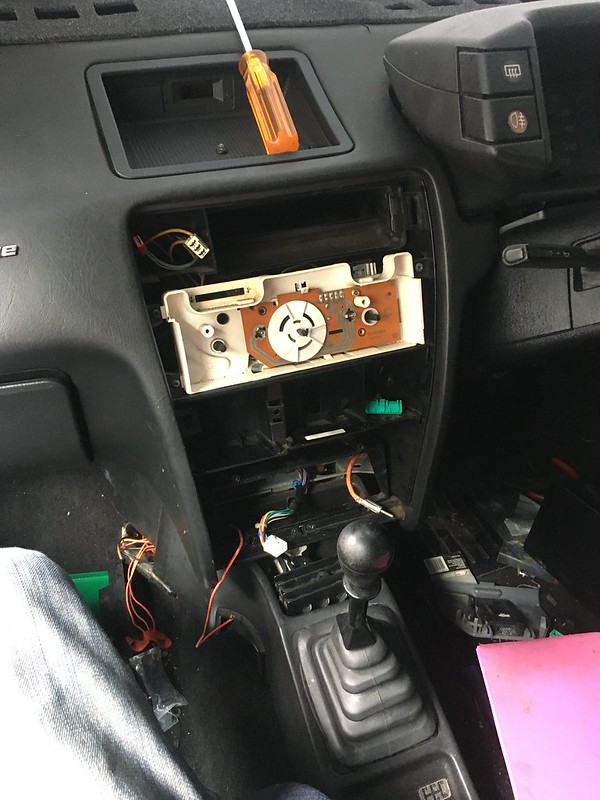
Following you advice Ken I took a multimeter to the door swithes and they all have 12v as expected and a good earth. So out the instrument cluster to hunt for the inter lighting timer but no joy there. Turns out the interior lighting timer is jammed between the glovebox and the centre console.

51624132941_44e0347ac7_c.jpg


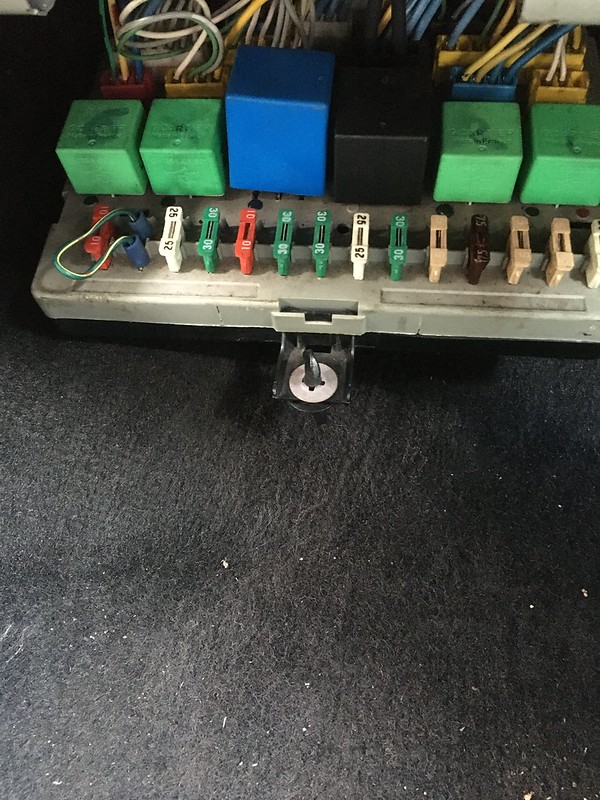
I thought DS wiring was a rats nest but the BX is next level. There are relays and connectors all over the place.

51623301787_4fbbfa3cba_c.jpg


Anyway, a check of the wiring diagram shows power from the lamps arrives at the lighting timer (item 92) on pin 5 of the brown connector. Checked with a meter and there's 12v there so that's a good start.

51623471632_250203733a_b.jpg


Next up, pin 4 is earthed via the door switches. With the front passenger door open I got continuity to earth so that is fine. Pin 6 should be a permanent earth however it's not connected to earth, more on that later.

Pin 7 should be permanent 12V which was fine. The other two pins are power feeds from the ignition and central locking which kill the lights immediately.

Seeing as I had the lighting timer out I decided to MacGyver a test setup to see if it worked.

51625158085_757c978940_c.jpg


No problems there and it's working as it should. I did find that If you remove the earth from pin 6 it stops the lamps working at all which seems to be the problem on the car.

According to the wiring diagram, pin 6 is earthed at the junction box via a 5 pin yellow connector. The only problem is that the junction box doesn't have any 5 pin yellow connectors. So more digging is was needed. Turns out the 5J5 connector at the bottom of the diagram is actually under the steering column.
51625158070_b5ec8a9761_c.jpg


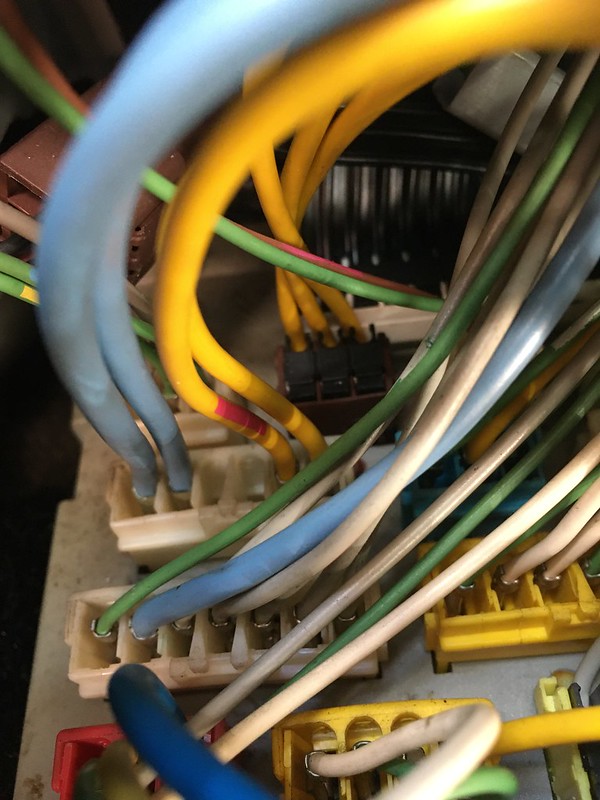
The yellow connector is part of earth point M2 and is used for the interior lights and a few other things. The brown connector takes the earths back over to the junction box at column 2 connector 4. The weird thing is that there's a complete air gap between the two connectors. If I earth pin 5 of the yellow connector, the interior lights work as they should. The glovebox light also earths via a pin on the yellow connector and it isn't working either.

51624300551_22498db95e_c.jpg


I feel like there is a piece missing from this connector but I can't see anything floating around behind the dashboard that fits the bill. Does anyone know what the missing piece looks like? It's visible from the drivers footwell without having to take anything apart.
 
There is indeed a part missing from that connector. It's a plate of male spade terminals bolted to the steering column

51626890646_e0b625a908_c.jpg


51627537969_71506abe2b_c.jpg


Wouldn't have thought of that in a million years.

It has helpfully been removed from my car so Plan B is called for. It should be bolted to the square captive nut on the side of the steering column bracket, roughly in the middle of this photo.
51627957570_c453b57cc4_c.jpg

I can make up a cable with a bunch of male spades at one end and a ring on the other or would it be better to cut off the multiplugs and crimp on some ring terminals?
 
Great work Faulksy. I will try to crawl into the resting 16V Tomorrow to see if I can spot the exact location of the missing element. I would guess there is a metal frame bolted to the chassis somewhere nearby, that this combo plugs into.

Cheers, Ken

PS I wrote this last night but forgot to Post Reply and it is still there today. You have saved me a trip down to the resting 16V or do you need me to see if I have a spare on the 16V wreck?
 
If you’ve got a spare that would be great otherwise I’m happy to make up an adaptor. Who would have thought it would be this hard to get some interior lamps working.

Im surprised more things haven’t stopped working given that plug is one of the main earths. The circuits must be taking some weird paths to earth.
 
Next on the electrical hit list, the cabin fans have spotaneously stopped working.

First port of call is out friend the junction box to check F2.

51426019755_39b3870d0b_c.jpg


Not an ideal situation but it does at least work. I nabbed F7and swapped it in just to check, no change. So out with the mulitmeter to go voltage hunting. There was 12v on one site of the fuse so that's a good start. Power from F2 goes out to the fans via the two yellow cables of this connector in column 3

51624990190_4781f46752_c.jpg


There was power there so on to the next item in the chain which is the fans themselves. The control gear is all on the earth side of the circuit. Both had 12v at the connectors. Having just reassembled the dashboard, it now has to come apart again to get at the fan controls.
51624780884_fe00816f5e_c.jpg


Pins 1 and 3 are earths which were both fine. Apparently a missing earth on pin 3 is fairly common. Pin 2 is power for the lighting. Pins 4 and 5 control the fans.

Everything checked fine here and yet the fans still refused to spin. The full speed relay on the back of the steering column seemed ok but wasn't doing a whole lot. Seems they are a bit redundant anyway.

51645832969_853e2159b1_c.jpg


Drastic measures are required, I disconnected on of the fans and rigged up a connection direct to the battery, still no life so it appears the fans are the problem. The next step is to yank them out of the scuttle and see what's what
 
Hi Faulksy,

I didn't have good enough access to my resting 16V to really go searching for the earthing connector bracket. My drivers door only opens by about 4 inches and the passenger door doesn't seem to want to open at all. So I suggest you strip off your earth wires and crimp a few at a time into loop connectors and bolt that to the steering column support as you suggested yourself.

There is also a TO3 cased power transistor bolted onto the body work somewhere under there that is also part of the interior fan control circuit but they usually don't give trouble. I have had some strange problems with the control panel in the past where I couldn't work out what had failed so I ended up have to redesign the panel to get it to work properly again.

Once you have the motors working, your next challenge will be to get the fresh/recirculate flap motors working again.

Cheers, Ken
 
All good Ken, I ended up making up a bunch of adaptor wires and earthed the whole lot to the pedal box bolts. Interior lights now work a treat even if the lenses are turning to dust.
 
You can also check the neighbouring earth plug for some unused slots and swap the wires you need into those. I have a spare 205Si I can raid for those earth sockets but in my opinion they're not that useful. They are useful for assembly in manufacture though.
 
Just when I though't I'd got a handle on the electrics something new crops up. Any thoughts why holding the brakes on would cause F3 to blow? It's a 25A fuse so something is very unhappy
 
Long time between drinks but time for an update. The bumpers are being sanded, patched, filled and are looking really good. Electrical gremlins are still running rife. This week's problem is the number plate lights are permanently on and even with them disconeected there is a battery drain. The wiring that is visible everywhere looks alright so I've yanked out the distribution box for cleaning and testing. Worst case is the dashboard has to come out to see what was smoking when the brakes were held on.

On the engine front, the clutch needs replacing along with the octopus, brake valve and timing belt. Given that list I'm tempted to pull the engine out to make access easier. What do you guys reckon?
 
Wow ... some nice electrical debugging there .... Do you want to come a get a CX tachometer working for me now you are so practiced at pulling apart fragile plastic and following wiring diagrams :)
 
Faulksy,

The gearbox comes off the engine quite easily on these and then gets lowered down to take out and attend to the clutch. This means you don't have to touch the cooling system.

I have weedled out a brake valve between the timing belt cover and the side of the engine bay after supporting the engine, undoing the top engine mount and pulling the engine forward a bit to get more access to the unions.

The timing belt can be done in situ but needs some engine upsies and downsies to get to the tension (allen key) bolts etc.

The octopus can be replaced in situ with the help of long needle nose pliers to insert the nylon tubes.

Taking the engine out involves dismantling the cooling system and its a very diagonal lift with the gearbox down to get the whole assembly out. You will need an un-leveller to go with the engine crane. But you do get better access to the octopus, timing belt and brake valve. Put new brushes in the alternator and starter motor if you take it out.

Cheers, Ken
 
Long time between drinks but time for an update. The bumpers are being sanded, patched, filled and are looking really good. Electrical gremlins are still running rife. This week's problem is the number plate lights are permanently on and even with them disconeected there is a battery drain. The wiring that is visible everywhere looks alright so I've yanked out the distribution box for cleaning and testing. Worst case is the dashboard has to come out to see what was smoking when the brakes were held on.

On the engine front, the clutch needs replacing along with the octopus, brake valve and timing belt. Given that list I'm tempted to pull the engine out to make access easier. What do you guys reckon?

Buy every plastic underbonnet part before you start .... Because if they aren't broken now, they soon will be :clown: .... I'd pull the motor every time. Think of all the aggravation of trying to reach stuff it'll save!
 
That's sort of what I was thinking Shane. A couple of hours to pull out the enigne and gain easy access against spending hours swearing at the lack of access on each job. If it was just the clutch or just the timing belt then could maybe put up with it.

A CX tacho you say?

I think the clubs engine crane has a leveller
We do have a leveller Michael. It the clubs though. Say pretty please…..
 
Faulksy, I just had a more comprehensive read of the thread and realised the male spade plate you were looking for above is identical to those used on Pugs the same vintage. The cars are littered with them. Get in touch with a Pug owner and they should be able to sort you out. I know on my 205GTI and Si there's a whole bunch of them, one in exactly the same position as yours. Or maybe put a wanted ad in the relevant section with a picture.
 
does anyone have a photo of the front bumper bar mount just ahead of the front wheel? Just went to for the bumper with what I thought were the correct pieces and they’re forcing the bumper to sit about 25mm out from the wings. Are the mounts the same on all BX models?
 
does anyone have a photo of the front bumper bar mount just ahead of the front wheel? Just went to for the bumper with what I thought were the correct pieces and they’re forcing the bumper to sit about 25mm out from the wings. Are the mounts the same on all BX models?
not the same I have some originals in my parts stock will dig one out and get the part number
 
Thanks Archrival, that would certainly explain why it wouldnt fit. Weirdly the parts books only list one part number for the front bumper mount regardless of model.
 
Top