Sam's Alpine A110 1600S !!!

geckoeng

Well-known member
VIP Paid Subscriber
1000+ Posts
Fellow Frogger
Joined
Oct 31, 2010
Messages
2,447
Location
Perth, WA
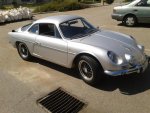
Sam and I have been friends for about 5 years. He heard I worked on classic Renaults, and wanted a few things done on his Silver V85. I did quite a bit of work for him, a real tune up and re-set all the front suspension (mod the accident damaged LH front) He was very chuffed and has returned numerous times for services and small stuff. But every time we sit and have a coffee and talk A110, and where he wants to go with it.

Sam was a regular visitor while the Gordini was being built, and asked about many things I was doing, in particular playing with a Gordini motor. When the car was in the testing stage, I took him for a drive in it, driving rather moderately, but with the occasional foot to the floor in 2nd and 3rd. He obviously was impressed.

In the last stages of a few upgrades from old parts on the Gordini, Sam came to visit, and we had a lengthy discussion with pen to paper, of a rebuild of the A110, with a strong 1600 807 and a 5 speed big box. I told him of a recently built 330, with 385 crown and pinion and 365 gears, built by Steven Swan. He went and haggled, and came back the next day telling me to pick the gearbox up.

And so started the re-build of the A110
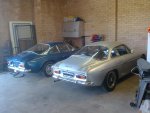
2x A110.jpgSam A110 sml.jpg
 
The first part was to get the car stripped. My son helped strip the car starting on Mon, we had it all in pieces and and stored on the parts shelves and the roller frames attached by Fri afternoon.

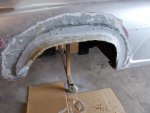
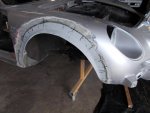
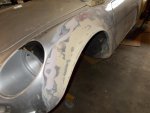
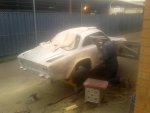
As you can see the Mexican V85, early version, has almost no fender flares, and the Alpine wheels Sam had bought would not fit inside the arches. So with a set of Simon Auto flares I started on the body. They were trimmed to make then easy to attach to the body, and then marked up to position them correctly. I drilled them for 5mm pop rivets, which also acted as locating points. Sanded all the mating faces with the small disc grinder, mixed a batch of epoxy, enough for each fender attachment at a time. Glued the arch flares to the body and pop riveted them in final position. Glass fiber lamination then to make the new arches part of the body, inside and out. It was also time to do all the body repairs where it had been accident damaged and indiscriminate drilling and cutting had been done to make things seem to fit.

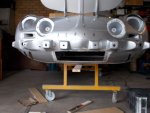
Sam and I agreed that the car would run a front radiator, and that it would be a bit bigger than normal, because of our summer heat in the west. I made an insert "shark mouth" to go just under the number plate in the front bodywork, to allow air into the front chamber. Then with a timber template of the Radiator, went about making the radiator chamber, leaving room for the battery and the air would exit into the front suspension chamber.There was a lot of glass fiber repair needed in the fuel tank area, as well as removal of the bitumen type paint that had been used. Terrible stuff.

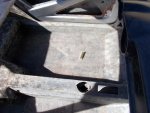
Everything had been removed from the dash, which had been treated very badly over the years. We decided we would start with a clean slate, so all the holes for switches and lights and controls were filled in, and all the instrument holes were repaired. The complete inside was power sanded free of the bitumen sealer paint, and then the floors were reinforce laid with 2 layers of 600 grm glass fibre, as they were in very poor condition. I also cut the hatch through to the engine compartment, so you would have access to the water pump and the drive belt from the cam extension. My son, very doggedly cleaned all the inside cabin so it could be painted properly.

I then took to shaping all the new fender arches to get all the lines to blend with the original body, and clean and shape all the inner fenders, so they would be relatively smooth.

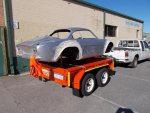
After four and a half weeks the body was ready to go to the body man for final shaping and preparation for paint.

Cut and Glued and extended Rear sml.jpgCut And Glued Front sml.jpgFront Arch LH Shaped sml.jpgFront Fender sanded.jpgFront hole cut.jpg
 
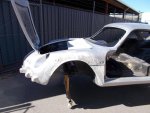
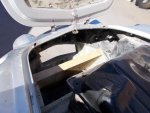
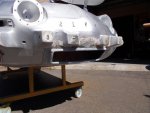
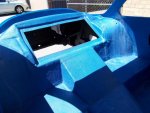
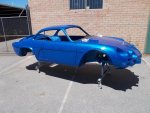
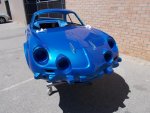
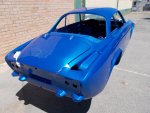
And Thurs last week the body came back from the paint shop :

Paint 5.jpgPaint 2.jpgPaint 3.jpgPaint 4.jpg
 
Thank you Guys for your comments. When you build not every body who enjoys the cars gets to see them as they progress. This one is as you see it. I am into the motor at the moment getting all the parts right for the assembly. And I am preparing for a dummy installation of the motor and gearbox, so I can do the chassis mods and gear linkage. and new rear engine mounts. Helps to plan ahead so there is no hectic work during assembly. It all goes together like at the factory.
 
By the way, I was going through pictures on my "C" drive, where I very seldom save stuff. And came across a bad picture from my phone. With a bit of work on Photoshop it looks decent and it is part of the project.

The "shark mouth" for the radiator inlet. I made a plug of what was required and then a split mould from that and out comes a product part.

There no doubt will be more like this.
Ray

20150817_123511.jpg
 
Last edited:
Anyone would think you've done this sort of work before Ray! :)

I think I'm grateful I didn't know about that gearbox. I think....

Very nice.

Cheers
 
Hi John,
It has been a long apprenticeship, and to be honest I have enjoyed it very much. I have worked with some very creative people and some that have a very different way of looking at things, and their input into what I do is also there. I originally was into building Hot Rods, but found them too special, and good ideas cost a lot of money, and then you are scared driving it. Then I got into Off-Road racing, and that was a lot of fun, but a lot of work and maintenance. I have always had a love for GT cars, and when I went to the UK and worked for a friend Fred Goddard, I knew where I was at, LeMans sports cars and GT cars. I was totally in my element. Then Ascari made me an offer to work in their "toy box". And 6 years in that element and exposure and the freedom to expand ones mind was amazing.

So that is what I try to bring to the classics I grew up with and totally enjoyed. I try and take all the old stuff i liked and bring it to what I know now, and still keep it simple and classic.

I hope my Dauphine will show exactly this philosophy, and when I get back to it, I will start a thread.

Take Care, Ray

PS. John, the fancy gearbox was in my workshop most of the time, stored in its box under the Dauph.
 
It was? I think my wife is grateful that you didn't tell me... :)

I think you are saying also that apprenticeships never end. I'm a rank amateur, with some experience for sure, but I learn all the time.

Cheers
 
Hi Ray and Sam
I love what you are doing with your Alpine, it looks great in the Blue colour and with the front mounted radiator and shaped guards etc.
Keep up the good work with plenty of details on the motor rebuild. If you need any info please let me know as I have done this upgrade to my car.
Rob Sealey

Ditto - Looking good Ray and Sam. Hope my old wheels fit well. I'll email you an article with photos that I sent off to Mille Miles Alpine magazine which you might find useful. Unfortunately, it was not published. The article deals with installation of a front radiator in my A110. It is too large to be uploaded here. I'll send to Rob as well.
 
Hi "bazzamac"
It was your wheels that caused all the trauma.

But I do think they will fit now. There was a lot of measuring off of Tom's A110 to get the final position of the arches. And we feel that they will look better than the original, as ours run level with the ground on the back.?????????

Thanks for the support.

Ray
 
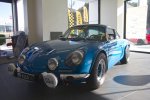
Sorry about that. Here is a photo of my car when on display at Rolfe Renault dealership last year - you can see that the rear has fairly wide hips that accommodated my original wheels. I am unable to email the article I spoke about in my previous post as it occupies too much memory so will put it on a disc and mail it to Sam and Rob.

IMG_2075.jpg
 
"bazamac"
Nice looking A110. Back bulges are quite big, but wheel is wide !!

Take care,
Ray
 
Awesome nice work - I've always wanted one of these cars - maybe one day, but 2 & 1/2 Restorations to complete before I can think about an addition to the fleet :-/
 
The Gearbox

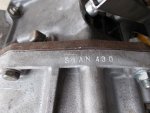
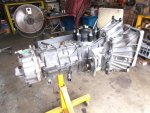
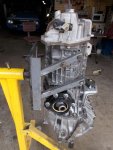
As I said in the beginning the gearbox is a Steven Swan unit. Sam came about it the long way around.

Towards the end of 2013, Tom Riley, who I have done quite a bit of work for on his Renault Squad, asked about building a “big 5 speed”. I told him all the parts have to be sourced in the UK or Europe, and I knew a very good box builder who is quite experienced at these. At the time there was a 17G being advertised for sale in north WA. It was a bit pricey as Tom wanted it for parts for his 17G (replica rally car) car that had been sitting with a broken crownwheel and pinion. And he wanted the genuine rear axle and brakes as well, and actually the body would be better than his.

So A few months went by and he phoned the guy to find out if the car was still for sale, there had been no contacts for the initial advert, so Tom offered him ridiculous money and he agreed. Next day it was on a truck to Perth, and by the next weekend the engine and gearbox was out. And a week later the box was packed with a 330 casing, and on its way to Scotland. That week I found a R5 385 in the UK at a bit of a premium price, my brother went and inspected it, paid the money and put it on a courier to Scotland as well.

Steven did the conversion for us and the box came back to WA. But in the mean time Tom had bought a big box of bits, with a newly built 330 with 385 internals, built in Oz, and most of the parts to build a R5 A/G motor. So this was started for assembly for Tom’s recently resprayed , blue, A110.

The 330-365-385, sat in its box under my Dauph in the workshop. For another day !!!

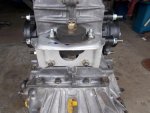
Swan Gearbox.jpgG-Box on Stand.jpgG-Box LH Side.jpg
 
Gearbox Part 2

The gearbox was a major part of the build for Sam’s A110, and it needed final assembly of the bell housing and spigot shaft when it came back to me. So I started all that last week.

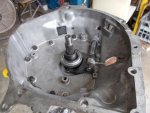
The bell housing was the important part as it needed to be converted for LH side clutch cable. So out of 3 units I put together a full set of bits to build a good mechanism with new bushes and everything. First I had to find my tool for removing the pins on the fork units. I also knocked out the bearing tube, so I could machine out the back for a locally available spigot shaft seal. Thrust bearings are difficult to find in Oz, and I had a new Merc unit, which has the same bearing as the R16 type, round face. Pressed the ones apart and made the unit I wanted for the R16, with a pressure plate without the triangle plate, where it engages straight onto the fingers.

The 2 bolt holes need to be marked and drilled on the top of the 330 flange to the bell housing. Eventually it was time to assemble all the bits together. It seems all the guys that have built these things over the years communicate with each other, as I thought I would need to drill and tap a small hole in the side of the casing to be able to knock the spigot shaft roll pin in on assembly. And there was a hole with a small plug in it done already. Well done Steve. I had extended the fitted length of the spigot, by the method we used in ZA. Knock the spigot out of the splined sleeve 8mm (and tack weld), and redrill the roll pin holes 6mm outwards, giving you 14mm extension (fitted). You actually require 18mm, but as long as the spigot shaft is in sufficiently in the spigot bearing I have found it works well.

All that done and the bell housing can be fitted to the gearbox casings, with a gasket and some sealer.

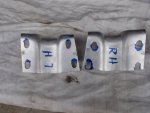
I have also modified the cross member mounts for their offset, and the side mount blocks attachment brackets.

Gearbox side mounts.jpgGearbox Crossmember mount off set.jpgG-Box Bell House.jpg
 
Top