You are using an out of date browser. It may not display this or other websites correctly.
You should upgrade or use an alternative browser.
You should upgrade or use an alternative browser.
Outa the shed, in the shed and on the bench.
- Thread starter lo203404
- Start date
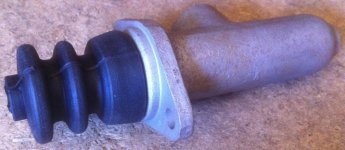
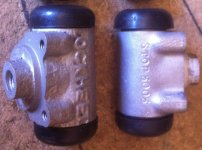
On the bench. First up is the most important part, the anchors! It's time for the old re sleeve trick. Phoned around to a few places in the southern states for a quote for the 4 double ended wheel cylinders, (2@ 1" and 2@1 1/8" and one 1" single ended master cylinder. Got frigged around with dubious quotes and answers like 'we have to see them first before quoting a price', so gave them the flick. Decided to go north and after the first call spoke to someone who, after giving him the details of the cylinders, emailed me back with a firm quote within the day. This person knew his stuff. Duly packed them up and posted 21 Feb. 2021. Got a call 5 days later from the company saying the jobs done and will wait for your payment. Sent the payment the following day 27 Feb.View attachment 217260View attachment 217261View attachment 217262View attachment 217263View attachment 217264View attachment 217265 Time to get the finger out, as there's a stack of 'tidying up' that needs to be done here.
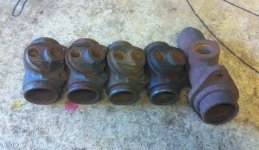
What transpired over the next few days, weeks and months to come for Justin and Dianne (the owners of the company), and the whole township of Lismore was truly devastating. The posted image shows a part of the industrial area that was inundated with red arrow showing their premises.On the bench. First up is the most important part, the anchors! It's time for the old re sleeve trick. Phoned around to a few places in the southern states for a quote for the 4 double ended wheel cylinders, (2@ 1" and 2@1 1/8" and one 1" single ended master cylinder. Got frigged around with dubious quotes and answers like 'we have to see them first before quoting a price', so gave them the flick. Decided to go north and after the first call spoke to someone who, after giving him the details of the cylinders, emailed me back with a firm quote within the day. This person knew his stuff. Duly packed them up and posted 21 Feb. 2021. Got a call 5 days later from the company saying the jobs done and will wait for your payment. Sent the payment the following day 27 Feb.View attachment 217272View attachment 217273


Correction on date: Should read '21 Feb. 2022'.On the bench. First up is the most important part, the anchors! It's time for the old re sleeve trick. Phoned around to a few places in the southern states for a quote for the 4 double ended wheel cylinders, (2@ 1" and 2@1 1/8" and one 1" single ended master cylinder. Got frigged around with dubious quotes and answers like 'we have to see them first before quoting a price', so gave them the flick. Decided to go north and after the first call spoke to someone who, after giving him the details of the cylinders, emailed me back with a firm quote within the day. This person knew his stuff. Duly packed them up and posted 21 Feb. 2021. Got a call 5 days later from the company saying the jobs done and will wait for your payment. Sent the payment the following day 27 Feb.View attachment 217272View attachment 217273
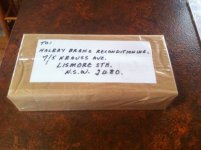
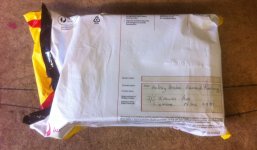
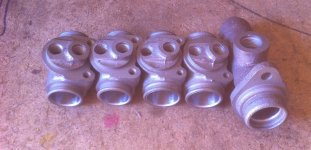
To cut a long story short, mid April 2022 a package arrived in the mail. It was the cylinders that I had sent to them for re sleeving. I'd been in touch with them a few weeks prior wishing them all the best in their efforts to get back on their feet. I was prepared to write it off, (the cylinders) thinking they would never be found, washed away down the Wilson river. As soon as the package arrived and was opened I gave Dianne and Justin a call to thank them ever so much for their efforts considering everything that they were going through. That's what I call true dedication to the customer. So do yourself a favour, if you have any brake work, e.g. re sleeving, etc. give them your business to help them recover. They are pretty well back on track with their repaired/ replaced equipment.What transpired over the next few days, weeks and months to come for Justin and Dianne (the owners of the company), and the whole township of Lismore was truly devastating. The posted image shows a part of the industrial area that was inundated with red arrow showing their premises.View attachment 217276View attachment 217277
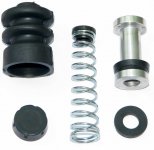
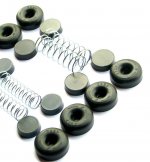
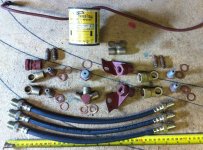
On the bench: Now to re assemble the master and wheel cylinders. Also sought out all the couplings and copper washers that connect to the flexibles.To cut a long story short, mid April 2022 a package arrived in the mail. It was the cylinders that I had sent to them for re sleeving. I'd been in touch with them a few weeks prior wishing them all the best in their efforts to get back on their feet. I was prepared to write it off, (the cylinders) thinking they would never be found, washed away down the Wilson river. As soon as the package arrived and was opened I gave Dianne and Justin a call to thank them ever so much for their efforts considering everything that they were going through. That's what I call true dedication to the customer. So do yourself a favour, if you have any brake work, e.g. re sleeving, etc. give them your business to help them recover. They are pretty well back on track with their repaired/ replaced equipment.View attachment 217309View attachment 217310
My brake man in ACT sends all his resleeving to Lismore , and he said Sydney contacts do also .
pleased to hear they have survived floods i heard they have bought a big trailer and have lathes etc on dollys for a quick move next flood
pleased to hear they have survived floods i heard they have bought a big trailer and have lathes etc on dollys for a quick move next flood
I can't recommend them highly enough, perfect people to deal with. Cost of the job at that point in time came in at $ 375 including postage to the South coast.I need to have a full set done as well. Be good to support this business, after what they have been through...
Cheers,
Dano
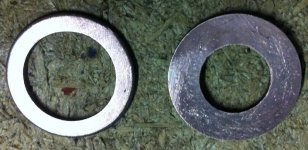
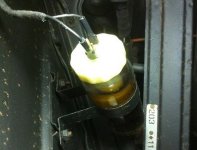
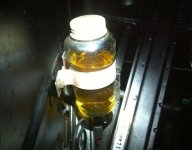
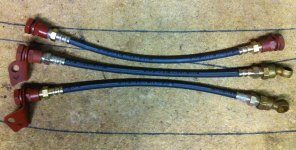
On the bench: Time to join the Brass banjo and hard line Steel connectors to the flexibles. Extra copper washers are needed here, as the new end fittings on the flexibles don't have inbuilt washers. Everything has to spotlessly clean dealing with this work so give your tin can reservoir, (if you have an early girl), or the glass bottle whether it be the small or larger one a thorough clean up and while your there, shout the glass one a new nipple. Also, if you feel inclined, find a lid off a late 404, or 504, 505 reservoir and wire it up to a telltale light, as these old girls are a single circuit setup, andOn the bench: Now to re assemble the master and wheel cylinders. Also sought out all the couplings and copper washers that connect to the flexibles.View attachment 217419View attachment 217420View attachment 217421View attachment 217422View attachment 217423
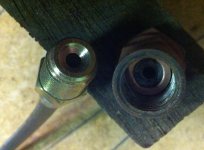
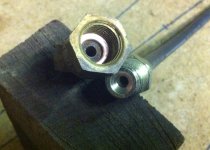
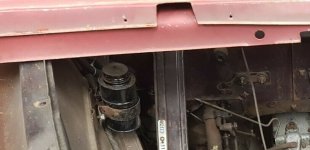
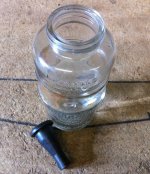
 at times one overlooks to check the bottle before taking off.
Outa the shed:On the bench: Time to join the Brass banjo and hard line Steel connectors to the flexibles. Extra copper washers are needed here, as the new end fittings on the flexibles don't have inbuilt washers. Everything has to spotlessly clean dealing with this work so give your tin can reservoir, (if you have an early girl), or the glass bottle whether it be the small or larger one a thorough clean up and while your there, shout the glass one a new nipple. Also, if you feel inclined, find a lid off a late 404, or 504, 505 reservoir and wire it up to a telltale light, as these old girls are a single circuit setup, andView attachment 217633View attachment 217634View attachment 217635View attachment 217636View attachment 217637View attachment 217638View attachment 217639 at times one overlooks to check the bottle before taking off.
 With the end couplings attached to the flexible lines, they can now be attached to the 2 front wheel cylinders, and joined up with the hard lines at the 2 front end connecting points on top of the shockies, and the rear one hanging off the back of the torque tube. Bolt the Master cylinder back into it's position, then connect the 3 hard lines into the Banjo connector, and the line leading up to the reservoir. Careful positioning of the line leading to the reservoir to be sure it lines up dead on with the nipple poking out of the bottom of the bottle.
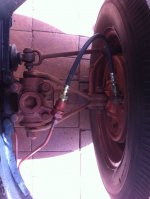
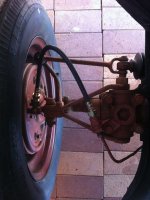
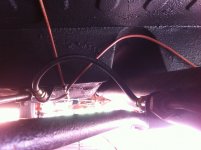
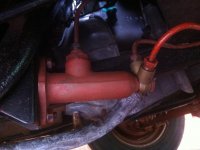
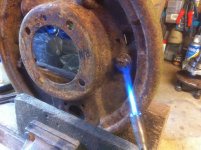
On the bench: With all the lines hooked up and ready for the bleed, there's 8 little suckers, (well 16 if counting both these 2 cars) that need to be checked before proceeding any further on the bleed. These are the cantankerous shoe adjusters. For clarity, this random one on the bench is undergoing the same 'therapy', as it is also totally seized. It's slightly tricky doing this under the car, just have to be careful where you point the torch, but basically there's nothing around the adjuster that you can damage, just concentrate the flame on the backplate directly behind the adjuster. You've got to get it nice and hot for this to work. After bugger all action for the last 40 years for 1 car and over 50 for the other one, these little buggers were in no mood to move whatsoever. Amazingly, all the adjusters were still square. This 1 method always brings the desired result to free them up. If the adjusters are flogged (rounded off), there's only 1 option, a trip to Bunnings for some box trailer wheel nuts and a small square file and have the welder at the ready. It's possible that when welding the nut onto the adjuster stump, it might generate enough heat to break the 'rust weld', so have a squirty bottle at the ready to hit it immediately after the weld. To be continued,,,,,,,,,,,Outa the shed: View attachment 217889With the end couplings attached to the flexible lines, they can now be attached to the 2 front wheel cylinders, and joined up with the hard lines at the 2 front end connecting points on top of the shockies, and the rear one hanging off the back of the torque tube. Bolt the Master cylinder back into it's position, then connect the 3 hard lines into the Banjo connector, and the line leading up to the reservoir. Careful positioning of the line leading to the reservoir to be sure it lines up dead on with the nipple poking out of the bottom of the bottle.View attachment 217884View attachment 217885View attachment 217886View attachment 217887View attachment 217888
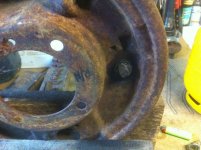
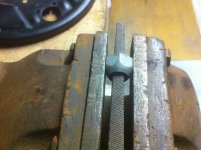
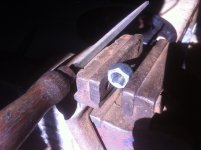
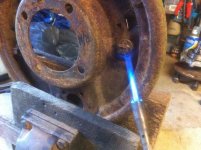
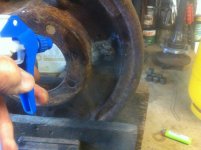
On the bench: With all the lines hooked up and ready for the bleed, there's 8 little suckers, (well 16 if counting both these 2 cars) that need to be checked before proceeding any further on the bleed. These are the cantankerous shoe adjusters. For clarity, this random one on the bench is undergoing the same 'therapy', as it is also totally seized. It's slightly tricky doing this under the car, just have to be careful where you point the torch, but basically there's nothing around the adjuster that you can damage, just concentrate the flame on the backplate directly behind the adjuster. You've got to get it nice and hot for this to work. After bugger all action for the last 40 years for 1 car and over 50 for the other one, these little buggers were in no mood to move whatsoever. Amazingly, all the adjusters were still square. This 1 method always brings the desired result to free them up. If the adjusters are flogged (rounded off), there's only 1 option, a trip to Bunnings for some box trailer wheel nuts and a small square file and have the welder at the ready. It's possible that when welding the nut onto the adjuster stump, it might generate enough heat to break the 'rust weld', so have a squirty bottle at the ready to hit it immediately after the weld. To be continued,,,,,,,,,,,View attachment 217921View attachment 217922View attachment 217923View attachment 217924View attachment 217925
Have you tried candle wax on the frozen bits when heating them? I've found it really does work.
On the bench: With all the lines hooked up and ready for the bleed, there's 8 little suckers, (well 16 if counting both these 2 cars) that need to be checked before proceeding any further on the bleed. These are the cantankerous shoe adjusters. For clarity, this random one on the bench is undergoing the same 'therapy', as it is also totally seized. It's slightly tricky doing this under the car, just have to be careful where you point the torch, but basically there's nothing around the adjuster that you can damage, just concentrate the flame on the backplate directly behind the adjuster. You've got to get it nice and hot for this to work. After bugger all action for the last 40 years for 1 car and over 50 for the other one, these little buggers were in no mood to move whatsoever. Amazingly, all the adjusters were still square. This 1 method always brings the desired result to free them up. If the adjusters are flogged (rounded off), there's only 1 option, a trip to Bunnings for some box trailer wheel nuts and a small square file and have the welder at the ready. It's possible that when welding the nut onto the adjuster stump, it might generate enough heat to break the 'rust weld', so have a squirty bottle at the ready to hit it immediately after the weld. To be continued,,,,,,,,,,,View attachment 217921View attachment 217922View attachment 217923View attachment 217924View attachment 217925
Lew,
I'm surprised to see that you have to send your brake jobs up to my part of the world. Justin has been able to supply all my brake parts for the last 20 years. He even found that half a Toyota caliper kit suited the 404 calipers for my 203C. I'm interested to know where you obtained the 203 flexible hoses.
NS
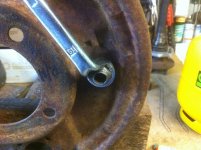
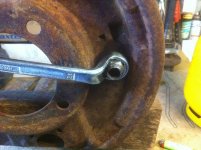
Previously, after turning the flame off the heated area, and giving the spot a hard hit it with jet spray, this will ever so slightly shrink the area between the adjuster and the back plate allowing the wet rusty residue to run out. After that's done it's time to grab the flame and heat it up again until the area is bone dry and quite warm. Time for an eye dropper with any oil that comes to hand, or, as 'Double Chevron' mentioned, some Candle wax. Give it a few minutes to soak through, then it's time to grab the ringy with the squared out wheel nut attached and start swinging back and forth.On the bench: With all the lines hooked up and ready for the bleed, there's 8 little suckers, (well 16 if counting both these 2 cars) that need to be checked before proceeding any further on the bleed. These are the cantankerous shoe adjusters. For clarity, this random one on the bench is undergoing the same 'therapy', as it is also totally seized. It's slightly tricky doing this under the car, just have to be careful where you point the torch, but basically there's nothing around the adjuster that you can damage, just concentrate the flame on the backplate directly behind the adjuster. You've got to get it nice and hot for this to work. After bugger all action for the last 40 years for 1 car and over 50 for the other one, these little buggers were in no mood to move whatsoever. Amazingly, all the adjusters were still square. This 1 method always brings the desired result to free them up. If the adjusters are flogged (rounded off), there's only 1 option, a trip to Bunnings for some box trailer wheel nuts and a small square file and have the welder at the ready. It's possible that when welding the nut onto the adjuster stump, it might generate enough heat to break the 'rust weld', so have a squirty bottle at the ready to hit it immediately after the weld. To be continued,,,,,,,,,,,View attachment 217921View attachment 217922View attachment 217923View attachment 217924View attachment 217925
Last edited:
just while we are here Wayne at better brakes recognised the dimensions and supplied new pistons for my 404 callipers, out of a Ford Escort ,he is now retired .his memory was encyclopaedic !
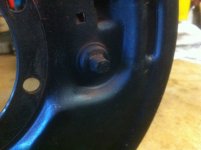
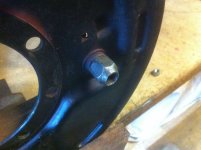
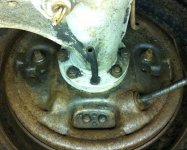
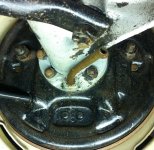
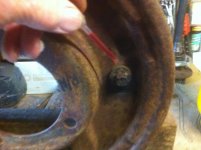
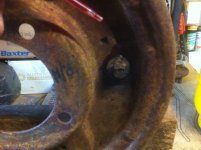
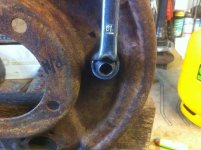
With post #13, if the adjuster square is in good shape and with good movement one has a choice of leaving as is, and keeping the squared out wheel nut in the car tool box for when it's needed. As the first image in this post shows, this adjuster is pretty well flogged, so no option here but to weld the wheel nut to the adjuster stump. Have to grind or cut the wheel nut to a depth that meets the end of the stump so you get a good strong weld here, as will be under a bit of stress when being turned. The third image shows how much space one has to do this with the road wheel attached. Fourth image shows the type of repair kit that was once available many moons ago. To be continued,,,,,,,Previously, after turning the flame off the heated area, and giving the spot a hard hit it with jet spray, this will ever so slightly shrink the area between the adjuster and the back plate allowing the wet rusty residue to run out. After that's done it's time to grab the flame and heat it up again until the area is bone dry and quite warm. Time for an eye dropper with any oil that comes to hand, or, as 'Double Chevron' mentioned, some Candle wax. Give it a few minutes to soak through, then it's time to grab the ringy with the squared out wheel nut attached and start swinging back and forth.View attachment 217973View attachment 217974View attachment 217975View attachment 217976View attachment 217977View attachment 217978
