Gerry's CX Restoration--restored pics

I have tried everything that I know to eliminate the engine noise between 3000 and 4000 rpm. There is now only one course of action remaining. Everything has to come out of the engine bay and an internal examination is necessary.
I have started to day-------------------geez I was not looking forward to this course of action! @@#%$$!*&&%! etc.
 
Motor is now out and on the engine stand. With the sump removed and a bit of levering with a large screw driver it is now blatantly obvious that the noise is number two and number four big ends.
Will measure up tomorrow to see what undersize shells are required!
All else looks good! So much for using parts that supposedly are good!!!!!!
 
Last edited:
The motor is now out and I have measured the crank. It needs new shells for big ends+.25mm. So I will do both mains and bigends. The shells have already been ordered from CX Basis along with +.12mm thrust bearings.
There is a fellow in Colac that reco's engines. I have had good reports from the boys in the Escort Club so I think at this stage I will use his services!
 
Hi Gerry so with your engine you'll supply the parts and get Colac to grind the crank, fit the new bearings so the engine will come back to you reconditioned and ready to fit?

Good to follow your progress!

Regards
John
 
I think that I will supply him with a spare block and some spare rods! That way I do not have to completely dismantle the entire engine. The pistons and head are all in good order. I will then fit the bearings and crank into the original block and rods.Provided that the rods measure up with no ovality.
I will also take the opportunity to reco a rack and replace it whilst the engine bay is clear. I have just ordered a seal kit and a gear side piston for the spare rack.
Turns out that the RHD piston is exactly the same as the one in a LHD rack!! Lucky???? Or good planning on the part of Citroen!
 
The Bearing shells arrived today! That is 5 days since I ordered them! WOW CX-basis are very fast!
while the motor is out I am going to do the steering rack as well! It is easier to get to this way. I have ordered a new seal set new dust boots and a new piston ram for the rack tooth side. This one gets corrosion from condensation on the lower side of it just out side and into the area of the seals!
Should be fun fitting the new seals but the rest of the rack is very straight forward!
 
RF Precision Heads in Colac have done a magnificent job on the Crank regrind. Bearings are now fitted and the sump is back on! I am looking forward to a very smooth motor. ( Fingers Crossed)
 
Did you carefully inspect the rocker arms? I have been starting to see significant wear on D motors. Wouldn't be surprised to hear the same 8n a CX lump.

Via the aussiefrogs App
 
Yes the head and sundry parts were done the first time round and are still all very good. The rocker faces were ground then and the shafts checked for wear, I learned to pay attention to these areas through dealing with TA motors that had done qiute high mieages. Thankfully D and CX are a lot more robust in this department!
 
Engine now back together and awaiting reinstallation.
Whilst under the car I notices LHM coming from the rack damper adjustment screw!
This can only mean one thing----A leaking steering rack!
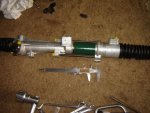
Having a spare rack that I stripped down to "learn" about CX racks I noticed that the small piston was heavily marked by corrosion damage. A news one and a set of seals have been ordered from CX Basis. They arrived very quickly!
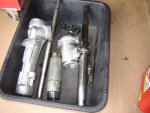
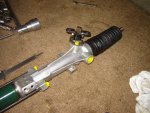
The rack is a little easier to remove once the engine is out of the way, but is still fiddly clearing the High pressure pipes with out bending any. Once the rack was out and dismantled the best of the parts were chosen. I turned out that apart from the corrosion damage to the piston that the spare rack was better in all other respects except the large piston. So now there is one very good rack assembled and a container of left over reject parts.
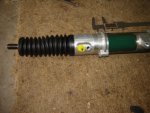
Fitting the new seals was time consuming and exacting especially getting the Teflon inner seal to sit in its bore. But all worked out!
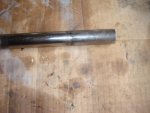
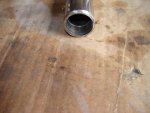
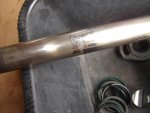
Note the end of the old piston that had to be ground away to retrieve the heavy circlip that retains the rack thrust pad inside the piston!
 

Attachments

  • DSC04069.jpg
    DSC04069.jpg
    94.3 KB · Views: 547
  • DSC04070.jpg
    DSC04070.jpg
    95.9 KB · Views: 571
  • DSC04071.jpg
    DSC04071.jpg
    99 KB · Views: 536
  • DSC04072.jpg
    DSC04072.jpg
    96.8 KB · Views: 559
  • DSC04073.jpg
    DSC04073.jpg
    96.5 KB · Views: 527
  • DSC04074.jpg
    DSC04074.jpg
    93.3 KB · Views: 539
  • DSC04075.jpg
    DSC04075.jpg
    88.1 KB · Views: 531
Engine now back together and awaiting reinstallation.
Whilst under the car I notices LHM coming from the rack damper adjustment screw!
This can only mean one thing----A leaking steering rack!
Having a spare rack that I stripped down to "learn" about CX racks I noticed that the small piston was heavily marked by corrosion damage. A news one and a set of seals have been ordered from CX Basis. They arrived very quickly!
The rack is a little easier to remove once the engine is out of the way, but is still fiddly clearing the High pressure pipes with out bending any. Once the rack was out and dismantled the best of the parts were chosen. I turned out that apart from the corrosion damage to the piston that the spare rack was better in all other respects except the large piston. So now there is one very good rack assembled and a container of left over reject parts.
Fitting the new seals was time consuming and exacting especially getting the Teflon inner seal to sit in its bore. But all worked out!
Note the end of the old piston that had to be ground away to retrieve the heavy circlip that retains the rack thrust pad inside the piston!

Thanks for the picices, I've never seen a CX rack apart before! There actually far less complex than I imagined.

seeya,
Shane L.
 
I also to overhaul my steering rack. Did all your new parts come from CX basis?

Yes !!!!!!!! They are really great!
To remove some of the internal O rings I took a piece of 1.2mm welding wire ( About 15 cm long) and flattened the end to a spatula shape and then filled it smooth . This tool was excellent for getting in at the sides of the O ring so that it could be lifted out of the groove at one point. Then it is an easy matter to use a narrow screw driver to flick the rest out of its groove!
 
Thanks for the picices, I've never seen a CX rack apart before! There actually far less complex than I imagined.

seeya,
Shane L.

Yes they are straight forward in design----- beautifully engineered! But slow and steady and care full is the order of the day when reassembling the seals and pistons. The output rubber bushed joints were in very sound condition, just a little swelling at the edges to trim away! No perceptible movement in them at all! No doubt the swelling was caused by LHM leaking into the rack boots! When I dismantled the boots the stuff poured out everywhere!
 
Last edited:
The motor, gearbox, cooling system etc. and rack are now back in the car. Just waiting on some electrical spade connectors to arrive from Hong Kong. Gee, it is easy to break the ends of the wire to the fan switch on the back of the radiator.
Looking for ward to the start up!
Does anyone have a nifty way to oil prime the galleries before the initial run?
 
Crank the engine with the starter, minus plugs, until the oil light goes out.

If you are really keen you can use a hand oil pump (the one for topping up diffs, gear boxes) and push oil into the outlet side of an oil filter port. Don't know the logistics of this on a Cx. On XN Pugs you can wedge a tapered plastic fitting into the port.
 
Thanks Rob, That approach is a bit hard on the CX, but the oil filter slopes upwards. Maybe I can prime the filter before re fitting it. That would at least have some oil in the galleries! Of course the oil filter is in a bastard of a place at the back of the engine and can only be reached from underneath. It helps to have universal joints for elbows!
 
Thanks Rob, That approach is a bit hard on the CX, but the oil filter slopes upwards. Maybe I can prime the filter before re fitting it. That would at least have some oil in the galleries! Of course the oil filter is in a bastard of a place at the back of the engine and can only be reached from underneath. It helps to have universal joints for elbows!

Pressure oil can and a piece plastic tube?
 
Crank the engine with the starter, minus plugs, until the oil light goes out.

If you are really keen you can use a hand oil pump (the one for topping up diffs, gear boxes) and push oil into the outlet side of an oil filter port. Don't know the logistics of this on a Cx. On XN Pugs you can wedge a tapered plastic fitting into the port.

That is exactly what I've done on the odd occasions I've started a reassembled engine. Plugs out, battery charged and spin it on the starter. It doesn't take all that long to get oil pressure on a Renault 4CV...
 
I Finally fired it up yesterday----ran like a charm.
Isn't always the way that you fix one thing and another problem rears its ugly head!
The next job is to remove the LH drive shaft AGAIN!!!!! and to stop a TQF leak from the out put seal plate. It has had new shaft seals so I bet that the culprit is the O ring seal around the seal carrier plate! Damn and Blast!!!!
 
Top