C4 II B7 1.6 EP6C TIMING CHAIN TOOL - Perth

DaveMcMahon

New member
Tadpole
Joined
Jul 1, 2019
Messages
13
Location
Perth
(Perth) Hi guys, if anyone wants to borrow my timing chain tool and would like advice/hand in changing out the chain get in touch - happy to help.

Just did my own chain and no looking back. Idle issued sorted. Rattle sorted. Power loss sorted. Hesitation during acceleration sorted. Hard change into 2nd when cold...sorted. has me asking why I didn't do it earlier.

~450 all in including hoist hire at DIY garage and using genuine Febi Bilstein kit and genuine rocker cover gasket to prevent the leak. Wasn't sure of the cheaper kits coming out of Taiwan (feel free to chime in if you have experience). Replaced chain, tensioner, guides, camshaft sprockets stretch bolts, crankshaft sprocket and seal. Significantly cheaper to source mini gear rather than Peugeot/Citroen I found)

Time wise was 8 hrs but could have been done so much quicker as needed to get to Autoone a couple of times after discovering the workshop didn't have the internal and external Torx bits required - can also lend if needed.

Daunting to start off with, but fairly straight forward in the end.

DM me if interested.
 
Dave, I did a similar job on my 2103 DS5 THP155, which I believe is basically the same as yours? I followed the instructions in the Haynes manual for the Peugeot 308. This was the first engine I had worked on that did not have keyways to located crankshaft or camshaft sprockets on their shaft. I had to construct a special tool to hold the ring gear in order to undo (and retorque) the crankshaft bolt. it wasn't that hard because part of the ring gear is exposed underneath. I bought a cheap cam timing kit on eBay and it worked ok. I am hoping that I properly cleaned the oil off the rear of the oil pump socket on the end of the crankshaft because if I didn't the crankshaft pulley which fits against it might tend to slip on the shaft- after a few thousand km it seems to be ok. The instructions were non-existent on how to align the 4 oil supply holes in the end of the Vanos unit with those in the end of the inlet camshaft. I did note that the notch on the rear of the Vanos unit was around 12 o'clock. I followed the instructions on first tightening the crankshaft pulley, fitting the chain and cam sprockets and tightening them fully, and then the tensioner. Then remove timing tools and rotate crankshaft 4 revolutions. I found that the inlet cam was retarded, and it took another two repeats of this procedure to get it right. Which meant my cam bolts were retightened fully about three times. I'm inclined to think that an alternative method I read about on the web is better- fit the cam sprockets and chain, but only lightly fasten the cam bolts so that when you fit the tensioner it allows the slack in the chain to be better taken up. However, this still does not address the question of aligning the oil feed holes for the Vanos unit as the inlet sprocket may well move on the fixed camshaft. I think my engine is ok only because on a trip from Hobart to Sydney we averaged 6.8 lt/100km.
 
Seems like you're doing fine then. Odd there's no key ways hey... That had me perplexed but no where did I find directions to align the vanos. Everywhere said to just clean the faces and torque ..like you said. Test. Then tighten 180 degrees. The issue is they're stretch bolts. Once torqued and tightened you shouldnt use again as they weaken and can snap.
I also struggled with the crankshaft pulley as it didn't provide enough slack to fit the second vanos sprocket under the chain. I had to release the crank pulley fit the 2nd vanos sprocket, slip the chain over it and let the crank pulley dangle on the chain and position and lock with crank bolt..that was without the tensioner too. Minimal play. Easy though in the end.
After a couple of rotations to test. Tightened camshaft bolts 180 degree rotation.

Did stuff up though putting back together though. Made an aweful Tapit sound...but it wasnt rythmic as you'd expect would typically be under load only. Turns out the rocker gasket slipped off as I was positioning the cover back in place. Found it weekend just gone and problem is now gone.
 
Oh and I used this tutorial for a mini. Note though we've got significantly more room to work with than those bastards.

https://www.bmwrepairguide.com/mini...hain-replacement-2006-2013-cooper-n12-engine/

Even goes into eBay tool modification however I found the flywheel locking tool has been m8dified from factory with the handle already offset to clear the sump A little grease and she slid right in once engine was at TDC.

Just on that point, the flywheel locks in other positions. Always make sure it's at actual TDC with writing on cams facing up to start, then check by placing 4 equal rods down each cylinder hole to ensure all are even. I was close to getting this little important aspect wrong with disastrous results. Fyi.
 
I'm commenting here only to help people avoid a disappointing outcome ... If you look at the cost of genuine Mini/BMW timing chain parts - e.g. via FCPEuro or Pelican Parts you will quickly appreciate that the PSA versions are typically less expensive. What does 'Genuine Febi/Bilstein' really mean? They are often re-boxers, like others such as Vaico, QH etc. so it could be 'genuine anything' inside the box. The factory chain is (or was), I think, actually made by IWIS.

The engine covers can leak because it performs a role in the PCV system and if it cracks internally, you can see leakage at a vent hole near the edge. Changing the gaskets won't fix that problem.

If you are doing this job obtain the latest PSA parts and forget the aftermarket items (OK, so you might get really lucky) to give yourself the best chance of longevity. You want the latest chain and tensioner and the top guide pad with a steel bracket vs aluminium. The cam bolts are single use and inexpensive. If the chain isn't very stretched, you may have some success with only resetting the cam timing.

Check by VIN, but the current part numbers for a complete timing chain job (includes sprockets if worn) on the typical EP6 engine sold in Australia will be:
9816058580 Tensioner - May now be 9824831580 - either ok
9816058680 Top guide - steel bracket
9822827180 Chain
0805K1 Intake cam gear (Variable hub - usually comes with a bolt)
0805K3 Exhaust cam gear (Fixed - usually comes with a bolt)
0513C8 Crank sprocket/gear
081830 Plastic chain guide
081831 Plastic chain guide
0249E6 Engine cover gasket
0249E7 Engine cover gasket (2 reqd)
082026 Bolt for guide with seal (2 reqd)
082027 Bolt for guide
082028 Seal on bolt 082027
080677 Cam bolt intake TORX SCREW M10x52
080678 Cam bolt exhaust TORX SCREW M10x30
1606466680 Crank pulley bolt
1614085980 Crank seal front

Otherwise, ... au revoir.
Great update an info, thanks David. My 2011 C4 1.6 turbo has just started with the rattle in the last few days at 66700kms. Do you think it's worth starting with the "resetting the cam timing" option? It's rattly from start/cold, for a couple of minutes and settles down, no loss in power or performance at this stage.
 
Awesome thread!

Bought an unregistered 207CC (2010, auto, 122k) with a bit of a challenge/risk mentality although I always had principle of not buying an Italian or a French car. Here we are regardless...

Among few things the catalyser is busted, heavy smoking when idling, some oil leakage from oil cooler housing etc. Loss of power...
Got some smaller fixes and touch aups done, and was advised to just live with the smoking because the labour related to changes valve seals is considerable.

After checking few Pug/Mini videos, I have now decided to do it myself and as I went deeper to the rabbit hole, I have decided to change all timing parts while I'm at it.

I opted to go with cheapest Ebay/Chinese parts, wish me luck...

Found https://www.ssg.asia/ to be awesome options to check the right part numbers for my VIN.

So far I've purchased:
- Timing: chain, 3 sprockets/bolts, tensioner, guides w/ 3 bolts
- Valve seals
- Gaskets: oil housing, crank seal, rocker cover
- Timing tools (for cam shafts)
- Valve spring tool
- Cylinder pressure tester (just for the adapter to go with the hose for the above kit)
- Torx set
- 2 Torque wrenches

Everyone wish me luck! I'll update how it goes.

Also replacing sway bar bushes and links.
VVT Solenoids have been replaced.

I also got a new BM cat.converter from UK. However the downstream pipe is about 5cm shorter than what is installed now. Anyone seen this same issue?
 
Firstly an edit on my #2 post- I was wrong about the need to align the oil holes at the end of the camshaft with those in the Vanos units. That advice came from the internet.
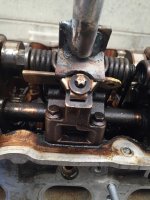
My Peugeot 207 manual does not discuss working on the VTi (twin-Vanos, variable valve lift, no turbo, port-injected) because they consider it unsuitable for amateurs. This makes it difficult to obtain the required info on how to do the job, and you have to rely on the internet. It can be done but be prepared to make up some special tools to work on the variable lift mechanism. Before you do it could be worth doing a compression test.
 

Attachments

  • variable lift tool-red.jpg
    variable lift tool-red.jpg
    844.9 KB · Views: 24
Could be worth explaining what you needed to do for the special tools Gwest for anyone referring back to this thread.

What was required and why? I found anything with dual Vanos was so difficult to come by. It's all single Vanos and fixed sprocket.

Tbh I wasn't aware anything needed to be done and hadn't come across anything in subsequent research online.

I think ours may have been running a little rich which may have been setting the timing.. Really wanted to get back in there but it never threw any codes and with two kiddos.. struggled to wipe my own let alone crack open an engine.
 
Firstly an edit on my #2 post- I was wrong about the need to align the oil holes at the end of the camshaft with those in the Vanos units. That advice came from the internet.
My Peugeot 207 manual does not discuss working on the VTi (twin-Vanos, variable valve lift, no turbo, port-injected) because they consider it unsuitable for amateurs. This makes it difficult to obtain the required info on how to do the job, and you have to rely on the internet. It can be done but be prepared to make up some special tools to work on the variable lift mechanism. Before you do it could be worth doing a compression test.
Good luck. Seems like quite some undertaking. I hired a 207cc back in the day and drove Amalfi. Life time ago. All I remember is the chassis twist with the roof down on the Twistys! (Oh and the view!!!!)

As Rue Paul says..Good luck..and don't F$#$ it up! Haha
Awesome thread!

Bought an unregistered 207CC (2010, auto, 122k) with a bit of a challenge/risk mentality although I always had principle of not buying an Italian or a French car. Here we are regardless...

Among few things the catalyser is busted, heavy smoking when idling, some oil leakage from oil cooler housing etc. Loss of power...
Got some smaller fixes and touch aups done, and was advised to just live with the smoking because the labour related to changes valve seals is considerable.

After checking few Pug/Mini videos, I have now decided to do it myself and as I went deeper to the rabbit hole, I have decided to change all timing parts while I'm at it.

I opted to go with cheapest Ebay/Chinese parts, wish me luck...

Found https://www.ssg.asia/ to be awesome options to check the right part numbers for my VIN.

So far I've purchased:
- Timing: chain, 3 sprockets/bolts, tensioner, guides w/ 3 bolts
- Valve seals
- Gaskets: oil housing, crank seal, rocker cover
- Timing tools (for cam shafts)
- Valve spring tool
- Cylinder pressure tester (just for the adapter to go with the hose for the above kit)
- Torx set
- 2 Torque wrenches

Everyone wish me luck! I'll update how it goes.

Also replacing sway bar bushes and links.
VVT Solenoids have been replaced.

I also got a new BM cat.converter from UK. However the downstream pipe is about 5cm shorter than what is installed now. Anyone seen this same issue?
Good luck. Seems like quite some undertaking for a 207 blowing smoke at 120k km. Are you certain the oil isn't the turbo? Poor oil upkeep kills these engines!

I hired a 207cc back in the day and drove Amalfi. Life time ago. All I remember is the chassis twist with the roof down on the Twistys! (Oh and the view!!!!)

As Rue Paul says..Good luck..and don't F$#$ it up! Haha
 
Thanks for all the encouragement! More I read, more doubts I have... :LOL:

I found this video on Youtube where the guy seems to lift the inlet camshaft assy more or less as whole without loosening the spring bolts. Didn't see him take it of in the video, but he obviously pries the spring ends out of their slots before taking it off.

When putting it back together, the whole assy is put back and finally the spring ends pried back with a flathead screwdriver with a small slot cut into the flat head.

This seems(!!) to eliminate the need for a lever/tool to keep the springs in bay and removing them in the first place.


I'm also getting contradictory information whether the cam sprockets with part numbers 11367545862, 11367536085 will fit the Peugeot. Can anyone confirm or deny this? An EPC gives me these PSA part numbers 0805H5, 0805J0 for my VIN.
 
You are right there are a few different ways to go about relieving the force applied by the spring arms. The main thing is to relieve any forces before unscrewing anything- the same applies to the camshaft caps. The recommended way for the exhaust camshaft is to make up a holding frame. From memory for the inlet camshaft you back off the eccentric motor adjustment to get minimum lift as well as releasing the spring arms from their notches in the rocker arms. The main thing to avoid is having unidentified objects hurtling around your workshop during uncontrolled release!
 
Top