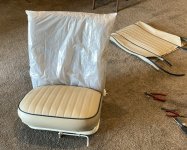
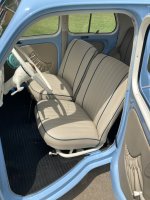
4cv seat rebuild

Stan W

Active member
Fellow Frogger
Tadpole
Joined
Nov 13, 2020
Messages
437
Location
United States, North Carolina
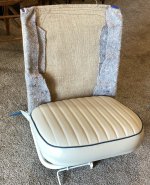
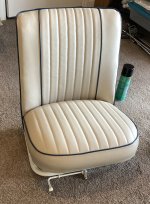
I have been busy rebuilding and re-trimming the front seats on my 4cv. I have one finished... finally. As with most tasks, it took a lot longer than I expected.

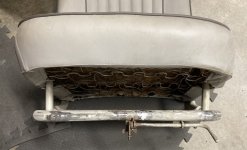
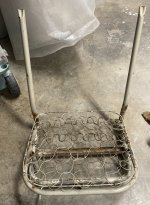
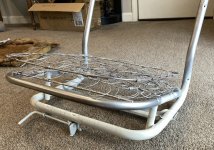
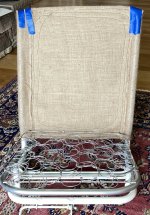
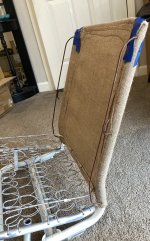
The driver side seat frame was bent, most likely from a heavy person sitting in the seat when the car was hit in the back. I had to cut the frame in four places to get it straight, then welded it back together.
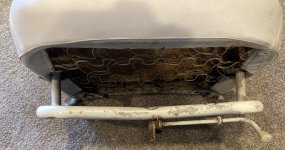
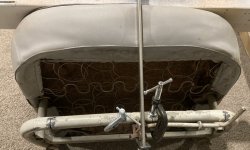
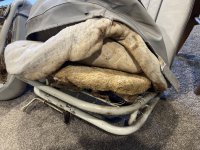
IMG_3653Copys.JPGIMG_3815Copys.JPGIMG_3817Copys.JPGIMG_3649Copys.JPG

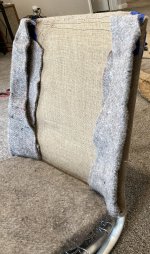
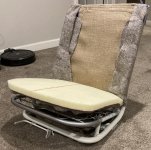
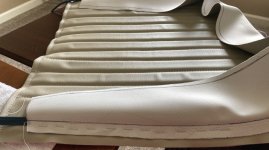
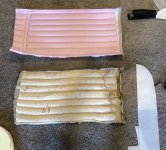
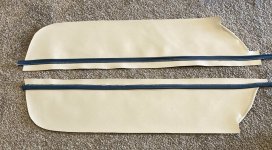
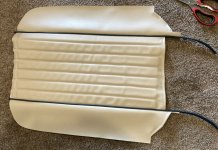
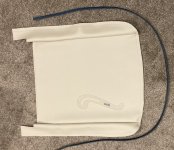
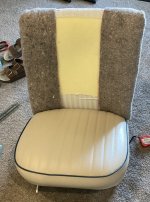
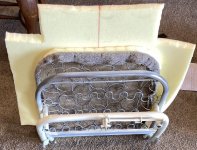
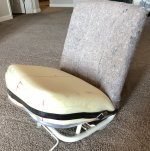
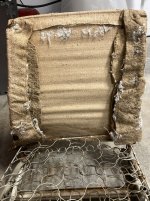
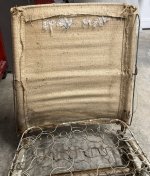
The lower cushion consists of a layer of jute backed by burlap, about 25mm of horsehair pad, and another 25mm of cotton batting. The seat back has a very strong burlap material stretched over the tubes. There are "border wires" on each side added after the burlap was installed. These are not present on all 4cv seats, but all the USA spec 4cvs I have seen came with these seats. The border wires are wrapped in jute and cotton batting to give the seat back a more scooped profile. It is probably to help keep the driver in the seat during spirited motoring - especially considering the amazing 28hp of the US spec 4cvs.
IMG_3879Copys.JPGIMG_3882Copys.JPGIMG_3883Copys.JPG

I will post more pictures soon.
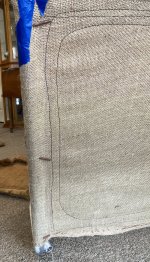
 
I cleaned and painted the seat frame. The parts that are visible got base/clear to match the other white parts of the car. I made a new burlap piece for the seat back. I had to sew the tube pockets tighter to get enough tension when installed. After the bulap, I re-installed the border wire. It goes through the burlap and is bend over to hold it in place. It was hard to get off and hard to put back. Next was jute padding and the layers of foam on the lower cushion. I put the second layer of foam on just before installing the upholstery. I cut out the corners and glued it together to give a smooth contour.

IMG_3895Copys.JPGIMG_3898Copys.JPGIMG_3900Copys.JPGIMG_3901Copys.JPGIMG_3905Copys.JPGIMG_3906Copys.JPGIMG_3968Copys.JPG

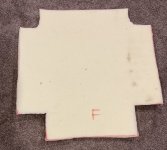
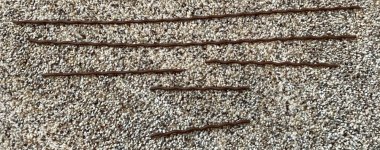
I sewed the pleated portions of the seat first. The vinyl was glued to 13mm sew foam, then the pleats were sewn with the foam side up since the lines were marked on the foam. All seams were locked with super glue. I stapled the seams together before sewing and removed the staples afterwards. The piping was sewn to the side piece of the cushion before being attached to the top. The final step was to sew on the three pieces that wrap around the seat frame. These pieces have pockets that contain hard wires. These wires are attached to the seat springs with hog rings.

IMG_3864Copys.JPGIMG_3908Copys.JPGIMG_3963Copys.JPG
 
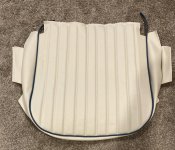
Here is the completed lower seat cushion.

IMG_3970Copys.JPG

The cushion mostly installed on the seat frame along with new foam

IMG_3911Copys.JPG

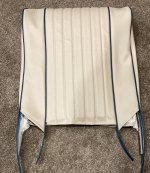
The seat back has piping on the front and the border. The piping was first sewn to the non-pleated pieces first.

Seat front panel:
IMG_3914Copys.JPGIMG_3915Copys.JPGIMG_3919Copys.JPG

Side and back panels:

IMG_3920Copys.JPGIMG_3969Copys.JPG

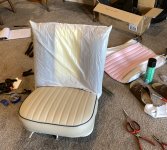
I put a plastic garbage bag over the foam and padding so that the upholstery would slide over it. The task would be almost impossible without it. The finished seat looks great and is comfortable. Now all I have to do it repeat the process for the other seat.

IMG_3957Copys.JPGIMG_3958Copys.JPGIMG_3960Copys.JPG
 
The saying goes "Jack of all trades, master of none". You blow that theory out of the water Stan! Jack of all trades, master of all trades, more like it :headbanger"
You are reminding me of the Master on here, 59Floride :approve:
 
Thanks! It takes me a LOT longer than professionals, but I get a good result. If I were doing it for pay, I would have to charge $2000 a seat. A really good local trimmer said it might cost around $700 per seat (USD) if he did it. That figure is now sounding very reasonable. I am doing it for the satisfaction of having accomplished it myself. It takes many hours to make patterns and mark all the fabric.

I bow to the expertise of 59Floride - he is on a higher plane :)
 
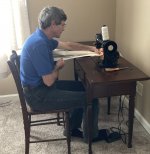
This is indeed amazing. How did you do all that sewing? Not by hand I suspect but I don't imagine how you would do it on a machine either. All those layers are bound to dance around in the machine especially with the foam, how do you keep them from moving?
 
I used a 1949 Singer model 66 home sewing machine. My machine is fine for two layers of vinyl, but only because I put a smaller pulley on the motor. I have to help it get through the really thick parts. If I were planning on doing more car interiors, I would get a more powerful motor or a different machine.

One problem with the home machines is that they tend to go too fast. Professionals have powerful walking foot machines and a piping (welt) foot. I have to gently pull the material to keep it moving. I used a zipper foot to sew the piping.

Keeping the material in place:

The vinyl is glued to the sew foam before sewing the pleats.

I marked the seams on the back of the material and stapled them in place before sewing (using a regular stapler made for paper). The last picture in my second post shows the staples. I remove them as soon as the seam is sewed.

The piping is sewn to the material on one side of the seam before sewing the two pieces together. The original seat covers appear to have been done this way also.
IMG_3578Copys.JPG
 
You know your sewing machines, that's for sure.

I take it the staples are far enough from the line of sewing to not have to go under the foot?

Your car is going to be such a nice place to be you want to swivel the fronts around and have coffee and croissants with the passengers in the back.
 
You know your sewing machines, that's for sure.

I take it the staples are far enough from the line of sewing to not have to go under the foot?

Your car is going to be such a nice place to be you want to swivel the fronts around and have coffee and croissants with the passengers in the back.
I don't know a lot about sewing machines, what I wrote is about the limit of my expertise. The staples did go under the foot, which made feeding the material a bit more difficult, but they needed to be close to the seam. If I added swivels to the seats, I might have to rebuild the back seat! :(
 
That was what I was afraid of. Our old Singer (pre-war?) had problems moving thick layers. Didn't have a problem going through it, but keeping it together. And you're right about the speed too.

What, you're not going to rebuild the rear seat?!
 
Thanks for the compliments, but a good trimmer can do the job for a lot less than I could. I guess you call them trimmers, we call them upholstery professionals. The back seat is in good condition, so I hate to embark on that task anytime soon. The front seats looked ok, but the stuffing was worn out on the driver's seat and the thread was failing at the seams. The original vinyl is nearly indestructible if it doesn't sit in the sun for 50 years. Rather than do the back seat, I will install my 4 speed gearbox, and might eventually install new king pin bushings.
 
It is inevitable a professional would do the job quicker/cheaper but not always better. Probably because they can only spend so much time on any one job. You on the other hand have all the time in the world to get it right. No matter what the job is. How long did you take from stat to finish to do one seat? Because in my experience the first time you do something it takes roughly twice as long as it does the next time you do the same thing, so there's some evolution involved.
 
It probably took me two weeks to do the first one. The second one will take less than half that time - I already have the upholstery done since the only difference on the driver's seat is that the back is a mirror image of the passenger seat. It still took a bit more than two days to cut, mark and sew the upholstery. Yes, you are right, I have the time to get it just the way I want it. At first, I wasn't going to include the two extra pieces of piping in the seat back panel, but I really wanted it to look the way it did when new. It wasn't much extra work anyway.

I wanted to keep the driver's seat in the car so I can still drive it. It should only take two or three days to paint the seat frame and install the new padding and covers.
 
Well, seems like your experience mirrors mine. Everything new I have tried went crap and hard the first time but it got easier and quicker in subsequent attempts with exponentially improved results. I haven't tried everything and don't even dream about it. But this fits pretty much everything I tried be it learning a new software, running mass spectrometers, installing timber floors, painting walls or rebuilding engines.

Upholstery however is to me in the same realm as painting cars. I know I could do it, but the time it would take would be infinite and the money and resources spent would approach infinity too, so I am not ready to try it yet.
 
The limit as x approaches infinity... reminds me of college mathematics classes. The second seat is now finished and in the car. It still took the better part of four more days, but that included stripping down the seat, painting the seat frame, installing all the foam and padding, then installing the seat covers. I included a couple of pictures not shown on the first seat - the two layers of foam and how I glued the corners together. I have NO plans to do the back seat, it is just fine and I don't use it much.

Reflections:
It is much easier to build a seat IF you can buy good pre-made upholstery.
It is much easier to build a seat if you don't need new foam/padding/frames.
It is much easier to rebuild a seat from a modern car - they have better/faster methods of attaching the upholstery to the frames.

I put new upholstery in my 2008 Corvette. I did not make the seat covers. The job went VERY FAST compared to the 4cv.


Final conclusion - the seats look great, did not cost much, are reasonably comfortable and I will eventually forget how hard it was to do the job.

IMG_4106Copys.JPGIMG_4108Copys.JPGIMG_4109Copys.JPGIMG_4113Copys.JPG
 
Very nice Stan. I had mine done professionally, perhaps 30 years ago, in a woolen fabric to match (sort of) my original rear seat upholstery. I take my hat off to you for tackling that job.
 
Top