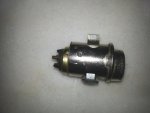
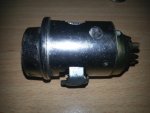
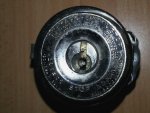
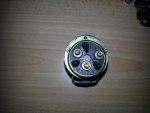
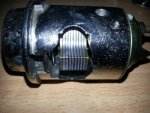
Hi folks. How does one remove the 404 ignition from the steering column? Is it even possible or should one just replace the whole steering column if he intends fitting a new ignition?

You are using an out of date browser. It may not display this or other websites correctly.
You should upgrade or use an alternative browser.
You should upgrade or use an alternative browser.
404 ignition
- Thread starter Edmund
- Start date
With the key in the Garage or ACC position (I forget which), the little detent finger is retractable and then it will come out.
Ed....
do you still have the key?
do you still have the key?
Removing a Nieman switch (by the book)
1) Disconnect the battery & pull the wires off the back switch (quick connect female terminals)
2) Remove the lower plastic cover off the steering column. There are three screws beneath the cover and a circular wire clip at the top behind the steering wheel. The clip will come off with the wheel in place.
3) Remove the small (M4) hex head screw at 7 o’clock at the back of the mount.
4) Rotate the key fully anticlockwise to the <garage position>
5) Find the small hole (about 2mm diameter) in the bulbous section of the switch mount. (It’s at approximately 4 o’clock)
6) Insert a small screw driver into the hole and press inwards for all you are worth and then push the switch from the back and withdraw.
Thanx for all your input folks, you never disappoint.
I will check with the owner.......it's a 404 I just acquired a few days ago
If you dont have a key you need to drill the guts out of the lock
"By the book" didn't work–it seldom does!
The "desperates" method:
1) Disconnect the battery & pull the wires off the back switch (quick connect female terminals) Protect the driver side floor
2) Remove the lower plastic cover off the steering column. There are three screws beneath the cover and a circular wire clip at the top behind the steering wheel. The clip will come off with the wheel in place.
3) Remove the small (M4) hex head screw at 7 o’clock at the back of the mount
4) Drill the small hole at 4o’clock out to about 4mm diameter
5) Get you biggest mains powered drill with a 10mm HSS drill and drill into the lock as part as you can go. Wobble the drill in an arc with in and out action to try grind as much of the lock away as possible. The centre key guide will eventually fall out, so will a heap of other crabber pins and washers.
6) When you can see the laminated locking lever and all is clear above it you can stop.
7) Fit the 100mm angle grinder with a 2mm blade steel cutting blade. Take a series of cuts as shown in the images. The more the better. Access will limit the number of cuts. Be very careful not to damage surrounding plastic items and the switch mount face.
8) Get a pair of vice grips and break as much of the bottom away. The aim is allow the laminated locking pin to move freely.
9) Move the locking pin with a screw driver to left as far it will go.
10) Insert a 4mm pin punch through the hole in #4 above and belt the punch until the anti tamper locking clip deforms and falls out this is easier said than done, but persevere, it will come out after a bit more drilling and bashing.
11) Slide the laminated locking pin to the right, clear of the steering column.
12) Extract the lock by grasping with vice grips and twisting.
Great illustration. Thanx.
