Kids I am fixing up an old starter motor and need to know where I can get the correct cloth wrap for the field coil, is it anything special? If not I'll go to Spotlight and get some ribbon.


You are using an out of date browser. It may not display this or other websites correctly.
You should upgrade or use an alternative browser.
You should upgrade or use an alternative browser.
Old, old starter motor fixemup
- Thread starter 56 Fregate
- Start date
Thank you yes I have some of that already and if that's all I need happy days. The existing tape seems quite thin compared to the loom tape but it might work, I'll suss it out.
Because the inner is concave I think it may be Adhesive backed Glass Cloth, I recall RS or Farnell may stock itKids I am fixing up an old starter motor and need to know where I can get the correct cloth wrap for the field coil, is it anything special? If not I'll go to Spotlight and get some ribbon.

electrical insulation | Husky Tape | Australian wholesale distributors of adhesive tape products
Husky Tape is an Australian owned and operated company established in 1971. Wholesale distributors of adhesive tape products for trade, commercial, industrial and DIY applications.
Ah yes that's the stuff and is available in 9mm width which is what I'll need to make a neat job of it.
Thank you one and all.
Thank you one and all.
I have my own fingernail polish and use it for all sorts of things. I think my field coil is plain aluminium flat wire with a separation layer of some sort, I'll know when I go to re-cover it. I think I'll need some shellac on the armature though. I am out of shellac but find it to be useful for all sorts of things as well.
your electrical wholesaler will have rubberised electrical linesman tape i dont know how it would go with the heat but it stretches to all kinds of contours and sticks to itself ,and yes check to see there are no nicks or blemishes in varnish insulation PUGS
There are plenty of bare wires in the armature which looks like shellac. Bunnings sell shellac.


Ashdown automotive electrical supplies at archefield stock everything you'll need. Wrapping+ spray cans of insulating material+ shellac spray. They are wholesale only but there's an auto electrical place opposite who'll maybe supply what you need. As probably will any good auto electrical shop. It's a common enough problem/fix. Buy the right product and fix it right first time.
Cheers.
Cheers.
Is this off the same engine as the sump repair?
Delco Remy are made in France too

The 2016 Prius HybridIs this off the same engine as the sump repair?
I didn't realise they made shellac in a spray can, I must get some. Among other things it makes a really good sanding sealer when doing woodwork, and French polishing of course. I have always mixed up the Lac beetle wings with metho at home. It has a thousand uses.Wrapping+ spray cans of insulating material+ shellac spray.
Cheers.
Mmm, probably picked it up cheap after the floods.The 2016 Prius Hybrid

Well that was a fizzer, I should have known better. I went to a busy auto electrician business today looking for some suitable tape to re-cover the field coil, "we haven't had any of that here for 20 years cos no one repairs starters anymore, we get new parts from China". So it looks like I wait beside the front door for a delivery 
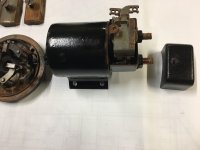
In the mean time the starter is being given the treatment. Parts are scrubbed with soapy water and sandpaper, dipped in acid then painted. I made a new cover for the brushes. I must say I am impressed by the mechanical engineering, quality of casting and general sturdiness of this old starter compared to a typical Ducellier or such. Have a look at the end plate containing the brushes, nice. Instead of pulling the whole solenoid apart I was able to peer down into the guts like a crow looking down into a milk bottle and could see that the contact points were serviceable.
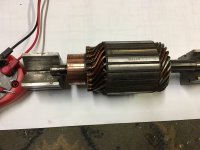
After watching a youtube video I tested the armature for shorts and it checks out okay.
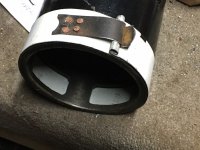
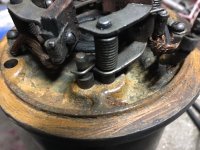
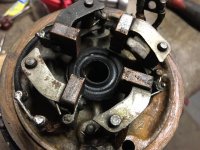
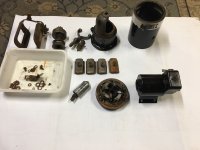


Last edited:
Nice work there Graham, just another thing you need to check and that is that the insulation is lower than the copper segments on the commutator.Well that was a fizzer, I should have known better. I went to a busy auto electrician business today looking for some suitable tape to re-cover the field coil, "we haven't had any of that here for 20 years cos no one repairs starters anymore, we get new parts from China". So it looks like I wait beside the front door for a delivery
In the mean time the starter is being given the treatment. Parts are scrubbed with soapy water and sandpaper, dipped in acid then painted. I made a new cover for the brushes. I must say I am impressed by the mechanical engineering, quality of casting and general sturdiness of this old starter compared to a typical Ducellier or such. Have a look at the end plate containing the brushes, nice. Instead of pulling the whole solenoid apart I was able to peer down into the guts like a crow looking down into a milk bottle and could see that the contact points were serviceable.
After watching a youtube video I tested the armature for shorts and it checks out okay.
View attachment 207073View attachment 207074View attachment 207075View attachment 207076View attachment 207077View attachment 207078
I like the repair option for the home DIY'er because it usually works out a lot cheaper than paying the professionals and is rewarding as shown by your results.
RogerNice work there Graham, just another thing you need to check and that is that the insulation is lower than the copper segments on the commutator.
I've completely given up on paying a professional to do anything cos they are just not interested in old stuff and who could blame them.Nice work there Graham, just another thing you need to check and that is that the insulation is lower than the copper segments on the commutator.
I like the repair option for the home DIY'er because it usually works out a lot cheaper than paying the professionals and is rewarding as shown by your results.
For any kiddies watching this, the acid dipping sequence is thus. Dip the cleaned ferrous casing parts in a strong hydrochloric solution for a coupla minutes to get a good clean etched surface ready for paint. Rinse in fresh water and then put them in soapy water to neutralise the acid. Dry quickly with a hair dryer ( I use a gas torch) then paint them while the metal is still warm. Works a treat.In the mean time the starter is being given the treatment. Parts are scrubbed with soapy water and sandpaper, dipped in acid then painted.