Peugeot 504 24v v-6

I suspect that Toni is correct in that the same happens in Australia as well, many people do great things with cars here but may choose not to put up with the foolish behaviour as seen in this thread and common to this website.

In respect of your injection question I have 2 answers, I believe that there is much doubt over the need for the injectors to run sequentially unless it’s a direct injection engine, many EFI systems have the injectors all fire at once per revolution. The other comment is that programmable EFI systems are very configurable and so you can set out puts and sensors in any way you wish. Graham may say more about this.
 
I heard a friend of mine that there are more pics of that 504 cabriolet with 24v v6. So I used search and I only found some brisbane meeting pics. But I noticed that he uses 6 coils so he dont use distributor at all?He has direct ignition too?

Alan or Oddfire: Do you guys have more pics of this sensational cabrio engine? :)
 
Erska said:
I heard a friend of mine that there are more pics of that 504 cabriolet with 24v v6. So I used search and I only found some brisbane meeting pics. But I noticed that he uses 6 coils so he dont use distributor at all?He has direct ignition too?

Alan or Oddfire: Do you guys have more pics of this sensational cabrio engine? :)
This a 4 part article on this car in Australian Classic Cars Magazine.
Graham
 
Hi, I'm back again! :)

Well, nothing has really happened becouse I spend my whole time to build my new hall. It is allmost ready, only electrics is missing.

So I pull 504 with my atv in to my new garage and "drop" the engine in the bay. Tomorrow I measure wich kind exhaust manifiold I will make.

But my main question is can I remove zpj4 valve balance shaft? Does that engine really need that? I mean PRV6 dont have it. Then I could lower the valve cover and possible fit the master brakecylinder without modifications in the enginebay(left side steering). Now it wont fit. Is 604/504 coupe brake cylinder different somehow?

Another thing, what did that 504cabriolet zpj4 owner do to his water pump? Becouse if you turn your injection 180degrees around, the front coolingpipe and pump dont fit there anymore...:cry:

Please help!

-Erska,Finland
 
Talked to the 504 Cab owner today. His car has 176Kw at the wheels. He turned the inlet manifold around and did this by slotting the mounting holes about 8mm.
He uses a Davies Craig (Australian made) electric water pump. He used the lower motor section from a Peugeot 604.
 
alan moore said:
Talked to the 504 Cab owner today. His car has 176Kw at the wheels. He turned the inlet manifold around and did this by slotting the mounting holes about 8mm.
He uses a Davies Craig (Australian made) electric water pump. He used the lower motor section from a Peugeot 604.
That's 240 horsepower at the wheels out of an engine that normally puts out 200 at the flywheel, probably close to 50% increase and around 100 hp per litre, it must have pretty serious modifications/ compression/ camshafts.
Graham
 
Last edited:
Ok. That electric water pump seems to be a wise choice.

But how about that valve balanceshaft? Can it be removed?

I just looked those 504 cab pics and it seems that the original master brake cylinder fits with right side steering becouse the lower valve cover. But how about left side steering?

I was considering a hydrobooster master brake cylinder,that higher valve cover fit with hydrobooster and that could be a good reason to but power steering in to my car too?

I still want to know how 504 coupe/604 master brake cylinder differences with 504 sedan? Is the body mounts more on the left/right side of the cylinder or centre as in the 504 sedan?

But I am also open for your hints/opinions.

-Erska
 
Last edited:
The reason why most of the 24v conversions are running aftermarket management is because of the internal immobiliser in the original ecu, which wires up to the transponder network in the dash. Most people forget to take this out of the donor vehicle when doing the transplant. A couple of 24v GTA's here in the UK are running R25 V6 ecu which can be remapped to suit the 24v and don't have the immobiliser built in. You loose control of the two stage inlet manifold solonoids though on the 24v..

Theres a common thinking that there isnt much gain over the 24v to the 12v PRV (and Im talking the late big valve big port Laguna/Safrane PRV V6), as the 12v can be fitted with some big duration, lift cams, and decent headers are cheap, whereas the 24v eats cams even easier with higher lift items (this is why Venturi redesigned the heads with mechanical rockers) so most people stay with the standard cam profiles (if they are still in good condition....)

24v cams from Pug/Citroen are very expensive, and getting proper manifolds designed are expensive due to the 6 port design.
 
Well, I have finnish made Tatech aftermarket engine managment system. So that is not a problem.

We will take every unnecessary part out of the standard injection and ecu, wire harnesses too. So I dont think that we have a problem with that or turning the injection around.
 
Erska, it is quite ok to mount the booster in remote location say inside of wheel arch, use standard non boost master cylinder set up and then pipe to booster.

ok

you still crazy, me thinks, but I love it.

ed ge
 
I am just thinking, how much weight I should take off of the flywheel? Or none?

I'm thinking removing that crankshaft position sensor ring becouse we do our own in the front...
 
On the 12V 3 Litre PRV Turbo I am currently putting together, I lightened the flywheel to 7 Kg, from maybe 10Kg. I removed the timing teeth as these were already damaged anyway. I think the main part of the flywheel ended up around 13mm thick. I removed no material near the centre part, only from where the back of the pressure plate bolts to. I also narrowed the ring gear a little.

I grooved the back of the flywheel with curved grooves to increase surface area a little for better heat dissapation, and to give the pressure plate area more rigidity, MAYBE!! Just a theory.
 
alan moore said:
On the 12V 3 Litre PRV Turbo I am currently putting together, I lightened the flywheel to 7 Kg, from maybe 10Kg. I removed the timing teeth as these were already damaged anyway. I think the main part of the flywheel ended up around 13mm thick. I removed no material near the centre part, only from where the back of the pressure plate bolts to. I also narrowed the ring gear a little.

I grooved the back of the flywheel with curved grooves to increase surface area a little for better heat dissapation, and to give the pressure plate area more rigidity, MAYBE!! Just a theory.

Kudos to you. I'm too scared to do anything drastic to my PRV flywheels!

On a similar note, a friend of mine is able to manufacture R30 or 604 flywheels out of any material you like, and in various performance / weight distribution patterns. Not cheap though. Several hundred dollars a piece. I'm sure if someone ordered a batch of them they would work out cheaper.
 
Whuppii!:roflmao:

I just tried 505 v6 clutch,zpj4 flywheel,604 ba10/4, B27E volvo starter motor and damn, it fits!:)

I just got my flywheel back, I balanced it. It had 13 gramm offbalance, is it a lot?
 
Erska said:
Whuppii!:roflmao:

I just tried 505 v6 clutch,zpj4 flywheel,604 ba10/4, B27E volvo starter motor and damn, it fits!:)

I just got my flywheel back, I balanced it. It had 13 gramm offbalance, is it a lot?


i have always had the crank,front pulley, flywheel, clutch and pressure plate together for balancing as they are all spinning on the same axis

having just the flywheel done might offput the rest of the line

mind you most pug engines are pretty damn close if not spot on from the factory or they used to be

i know the last PRV i put together was almost perfect according to the bloke that i got to do it and he laughed at me when i asked him to balance it
 
The Volvo evenfire crank that I recently balanced was out a mile. The various balancing holes drilled in it made it look like a "generic" balance, as they were all the same depth and equidistant on the various counterweights on the crank.

I actually did the balancing as the balance machine operator found that it was too hard to be drilled, and suggested I could do it as it required the crank and bob weights to be removed from the machine and the counterweights ground to remove the material. He wasn't keen. It took me about 3 hours of grinding and refitting the crank to get it done. Doing V type engines is much more involved than inline engines, and I will be the first to admit I did not understand the various calculations.

13 Grams out of balance on the flywheel is quite significant but not extreme.
 
Ok... it seems we lost quite a bit of in the AF crash but it's nice that we still have my topic in here what has changed to my Peugeot blog... kind of.

I found one page from google search and here's all the quotes I made

You know, the splines were all twisted and broken. Deep on inside the shaft, on the gearbox side. There was vaseline in the end, and the splines looked good on the beginning. It was just bad luck.

This last on is so cleaned and checked up when I installed it with a new layer of vaseline that it just has to work. And it seems to be working...
I have been trying to find some spare 504's but everybody in here want's some outrageous prices of those rusty old 4's...

My friend took some pics of mine yesterday when I came home.

img2129616.jpg


img2129617.jpg


img2129618.jpg
Ok. Tell me what's wrong with my speedo.

I have 504 TI cluster, Ba10/5 transmission from some 505 turbo and rear diff from 505 turbo, don't know what ratio, but the problem is not like that.

I used GPS today against to my 504 speedo.

So it goes like this:
Speedo: 40km/h Real: 28km/h
Speedo: 50km/h Real: 45km/h
Speedo: 55km/h Real: 52km/h
Speedo: 60km/h Real: 60km/h
Speedo: 65km/h Real: 70km/h
Speedo: 70km/h Real: 79km/h
Speedo: 75km/h Real: 96km/h
Speedo: 82km/h Real: 100km/h
Speedo: 120km/h Real: 164km/h

So, what's causing that to go like that!? There's no formula for that. It just goes with no reasonable pattern?

10 kilometers on the trip is 16.1km real
icon1.gif

peujohn:
Yes I did!!
I had 80km/h speed when I started accerlating, I took that 164km/h speed in the gps in a 1.1km straight and I got it at LEAST 300-400m before the end of the straight/I released the throttle.

And I even had 3 other friends with me at the time!

I'm pretty sure that It goes OVER 180km/h easily. Maybe even 200km/h. 190km/h+ is not a dream. I was really surprised.
cool.gif


pugrambo:
I'm not sure that is it because the speedo drive. The scale is not linear at all. So I don't think that the TI speedo system on the gearbox would do that much. I have 604 Ba10/4 and couple 504 GL Ba7/4's lying around with speedo gears if that helps?
I had 3.75 limited slip( 12x45) rear end my 504, I destroyed it today. It started making a knock knock sound couple days earlier, I didn't know where it was coming from, I even thought my CV or transmission is bad. Anyway, I took it to the dragstrip today, I drove my first quarter miles ever. The rear end hold it, the koncking sound was coming more worse. After the 1/4 miles I changed the rear end to 9x35 limited slip( 3.88) and opened the old one, the pin was cracked on the carrier and destroyed pretty much everything. Well. At least I might have a pretty good 3.75 wheel and housings.

And about the 1/4 mile. I got 16.2s @ 139km/h. I think that's very good.

If I'll modify the injector pump linkage I can get more fuel and boost, I can get easily on the 15's.

But anyway, I'm real impressed! 16.2s XD3
cool.gif
Here's my full time slip:
ET: 16,289 s
SP: 138,73km/h
RT: 0,730s
60ft: 2,498
330ft: 6,889 s
660ft: 10,539 s
990ft: 13,584 s

And here are couple photos of me on the line that I found on the net
img2190246.jpg


img2190247.jpg
V6 project is greatly going on!!!:cheers:

I have solved my brake booster issue!

I bought Chevrolet Van hydrobooster which uses power steering pump & fluid to operate.
But because I have no intention to lost any of my engine room or engine power for power steering, I bought an Electro Hydraulic power steering pump. It works completely electronically. The pump is bigger than I tought, so I might have to install it on the boot. The hydro booster fitting was UNBELIEVABLE! I just needed to drill bigger holes on the original 504 vacuum booster place and bolt on. Of course I have to change the brake pedal rod and make a small adapter for the 504 master brake cylinder. When I have done that, don't even have to bleed my green 504 brakes to install the hydrobooster!

I saved about 7 centimeters of space for swapping the vacuum booster for hydrobooster. But it is still VERY close. I still had to remove the upper valve balancing shaft on the left cylinder head.Today I grinded a lot off from the rocker cover where I now have some space because I took the shaft off. But without the rocker cover there is still only 2cm or less room from the booster to the valves. The rocker cover is now in a TIG aluminimum welders care. He welds a lowered top on it.

Also I removed the upper part of the intake manifold for a Supercharger. Possibly for Eaton 90 or 122 and I'm going to buy big injectors, about 440cc . And only one big Throttle Body before the supercharger.

THE V6 project is still on!!!

Here's pictures of the engine without the rocker cover on my spare parts 504 engine compartment with the hydrobooster. I'm using this blue 504 for fitting the engine because I don't want to take my diesel engine out yet. I'll took it out when the v6 is "bolt on" condition for my green 504.

img2293209.jpg

img2293210.jpg


img2293211.jpg
Okay.

Now it's happening on three front!

V6 project:
-I got six new 440cc Bosch injectors for my v6, supercharger is on it's way.
-Already have an brand new 80mm throttle body.
-Exhaust manifolds are under work.
-I'm going to remove the water oil cooler and install oil cooler adapters on it's place.
-Aluminimum rocker cover is lowered and welded.
-Camshaft balancing shaft is removed and oil pressure ports welded shut.

Historic rally 504 project:
-After 23 years absence of the road I have welded a massive amount of new sheet metal on the bottom of the car.
-Front beam is changed to access newer style Xn2 engine and it's mounts.
-Engine bay is painted
-Bottom is rustproofed with that black nasty stuff.
-Interior is stripped waiting for new electrics and roll cages.

My fathers ex 1978 504 GLD (where all my enthusiasm for 504 started, it's been in our family for 30 years) museum registration project.
- I have bought an 1978 TI for spare parts such as sheet metal.
-I have cut both rear fenders of the TI for my 78 GLD
- TI front end is a complete assy for the GLD
- I bought 165000km driven Italian import 504 seats which are like brand new and same colour of course.

An here are some pics of the historic rally 504 and after that some photos of the V6 waiting the supercharger:

img2339414.jpg

img2339415.jpg


img2339426.jpg


img2339429.jpg


img2339449.jpg


img2339451.jpg


More pictures and bigger versions available in here!

Historic rally 504:
http://kuvablogi.com/blog/9142/11/

V6:
http://kuvablogi.com/blog/9142/12/

Scott: Yes there's a cutout fender and the brake booster is an offset modell.
I find that it's easier to fit another brake booster tha modify half of the engine bay and find a brake booster like that. And then again, I think that a supercharged engine needs a vacuum pump or a vacuum assisted alternator. So a hydrobooster is the easiest choice. And possibly the most powerfull.

I think they fitted them in GM pick-up trucks and vans over there? + some of the big GM station wagons on the 80's.

The rocker cover is aluminimum and when welding with TIG or any other aluminimum appropriate welding machine, it does not heat up the component that much. Or at least it seems my cover is still straight. I did not weld that myself, I don't have a very costy TIG.

dwerbnok:
No it does not damage the paint of the car, Scott was right, it's brilliant!
You just need to pile two three tire pile on the other side of the car and place them in a correct spot. After that the car just lies on the tires and the another side of its own tires.
The rocker covers look different because it's an ultra rare ZPJ4 engine. That's a 3 liter 24valve engine!

I like to try the supercharger for a change. I don't know how it feels. I am not going for huge boost pressures at least for now. 0.5bar/7 psi max I have a one spare belt route left on the front dampener, I'm lacking a throttle body assembly on the top of the flat manifold. That's an ideal place for the supercharger right there! That solves a lot of problems. And supercharger don't require oil feed because it has it's own oil. + I can throw the small intercooler(for the ZPJ4) of the front and install a huge electric fan there. + I am going to install an oil cooler there for the engine. I'm throwing the big water cooled oil filter assembly away to gain more space.

But maybe the biggest reason is the space. I don't have enough space for two or even one turbo there. I'm afraid that can I even get the drivers side naturally aspirated exhaust manifold to fit there!
eek.gif
ZPJ4 has 6 to 1 design exhaust manifold. That's 6 pipes per side!

And at least Scott knows that I have enough turbopowered vehicles
smile.gif


Yes I have Peugeot drivetrain. 230mm 505 Turbodiesel clutch in a ZPJ4 assebly, Ba10/5 gearbox with limited slip rear diffrential. I'm testing that first. _When_ Peugeot gearbox fails, I think I'll copy Scott and try to modify Supra gearbox in it.
Hmmh. I finally got my Eaton M90 supercharger from USA.

It's kind of smaller than I thought. Even though Eaton recommends M90 for 3 to 5.7liter engines, so it is supposed to be good for my engine.

It's only 1.5centimeters taller than the zpj4 original upper intake. But I think it might get a little more taller because I have to build a little pyramid between the intake manifold and the Eaton M90. Well, at least I have enough space on the back to do a 90 degree turn for the throttle body.

I have to get the water pump thermostat cover welded shut and get it turned on the left(looking at the front of the engine) on the side of the water pump block. Because it's getting on the way of superchargers belt route.

I might throw thermostat completly away or use an model that fits inside the upper water line.

Okay, pictures.
Can you allready see the complete engine inside my 504 engine bay!?

img2365736.jpg

Hello again!

I just got my v6 intake manifold from aluminimum welder and now it's machined flat on the top and glassfiber ball blasted all around! Very expensive but , well life is!

Only the top deck is still non machined and requires hole for the supercharger attachment.

You see, the top lid is going to be shortened and bolted on the sides of the intake manifold box with 5mm studs. Walls are 10mm thick. So, does it look good?


img2390514.jpg
Yes I think so too, it looks so good! After I have worked everything out I will make that engine look like new! Lot of cleaning.

Yes I try the first pulley on the front first with the charger, dispite it's only a 5 row belt and the charger is 6. But the ratio seems to be very good. It will produce something like 0.4 to 0.5 bar of boost. At least I hope so. This is my first supercharger to play with, so everything is open.

Soon I will start making threads on the intake manifold for the top lid with my new drill press. Maybe I can get the charger mounted sometime in next year...

After Christmas day I will start welding the roll-cages on my 504 historic project

Hey guys!

Demanu was here in Finland for better part of the last week!

We did great wonders to my 1972 Historic Rally Car Project. Scott was helping me so much!

But guess what!

How often you see a car running after sitting outside for after 27 years!?

Well take a look at yourself! :cheers:

http://www.youtube.com/watch?v=5UKD_6pnUA8

http://www.youtube.com/watch?v=VxxH7g0C6dY
Ok guys, now is the time for some comments so we can get on the next page, it's starting to be too much pictures for one page! :joker:

Anyway, I got the rollcages finished up. It only needs the required 3 bolts on the four floor attachements.

I also got the dash back on, I had to cut the air ventilations out. And I needs a little cutting on the glovebox lid + the dashboards soft top layer.

So, it's getting there, big thanks belongs to Scott for helping a lot of me with the 504 technical side to get it running!

Here is some pics of the rollcages.

img2454066.jpg

I have my 6th 504 now.

Is there anybody interested of it?

I bought it from France and drove it home.

It's the only one in Finland.

Peugeot 504 Break 4x4 Dangel...:yawn:
 
Ok, here's something from yesterday, not old posts.

About my Dangel.

Still keen to hear some more about my 504's?
As you know, I bought the Dangel station wagon.
It's been dissambled allmost to it's bare body shell, literally.
There have been an unbelievable amount of sheet metal work caused by those african people or so who owned it previously.
A lot of urethane, fiberglass, paper, wood, sheet metal pieces and even tin foil+ plastic filler. Oh yeah, and some glue.
Also the paint was horrible. There were three layers of paint, original white, lime green what still was visible on the doors and insides of the a,b,c and d pillars.
But no more!
The car went trough on expensive 2000 aud soda blasting where everything was blasted to it's bare metal without damaging or heating up the steel. Not like sand blasting.
Now there is no that fugly paint left!
And it was very good decision to do so. The rear mudguards where fixed with plastic filler and THE ROOF! Darn someone has drilled 4 holes on the roof and fixed it with a filler.
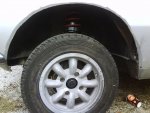
I have been using a professional car sheet metal guy for the sheet metal work on the car because I want it right. Every shape is like they should be. I'm also going to fit 235/85 R16 tires under it. I hope they fit. If it needs a little bit trimming, it's easy to do now because it's on it's bare metal. I took 4 235/85 R16 tires off from my friends 2wd 3500 Dodge Ram Dually and I'm going to put the tires on the Dangel rims to see if they have any hope. But at least what I measured I think it can be done. Those tires are allmost 33" tall :D
And I'm going to buy a Hankook mud tires under it on the same size if those tires fit.
The car is going to be the same metallic Peugeot green than my other 504's are. The rocker panels under the doors all the way around are going to be black painted with a bed liner kind of stuff, wheels, front fender flares, bumbers and the roof rack with extra lights and a spare wheel are also going to be the same black.
Anyway, take a look of the pictures and tell me what do you think! :D

img2862453.jpg

img2862454.jpg

img2862455.jpg

img2862456.jpg

img2862457.jpg

img2862458.jpg

IMG
 
Time to separate?

This looks great Erska and congratulations for doing it right, but I do have a suggestion. As best as I can count, this thread contains four different projects: the 24v V6, the 504 turbodiesel, the historic rally car and the Dangel. Perhaps the crash can become the opportunity to separate this into four different threads; more targeted and less confusing to the reader who clicks on the V6 and finds a Dangel. It will be a shame for all this useful information to be lost in the confusion. Regarding the oversized wheels, I don't think they will clear when the car will be in motion, not if you need any sort of suspension travel anyway or if you need to steer. In the gravel rally cars we plasma-cut the fenders and use polyester flares and the wheels are only 640 mm. See the front of the silver coupe to get an idea how much metal needs to be removed from the front. Sorry the back is not visible, we put the polyester flare on it already so the extend of cutting cannot be seen.
 

Attachments

  • DSC00014.jpg
    DSC00014.jpg
    93.5 KB · Views: 1,289
Last edited:
Top