807 Competition motor.

Frans

Well-known member
VIP Paid Subscriber
1000+ Posts
Fellow Frogger
Joined
Sep 24, 2001
Messages
1,944
Location
Auckland
Hi All,
I have started to put Ross's engine together. This will be the one to power the Dauphine as seen in the Renault section.

It will be just below 1600 because that is the class Ross wants to race against. His theory is that in the 1600 class he will have at least a 1600 to compete with and not the 1400 as with the previous Dauphine.

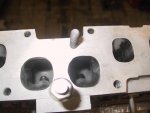
If there is a need I will take pictures of the process and post it here. There isn't many 807's racing out there so let me know.

Regards
Frans.
 
frans yes please do. i have been putting off attempting to build a high performance 807 for my lotus europa, for quite a long time, because i dont feel confident getting started, despite some very expert advice. so i would love to see a pictorial record of the process.

i also believe many people would be most interested in a more general in anything you do, as you seem to be gold mine of great ideas and interesting pursuits.

regards
alexander

Would you be using the original 1470cc non-crossflow engine, or a 1565cc 16TS crossflow type? I did build up an original type motor many years ago and was surprised by the approx 130 flywheel Hp. I had put the longer stroke 1565cc crank and 1mm larger pistons and sleeves out of a 16TS into it, and the usual porting, larger valves, bigger cam, high compression. When pushed I had said to the owner I thought it would be lucky to make 110, given I had not liked the TL style engine at all.
 
Hi Frans,

Yes I'm sure many of us would like to see your build given your past work!

I put my 844 motor together a few weeks ago. Went with 77.8mm pistons as the supplier couldn't get me 78mm at the time. Still sitting on the bench and yet to be installed in the car, will be interesting to see how it goes.

Cheers
Jeremy
 
Hi All,

I started and did a few things up to now.

Checking the block I found some bad corrosion that is normal in these blocks. It looks like the water was cavitating in certain spots. I cleaned the holes that was close to edges with a little Dremel tool and then filled the holes with some Pratley steel. It is a 2 pack epoxy from S Africa that we used to use.

Then I fitted the sleeves and measured each one individually for protrusion. Each one had a little and that I noted down. I refaced each sleeve so that all of them will be exactly level with the block. But during the surfacing in the lathe I left a little metal in the shape of a ridge and they are .004" high. I will now use .004" shimstock rings below the sleeves and that will be the protrusion required plus the additional .004" of the little ridges. They will press into the gasket and give that additional pressure on the gasket that is needed for the high compression racing engines.

Then I tapped the 2 center cam bearings M10 and made two plugs to screw in and I drilled them 5.5 mm so that the oil hole is slightly smaller. That will assist the oil pump in keeping pressure up. I then screwed them in with some Loctite because they must not come out...ever.

Then I drilled 2 extra holes in the block where the cylinder head bolts go through and made 2 extra dowels that will guide and position the head gasket in the correct position.

Then I fitted the cam with the adjustable cam gear and marked the space required to do some settings on the cam chain cover. I cut the hole needed in the cover and now I'm still busy with a way to make a oil tight cover for this.
 

Attachments

  • IMG_0125.jpg
    IMG_0125.jpg
    51.7 KB · Views: 735
  • IMG_0133.jpg
    IMG_0133.jpg
    60.4 KB · Views: 769
  • IMG_0139.jpg
    IMG_0139.jpg
    90.6 KB · Views: 723
  • IMG_0115.jpg
    IMG_0115.jpg
    83.8 KB · Views: 758
  • IMG_0113.jpg
    IMG_0113.jpg
    50.9 KB · Views: 730
  • IMG_0112.jpg
    IMG_0112.jpg
    80.9 KB · Views: 737
  • IMG_0099.jpg
    IMG_0099.jpg
    38.1 KB · Views: 710
  • IMG_0137.jpg
    IMG_0137.jpg
    62.4 KB · Views: 679
  • IMG_0116.jpg
    IMG_0116.jpg
    61.1 KB · Views: 727
  • IMG_0106.jpg
    IMG_0106.jpg
    69.6 KB · Views: 751
questions:
re the liners. i recall your photos of that technique from the past. i take it you make a metal .004 shim to sit underneath the liner, and the liner seal sits on top of the shim, and then the liner goes in? assuming that is so, i am wondering how the liner seal does actually seal, now that it is sitting on top of a shim, rather than an L shaped ledge in the casting? or perhaps i have misunderstood something.

re the adjustable cam gear... i suppose you have modified the original cam gear yourself. do you have any other photos of that? i can really see what you have done, from that photo. i have read elsewhere a view that the cam gear is so firmly set on the cam that it cannot be removed. obviously that is not the case, but is there some special technique for removing it?

many thanks
alexander.
 
I have managed to pull cam sprockets off 807 camshafts in the past by just using a strong gear puller. Putting it back is the difficult part. I used to heat them up a bit and press them down. That was successfull every time.
 
Hi Alexander,
The liners without anything will be level with the block. Then I cut the .004" seal and and no liner seals at all. I use silicone sealant on the seat of the sleeve, shift the shim onto the sleeve and some sealant on that and then I push the sleeve in and force it home with some homemade clamps. The same type you would use to prevent the sleeves from lifting when the head is off. This will now give you a sleeve protrusion of .004" plus the additional .004" of that little ridge. The paper seals are not used at all.

The cam gear can be pulled off with a puller. Then I put it in the lathe and cut the boss away at the back of the gear plus a little bit deeper into the body. Then I make a new boss from mild steel and weld a flange on. That is then trued in the lathe, a keyway and slots cut in. This will slide over a slightly shortened key and when the gear gets bolted on to the flange the new boss will be held by the key and the gear itself will miss the key so that it can be set where you want it. One extra thing is that the cam has now a M8 tapped hole where the gear is for a bolt and washer and I now longer rely on the press fit as done by the factory.
The little piece that remains on the gear is made slightly bigger with some sandpaper so that it can rotate freely because that position will be decided by a degree wheel initially and some fine tuning on the dyno. The same as guys with vernier gears on OHC engines.

Regards
Frans.
 

Attachments

  • PICT0020a (1).jpg
    PICT0020a (1).jpg
    91 KB · Views: 576
  • PICT0020a.jpg
    PICT0020a.jpg
    91.9 KB · Views: 613
  • PICT0020a (10).jpg
    PICT0020a (10).jpg
    95.2 KB · Views: 555
Hi All,

The timing chain cover is now complete. I have made the cover that fits over the cam gear and I had to make an additional spacer that fits over the crank to space the pulley further away because of the spacer plate.

Next up is the sump. Ross has made the baffles already so I will clean it and have a look at the cut out for the oil pump and dipstick etc.

Regards
Frans.
 

Attachments

  • IMG_0154.jpg
    IMG_0154.jpg
    87.5 KB · Views: 897
frans, pardon me if i am missing the bleeding obvious, but i take that black plate is also something you have made, to attach ancilleries to ie alternator etc? it looks like it is sitting between the timing cover and the block, but i cant see how that could be?

alexander.
 
Alexander,
The black plate is handmade and that is for the engine mountings. This is a 16TS motor going into a Dauphine. The 16TS has no other means to take the rear engine mountings ala Dauphine, R8, R10 and also the A110.

Regards
Frans
 
frans, i am guessing that you have put fuego inlet valves into an 807 head at some point. if so, could i bother you with a few questions about that?

ta
 
Hi,

I am not good at 807's. The 1800 A110 was the 1st one and now I am busy with the 2nd.

Are you talking about a 2000cc Fuego? or which ever, No I have not. But I have put many different valves in different motors. eg. the A110 Targa car has Cosworth valves in it.

What are the questions? I will try and answer them.

Regards
Frans.
 
thanks.
first question is general.
if you put bigger inlets in, should you put the bigger exhaust valves in too?

second, the fuego inlets the same length, but have a different spring, washer and collet arrangement. particularly, the 807 valve, as you know, has two springs, and the springs' diameters match the machined lands in the head. the fuego has one spring, with a smaller washer, and the groove for the collet is higher on the stem and differently shaped.

so the 807 head wont take the fuego spring, but the fuego washer wont cover the 807 springs and the fuego valve wont take the 807 collet and washer.

yet, i know this conversion is well known. so in a general way, how do you approach issues like this? i will post some photos tomorrow, but now i am typing, i might start a new thread for the project, and put them there so i dont confuse this thread.

lastly, back on your topic... just quickly to remind me, how did you get 1800cc from an 807?

ta
 
Hi Frans,

What pistons are you running in Ross's car to keep it under 1600cc?

Cheers
Jeremy
 
thanks.
first question is general.
if you put bigger inlets in, should you put the bigger exhaust valves in too?

second, the fuego inlets the same length, but have a different spring, washer and collet arrangement. particularly, the 807 valve, as you know, has two springs, and the springs' diameters match the machined lands in the head. the fuego has one spring, with a smaller washer, and the groove for the collet is higher on the stem and differently shaped.

so the 807 head wont take the fuego spring, but the fuego washer wont cover the 807 springs and the fuego valve wont take the 807 collet and washer.

yet, i know this conversion is well known. so in a general way, how do you approach issues like this? i will post some photos tomorrow, but now i am typing, i might start a new thread for the project, and put them there so i dont confuse this thread.

lastly, back on your topic... just quickly to remind me, how did you get 1800cc from an 807?

ta


I think you can buy the liners/pistons/rings off the shelf from Mecaparts to increase the 807 engine capacity to 1800cc.
 
Alexander,

Yes, if you get more air/fuel in there will be more gas to get out. Normally it is not that hard because when the exhaust valve opens, the piston is still on its way down after the compression stroke so there will be a lot of pressure inside to force the gasses out. Then the piston moves up and forces the some of the other gases out as well. The reason for the bigger exhaust valve comes into play at this stage...with the proper extractor the last bit of gas is sucked out by the scavenging effect created by the extractor and at the same time it assists the sucking in effect of fresh air/fuel at the start of the intake stroke when the valves are overlapping. With the bigger exhaust valve this is improved.

Valve springs. My approach is very different. I will decide on what pressures I require. For 807 valve train I will make the on seat pressure about 80 - 90 pounds and the compressed pressure around 210 - 220 pounds for effective 7500 - 8000rpms. ( you have to know the lift of the cam at this stage) Then I will check my Kent Cams list and order a spring in the vicinity of those figures with diameters plus minus to fit the head. When I get the springs I will check them with a valve spring pressure tester and get the lengths I need. Simulate the length with the valve closed and then open. If the pressures are slightly high, I will cut into the head to lengthen the springs or otherwise get washers to lift the springs. This way I can check if the spring wont bind as well.

The tools I use to cut into the head and other tricks are not fancy. This can be made by all. On G heads I bought a piece of bright steel 7mm dia because the valve guide is 7mm. Then I cut about a 150mm length and slot the tip enough to take a power saw blade (about 2mm) With an old power saw blade that I break I will silver solder it onto the tip and then grind the blade to do what I want. I made several of these that I use regularly and one fancy one I made is even adjustable. Eg. I will never put valve stem seals on a race motor. so what I do is I cut the top of the guide into a sharp taper so that the oil can run of next to the guide with one of the tools. A little bit will go into the guide for some lube. I do the same inside the ports to minimise protrusion. This way the guide is longer for durability but thinner for less restriction. I can do pics if you need.

The 1800 is sleeves bought from Salv Sacco in England with matching forged pistons (82.5mm). CR is worked out from there.

Jensen. 78mm forged pistons and sleeves re-bored to suit.

In the pics you can see the way how I made the seats deeper for the springs and you can see the taper on the guides. On the other you can see the mod inside the port.

Regards
Frans.
 

Attachments

  • IMG_0033.jpg
    IMG_0033.jpg
    93.4 KB · Views: 740
  • IMG_0036.jpg
    IMG_0036.jpg
    71.7 KB · Views: 645
  • IMG_0040.jpg
    IMG_0040.jpg
    65.6 KB · Views: 701
Valve springs. My approach is very different. I will decide on what pressures I require. For 807 valve train I will make the on seat pressure about 80 - 90 pounds and the compressed pressure around 210 - 220 pounds for effective 7500 - 8000rpms. ( you have to know the lift of the cam at this stage) Then I will check my Kent Cams list and order a spring in the vicinity of those figures with diameters plus minus to fit the head. When I get the springs I will check them with a valve spring pressure tester and get the lengths I need. Simulate the length with the valve closed and then open. If the pressures are slightly high, I will cut into the head to lengthen the springs or otherwise get washers to lift the springs. This way I can check if the spring wont bind as well.

Gold. A true professional. It doesn't need to be Kent Cams however.
 
The tools I use to cut into the head and other tricks are not fancy. This can be made by all. On G heads I bought a piece of bright steel 7mm dia because the valve guide is 7mm. Then I cut about a 150mm length and slot the tip enough to take a power saw blade (about 2mm) With an old power saw blade that I break I will silver solder it onto the tip and then grind the blade to do what I want. I made several of these that I use regularly and one fancy one I made is even adjustable. Eg. I will never put valve stem seals on a race motor. so what I do is I cut the top of the guide into a sharp taper so that the oil can run of next to the guide with one of the tools. A little bit will go into the guide for some lube. I do the same inside the ports to minimise protrusion. This way the guide is longer for durability but thinner for less restriction. I can do pics if you need.

Frans.

yes, a couple of pics would be good when it is convenient; i just cant quite visualise what you are saying about the steel and bit of saw blade.

and as a matter of interest, i suppose fitting the 1800cc liners require the block to be machined. if that is so, how do you go about machining out the block to match the exact taper on the larger liners?

ta.
 
Last edited:
Hi Alexander,

The block will have to be machined at an engineering shop. I can only do small things.

Attached is a pic of my "Special Tools". I do not have a stripped head around to demonstrate but I will explain.

The first on the left is my adjustable one. The 7mm rod goes into the guide from the top of the head and then I attach it to my drilling machine at the combustion chamber side. I can then machine the sides of the alloy thinner to accept a small inner valve spring when going from single to double springs. It can also machine the base where the inner spring is going to be a little deeper if the pressure is to much and the spring needs to be a little longer. The cutting tool is held tight by 2 grub screws and can be tightened at different positions. (A grub screw is not a prostitute you take out for a hamburger :D)

The second one will machine the base deeper where the outer spring needs to be a little deeper.

The third one will go the other way round and machine the guide inside the port to a taper. That is to make the protrusion of the guides thinner or smaller where the gas flows.

The fourth one Has had a few mods but it serves a dual purpose. Tight up against the rod is the part that cuts the guides into a taper as explained in the previous thread. Then the outer fancy curves is for cleaning metal away from the valve seats if there are protrusions. This was done for a specific head with a specific valve seat size. I can't remember on which head I used it but I do grind different profiles for special shapes and purposes.

The fifth one is to make the guides shorter if there is a possibility that the valve spring retainer might touch the guide with a very hot cam. It can also make the guide inside the port shorter if I think it is needed.

The sixth one is a center punch that I use to determine the center position on the piston when I need to machine pockets in the piston tops for the valves to clear. You need to do a dry assembly for this but it will be very accurate and the valve head will clear for sure.

All these edges are grinded/ground:confused: to have a cutting edge like you would do for lathe tools or drill bits etc. Remember to oil the guides before you insert the stem. All these tools can be related to the pics in the previous thread except the punch. My drilling machine is the driver for all these steps and it does not take long.

Regards
Frans.
 

Attachments

  • IMG_0003.jpg
    IMG_0003.jpg
    51.5 KB · Views: 605
Top