Vince's ongoing DS23...

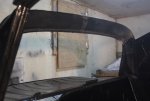
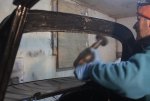
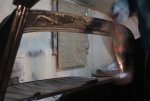
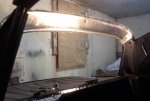
If anyone ever offers you the chance to strip and prep a front cant-rail on a DS, "just for fun", you can now say on good authority (mine) an emphatic NO. Seriously, it's such a pain in the arse that it has to be a paid job. So I'm charging myself out at $25 per hour, and this video represents $150 cash in hand. I hope I don't need a bailiff.

The Youtube Video Cant-rail Sunday 11th June.

A good grind with the flappy wheel and a brumby wheel worked rather well - if prone to being abraded itself, which isn't a bad thing. I think it is very suitable for the more fragile areas and it was just sheer luck that my first use was on the cantrail, especially since it was quite narrow. I had to bring a small wire wheel into play for getting into those right angles folds.
Some areas of the rail had sealant in join's that I didn't want to disturb.

A quality etch primer from a rattle can was followed by POR15. I still don't quite believe the 'self-leveling' feature of the paint so I'm using it in the hidden regions. But so far it seems all good as an area I painted on Saturday, fully expecting to have to sand off and re-do, looked fantastic.
 
I have been a little slack with posting here - I claim lack of energy..

https://youtu.be/w2WXx510PSA Lower RHS A-pillar

https://youtu.be/aiHUCg7lI5M RHS cantrail which initially i thought would was in quite good nick until I starting chasing a bit of surface rust and eventually realised that I may as well just do the lot back to metal. Completed up to etch priming and topcoated the day after.
 
It has been awhile - so much for promises to keep updated!! No excuses, I admit I am typically lazy and dis-interested in life in general.

However.... in the meantime I have progressed with my coating of the chassis and also have a quick video of my journey to "The Shed"

The Tank Compartment
https://www.youtube.com/watch?v=e_FXFnJ5bzg

Drive to the shed
https://www.youtube.com/watch?v=w03KaHrz4fE

Prepping and coating the tank compartment divider
https://www.youtube.com/watch?v=iLugQa2CnTE


Moving onto the rear end now!! The brushing of the coating seems to be working quite well although getting the technique down is taking awhile. It is also frustrating to be as careful as you can, yet on later inspection an errant lump of join sealant is found. Fully painted of course!! Lalochezia is my friend.
https://www.youtube.com/watch?v=huLi0Z40jrM

I have run out of coating now and am off to buy some more - expensive stuff.
 
I bought a mini-gun to eventually spray the visible areas of the chassis (scuttle etc,) and thought to practice using it before I needed it. However due to my initial unfamiliarity with all things workshop, events did not quite go to plan and I ended up brushing again. Turns out the compressor was cactus from the get go, so I'm not quite the fool that I felt, not for that issue anyway.


Roof Hoop, last c-pillar, bit of boot finish.
1min 29 secs of POR15 goodness, set to the dulcet tones of Denny McLain's meditation of "The Girl From Ipanema" by request of one of my adoring fans. They are a factitious lot, my adoring fans....

Some publicity shots of the action... to be added as soon as I can resize them from "****ing Huge" to "that's a bit more reasonable"
 
Action stills to motivate you into actually watching the thrilling short movie. Next week "8 hours of paint drying, like a boss"

_MG_9384.jpg_MG_9437.jpg_MG_9515.jpg_MG_0017.jpg_MG_0056.jpg_MG_0119.jpg_MG_0210.jpg_MG_0281.jpg_MG_0343.jpg_MG_0406.jpg
 
impressed you didn't use gloves with that stuff it isn't easy to get off skin.
 
Remember, POR15 needs to be overcoated as is will become chalky with UV exposure.
 
Forumnoreason: Sometimes I find the gloves to be a bit restrictive - I tried very hard to not get any on me and succeeded...

David S: Virtually all areas cleaned back and painted will be covered by trim of some description. I'm hitting the scuttle this weekend after a lazy weekend off, just gone. I expect it will be a full two day event..
 
I concur gloves are a pain, I just seam sealed my doors prior to further coats of paint and ditched the gloves for a better smearing effect with bare skinned digit finger! You can push the crap in further into the edges, and inside the doors, especially useful as the gloves even with thinners drags and gets caught up with sealer. Still bits of crap on my hands two days later. Messy stuff.
 
ha ha the sacrifices we make. If someone asked what the most useful tool to have in the workshop I'd have to reply 'my fingers'. nails in good condition are a bonus too!


Finally finished off the front part of the scuttle after having to stop prior to painting yesterday. I was a little disturbed to see how many small patches I had missed on the first few passes of the tools. So I had to hit them with a bit more elbow-grease before spraying.

https://youtu.be/-iZPeUVbAh0 41 secs worth of Lightning Hopkins to add entertainment value. Otherwise the soundtrack would be very blue of another kind..
 
YOUR chassis is becoming a beautiful piece of restoration work, go Vince!
 
The latest update: Starting the scuttle strip and repaint. The end of this section of work is getting close and other car parts are coming together.

https://youtu.be/4sjqKJ_QJZA

Extensive and very comprehensive restoration must admit you’re very brave and luckily not much rust showing, can’t wait to see the end results this is going to be a beauty wish you all the very best.
 
Thank you guys. It has been an education for sure. I have couple of days of bed rest and not allowed to talk (sacre bleu!) so I will gather some of the choice photos and post them.

For painting the chassis I started of with the idea of giving the existing cover a damn good scuff and then painting over top. The first hint of underlying rust had to be chased and although it was superficial I decided that everything had to go back to the metal, bit by bit. If I do another car I will pay for the dip and spray package to be done in a week...

The front was largely free of rust, the rear not so much. A small delay of a year and a bunch of new stuff fixed that!
 
There have been a few small issues with time and motivation. Shitty cold weather hasn't helped and some weekend work (I work to pay for the car..) and family things really ruined my September momentum.

Anyways, I'm back on the tools now with the chassis bolted onto a 'Tilt-A-Car' courtesy of David Jones at AutoFrance in Auckland. I'm being charged a box of guinness hireage!

The 90 sec video is here (https://youtu.be/2Z1-Ga_3VAc) and it features the first hit of the degreaser under the belly pan. The main event is hitting the last part of the caisson up to anti-rust undercoat. Next week the por15 topcoat will be applied.
 
You're still making better progress than I am Vincent!
 
Good to hear the team at Auto France are still helping the french car owners, we used a couple of their DS' s for our wedding vehicles. They also keep our BX on the road. Great job keep on with the momentum!

Sent from my SM-G900I using aussiefrogs mobile app
 
You're still making better progress than I am Vincent!

I also did a small audit of what is in boxes that I hadn't looked in for some time. Then I got kind of depressed. There is still a lot to do!
 
I also did a small audit of what is in boxes that I hadn't looked in for some time. Then I got kind of depressed. There is still a lot to do!

Tell me about it. i've got crates of the stuff - and loads of little freezer bags full of parts, nuts and bolts.
 
Tell me about it. i've got crates of the stuff - and loads of little freezer bags full of parts, nuts and bolts.

Yogurt pottles, small tin cans, empty spray bottles - they are all fair game. It has taken 2 years to train my wife in the art of asking herself "Can this be used at the shed?" before throwing anything away..
 
Top